Create a Form to Enter Google Sheets Data in 7 Steps
Obviously, Google Sheets is great for collaboratively managing all sorts of data. There are big downsides here too though, especially if you’re working at scale. One solution is using a form to enter data into Google Sheets.
Today, we’re going to look at exactly how you can do this in Budibase.
There are a bunch of other ways you could do this too, of course. We’re biased, but we think Budibase is the best option. We also think that once you hear what we have to say, you’ll definitely agree.
But first, let’s check out a bit of background information.
Why would you build a form for entering Google Sheets data?
This is a reasonable enough question. After all, it’s perfectly easy to add or edit rows in a spreadsheet.
What’s the point in adding extra complexity with a dedicated Google Sheets data entry form?
There are a bunch of situations where spreadsheets alone fall short. We won’t bore you with every single one, but instead, let’s take a couple of quick examples.
First, say you wanted to manage sign-ups for a meeting or event. You can’t just let each participant add their own details, because they’d then be able to see all of the other attendees.
Or, they might accidentally do something they’re not meant to, like delete a row. A data entry form for Google Sheets helps to prevent this.
Similarly, what if you had a whole army of admin staff working on a lot of data at the same time?
Real-time collaboration is cool and everything, but it can also get very messy, very fast. Data entry and update forms are critical for ensuring accuracy and error prevention.
Check out our ultimate guide on databases vs spreadsheets for more details.
Why would I build forms for Google Sheets with Budibase?
Another excellent question!
No doubt, you’re well aware that Google offer their own solutions here. So, you could build a form on a separate sheet and use built-in functions and Google Apps scripts code or other script editors to add rows to your dataset.
Alternatively, you could do something similar with Google Forms - or other Google Drive integrations. You might also like our guide to data access control .
There are three big problems here though:
- Google’s solutions only really let you add data, not update existing rows.
- Neither of these options looks particularly professional.
- You can get a better result with Budibase, with much less effort.
The last point might surprise you. It’s a very big claim, to be fair.
So, how exactly is this possible?
Our dedicated Google Sheets data connector
Budibase offers an unbeaten range of dedicated connectors for external data sources. One of these just so happens to be for Google Sheets. All you need to do is sign in with your existing Google account, paste a link to your spreadsheet, and you’re ready to go.
Then, you can use Budibase to automatically generate a fully-functioning CRUD app .
We’re going to look at the full details in a second, but the whole process won’t take you any more than a couple of minutes. You’ll also enjoy far superior functionality, customization, data validation, and flexibility than you would with an all-Google solution.
Simply connect a sheet and create your custom UIs and business processes.
We’ll return to some of the more specific features of Budibase that make it the ideal solution for using a form to enter data to Google Sheets a little later.
For now, though, let’s jump into the practical stuff.
Building Google Sheets forms: step-by-step
We do have a couple of obvious prerequisites. We can safely assume that you have a Google account already, along with a spreadsheet you want to manage. You’ll also need to sign up to Budibase, of course. You can use the same email address for this.
With that out of the way, here are the specific steps you can follow to start using a form to enter data to Google Sheets.
1. Create a new app & select Google Sheets as your data source
Unsurprisingly, our first step is to start a new app project. So, once you’re signed in to Budibase, hit Create new app, and then choose Start from scratch. At this point, you’ll be prompted to choose a name and URL:
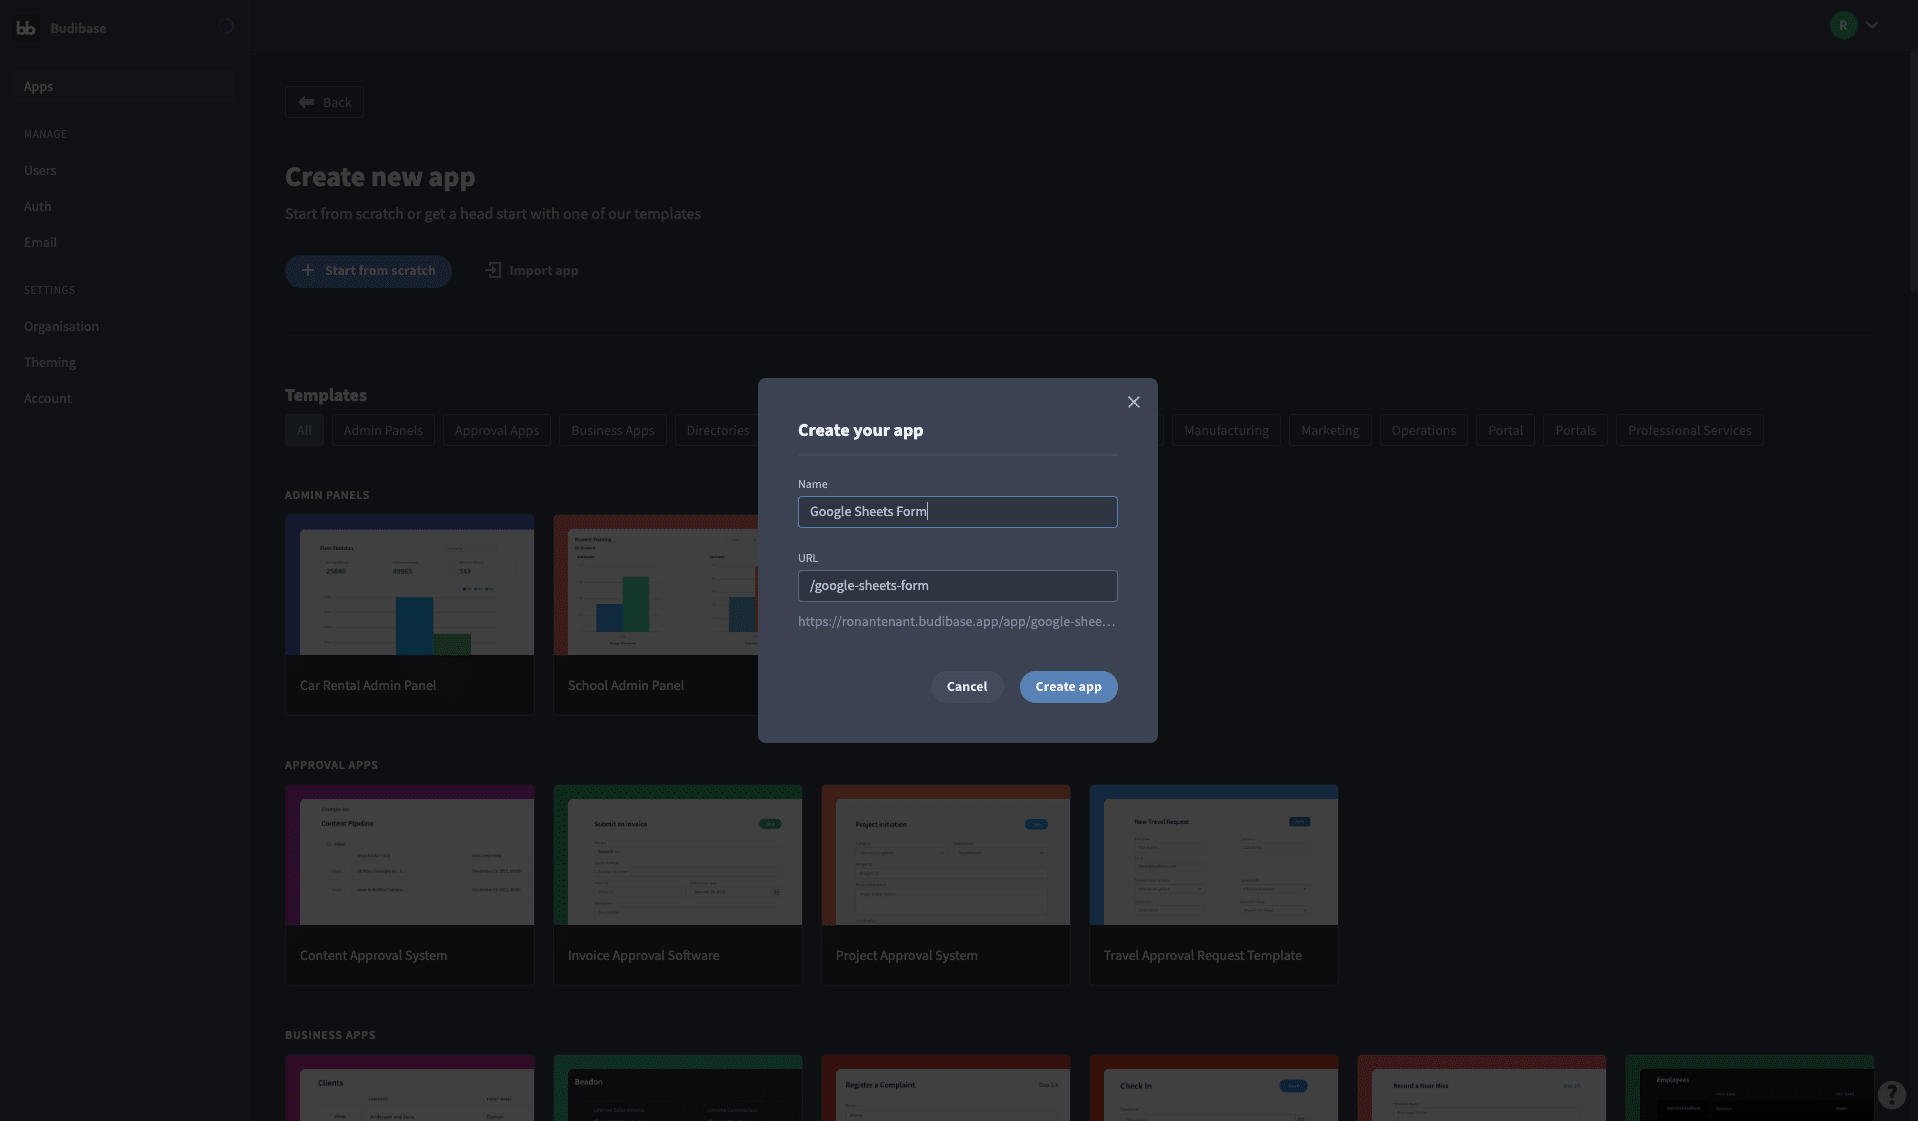
Hit Create app when you’re ready. Next, you’ll see a modal with a list of all of the data sources you can choose.
Pick Google Sheets. No surprises here.
You might also like our tutorial on how to make an app from an Excel spreadsheet .
2. Configure your data connection
With your app created, the next thing you’ll be prompted to do is sign in with Google to connect your accounts.
You’ll then see a screen like this:
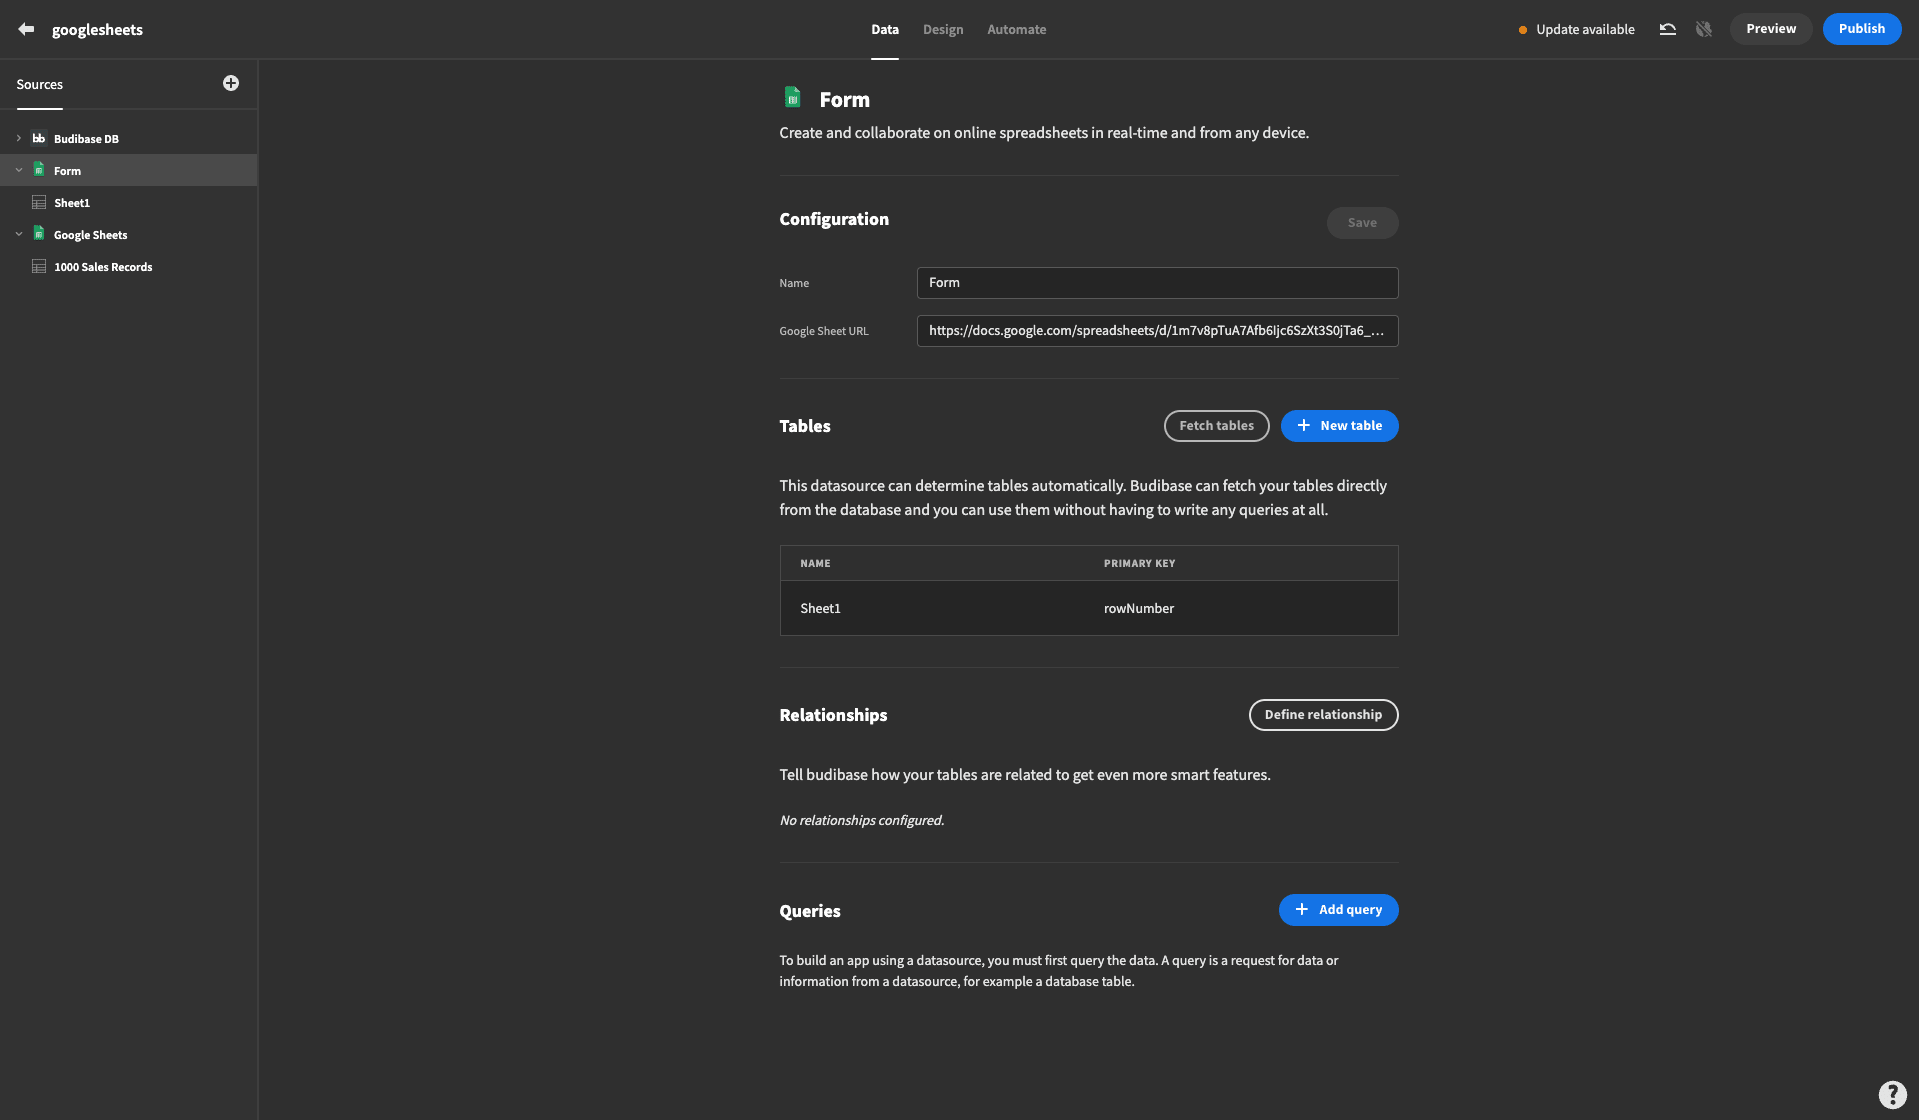
We need to do two things here.
First, we’ll give our data source a name. This is only for internal purposes, so the important thing is that you use something that’s easily distinguished from other data sources you might use.
We only have one data source for our example, so we’ve just gone with Form.
Then, we simply paste the URL of our spreadsheet into the second field.
You might also want to check out our guide to throwaway prototyping .
3. Fetch tables
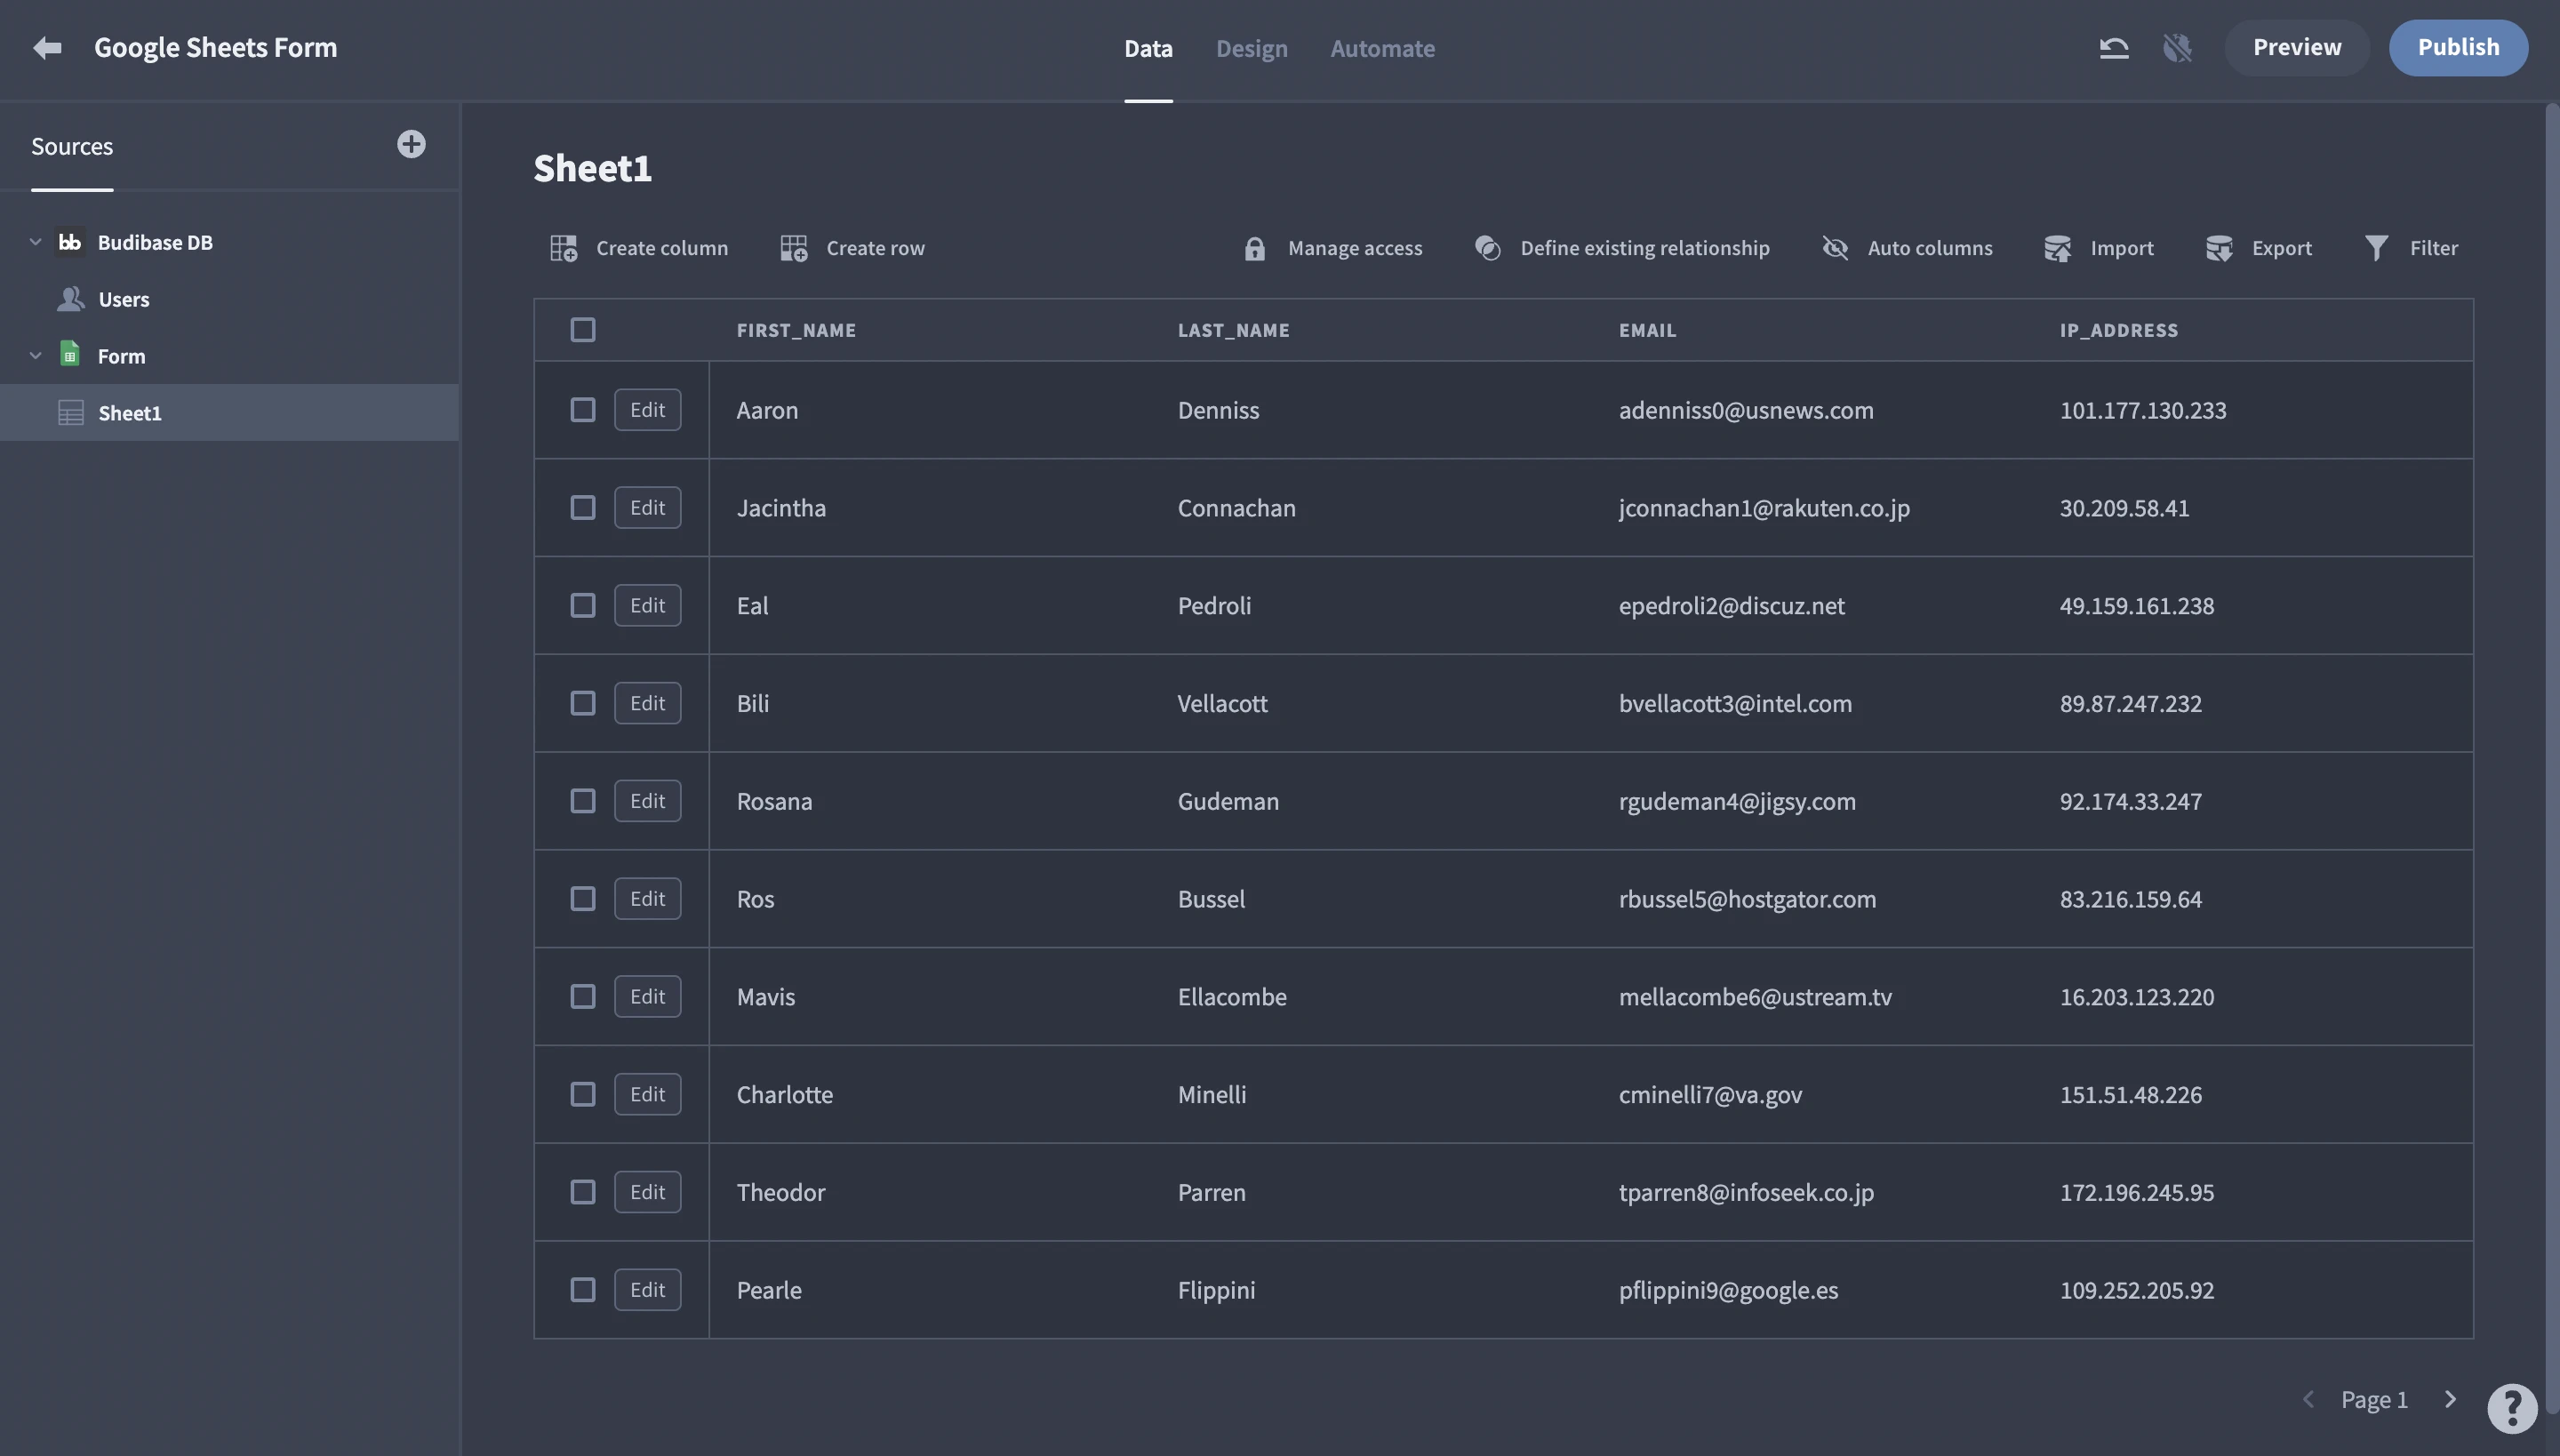
Next, we’ll fetch our tables. This means pulling in our Google Sheets data so that we can interact with it in Budibase, as we would any other type of database.
First, hit Fetch Tables. You’ll then see something like this, with all of the data from each of your spreadsheet’s tables:
For context, our spreadsheet looks like this:
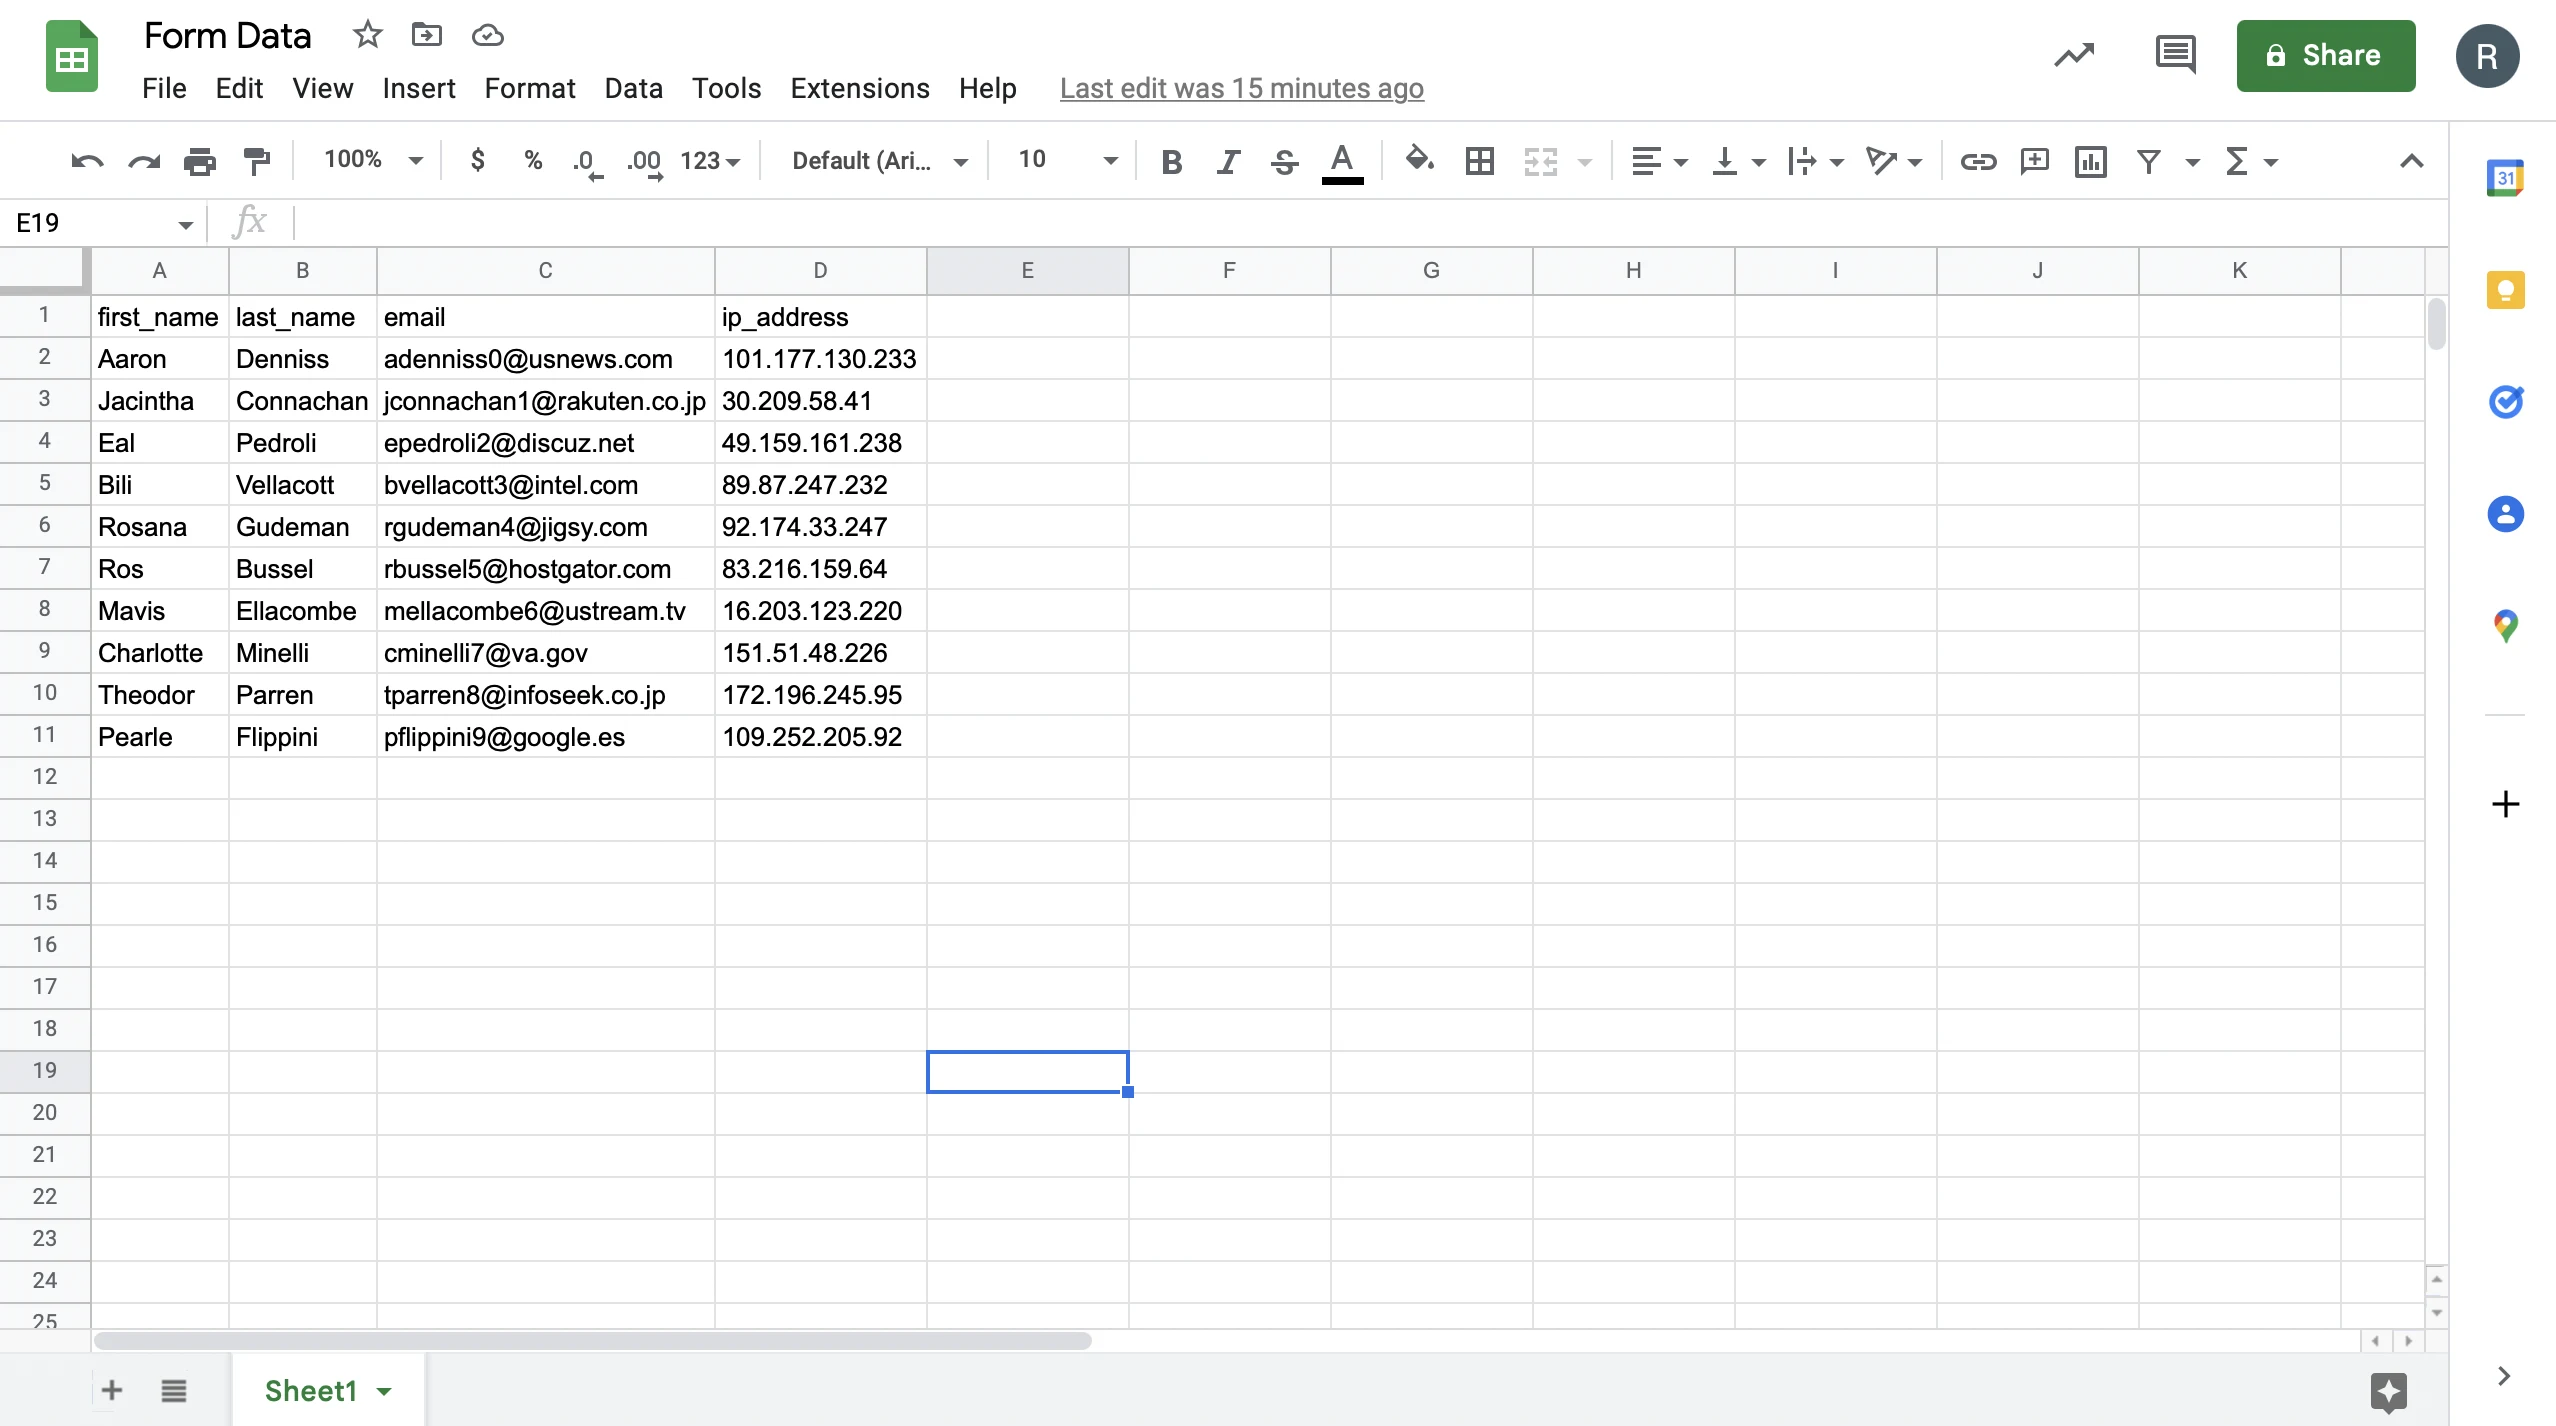
Notice that you have a few extra options at this stage. You can add new columns or rows to your Google Sheets data from the Budibase backend. You can also import or export data in bulk, or, if you have multiple tables, define relationships between them.
We just have one table today though.
As we’ll see in a few minutes, we also have the option to set minimum access levels for different kinds of queries.
4. Autogenerate CRUD screens
Next, we want to build our forms. Specifically, we want one form to add new rows to our spreadsheet and another one for updating existing rows. For the second type of form, we’ll also need to provide an interface for users to find the right entries before they can edit them.
Budibase offers you a couple of different options here. On the one hand, you can build your own interfaces from scratch, if that’s what you want to do. We offer a huge range of built-in components, making it easy to build professional apps, with minimal technical skills.
For our purposes today though, we’re going to let our auto-generated CRUD screens do the heavy lifting.
Head over to the design tab at the top of the Budibase builder and hit Add screen on the left-hand side. You’ll then be given a choice to either create a blank screen or to use autogenerated screens:
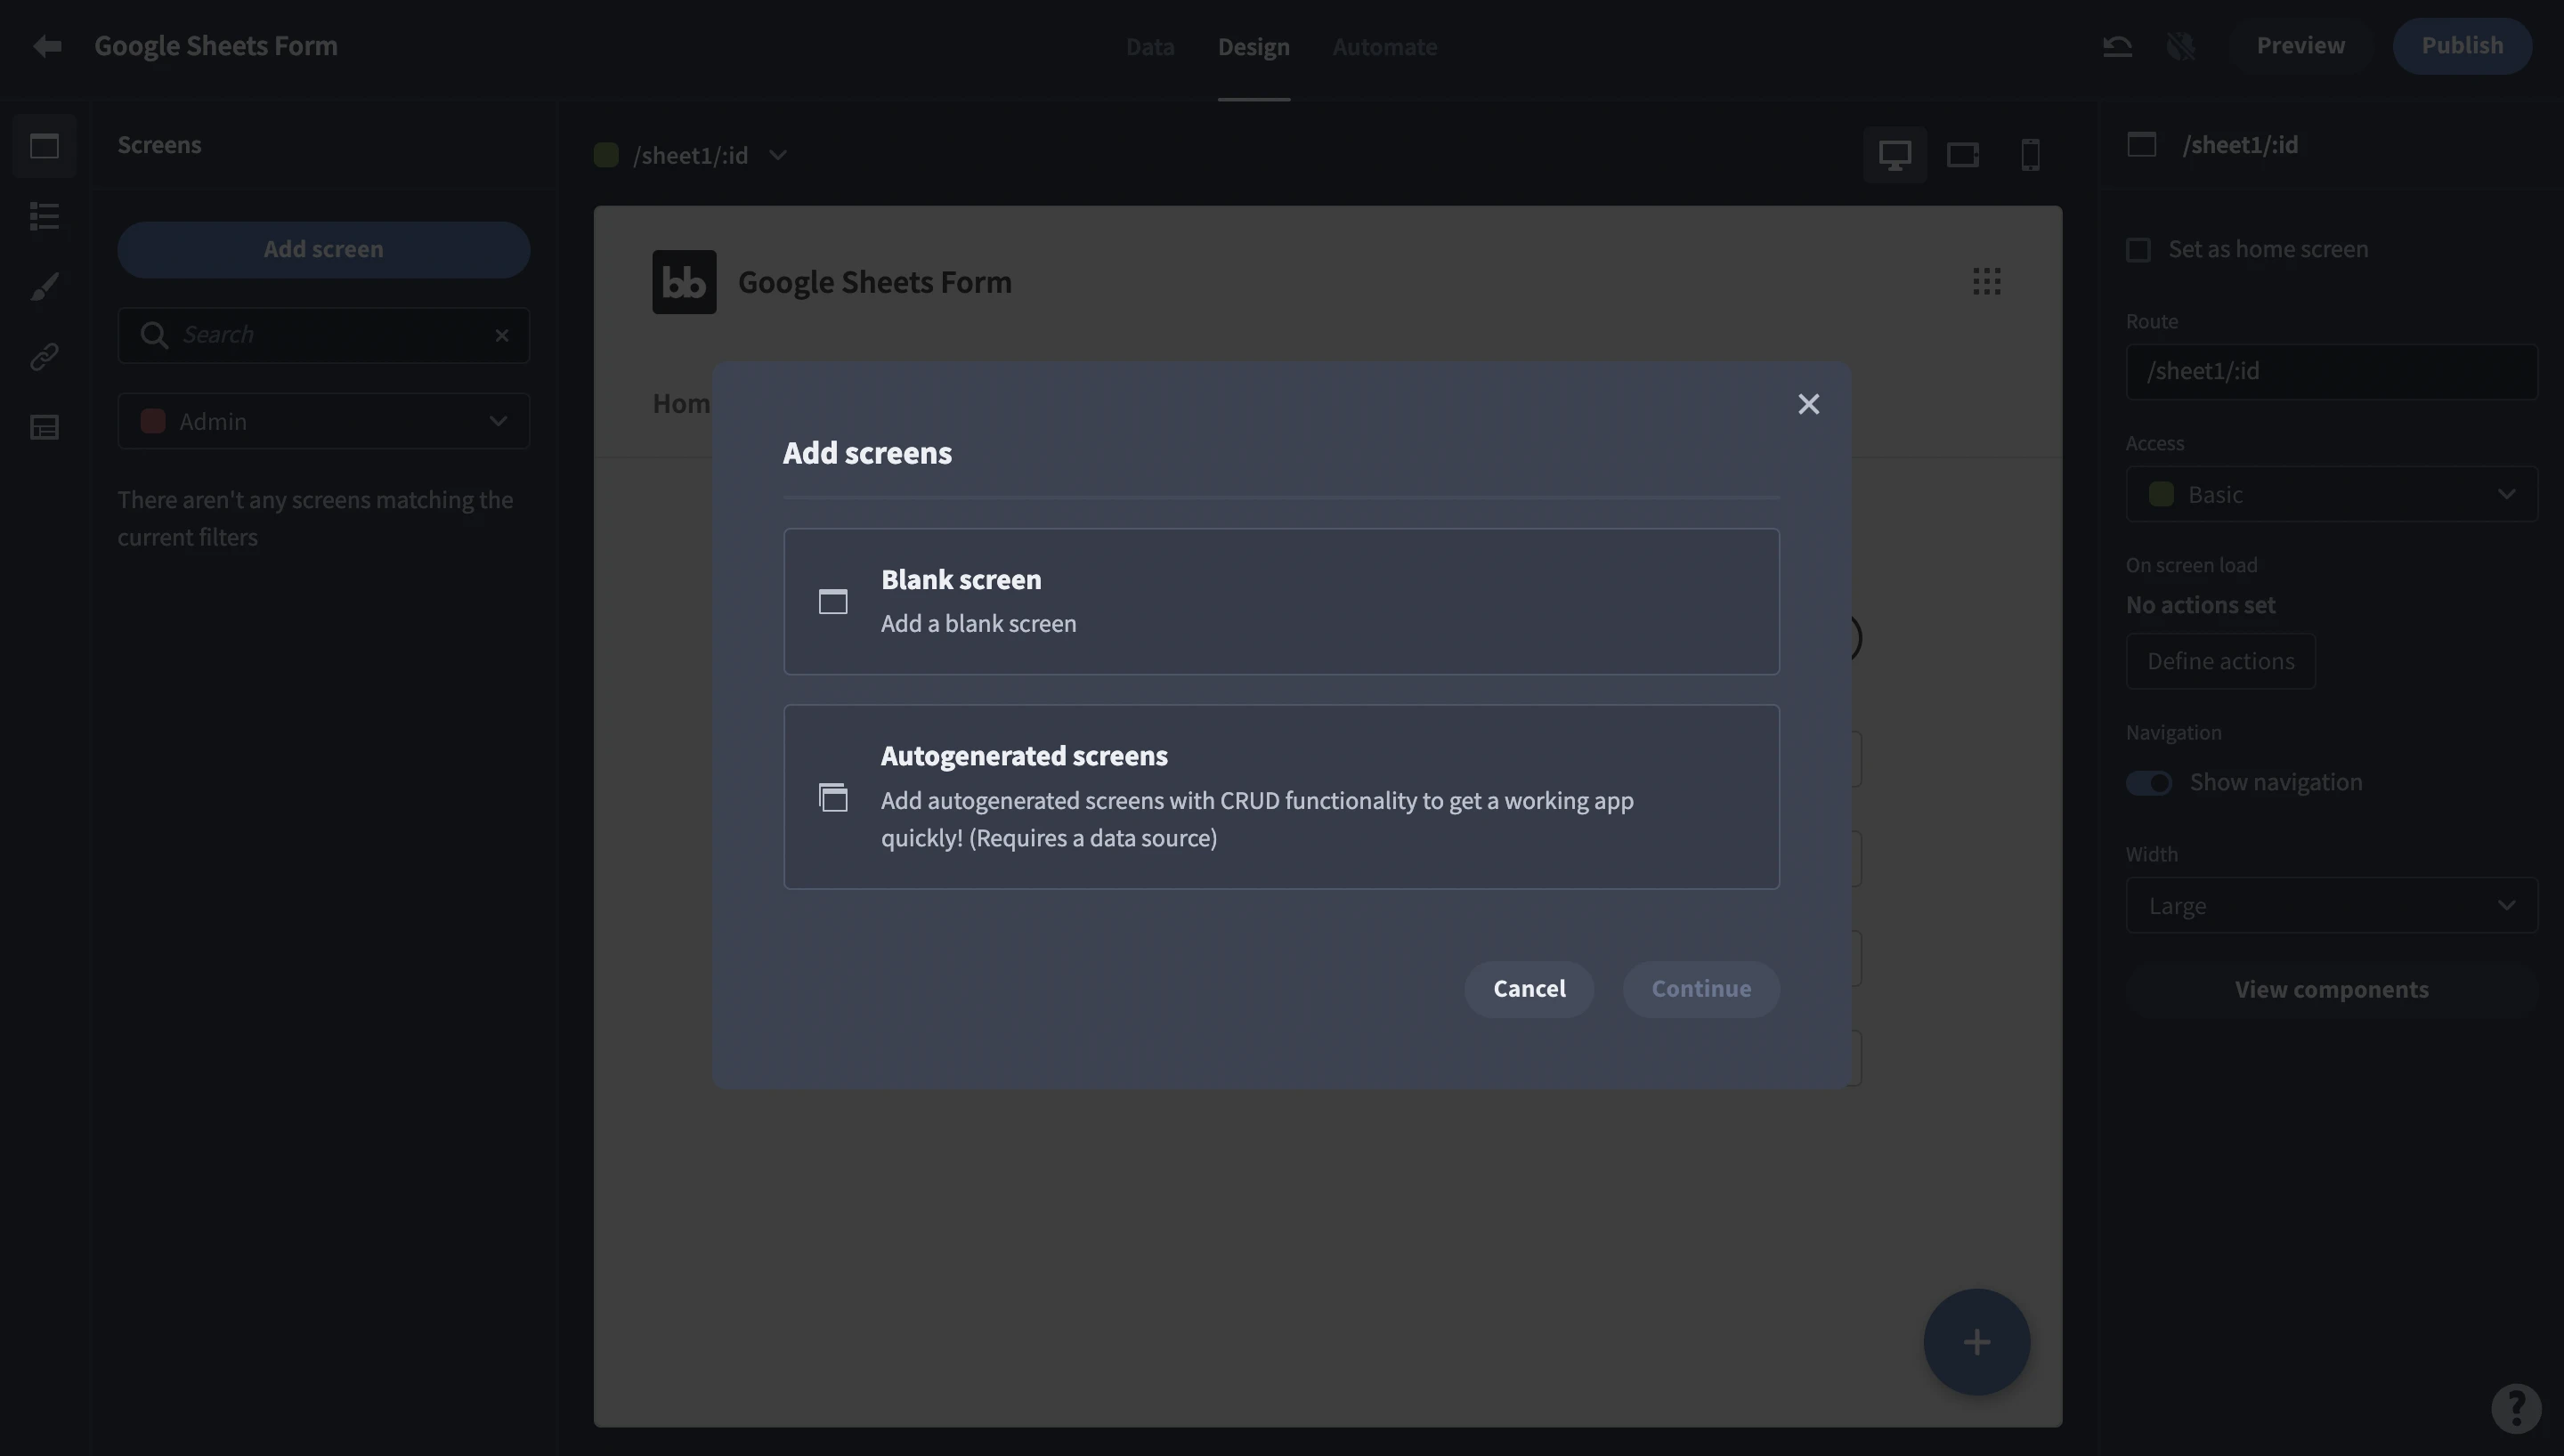
Choose the second option, and hit Continue. You’ll then be asked which data source you’d like to autogenerate screens for:
Remember, we only have one sheet in our connected spreadsheet, but if you had more you’d need to choose between them:
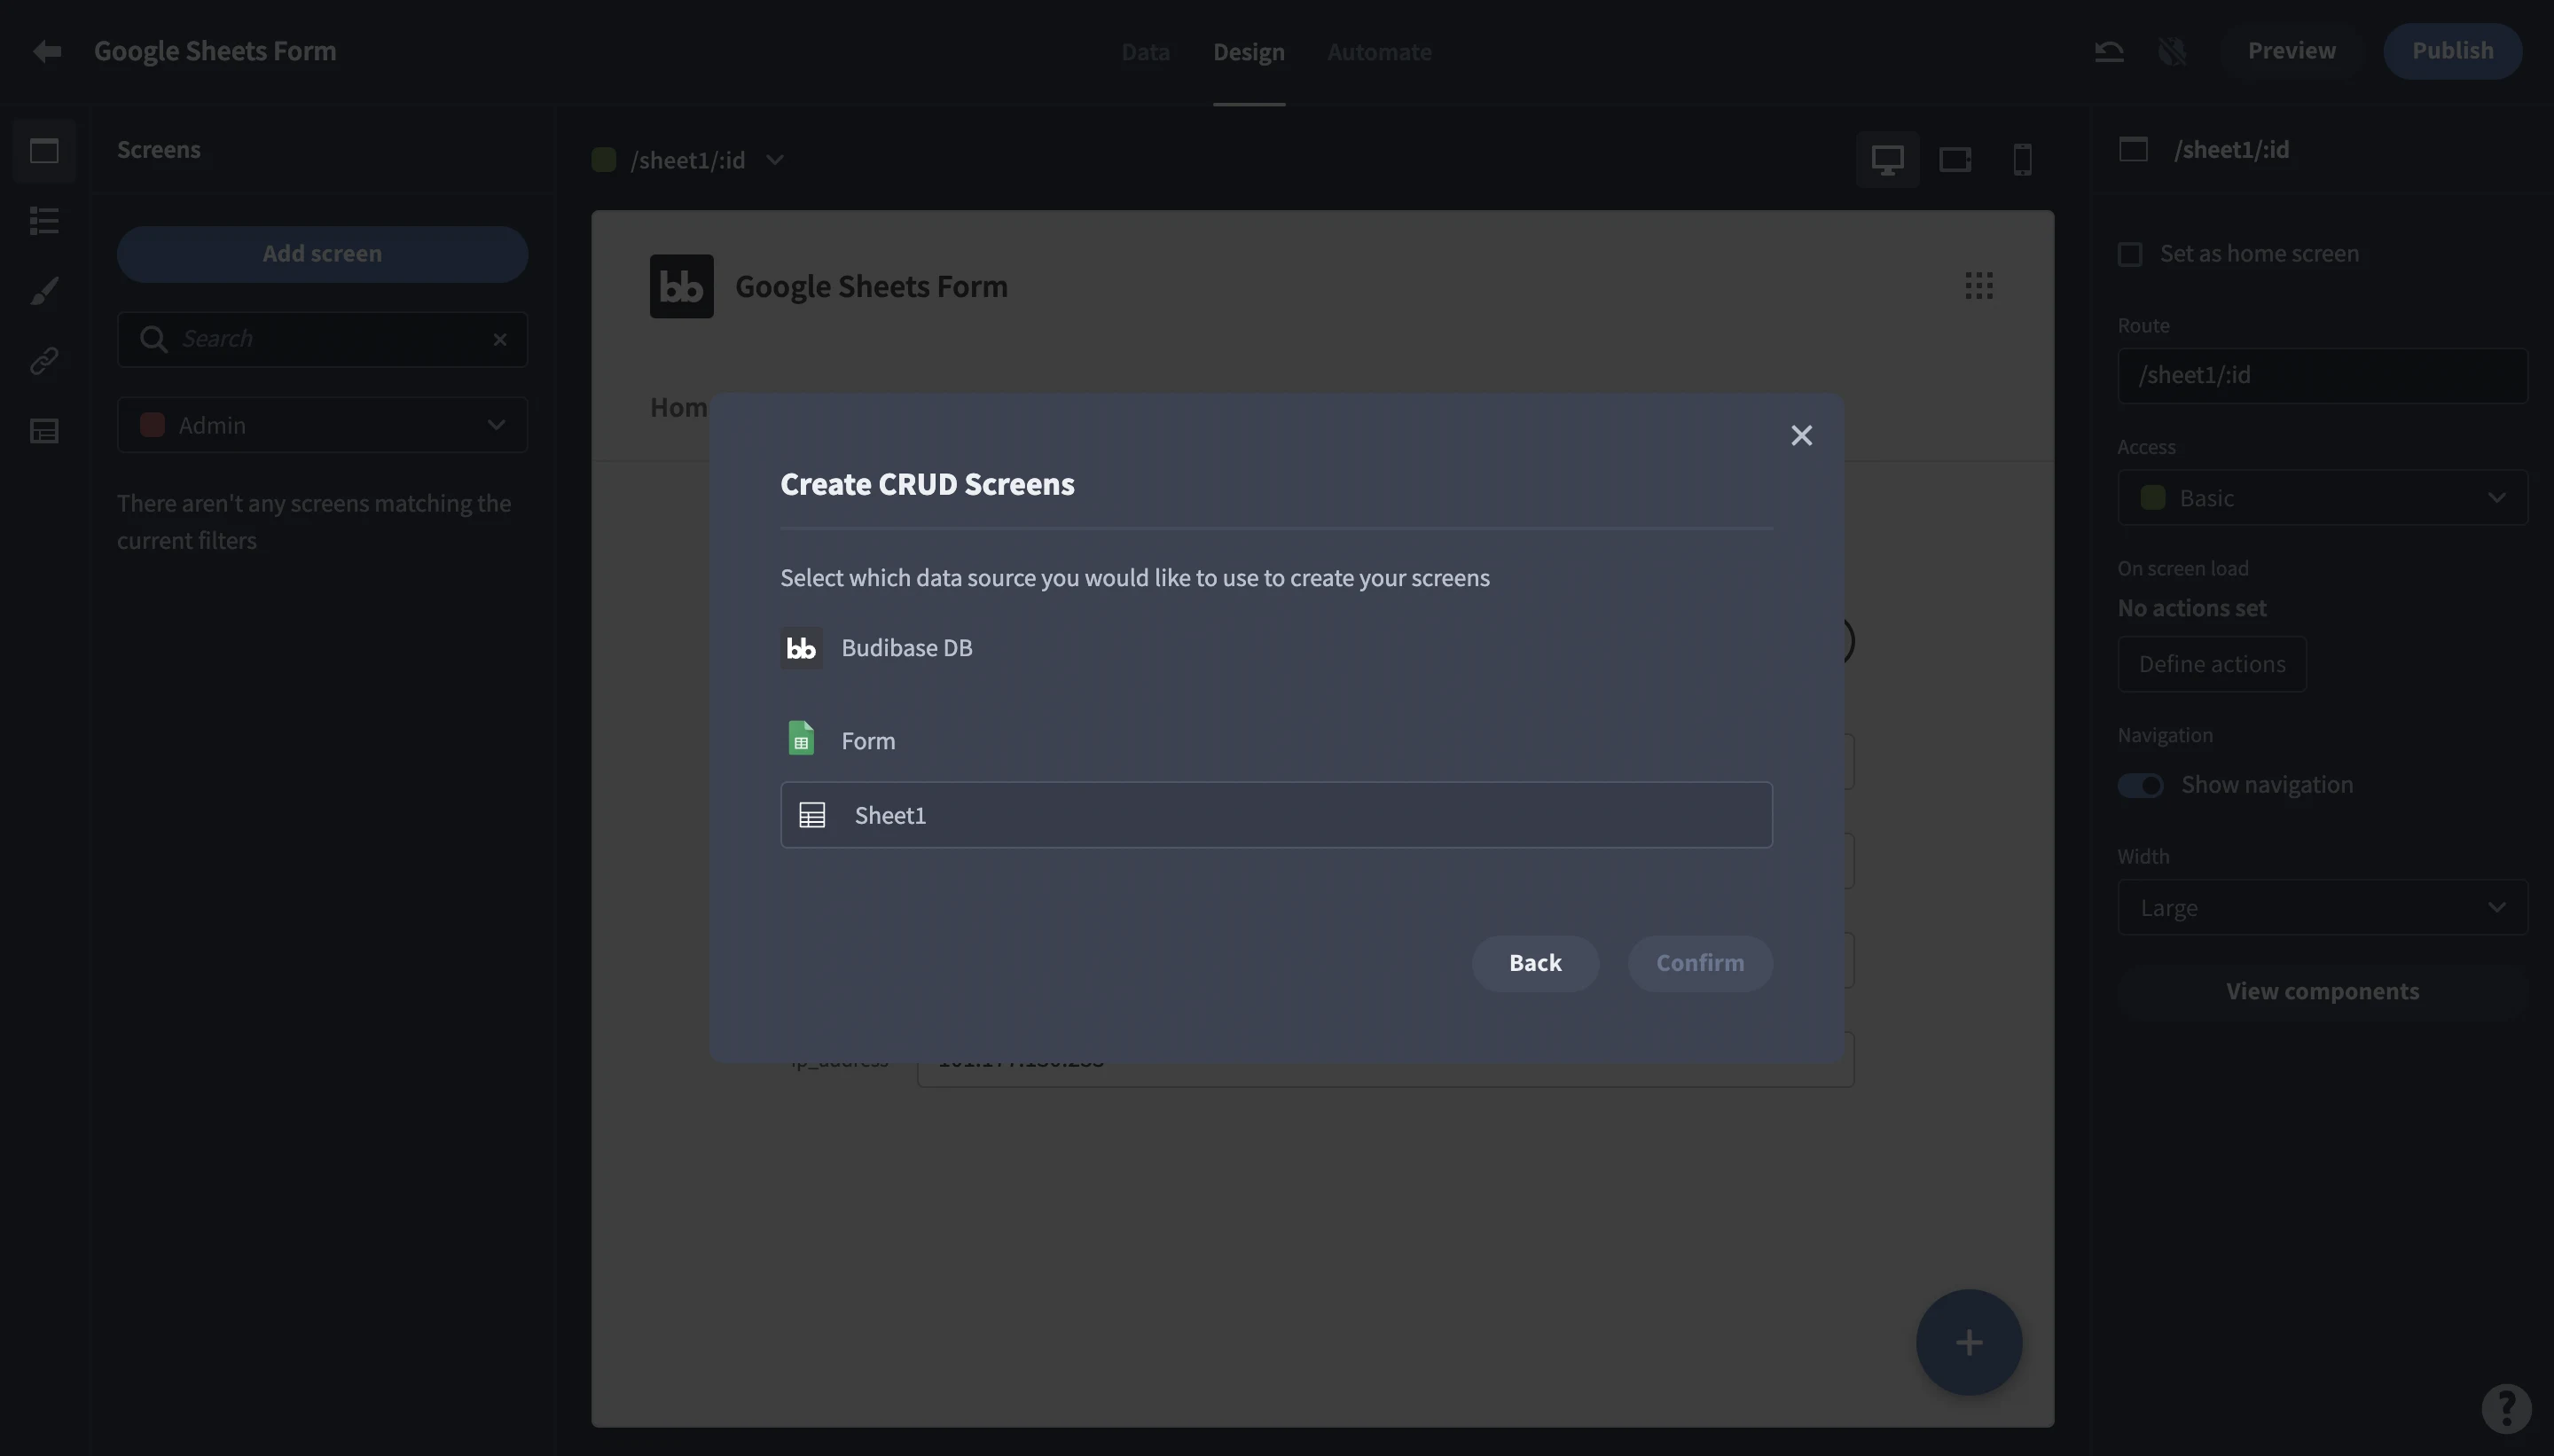
Hit Confirm and Budibase will build three screens for you. One is a table for reading and navigating to existing entries:
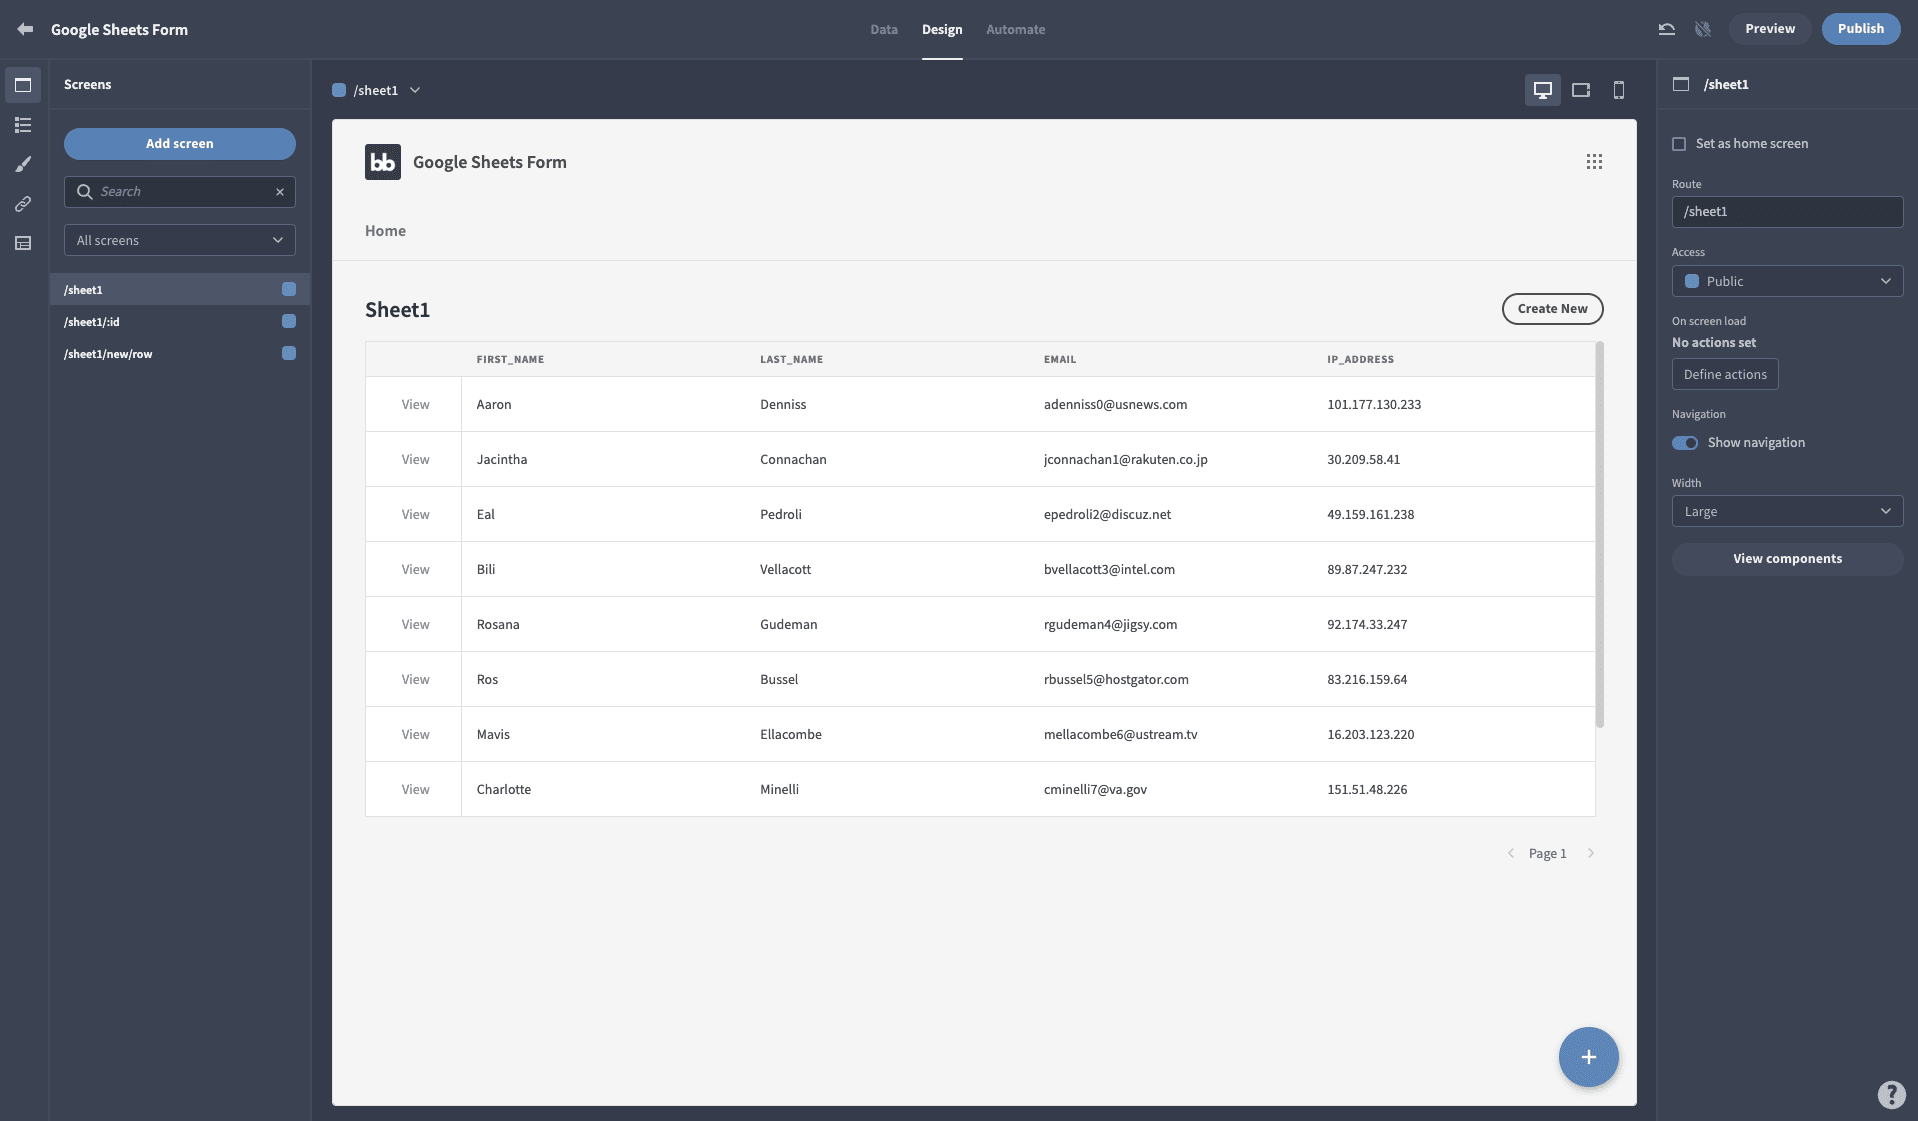
Each row has a link with the anchor text ‘View’. Users can click on this to access the Update form:
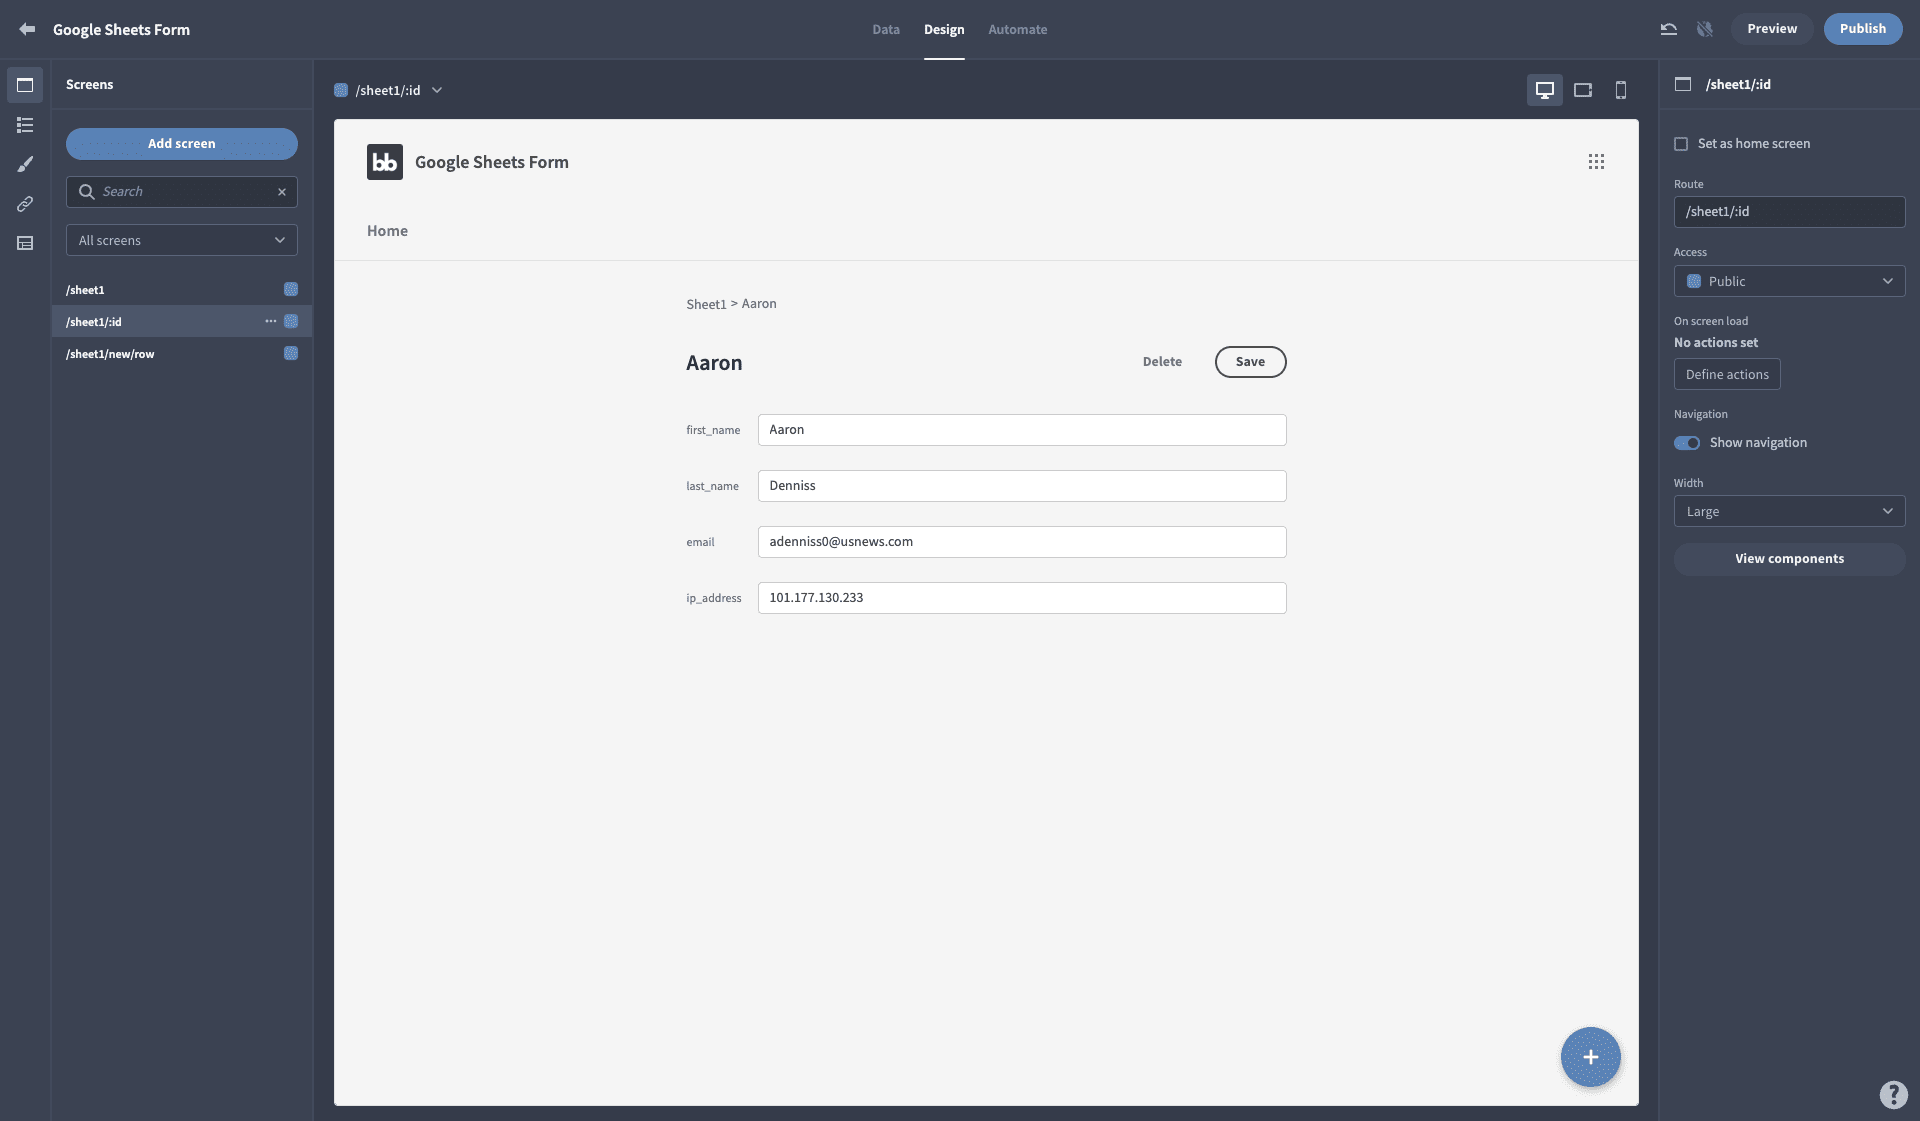
And finally, we also have a form for creating new entries:
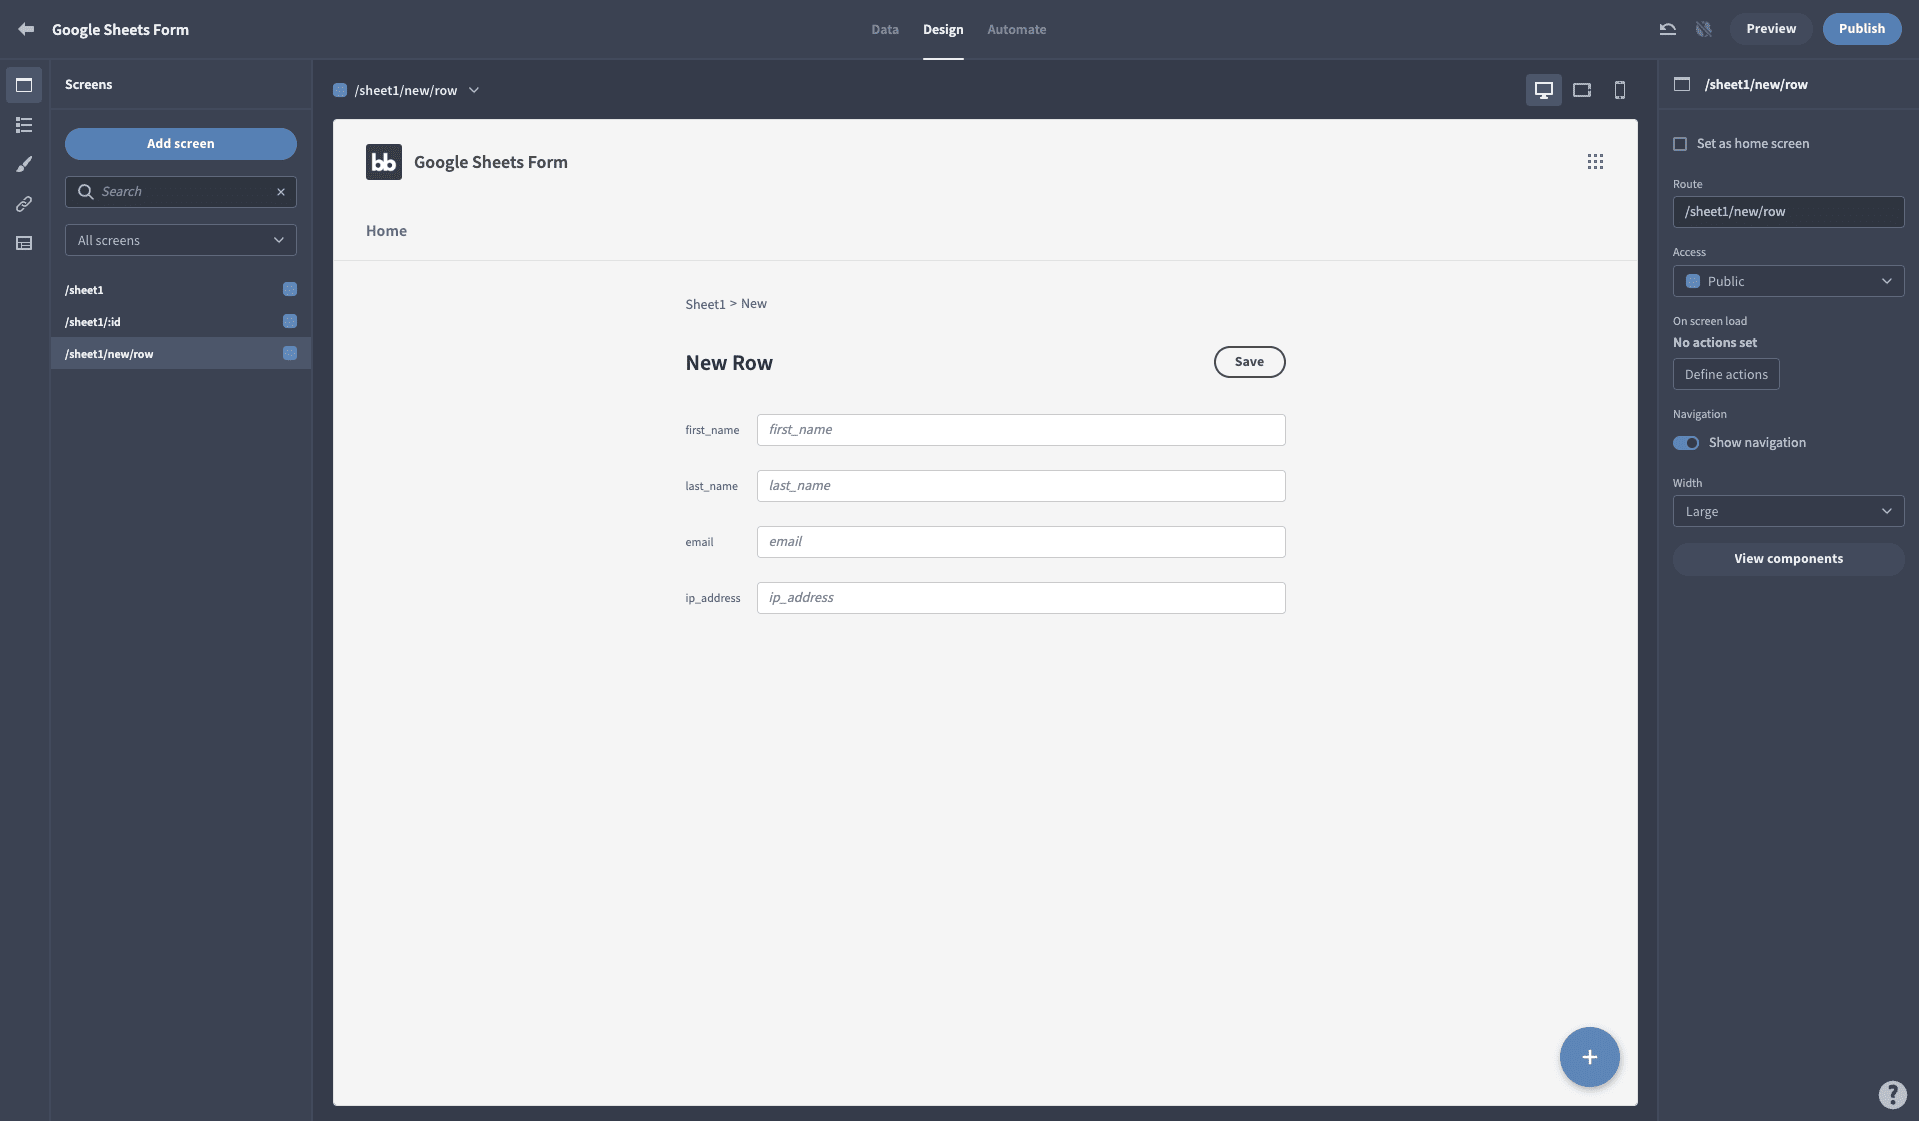
So far so good!
Before we go any further, let’s make sure our app actually works, though. Hit Preview up in the top right corner to open your demo app. First, we’ll try updating a row. Navigate to any existing entry, using the View link on the relevant table row.
We want to see if changes made in our app are reflected in the connected Google Sheets document, so make a change to one of the attributes. We’ve added the word TEST to the first_name field:
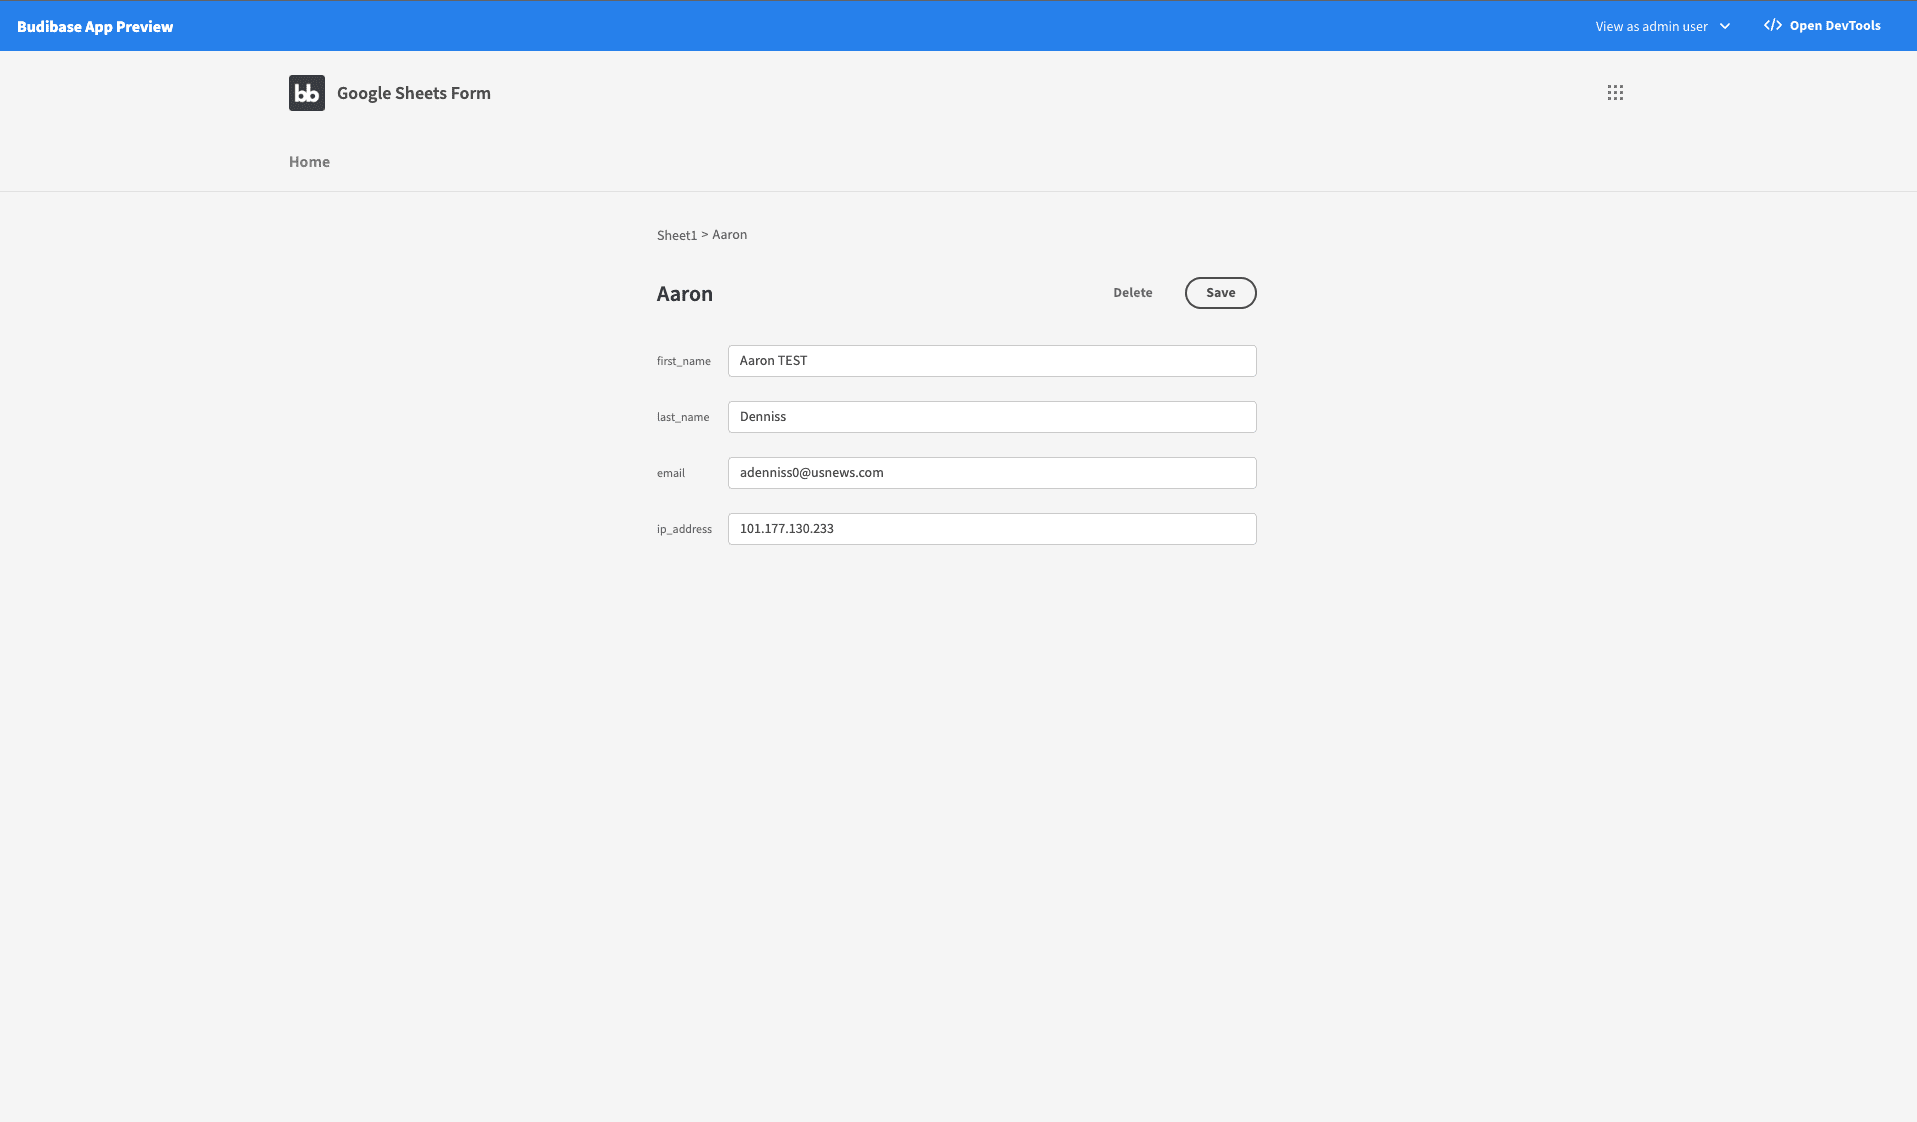
Hit Save and head back to your spreadsheet to confirm the change has been made:
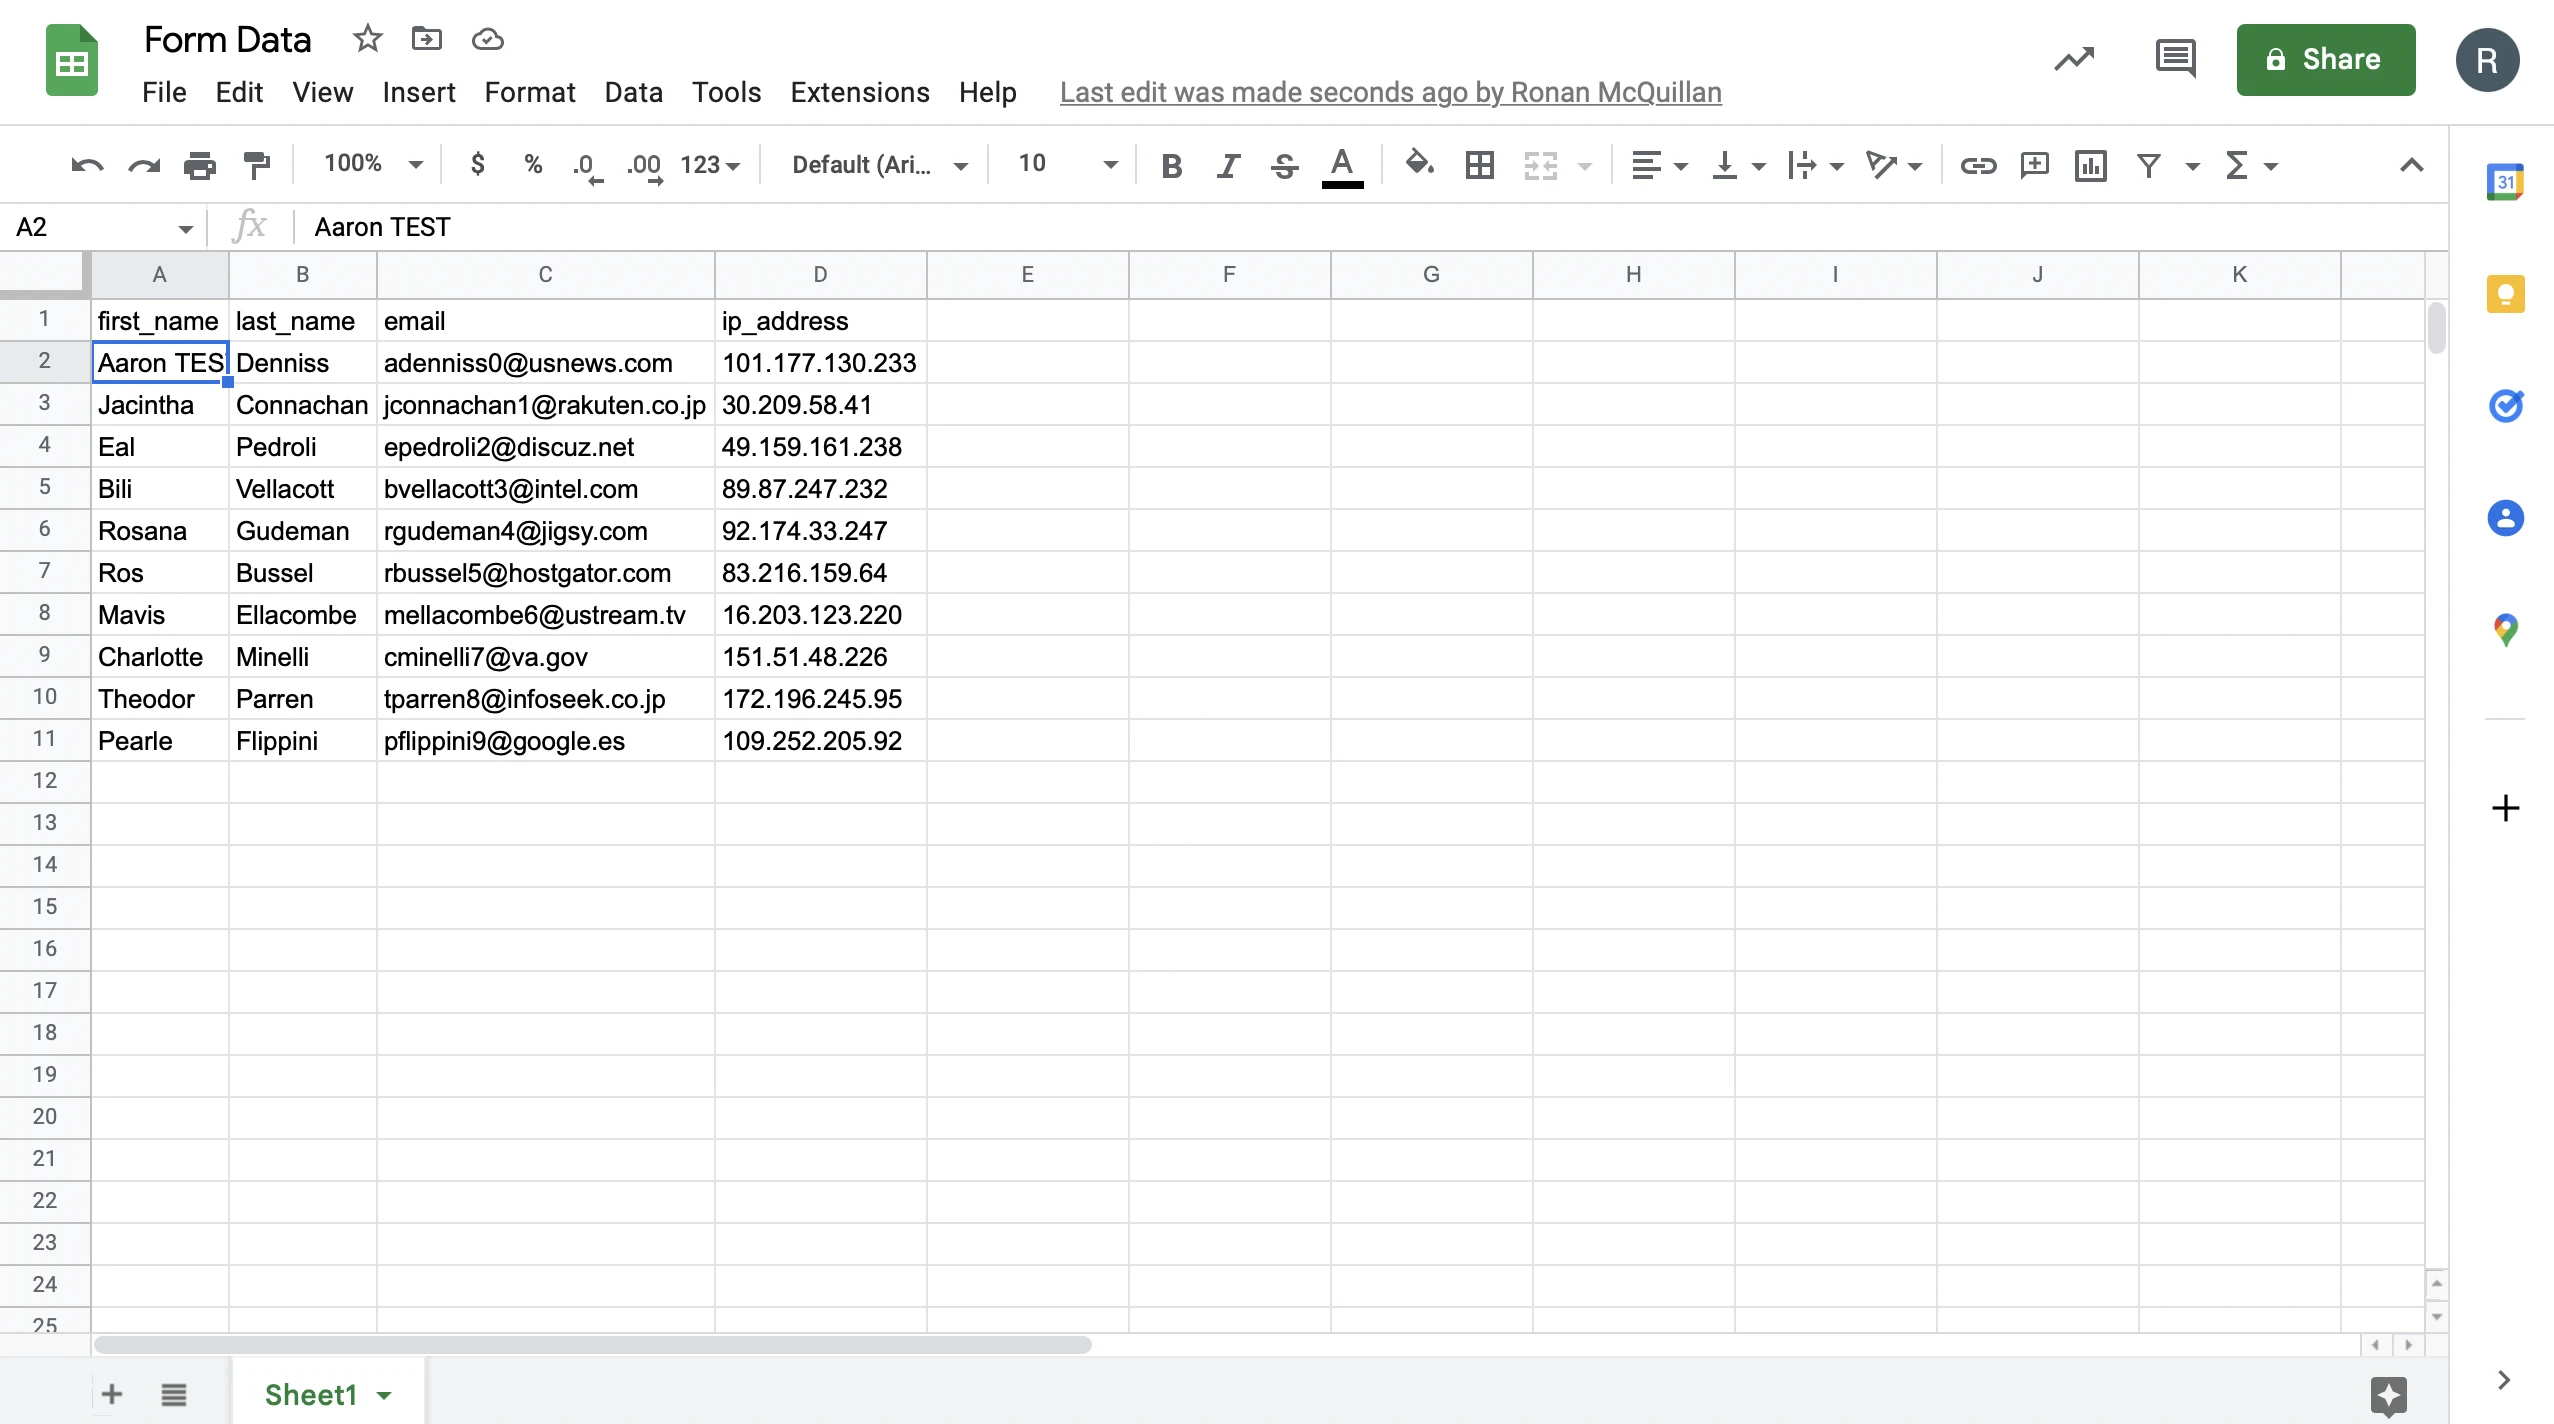
Happy days!
We can repeat the same process for our Create form too. We can also reverse this process - so make a change in your connected spreadsheet and then refresh your Budibase data screen, to confirm the update is reflected.
Now, for really simple use cases, we could use what we have so far as a deployable solution. For example, you might not be too worried about access control or design for your Google Sheets form - in which case you could simply skip to step 7 and publish your app.
But, part of the beauty of Budibase is that we don’t need too much more effort to transform this simple app into something really impressive.
Take a look at our guide to building MongoDB CRUD apps .
Let’s think about how we could spend a couple of extra minutes really supercharging our forms to enter data to Google Sheets.
5. Assign access levels
First, let’s think about how we want different kinds of people to use our app. We have two forms, so it’s unlikely that they’ll be used in the exact same way.
For example, maybe we want customers to be able to add their details, but only internal users to read or update existing entries. Luckily, Budibase has you covered with our built-in role-based access control system.
Essentially, this allows us to give each user a role and then assign access to different resources to groups of users based on this.
For our Google Sheets forms, we could do this at a few different levels. One option is to restrict queries under the Manage Access modal in the Data tab:
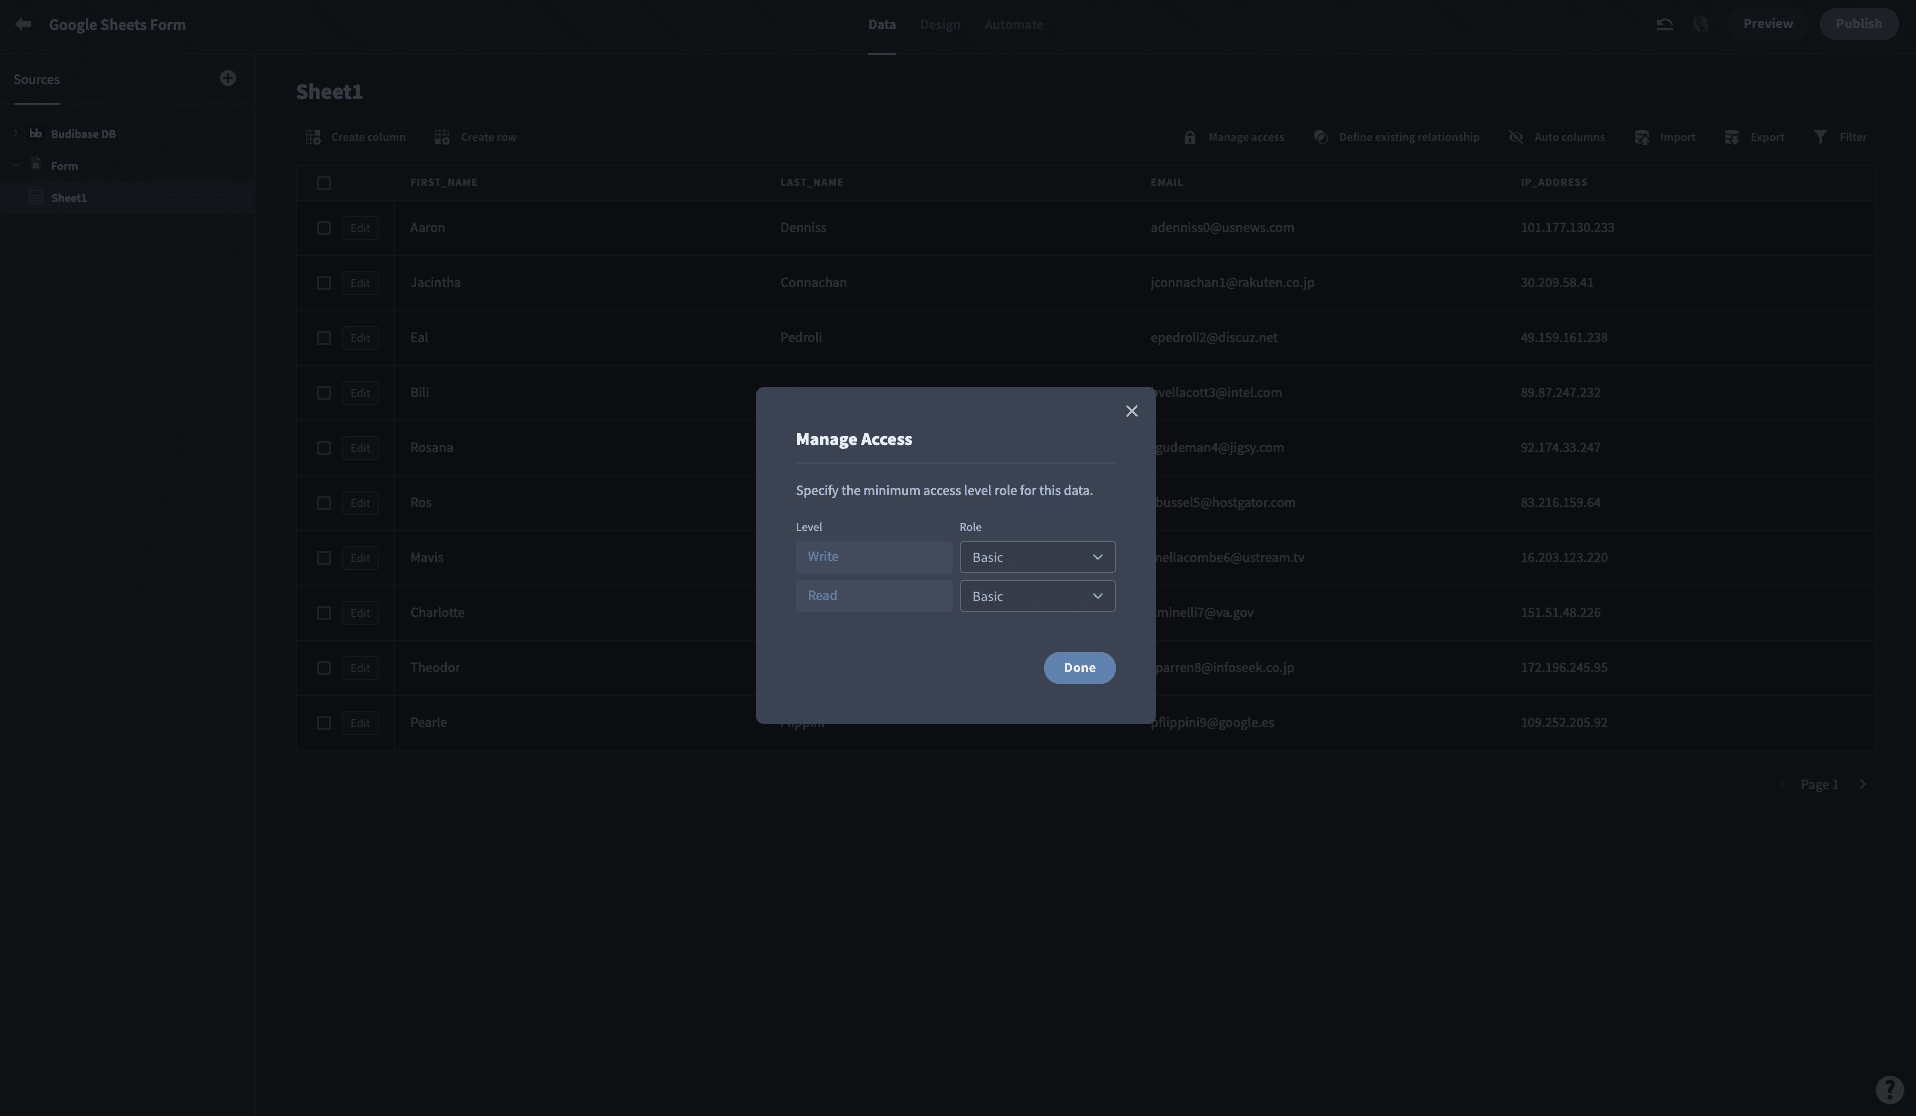
This simple data access control screen allows us to set the minimum role required to carry out different kinds of queries. We’ll need to set Write to Public so that external users can sign up using our form.
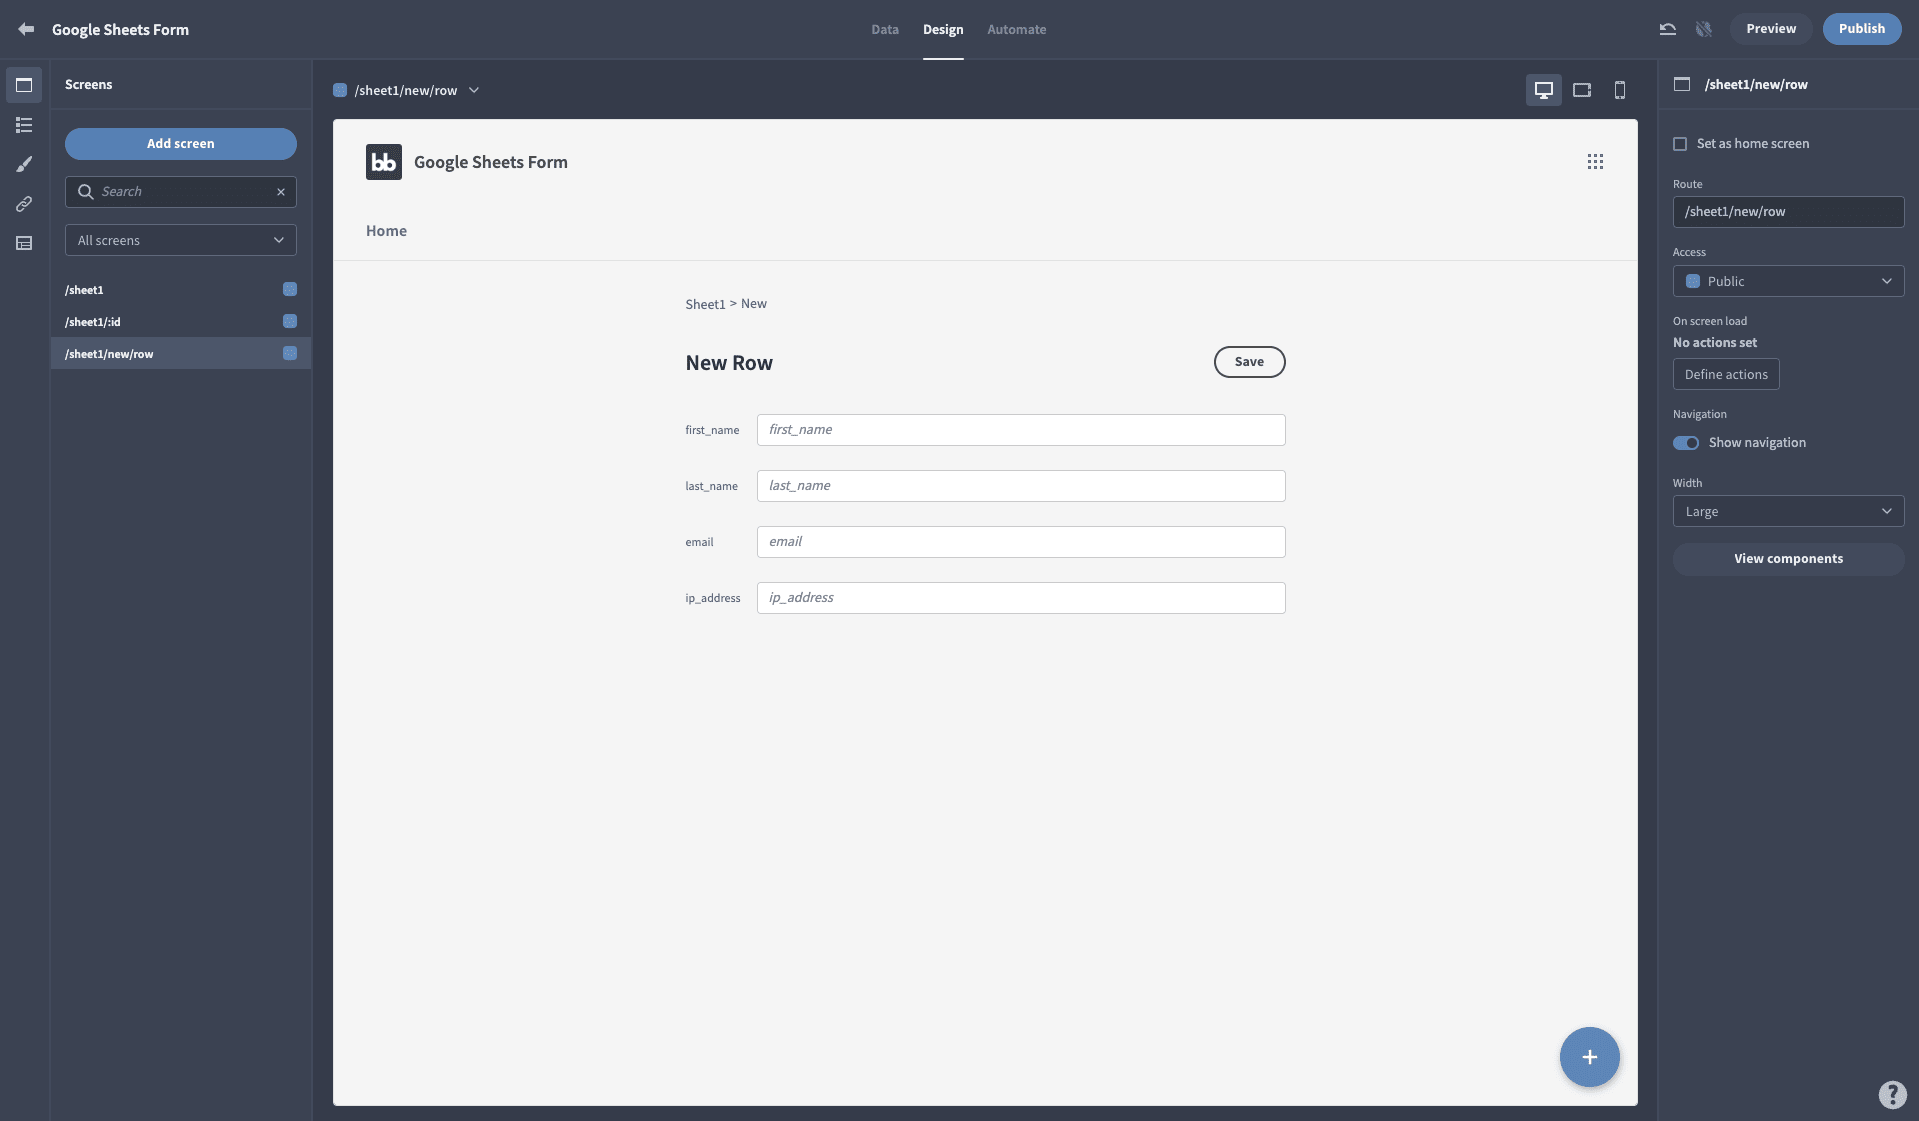
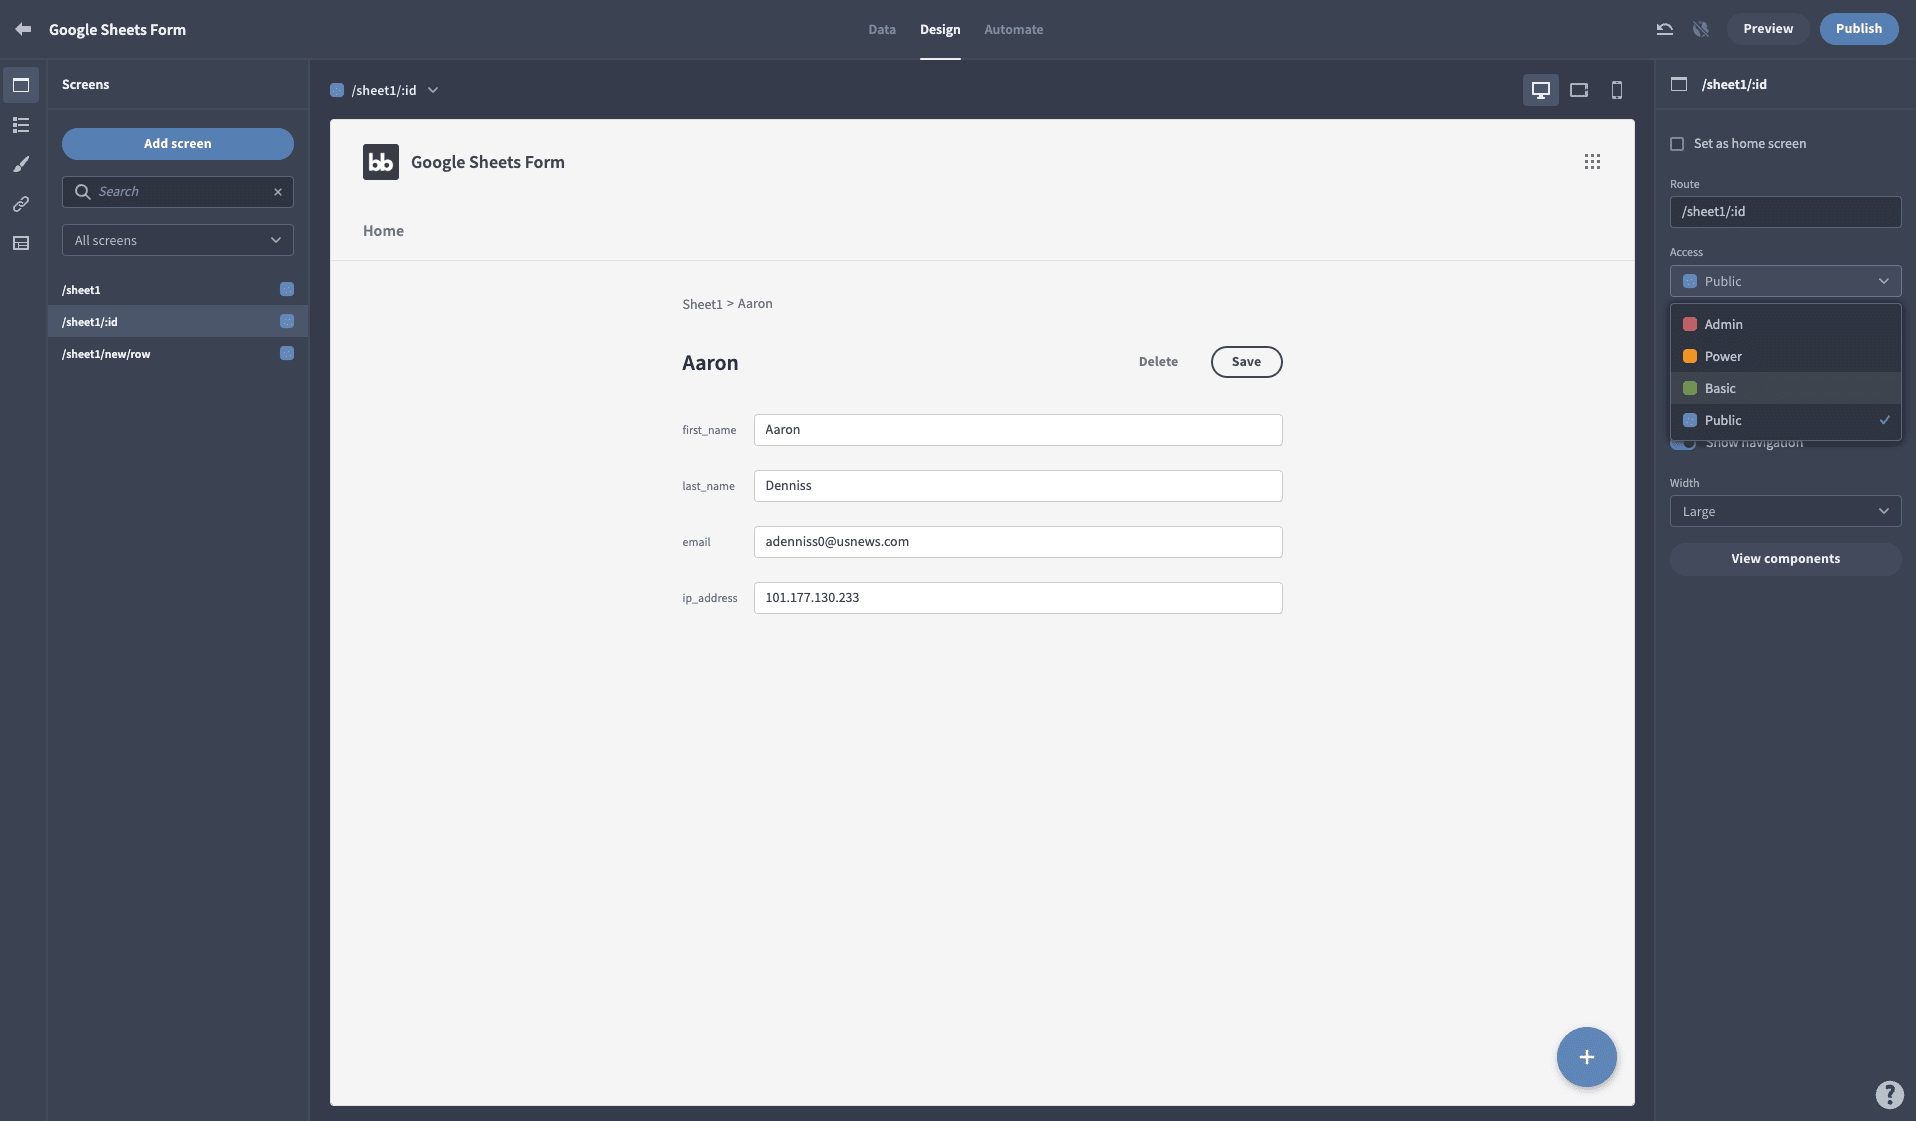
We’re also going to set the minimum role required to access each individual screen. So, let’s say we want our Create screen to be accessible to Public users, but for the other two, you need to be a Basic internal user.
We can use a simple dropdown selector to set the minimum access level for each screen.
Our Create form is already set to public:
And we can quickly change the others to Basic:
Since different users can access different screens, we need to adjust our in-app navigation too. That is, we don’t want to show users nav elements that relate to screens they can’t actually access.
This would make our UI much too confusing.
Again, Budibase gives you a bunch of different options for achieving this. One approach would be setting custom conditionality rules to hide individual components. For our app though, there’s an easier way.
First, we’ll set the home screen for each of our two access roles, using the checkbox on the right-hand side. Check this for the Create form and the Table UI:
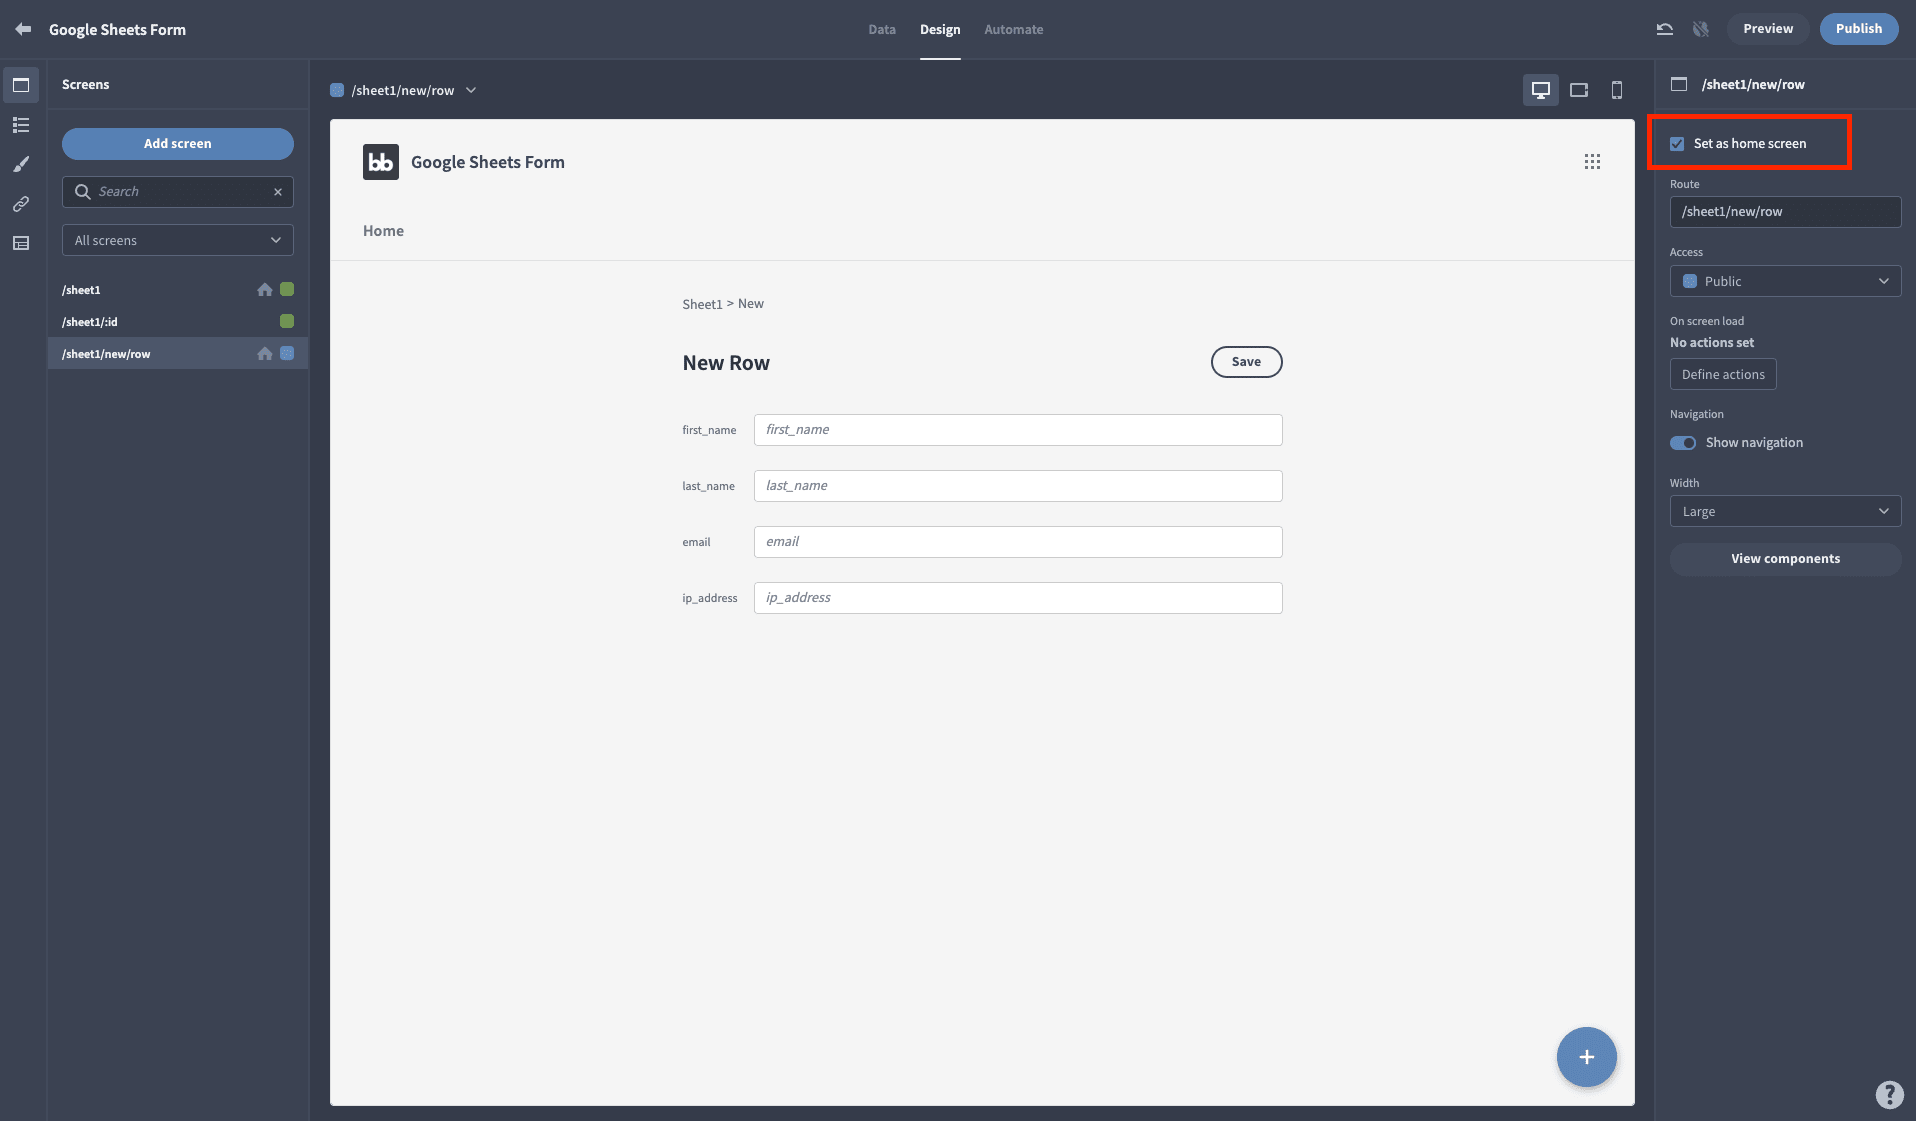
We can designate more than one interface as the home screen, but only if they have different roles assigned to them. When a user opens our app, they’ll see the home screen for the highest role they have access to.
Finally, we’ll deselect the Show navigation setting for our Create form:
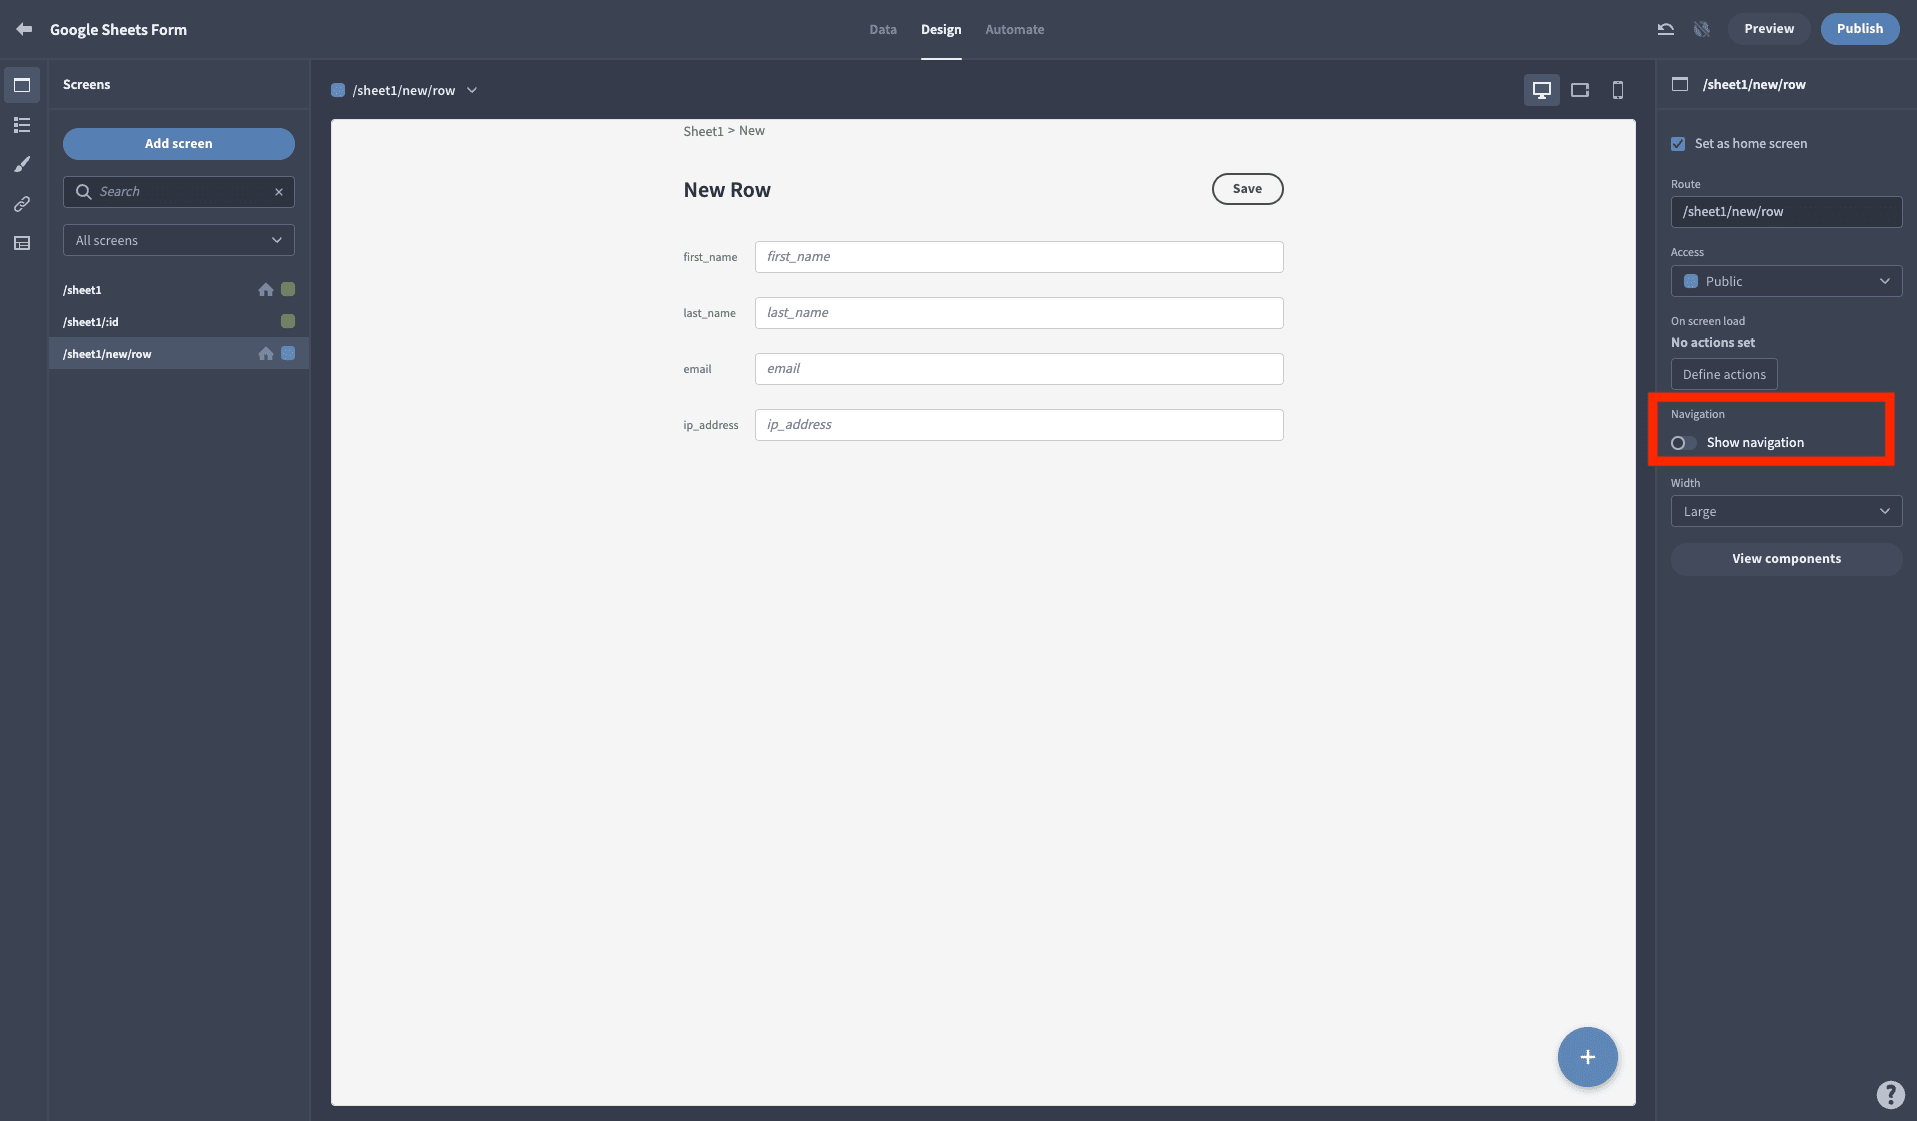
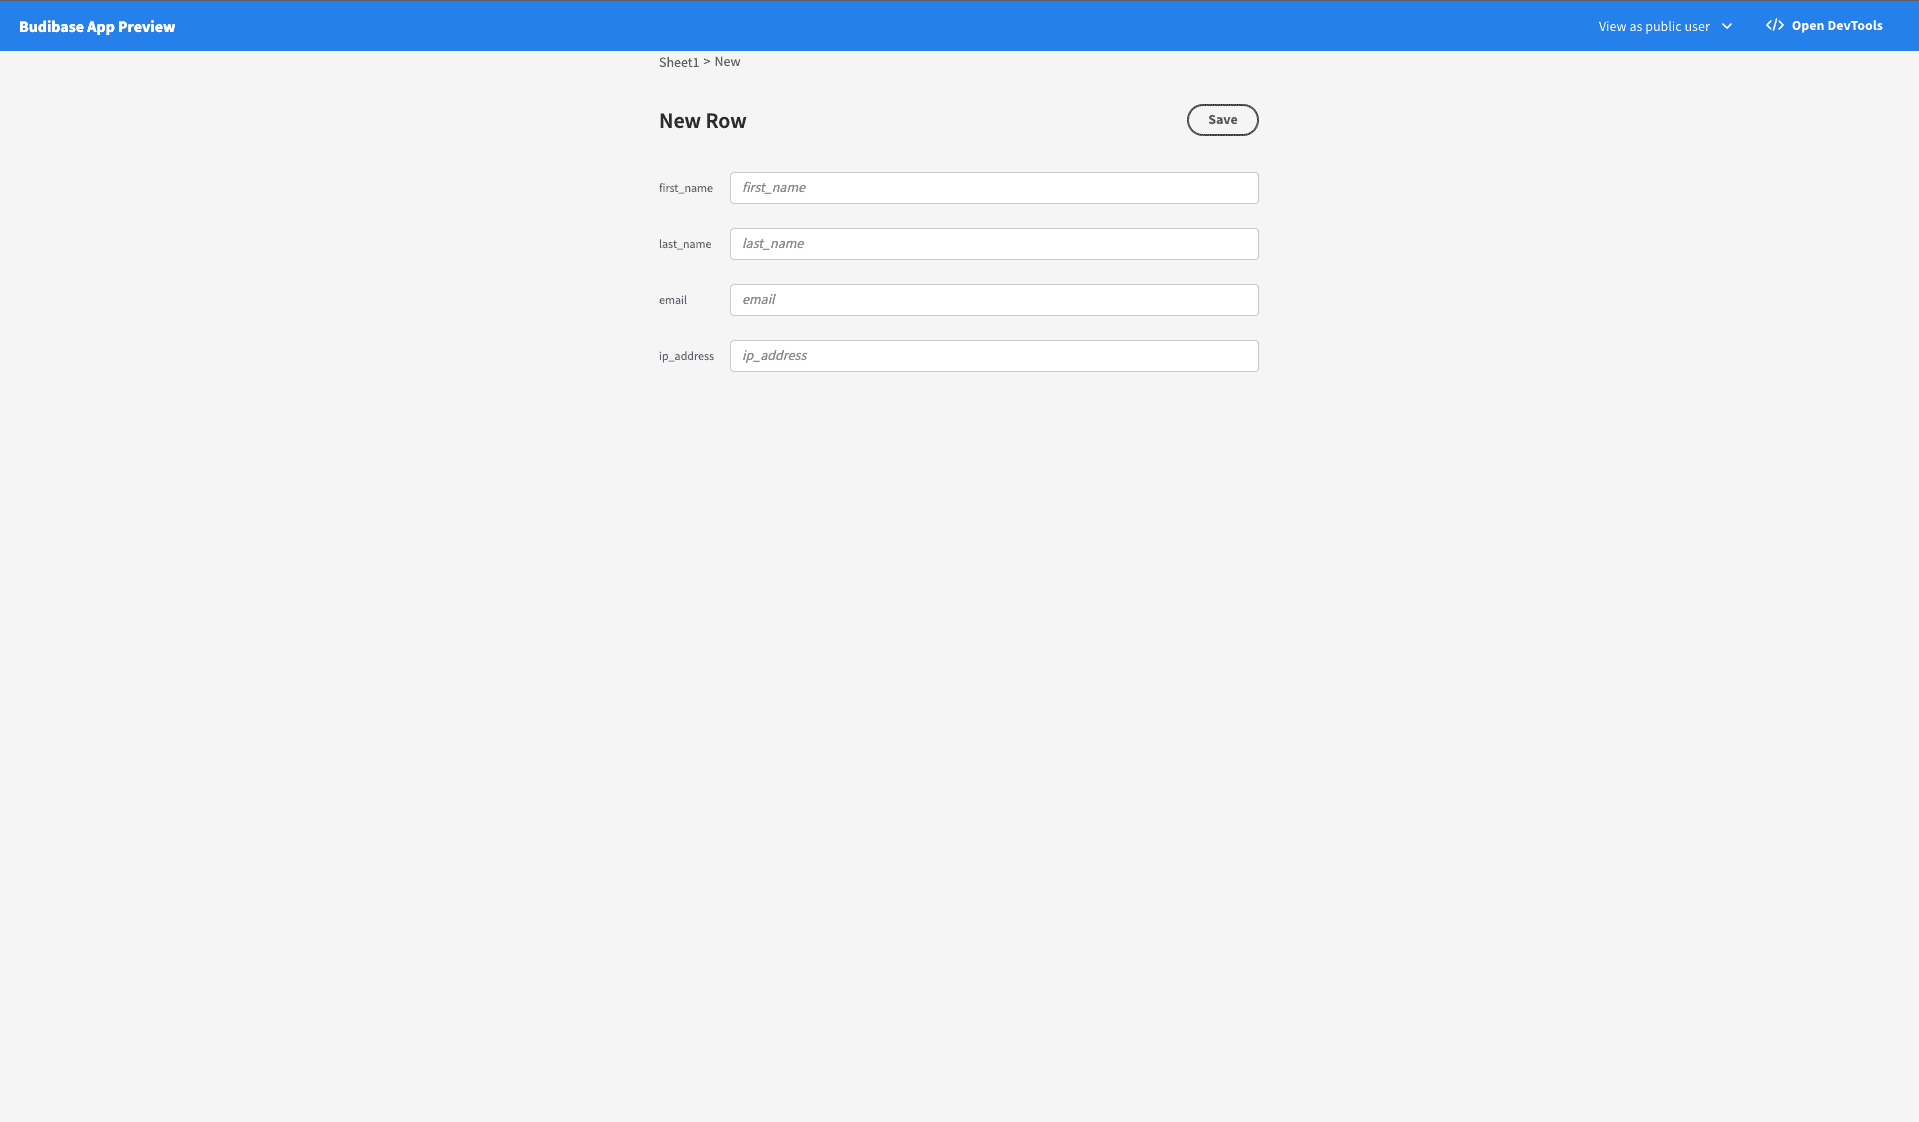
Now, when a public user lands on the app, they’ll see the form, but they’ll have no way of navigating to any other screens:
6. Customize your design
As you might have guessed from the last image, we’re also going to put some work into making our design a little bit more visually appealing. A form to enter data to Google Sheets isn’t the most exciting app in the world, but we should still aim for an attractive UX.
First, let’s change our app’s theme a little bit. We’re creating a customer-facing tool, so we’ll go with something light and airy.
First, we’ll set the default theme to Lightest:
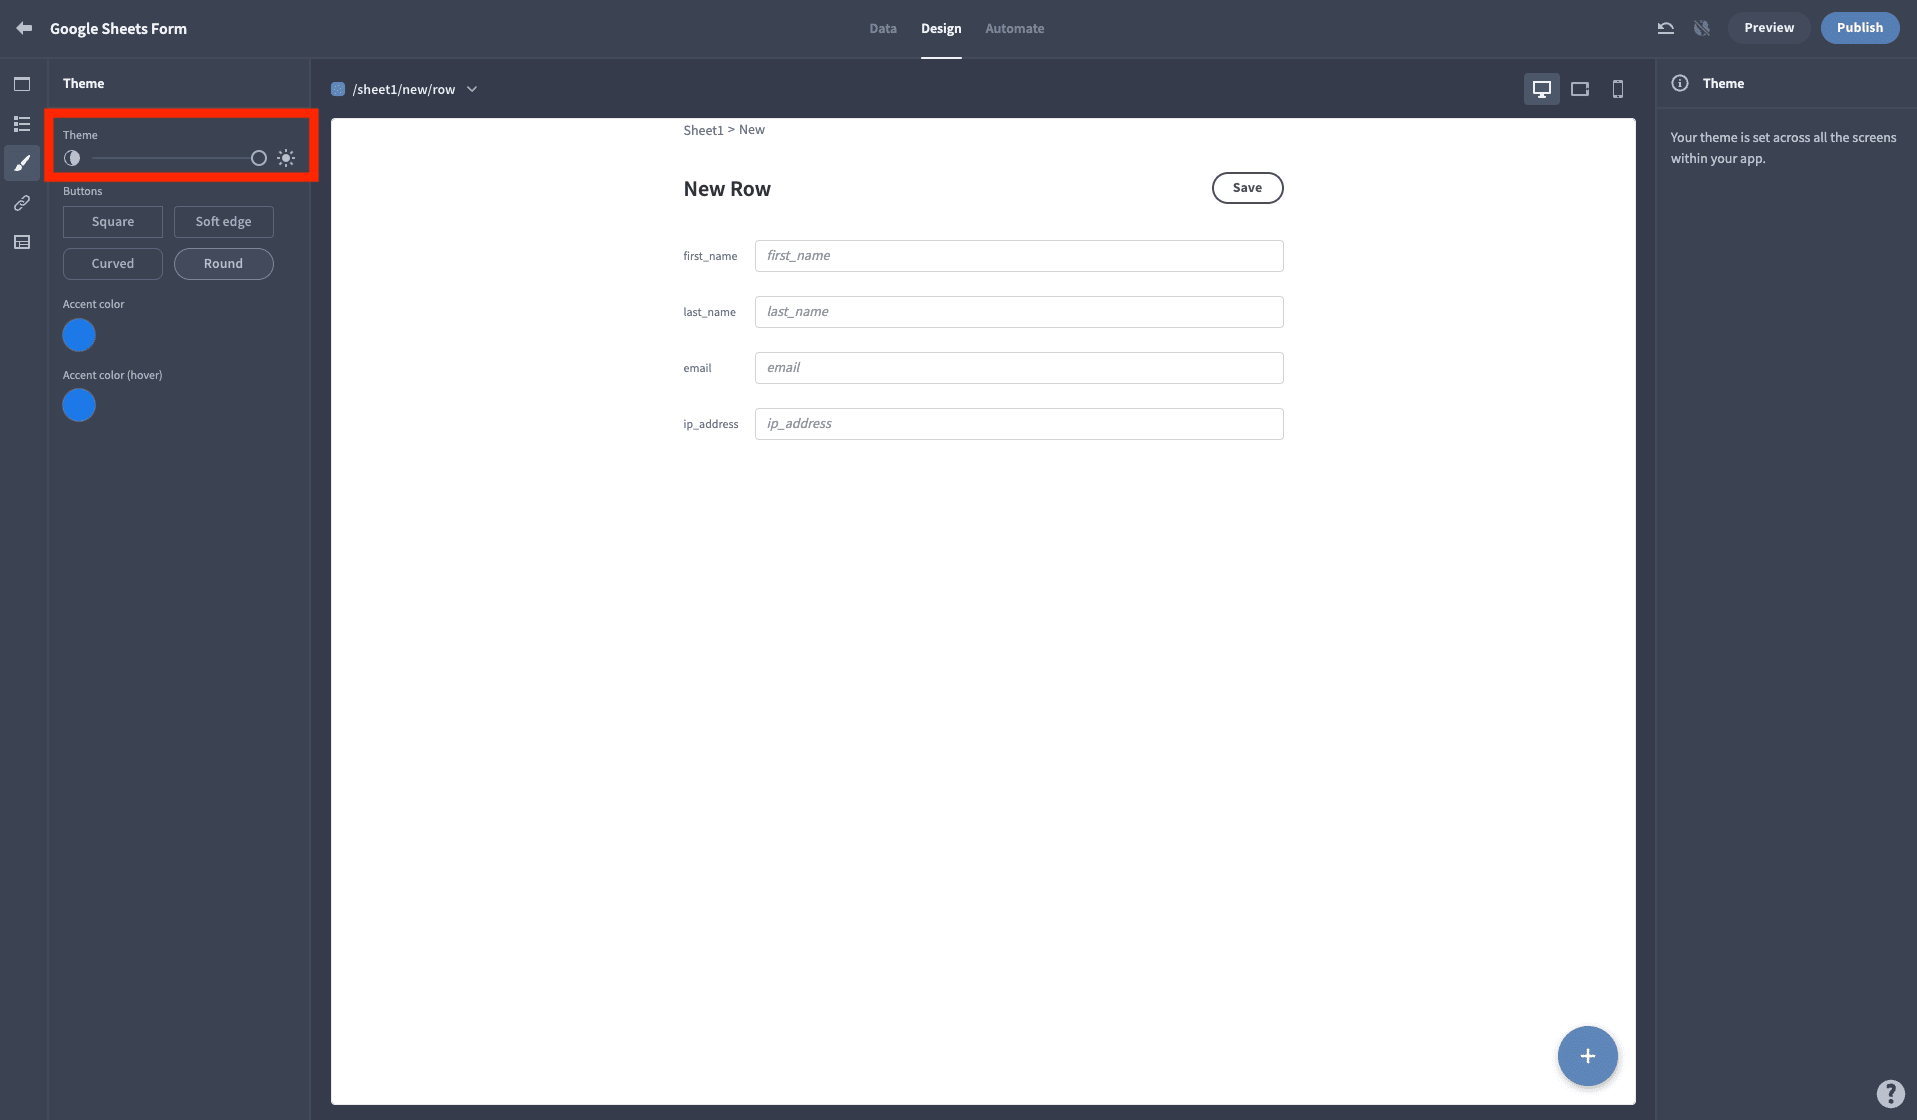
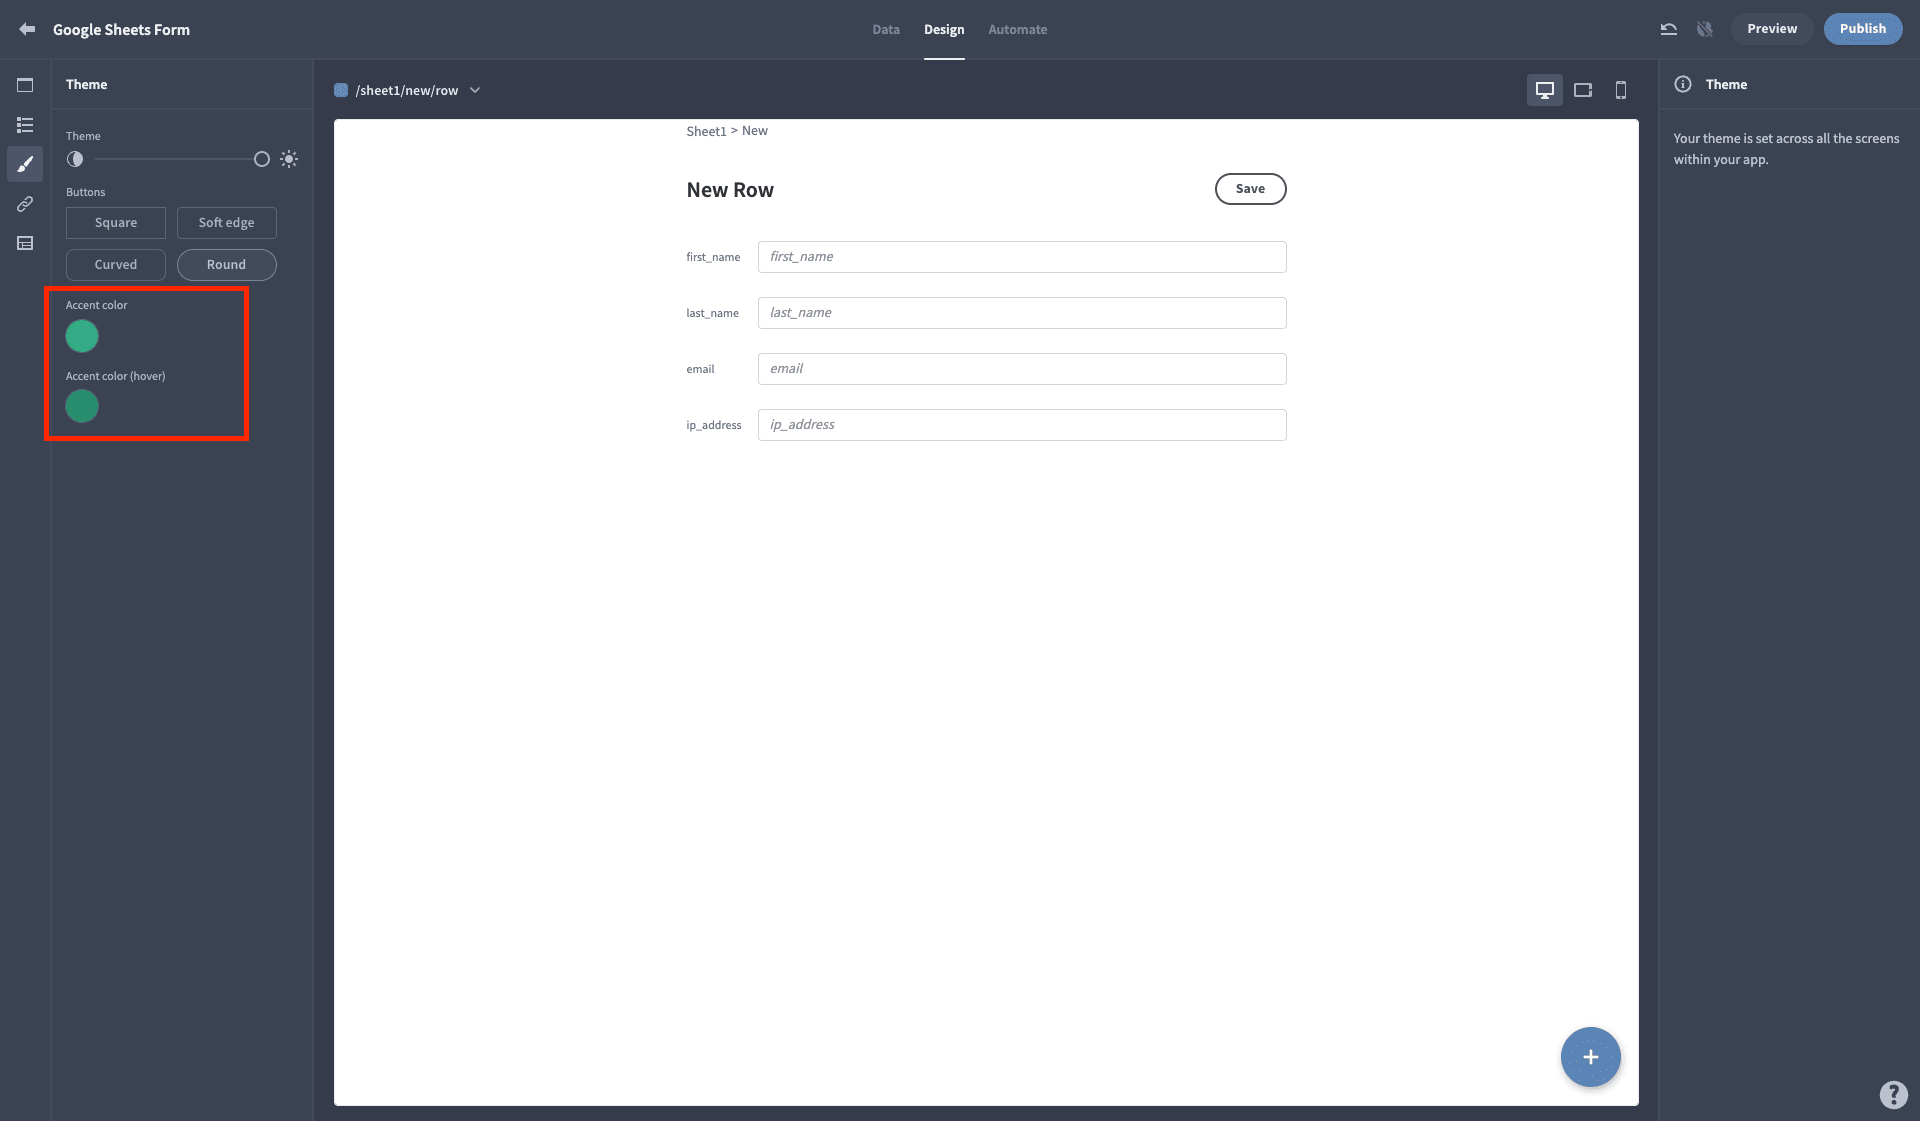
Then, if we like we can also change our accent color while we’re here. Let’s go with green since we’re talking about Google Sheets:
Now, let’s focus on the Create form to show off what we can do in Budibase to make our UIs pop.
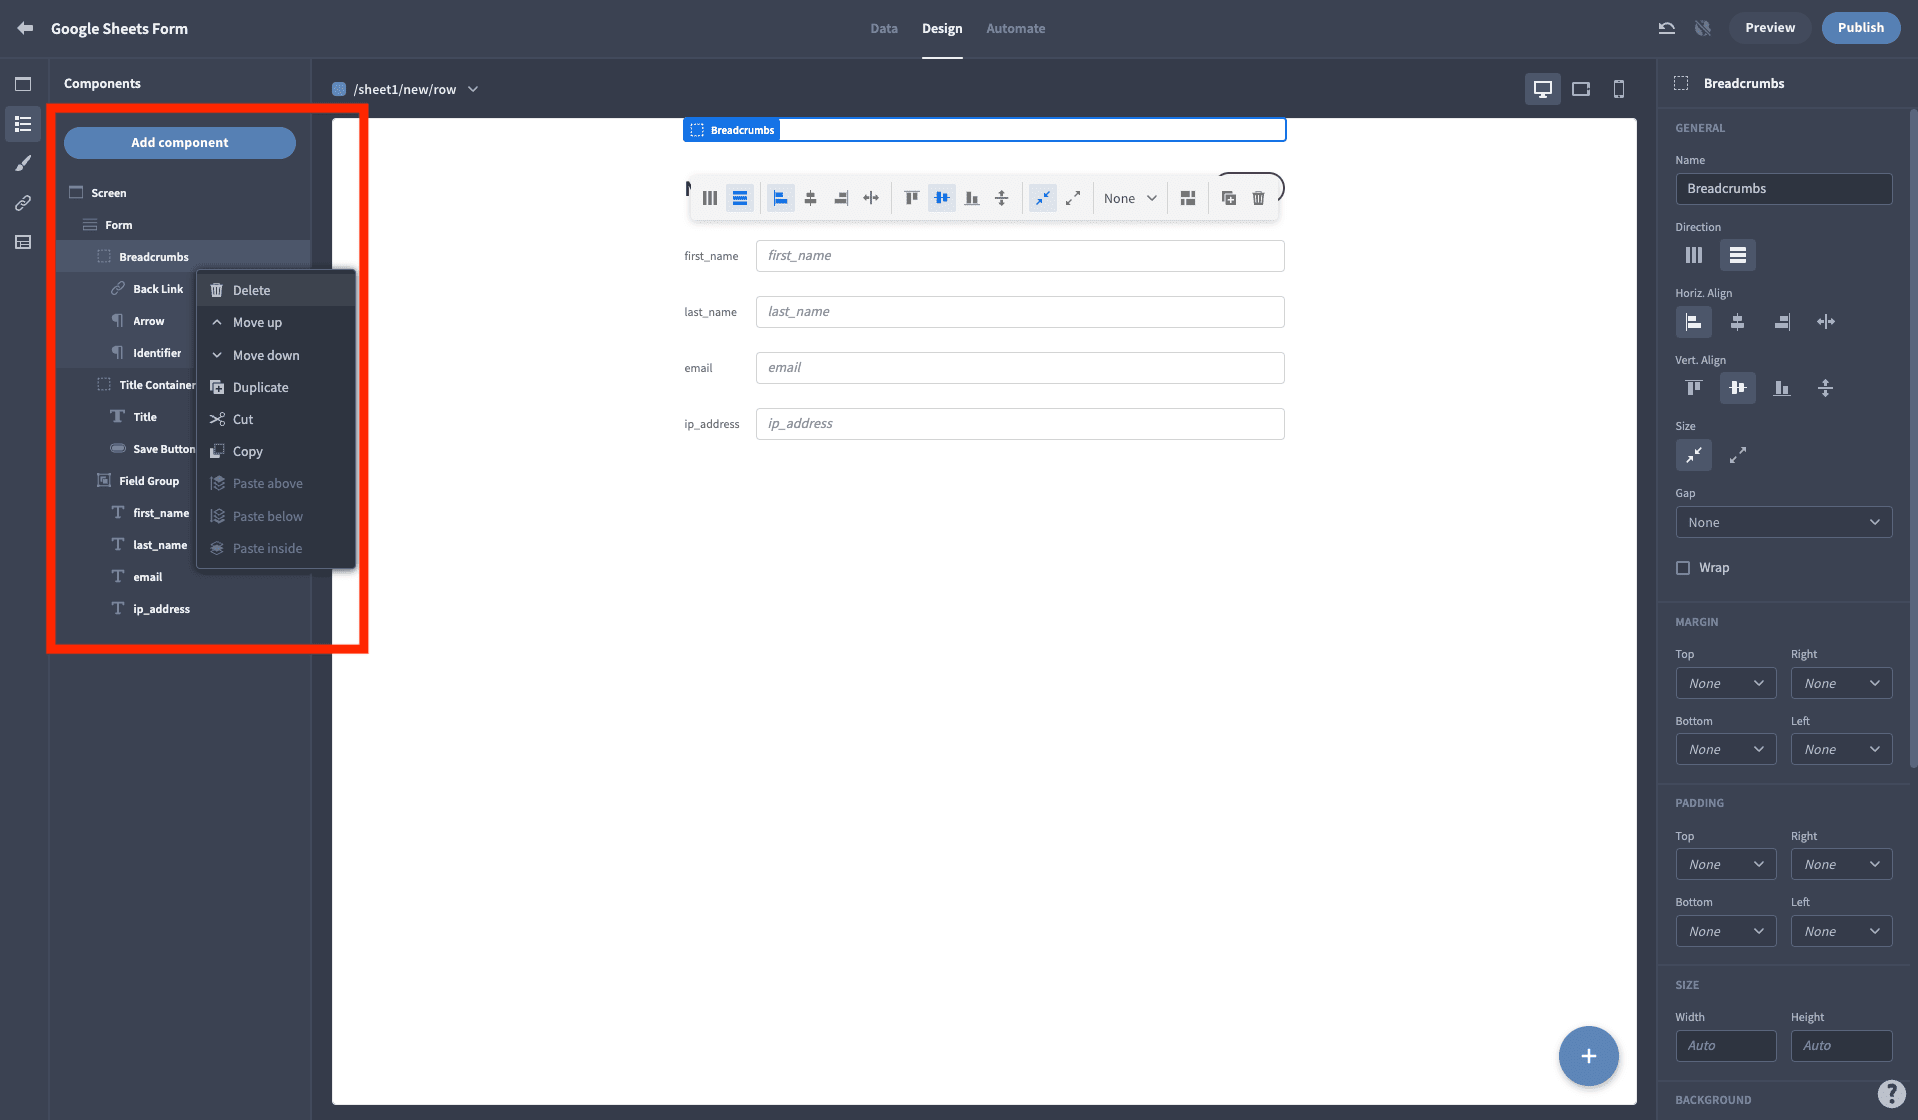
First, autogenerated screens come with breadcrumbs by default, but our Public users can only access one screen, so we might as well delete these:
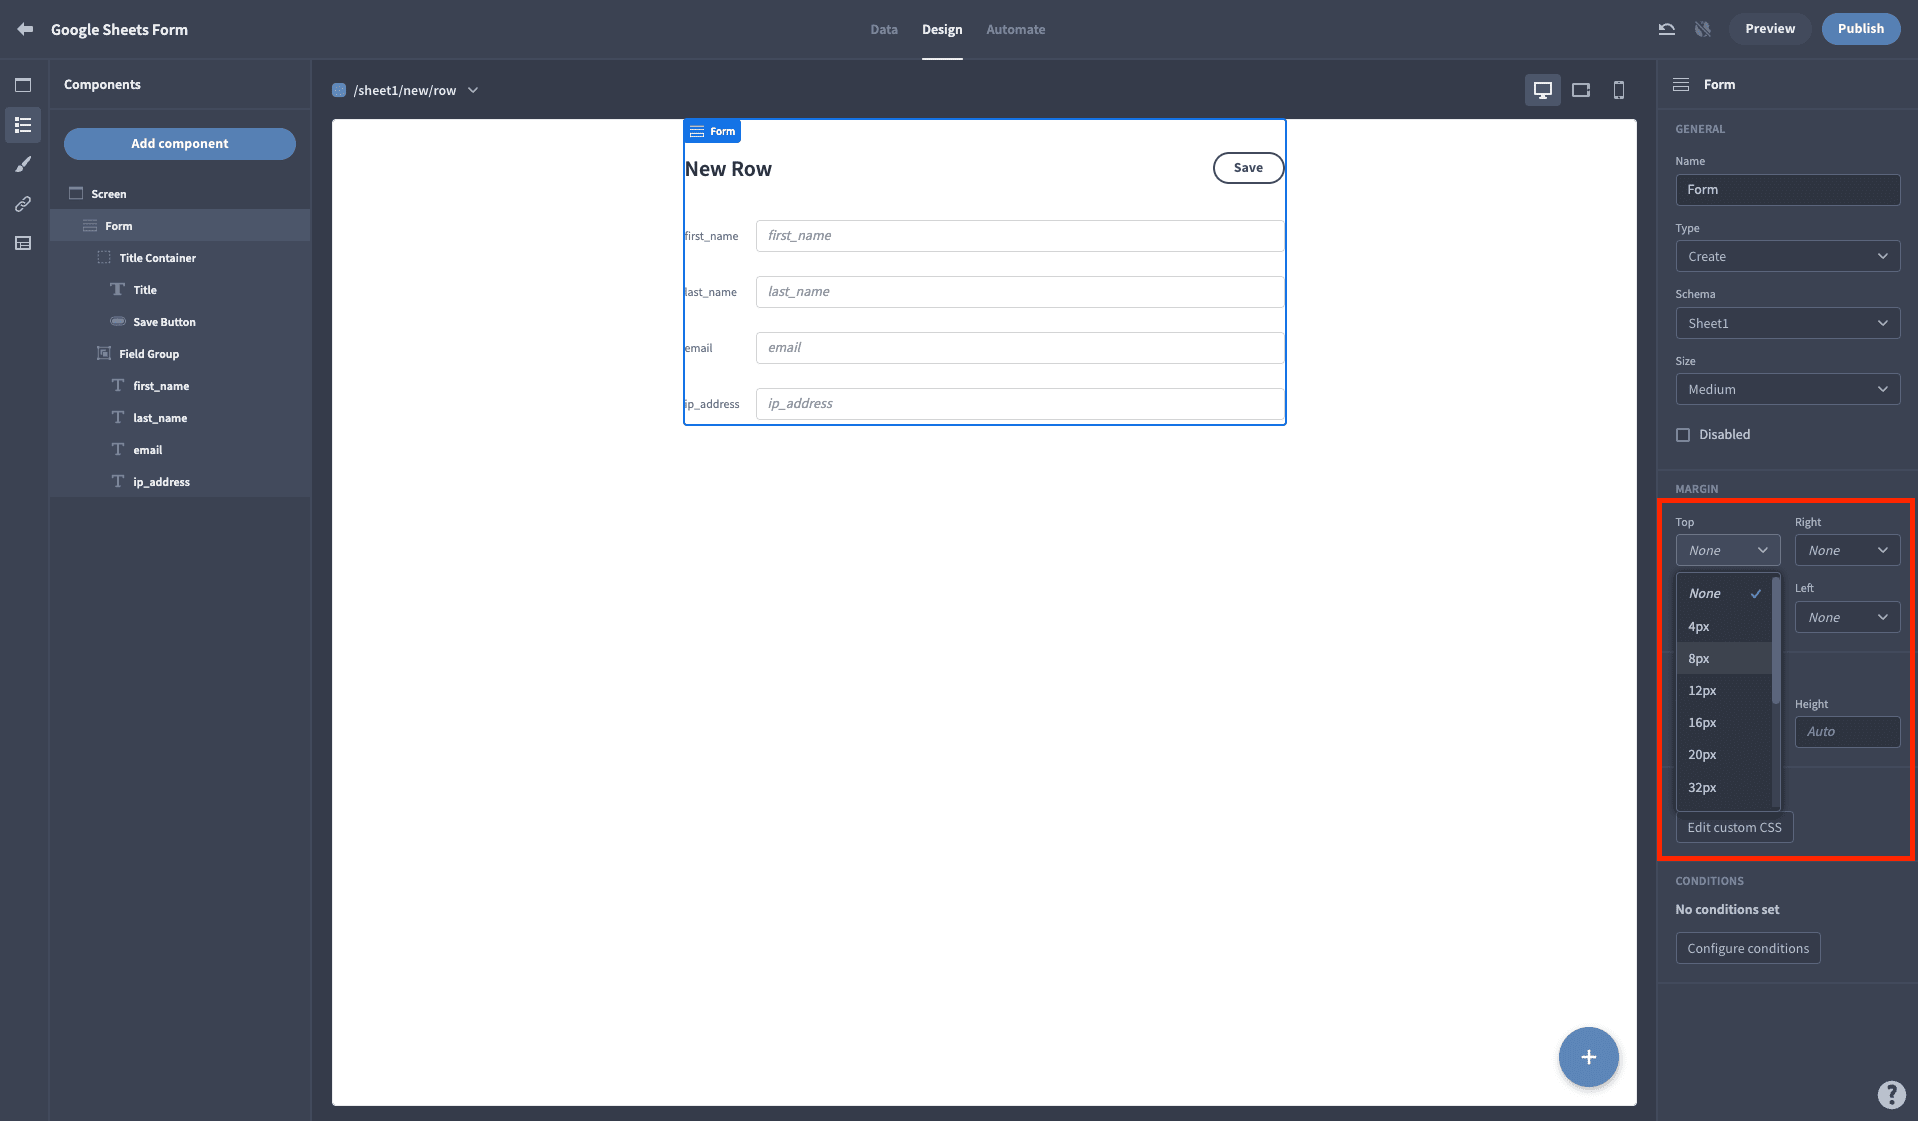
Then we’ll add a bit of margin to the top of our form:
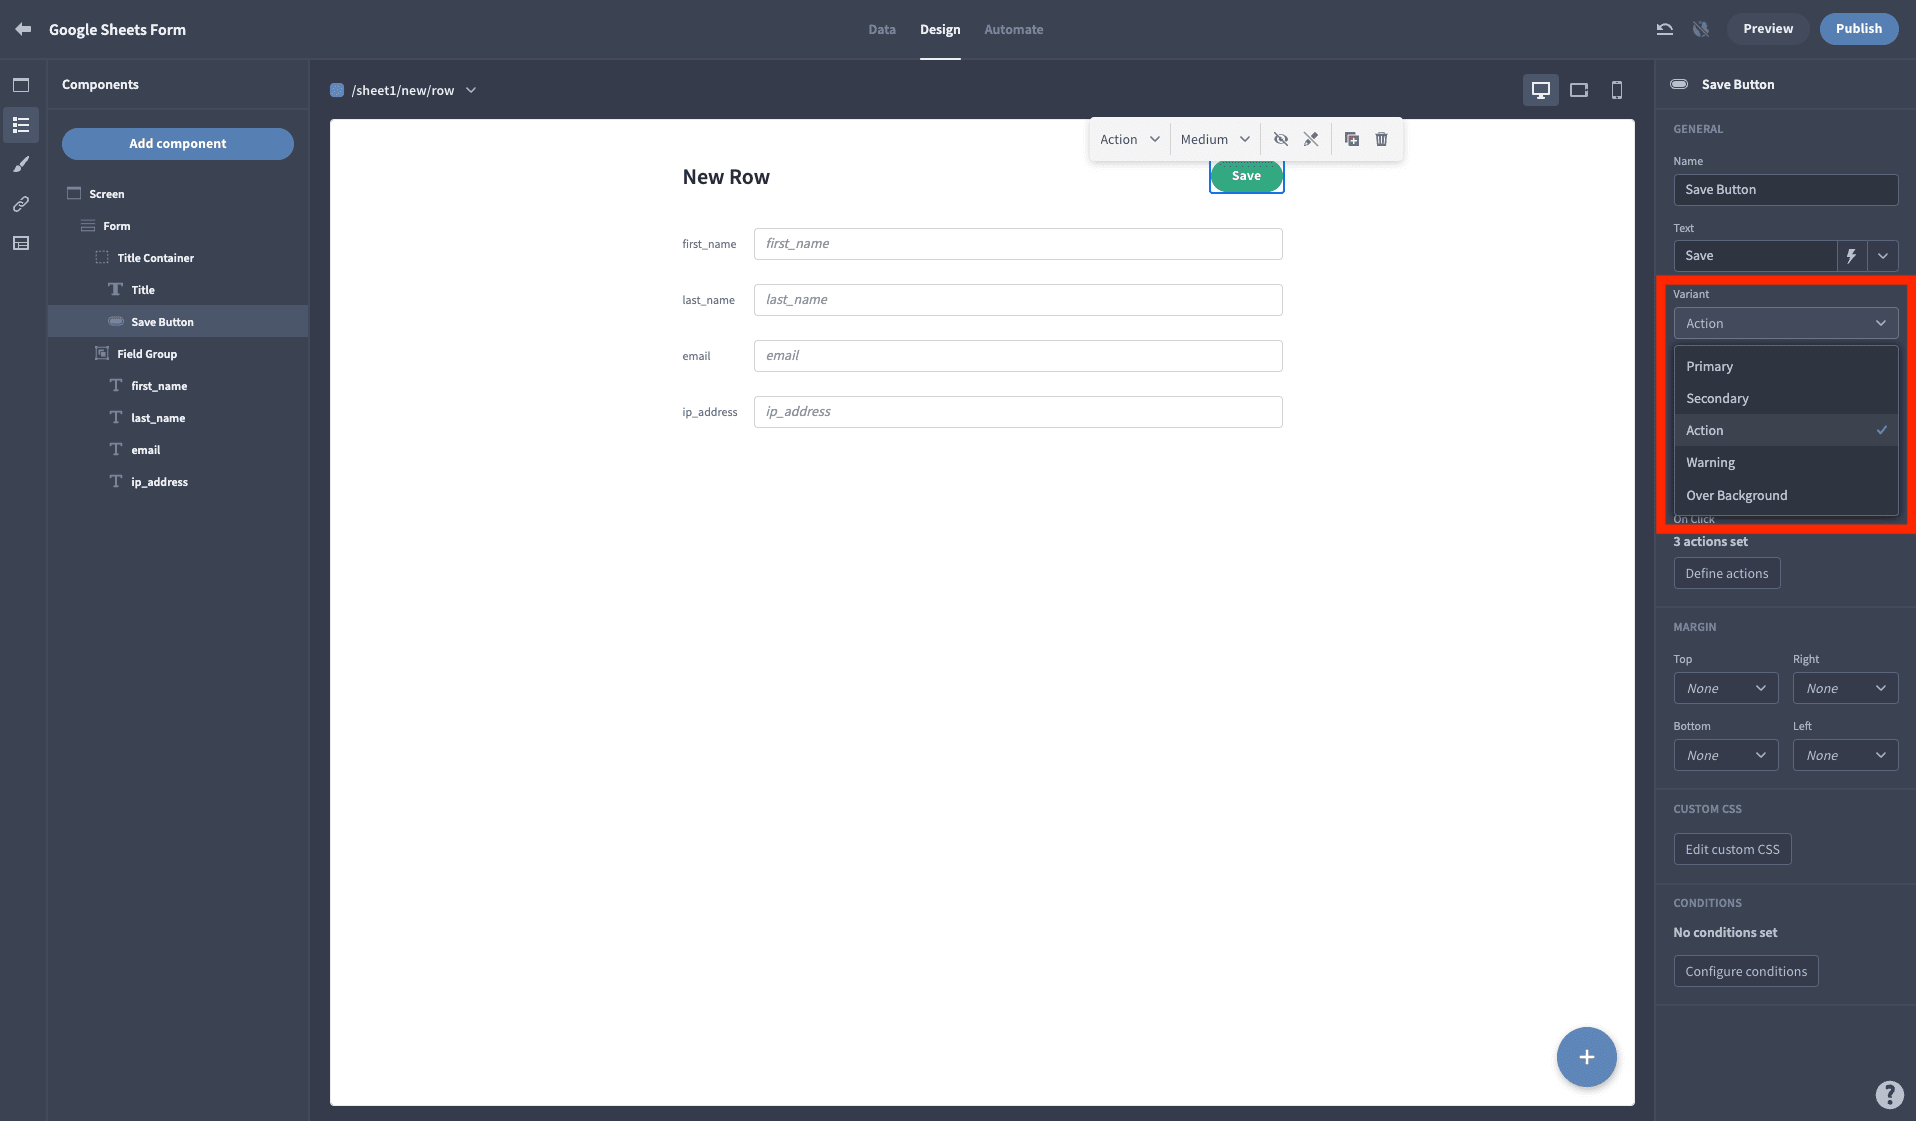
We’ll also set the Variant field for the Save button to Action, so we can use the theme colors we chose a minute ago:
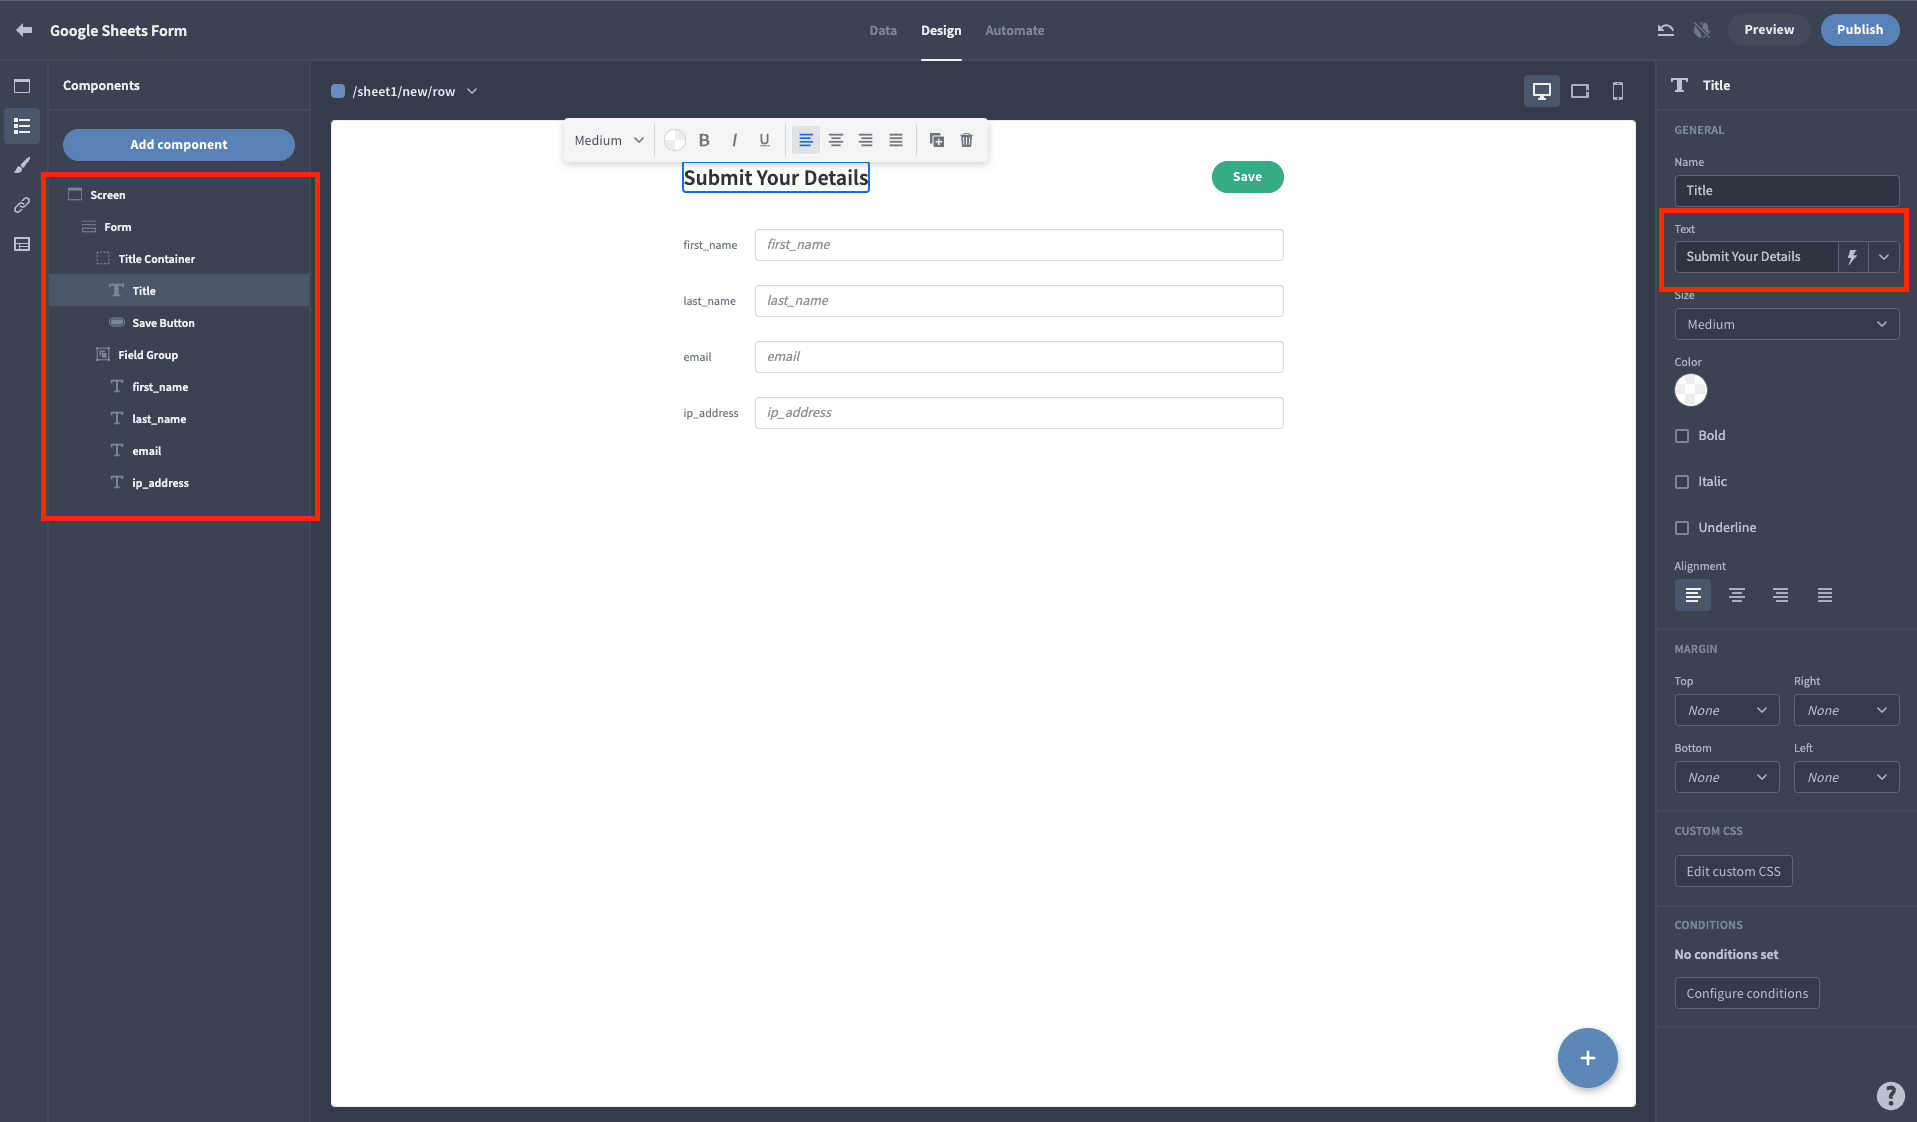
New Row isn’t much of a headline. To change this, select the Title component on the left, and add something a bit more exciting to its Text field:
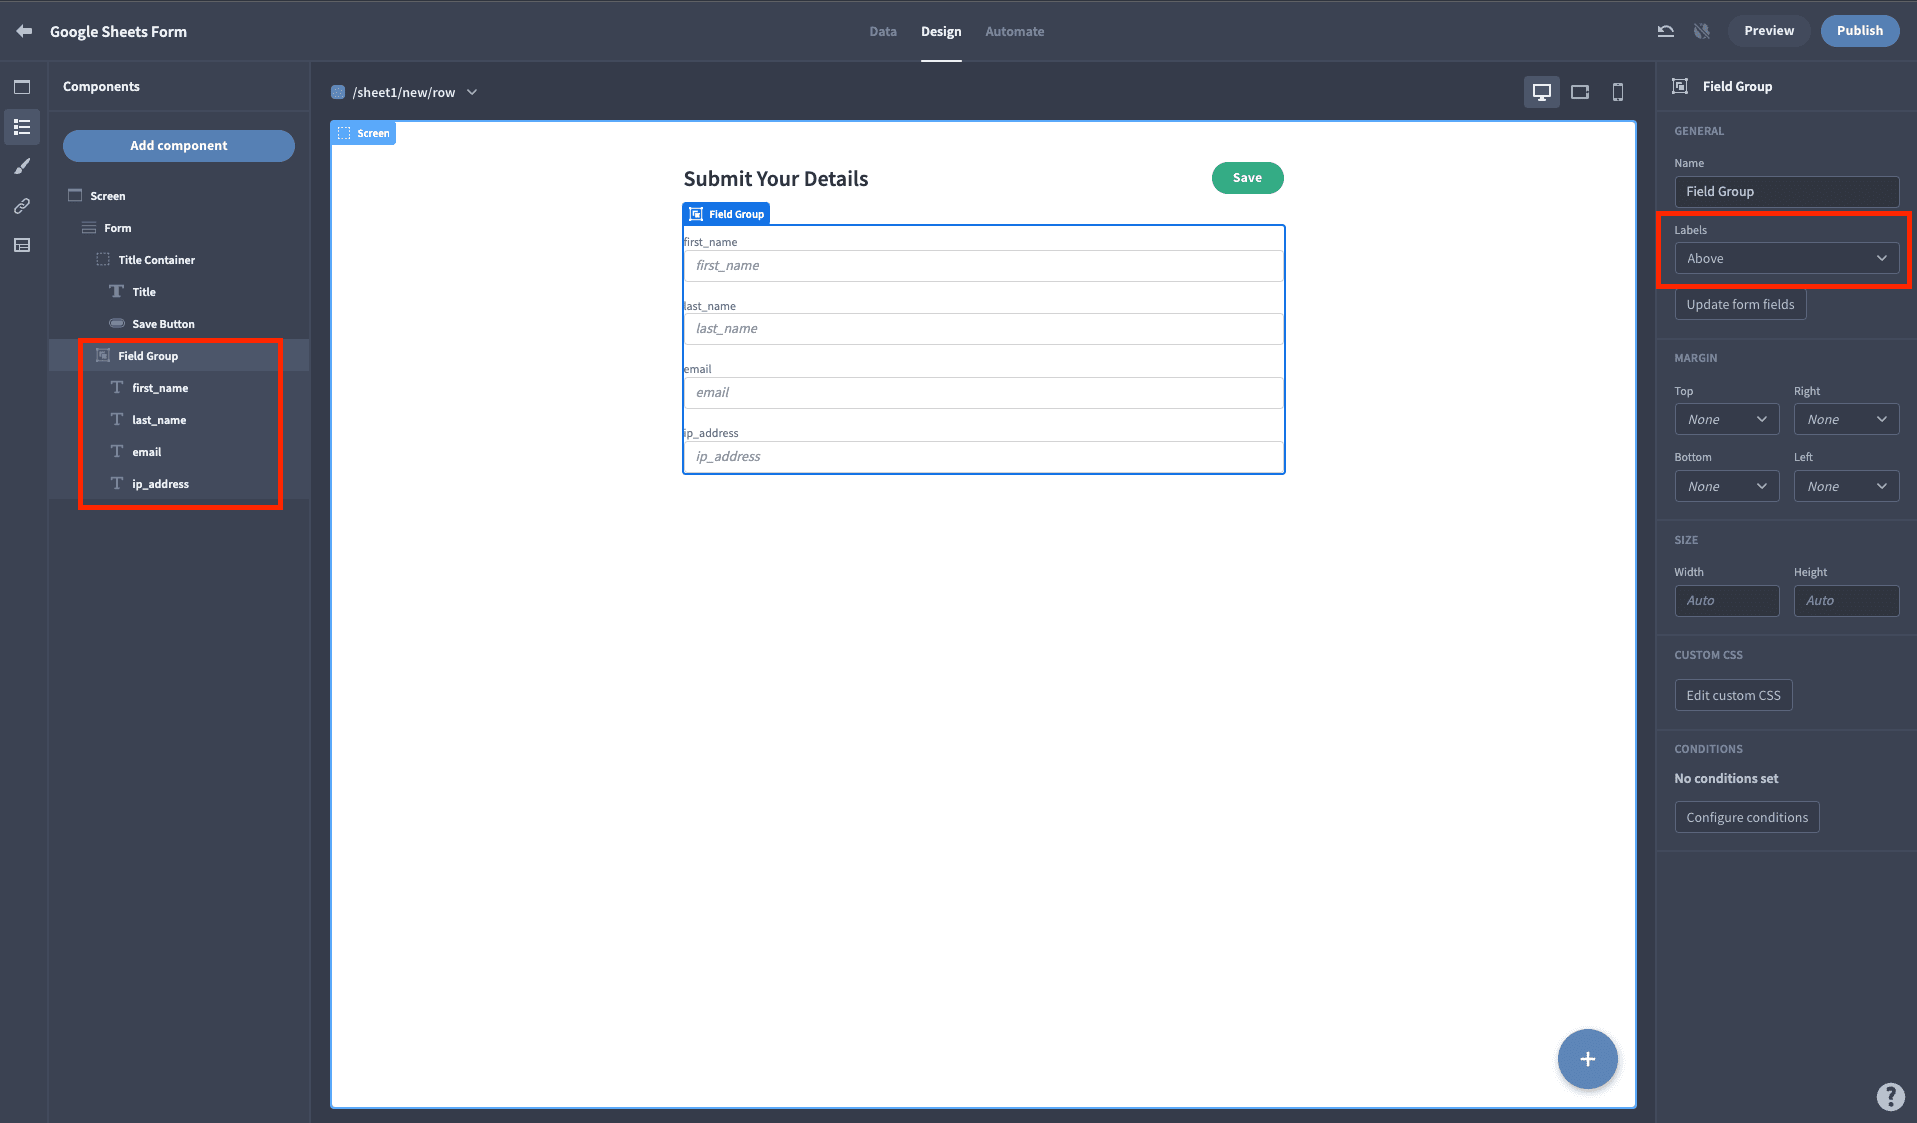
This is already much better, but our form UI design still looks a little strange. Next, we’ll select the Field Group component. This is essentially a container that controls certain settings for each individual field component.
We can use this to move the labels above the text boxes, instead of to the left of them:
Finally, we’re dealing with members of the public here, so we don’t necessarily want them to know we’re using our form to enter data to Google Sheets.
We can change the Label and Placeholder text for each form field to something more user-friendly than our spreadsheet headings. Just take care to leave the Field as it is:
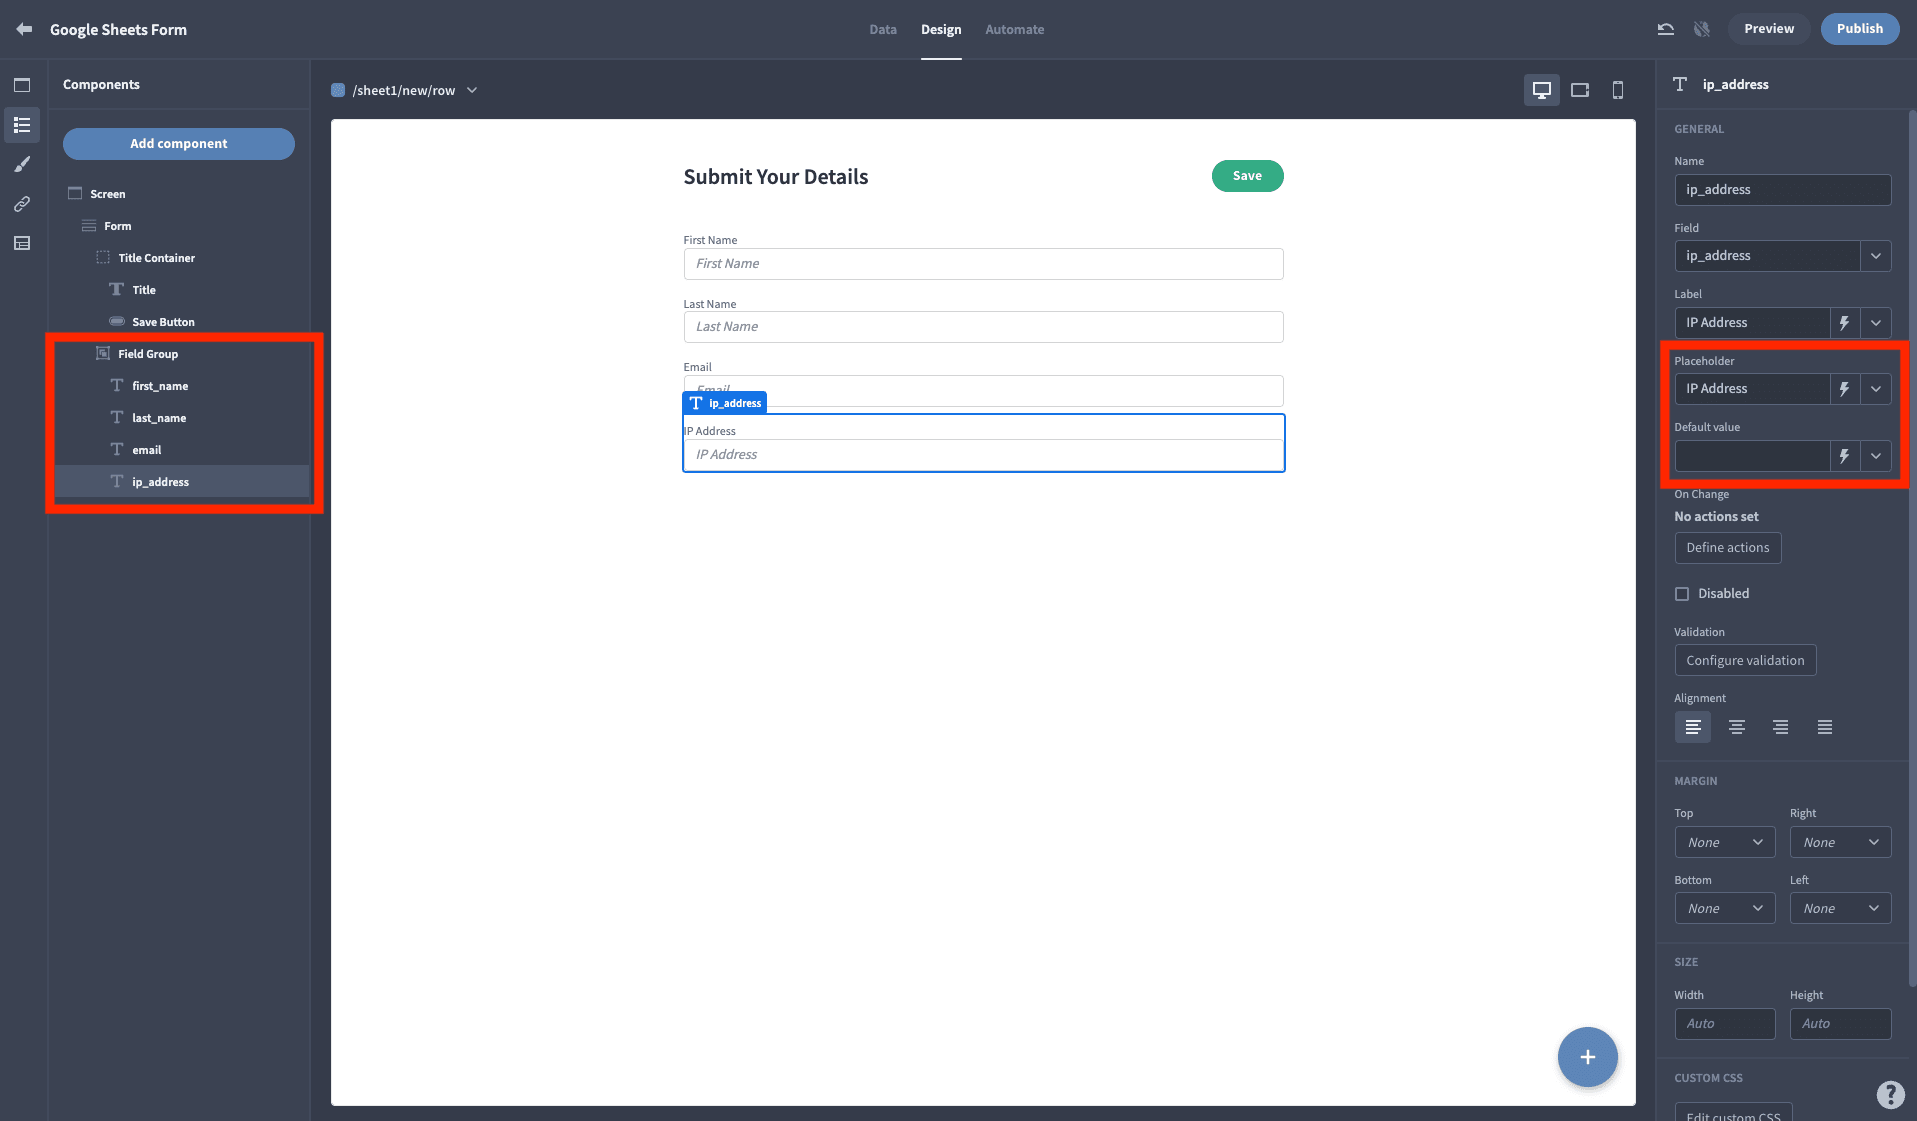
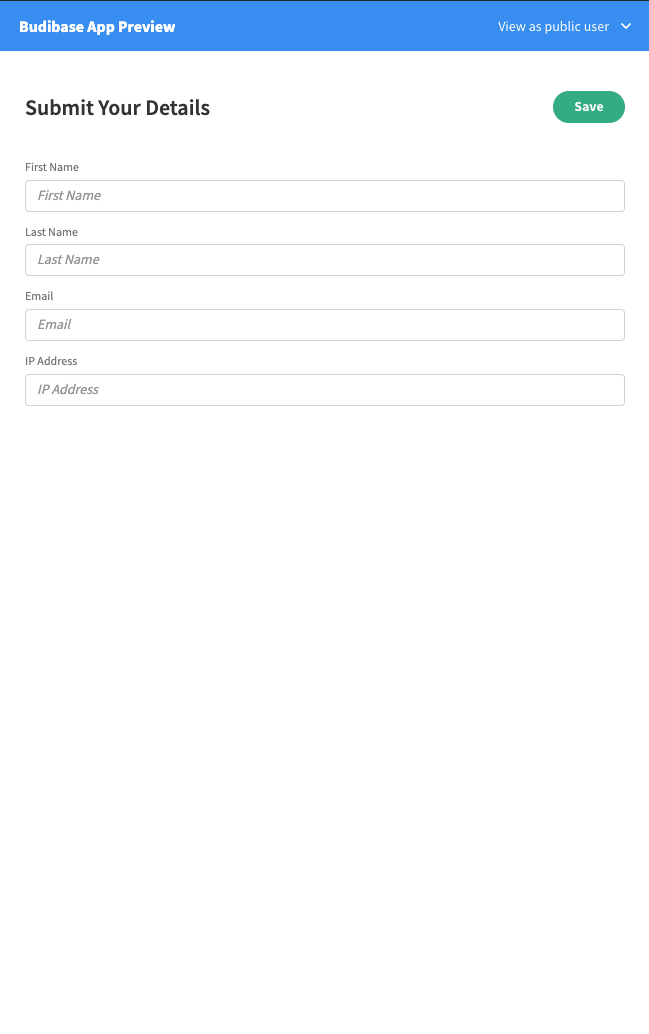
Et voila! We now have a clean, professional-looking form to enter data to Google Sheets:
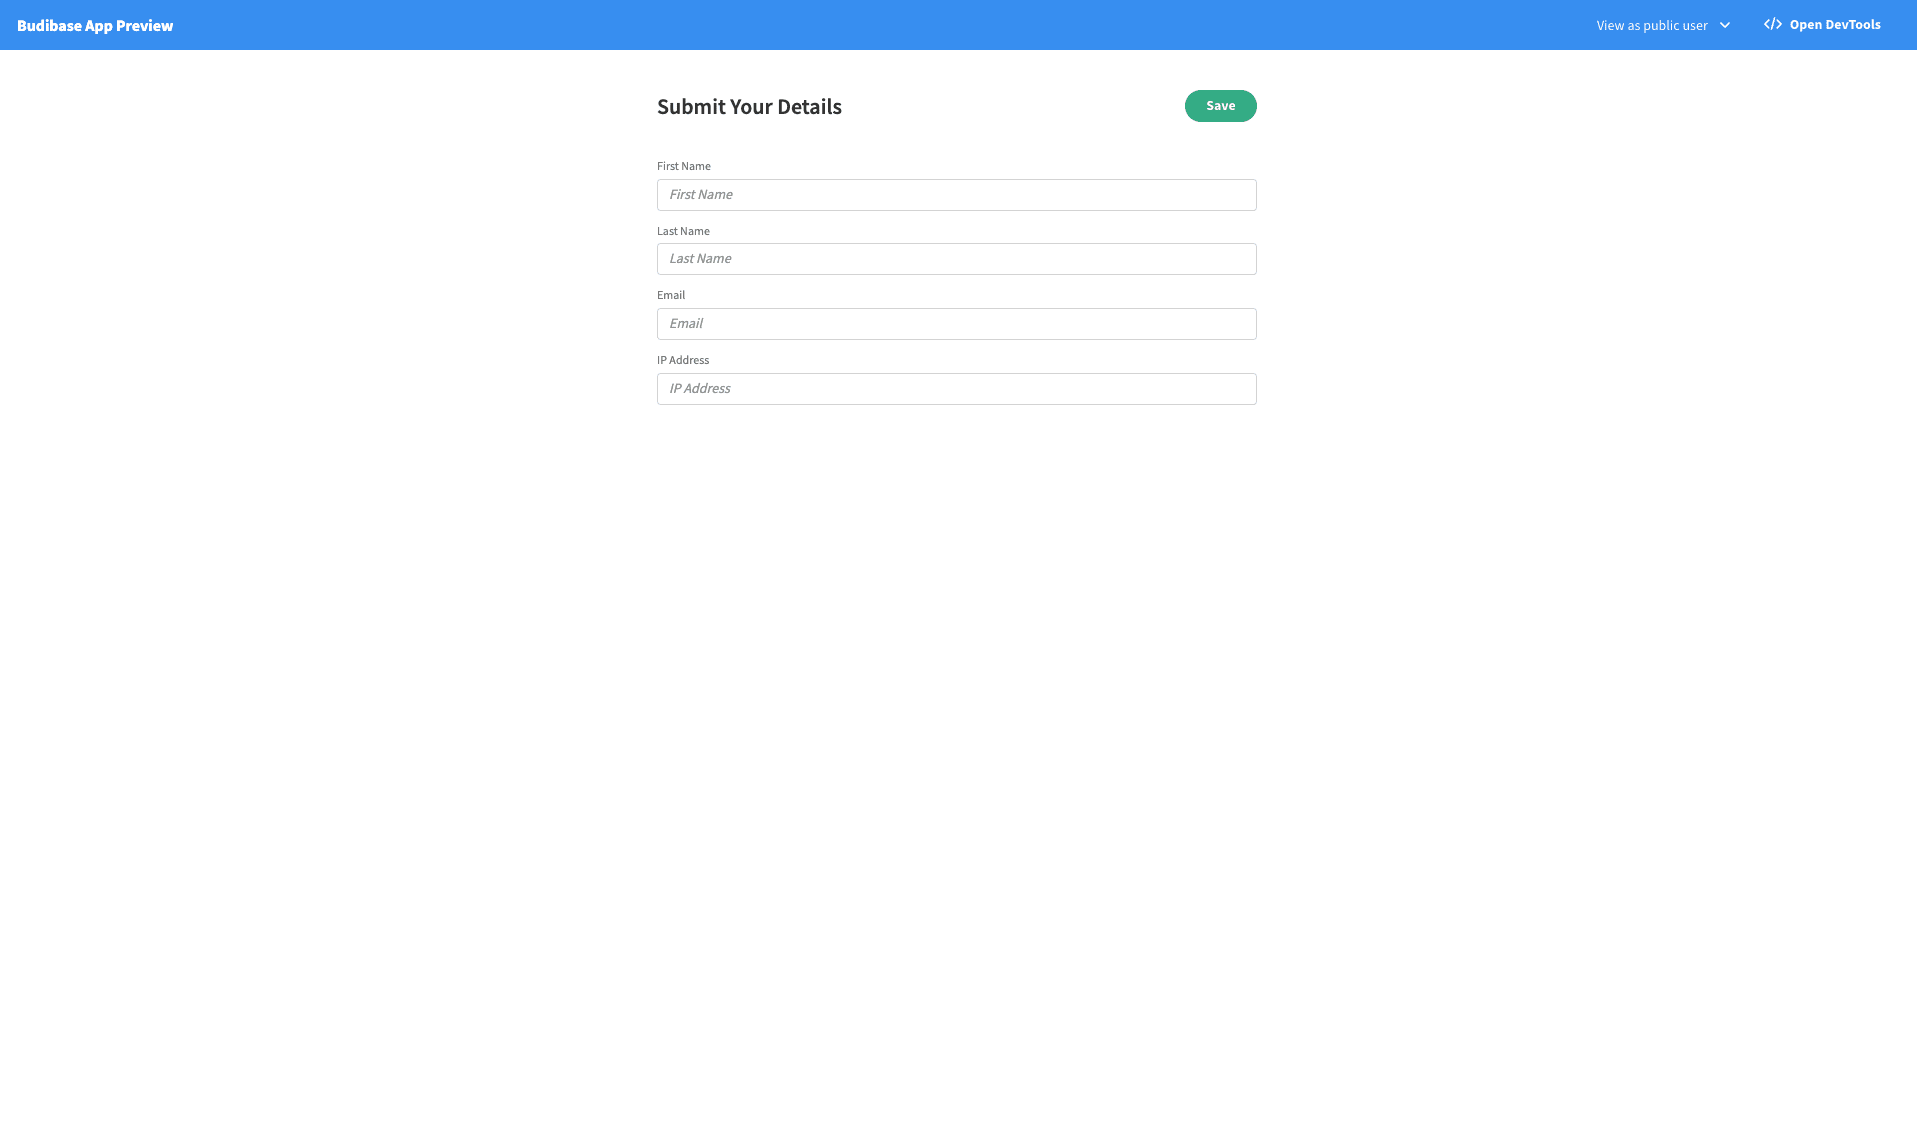
It even looks great on mobile:
We can also make all of the same kinds of improvements on our Update form, but we won’t bore you with showing you all the same ideas twice.
Let’s just make a couple of quick adjustments to our <em>Table</em> UI , and we’re all done. Here’s what this looks like at present:
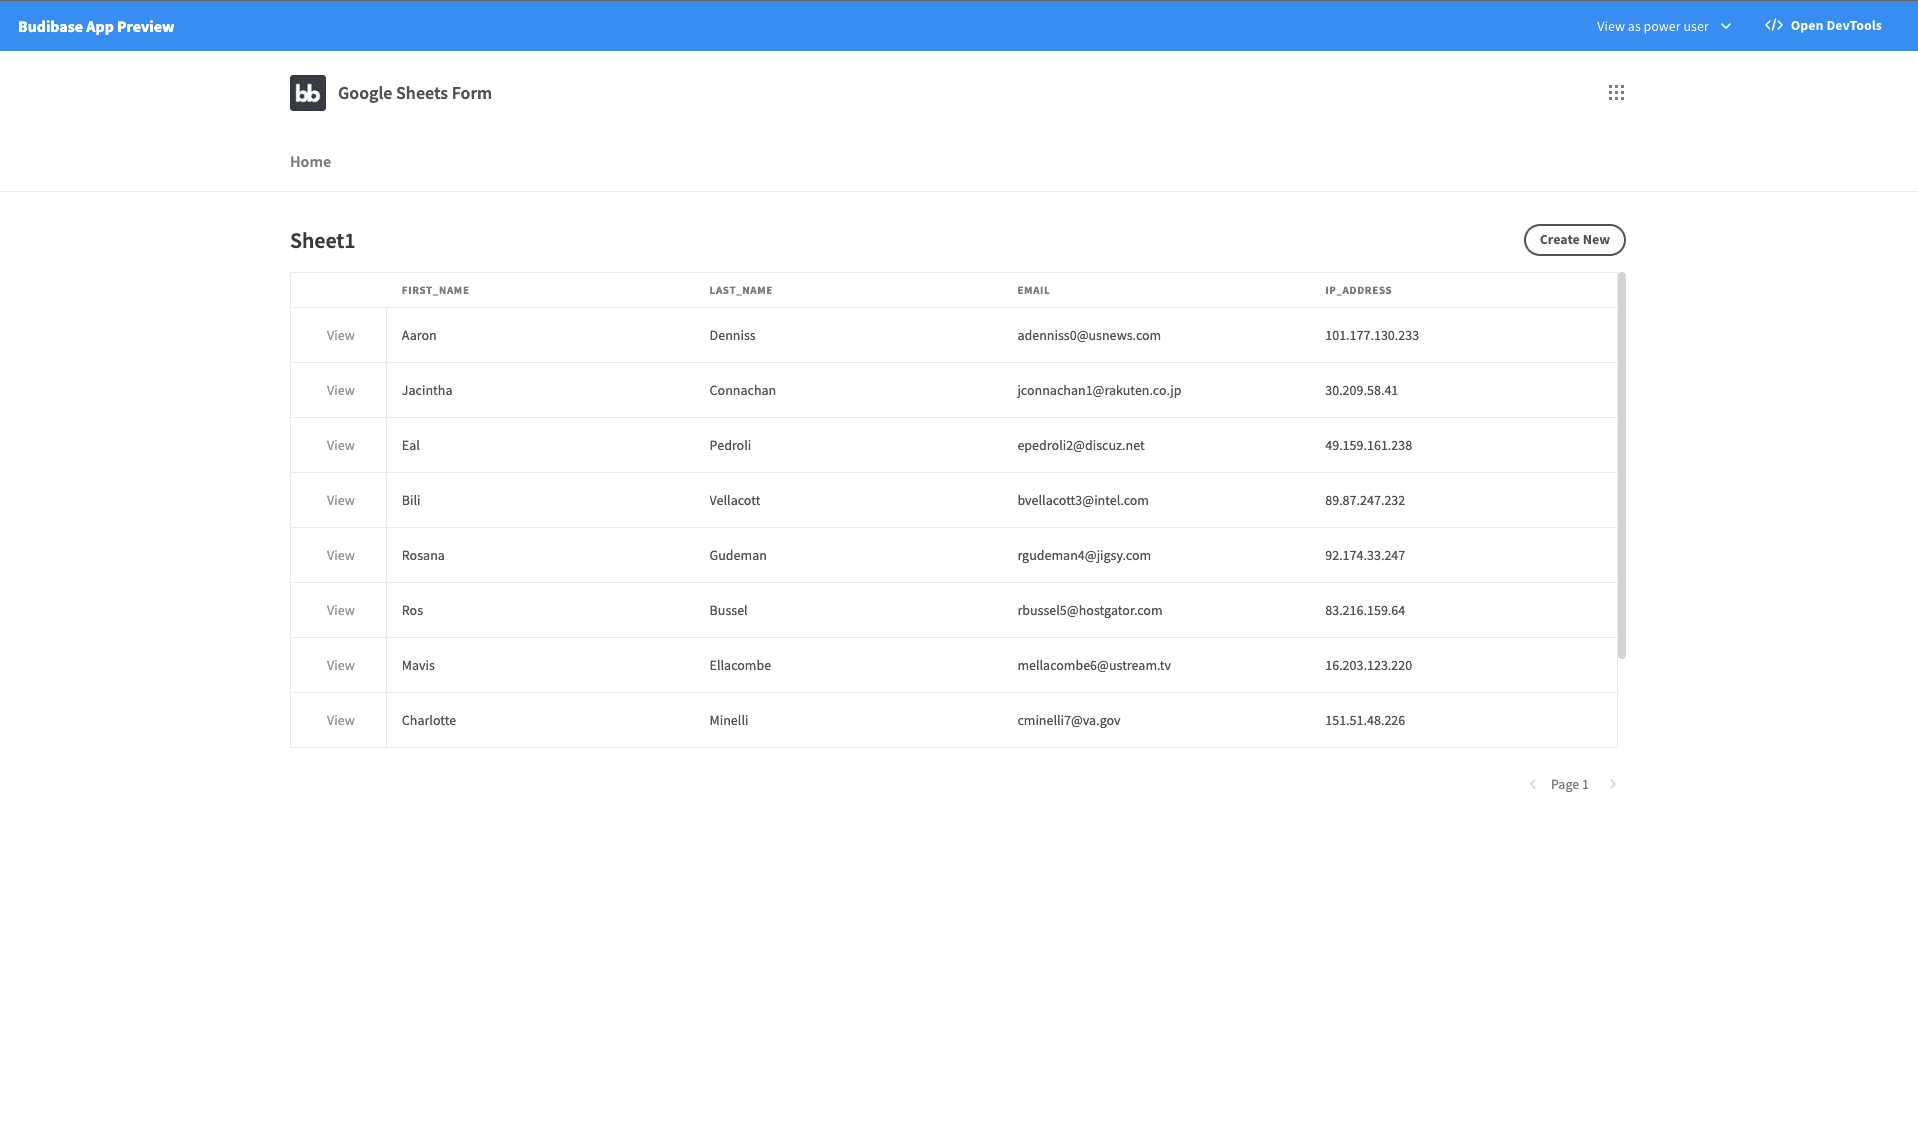
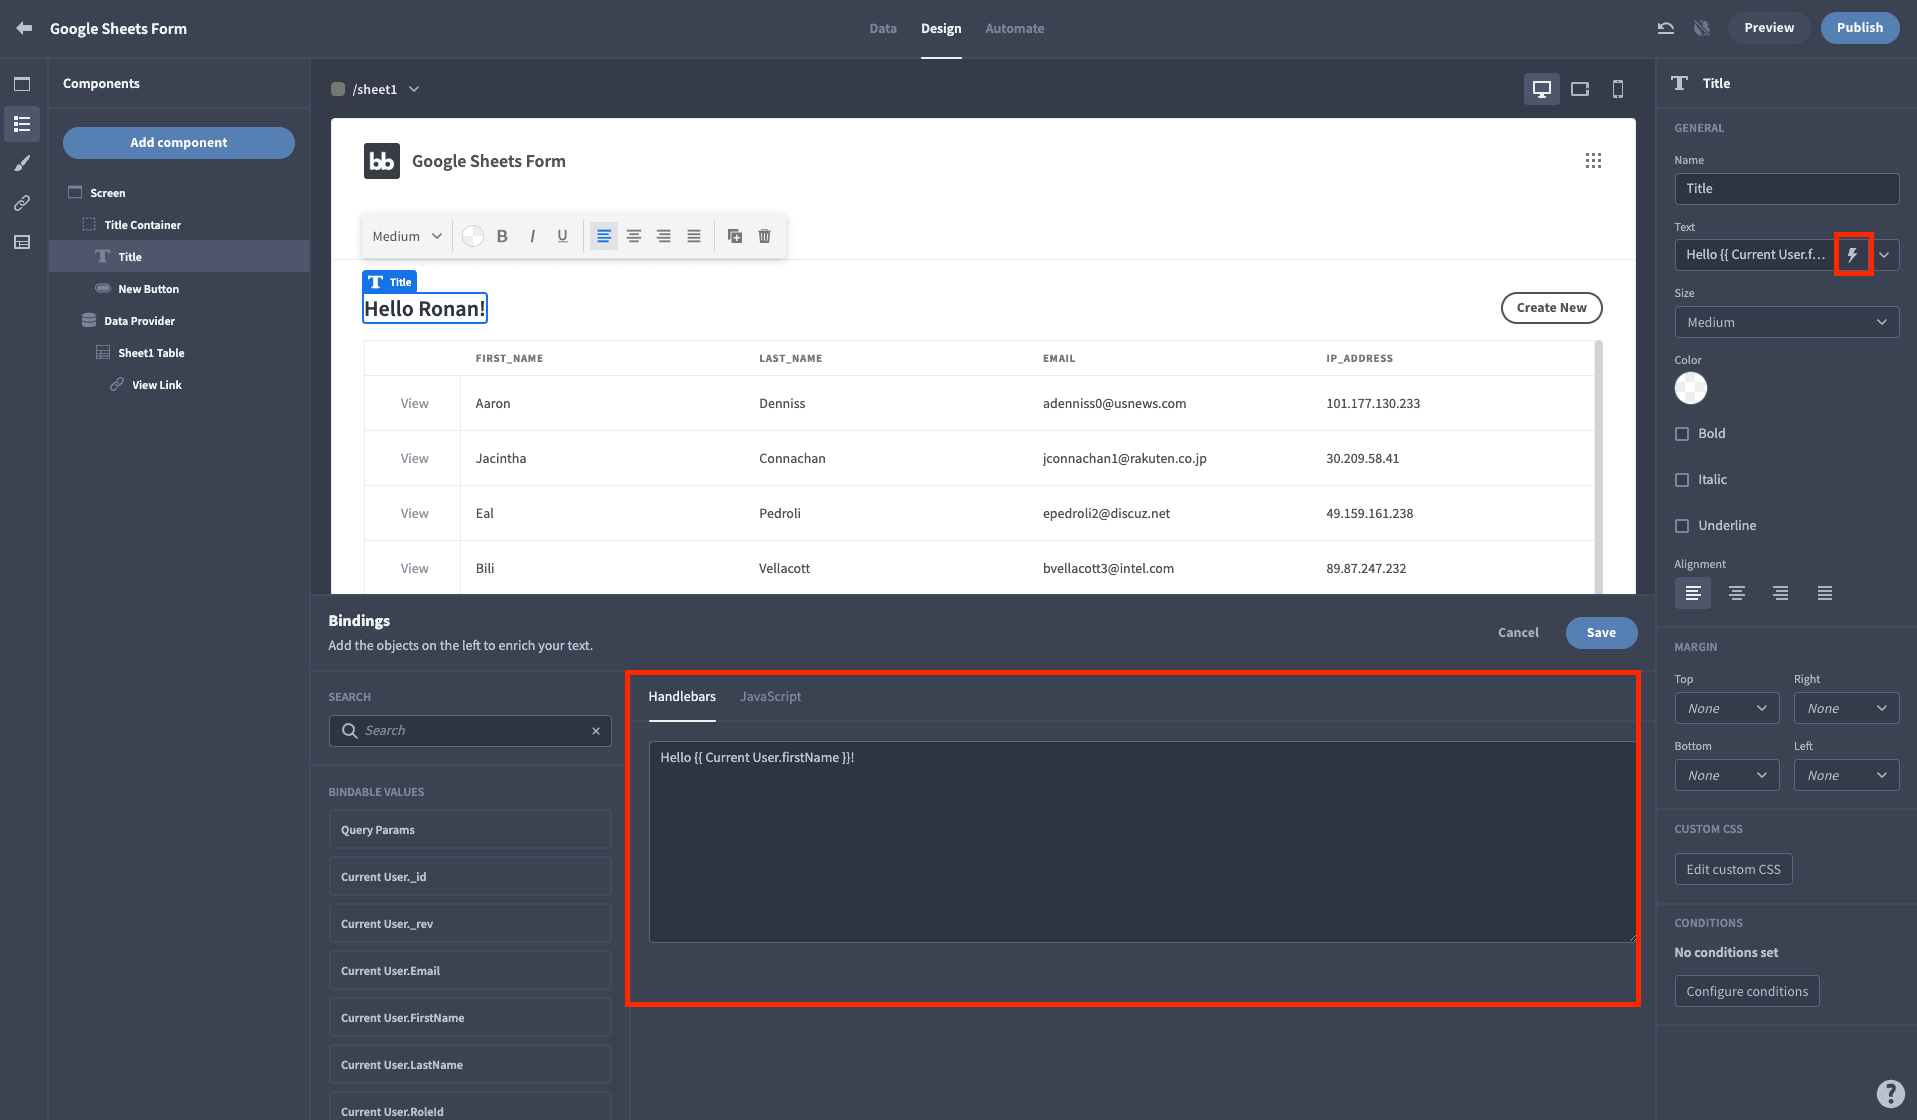
By default, the heading is the name of your source sheet. Let’s change this just like before, except this time we’ll bind the current user’s first name to make it a little bit more personalized:
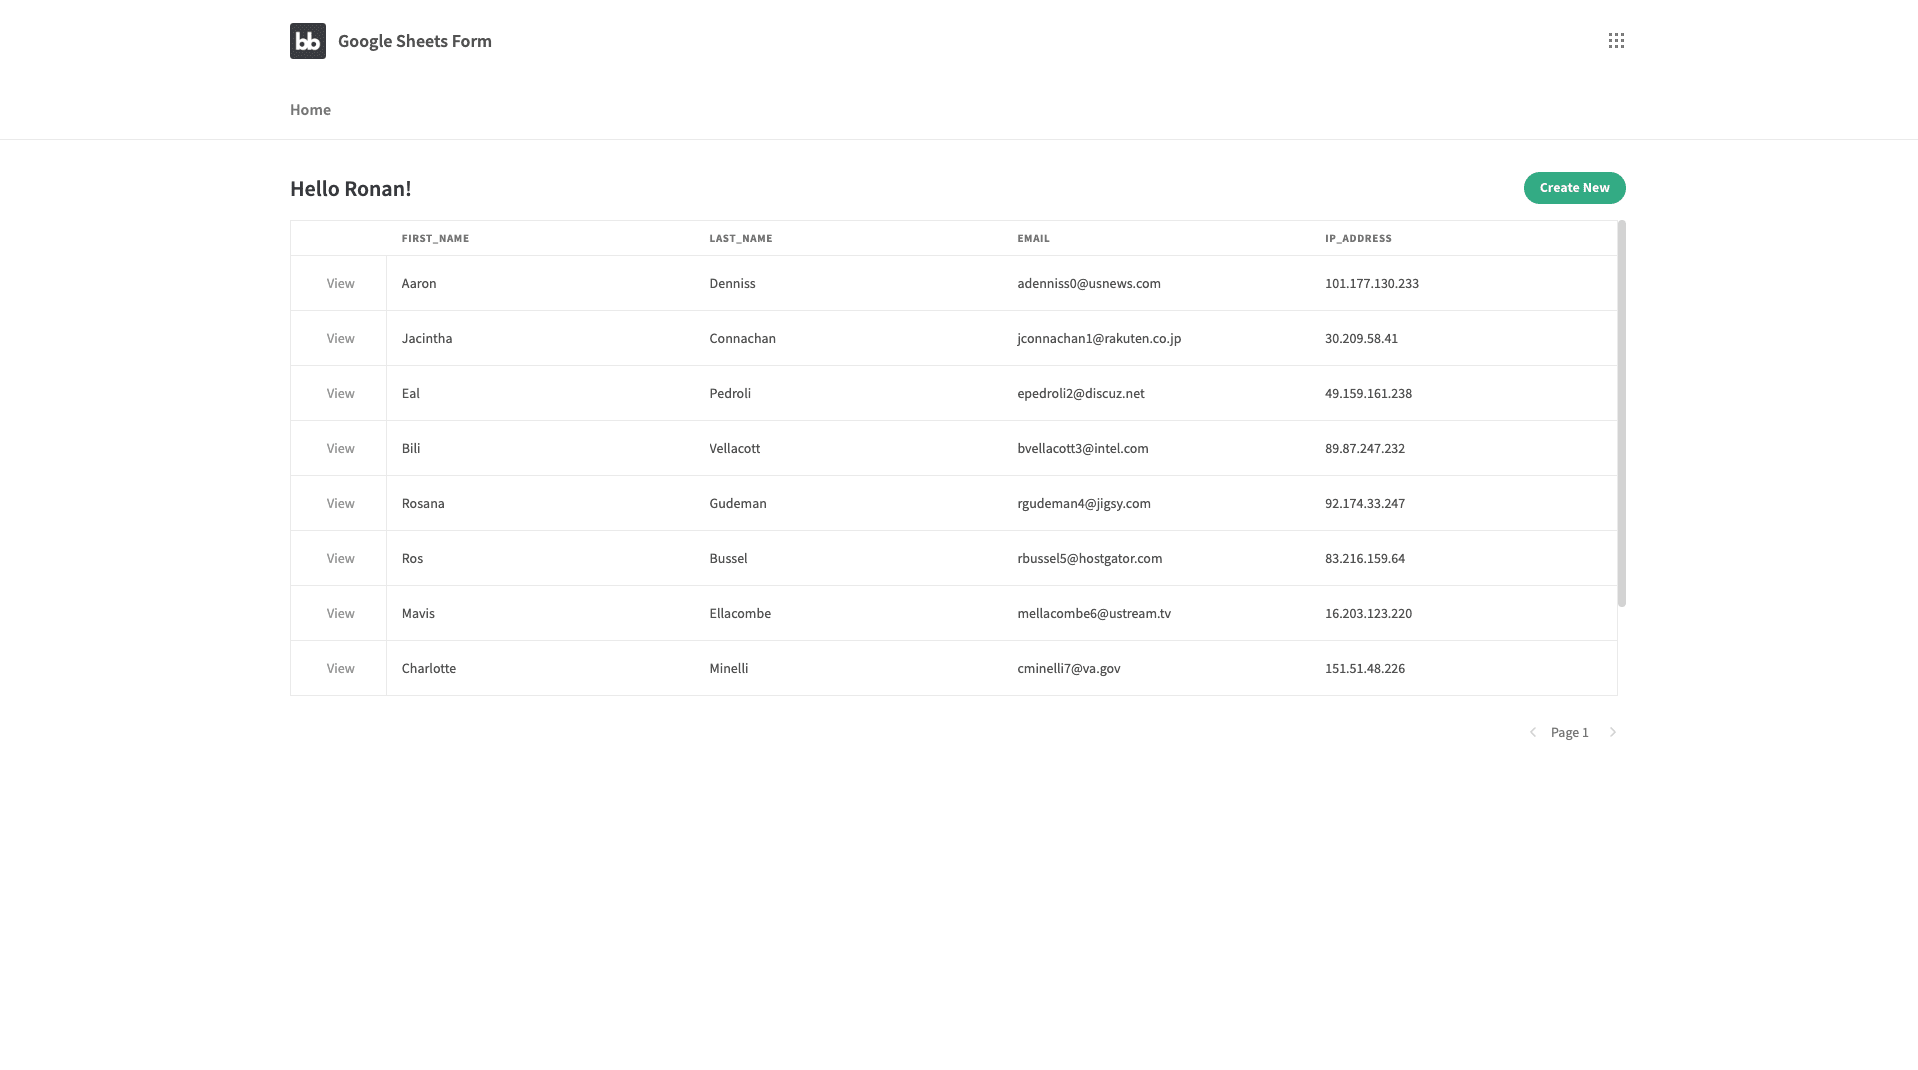
We’ll also change the Create New button to the Action variant again. Now our app looks like this:
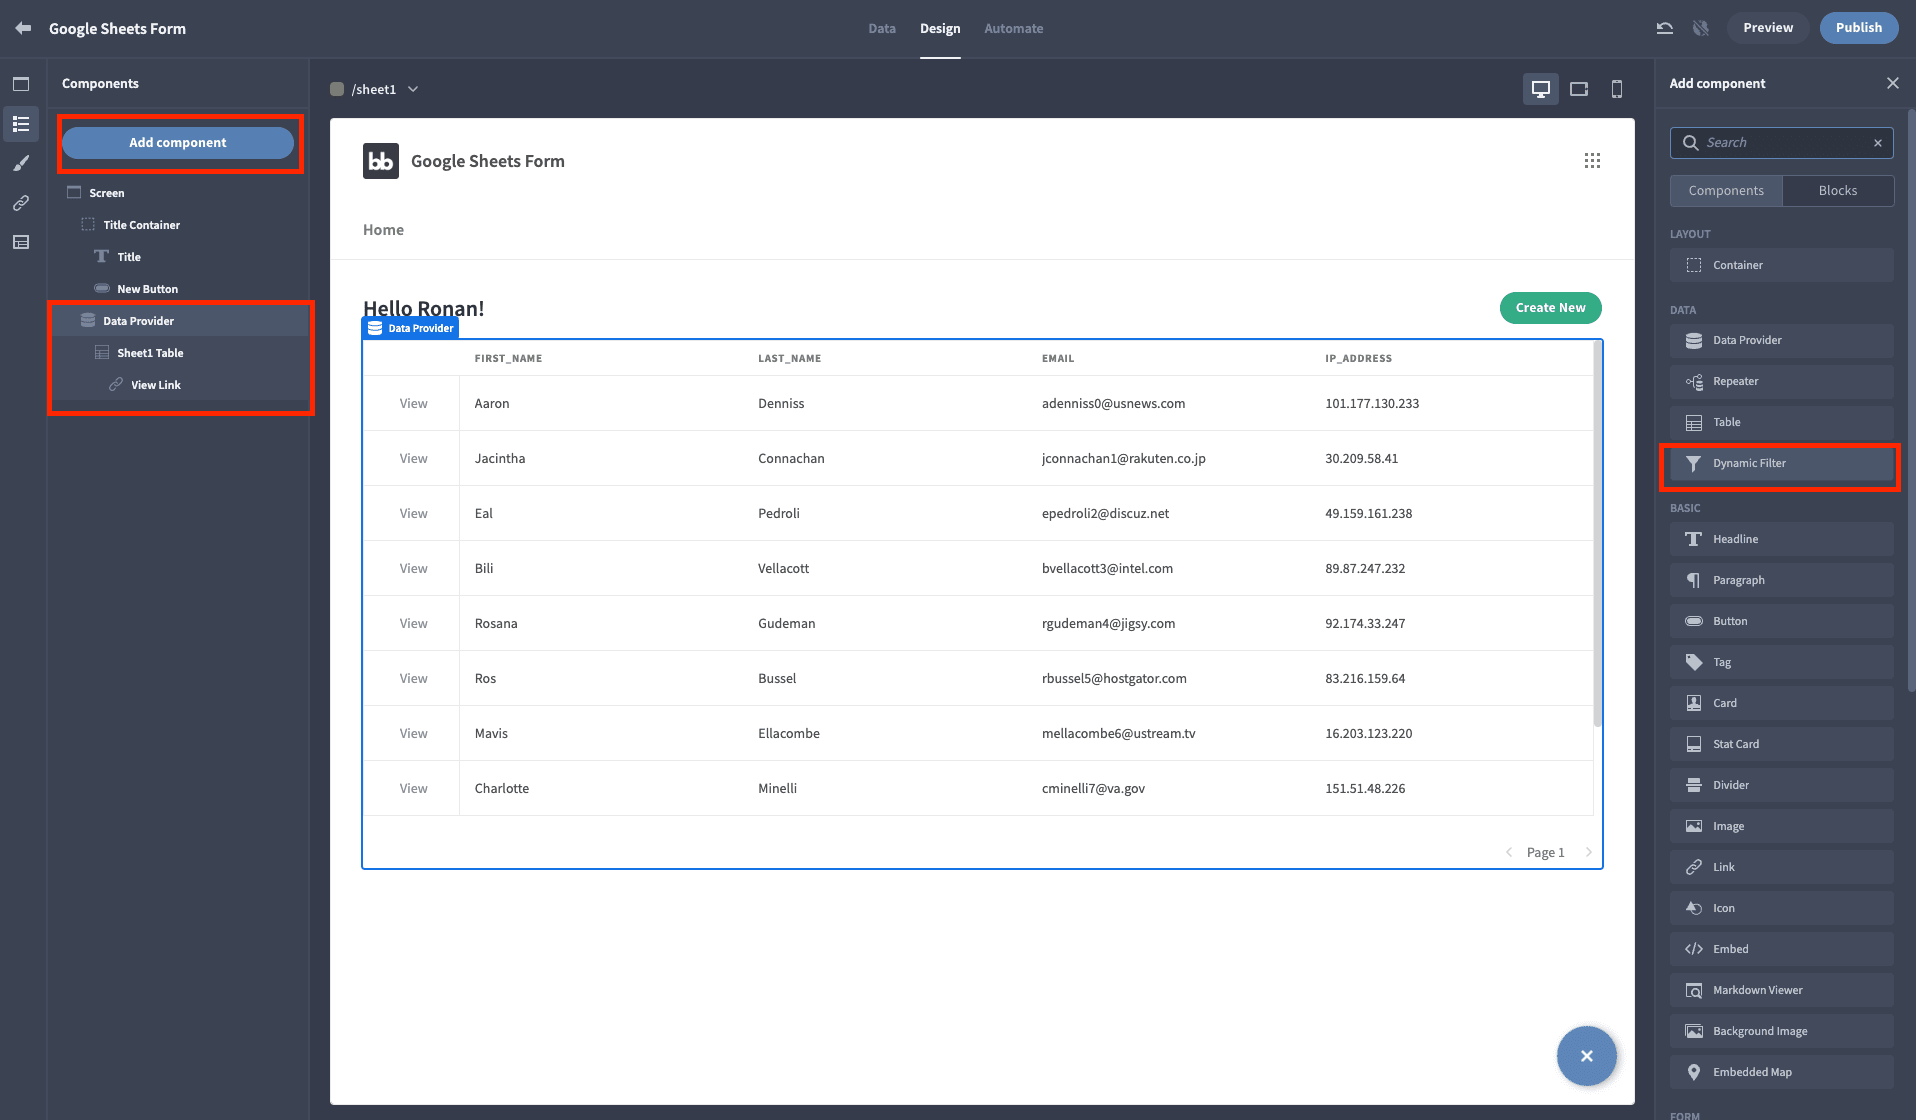
Finally, we want users to be able to search for specific entries to edit. Select the Data Provider, hit Add component, and choose the Dynamic Filter:
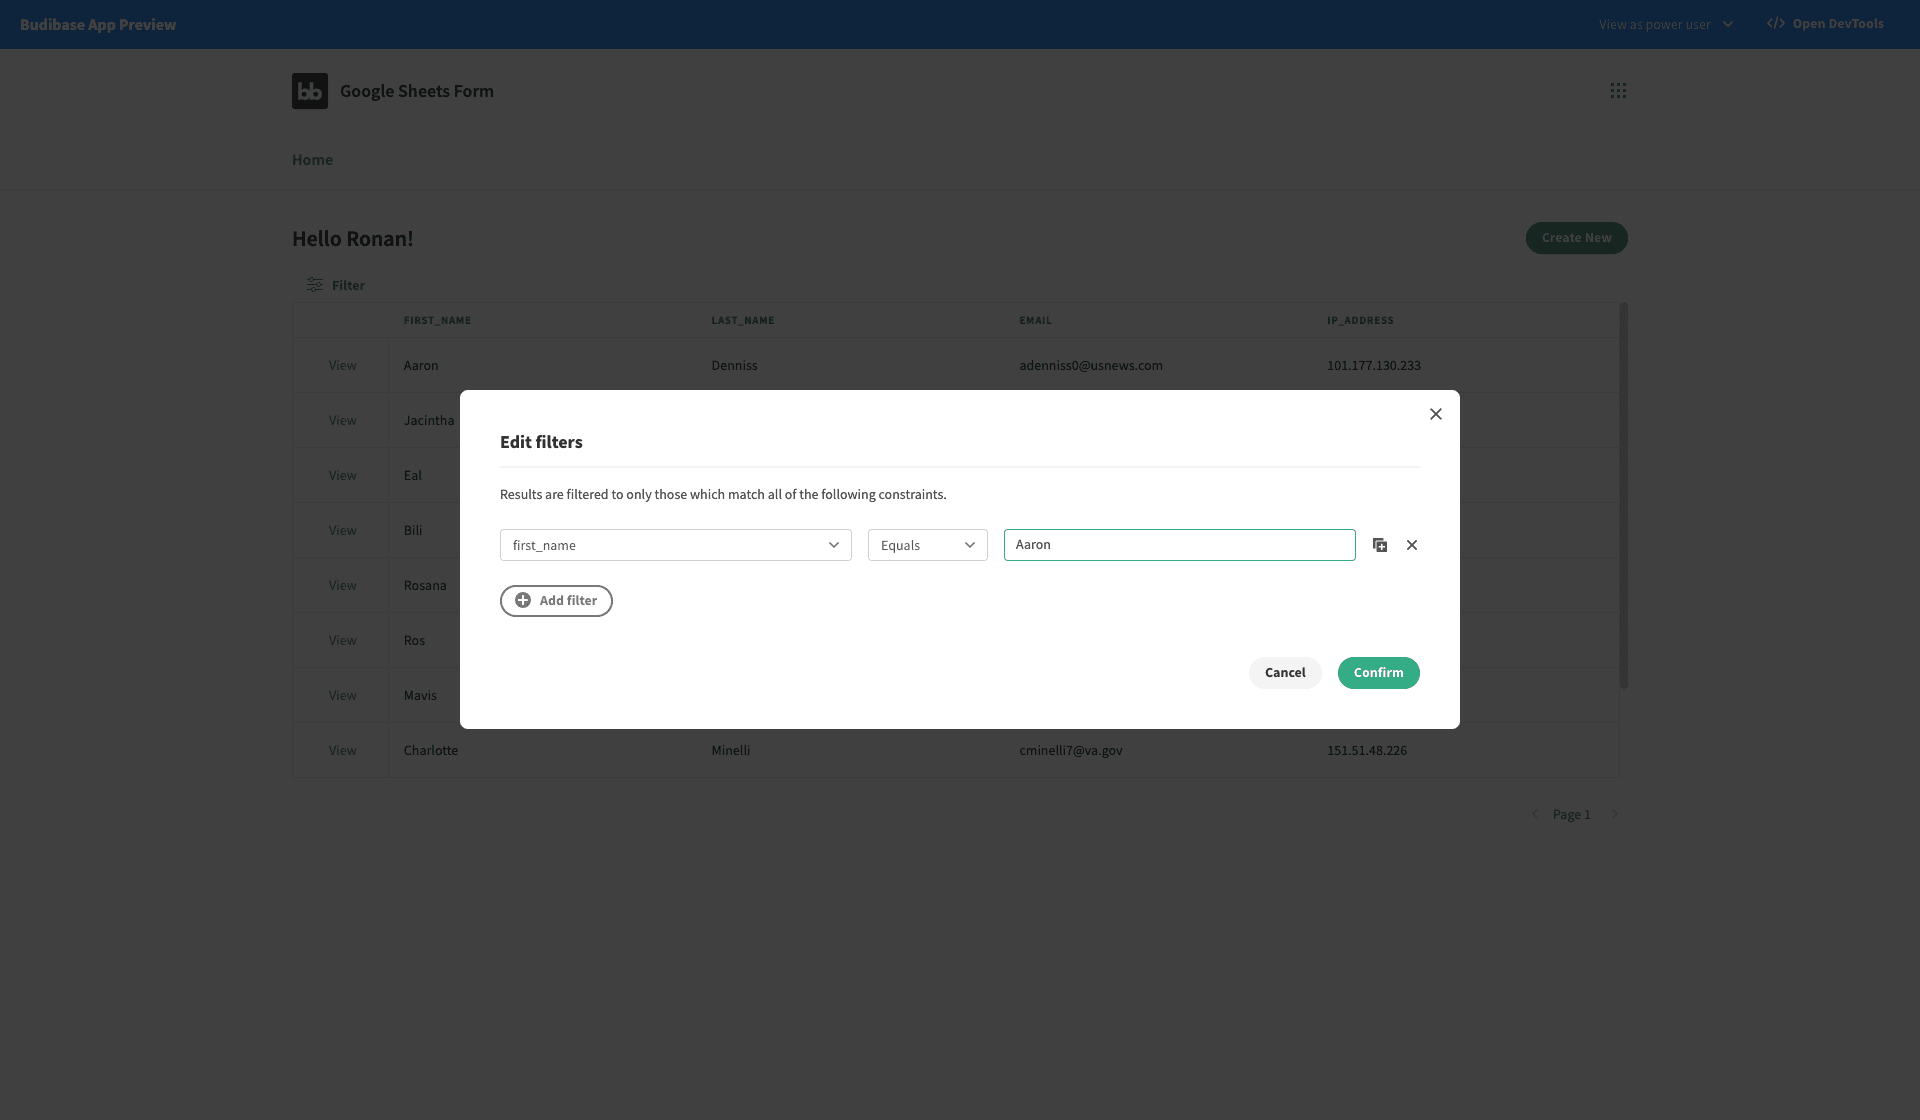
This gives your team a simple way to create complex filters for finding specific data:
7. Publish your app
Finally, when you’re happy with your app, it’s time to push it live. As ever, with Budibase, you have a few different options for how you deploy and host your apps. On the one hand, you can deploy to Budibase Cloud, in just one click and let us worry about everything.
Or, if you prefer, you can deploy to your own infrastructure with Kubernetes, Docker, Docker Compose, Digital Ocean, and more.
This may not seem like the top priority when using a form to enter data to Google Sheets, but there are countless situations where how you host your tools plays a critical role.
For example, you might want to introduce extra levels of security, monitoring, or other measures.
Or you might simply have your own infrastructure and want to use it. As the leading open-source, low-code platform , our goal is to give you the tools you need, whatever your specific use case.
The smart option for using a form to enter data to Google Sheets
Budibase is the fast, easy way to build all sorts of custom solutions. Our intuitive low-code tool is the perfect solution for internal tools , customer-facing apps, dashboards, and more.
The vast majority of apps that businesses use are simple interfaces on top of a data source.
You might also like our tutorial on building a Google Sheets dashboard .
We’re on a mission to create the world’s largest ecosystem of open-source tools. Budibase is the smart way to create custom solutions for a whole range of business problems.
Sign up today for free to start building your own incredible, low-code solutions.
Or, check out our library of free, deployable app templates to see more of what Budibase can do.