How to Build Complex Approvals with Budibase
Managing requests and approvals is a fundamental step within all kinds of business processes. In fact, almost any internal task is going to require some element of sign-off or vetting.
The tricky thing is that this is often tightly aligned to very specific policies and procedures within a particular organization. In other words, the specific steps required to gain approval - and the logic underpinning these - will vary across different businesses and individual tasks.
At the same time, implementing approvals can pose serious challenges - especially when we rely on manual communications, decision-making, and record-keeping.
In short, this can present a massive time-sink - as well as introducing unnecessary scope for delays and errors.
So, the need for digitalization is high - but at the same time, the demand for custom approval solutions can often outstrip internal development resources.
Today, we’re looking at one solution to this problem - by checking out how Budibase can be used to build custom tools for managing even the most complex approval workflows.
What is a complex approval workflow?
But first, let’s think a little bit deeper about the kinds of tasks we could potentially be dealing with here.
In the most basic form, an approval workflow is any internal task where one employee or group of employees can submit a request - and another employee or group of employees can decide what to do with this request, based on established business logic.
The submission might be a request to access a particular piece of information, take a particular action, or anything else that requires sign-off from a colleague or third party.
However, outside of this very high-level definition, approval workflows can vary widely - both in terms of the number of steps involved and the sophistication of the logic that governs them.
So, on both levels, different approvals can present us with varying levels of complexity - directly impacting the amount of effort and resources that will be required to output custom solutions.
Take a look at our guide to approval workflows to learn more.
How to build a tool for complex approvals in 6 steps
At Budibase, we’re on a mission to help businesses turn data into action.
Our goal today is to demonstrate how you can use our open-source, low-code platform to connect to existing business data, build professional UIs, replicate complex business logic, and output working solutions in a fraction of the time it would take you with traditional development.
As you’ll see, Budibase makes it fast and easy to build complex approval workflows around bespoke business rules.
Let’s take a look at what we’re going to be building.
Our sales data approval tool
We’re using a sales data approval tool as our example.
Basically, the idea of this tool is that regional sales teams can submit their monthly reports. Head office can then review and approve these.
Approved figures will be added to a company-wide dashboard - which we’ll be building out in a subsequent tutorial.
The approval section of our app will be made up of two parts:
- A form UI where regional teams can input their monthly figures.
- An admin screen where the head office team can review, edit - and approve, reject, or query these submissions.
We’ll also be building some notification automations - so that colleagues can be alerted when a new item needs their attention - as well as using Budibase’s built-in RBAC to craft secure yet efficient user experiences.
Along the way, we’ll be flagging some of the key areas where you might want to implement your own complex business logic within the Budibase platform.
Let’s jump straight in.
1. Create a new Budibase project
First, we need to create a new Budibase app project. To do this, you’ll need a free account - so go ahead and sign up if you haven’t already.
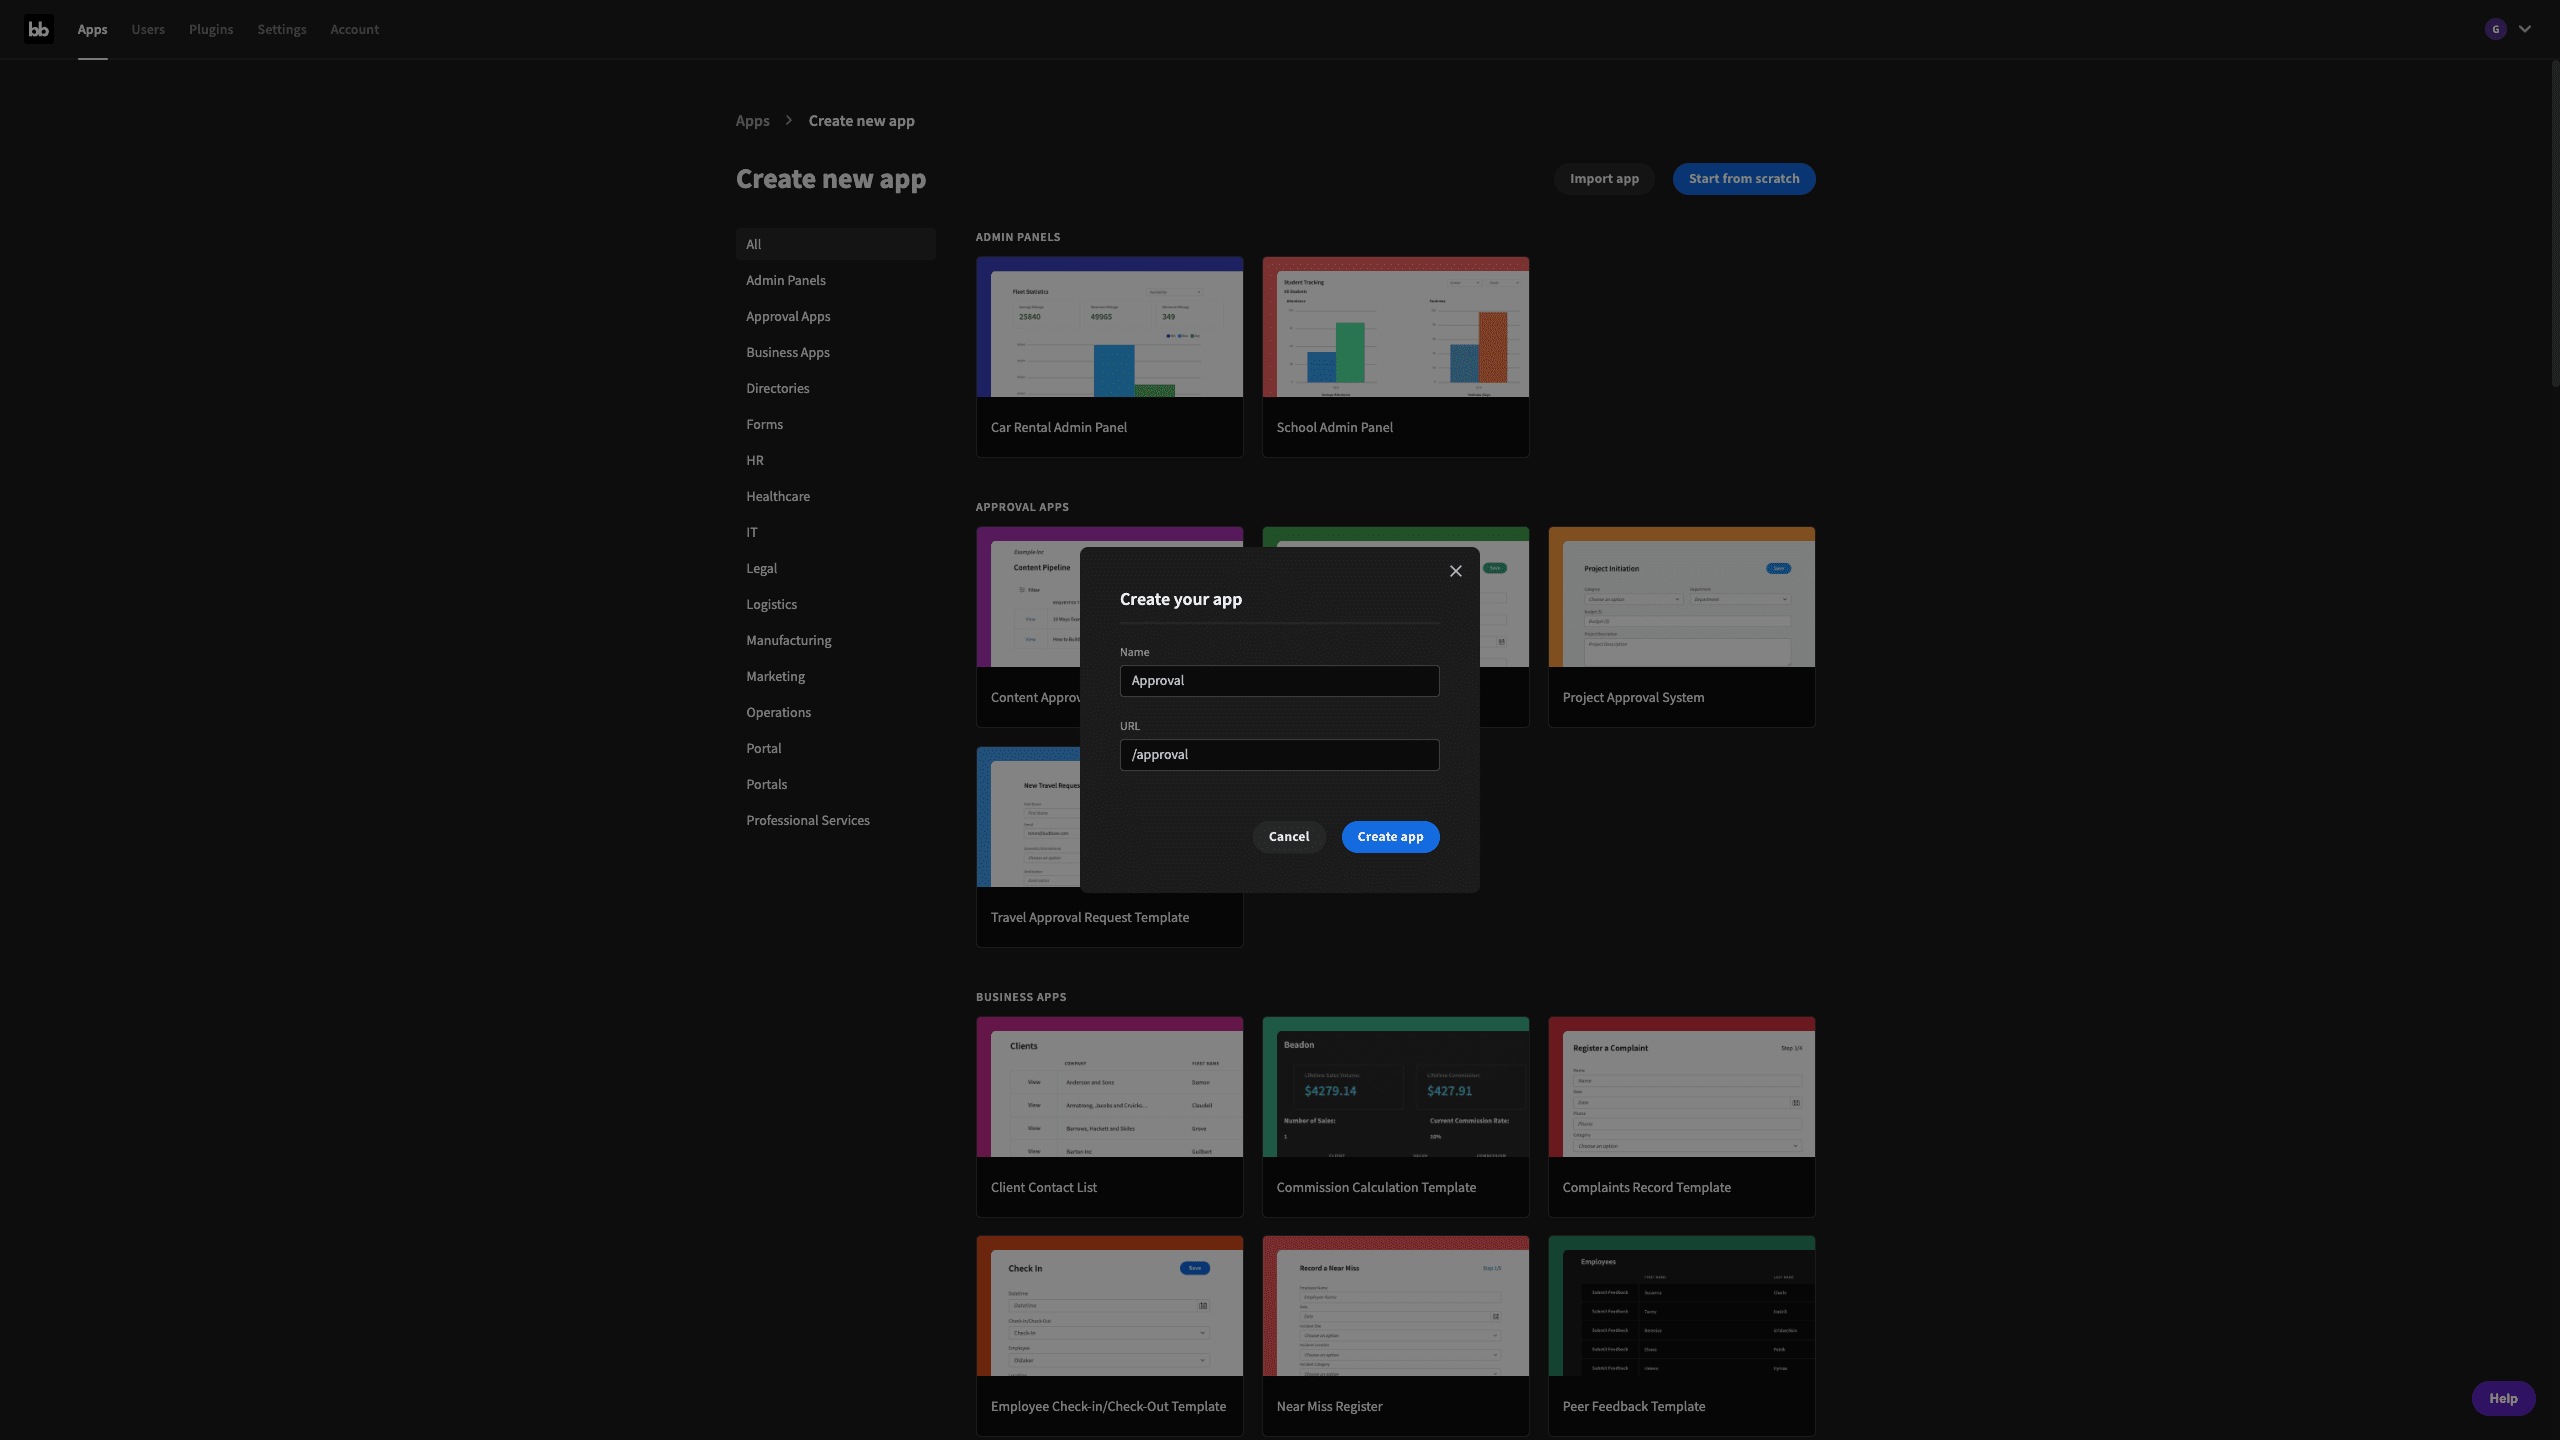
When we hit create new app, we’ll be given the option of starting from scratch or using one of our pre-built templates. We’re going to start from scratch. Then, we’ll be prompted to choose a name and a URL extension.
Then, we’ll be asked to choose a data source:
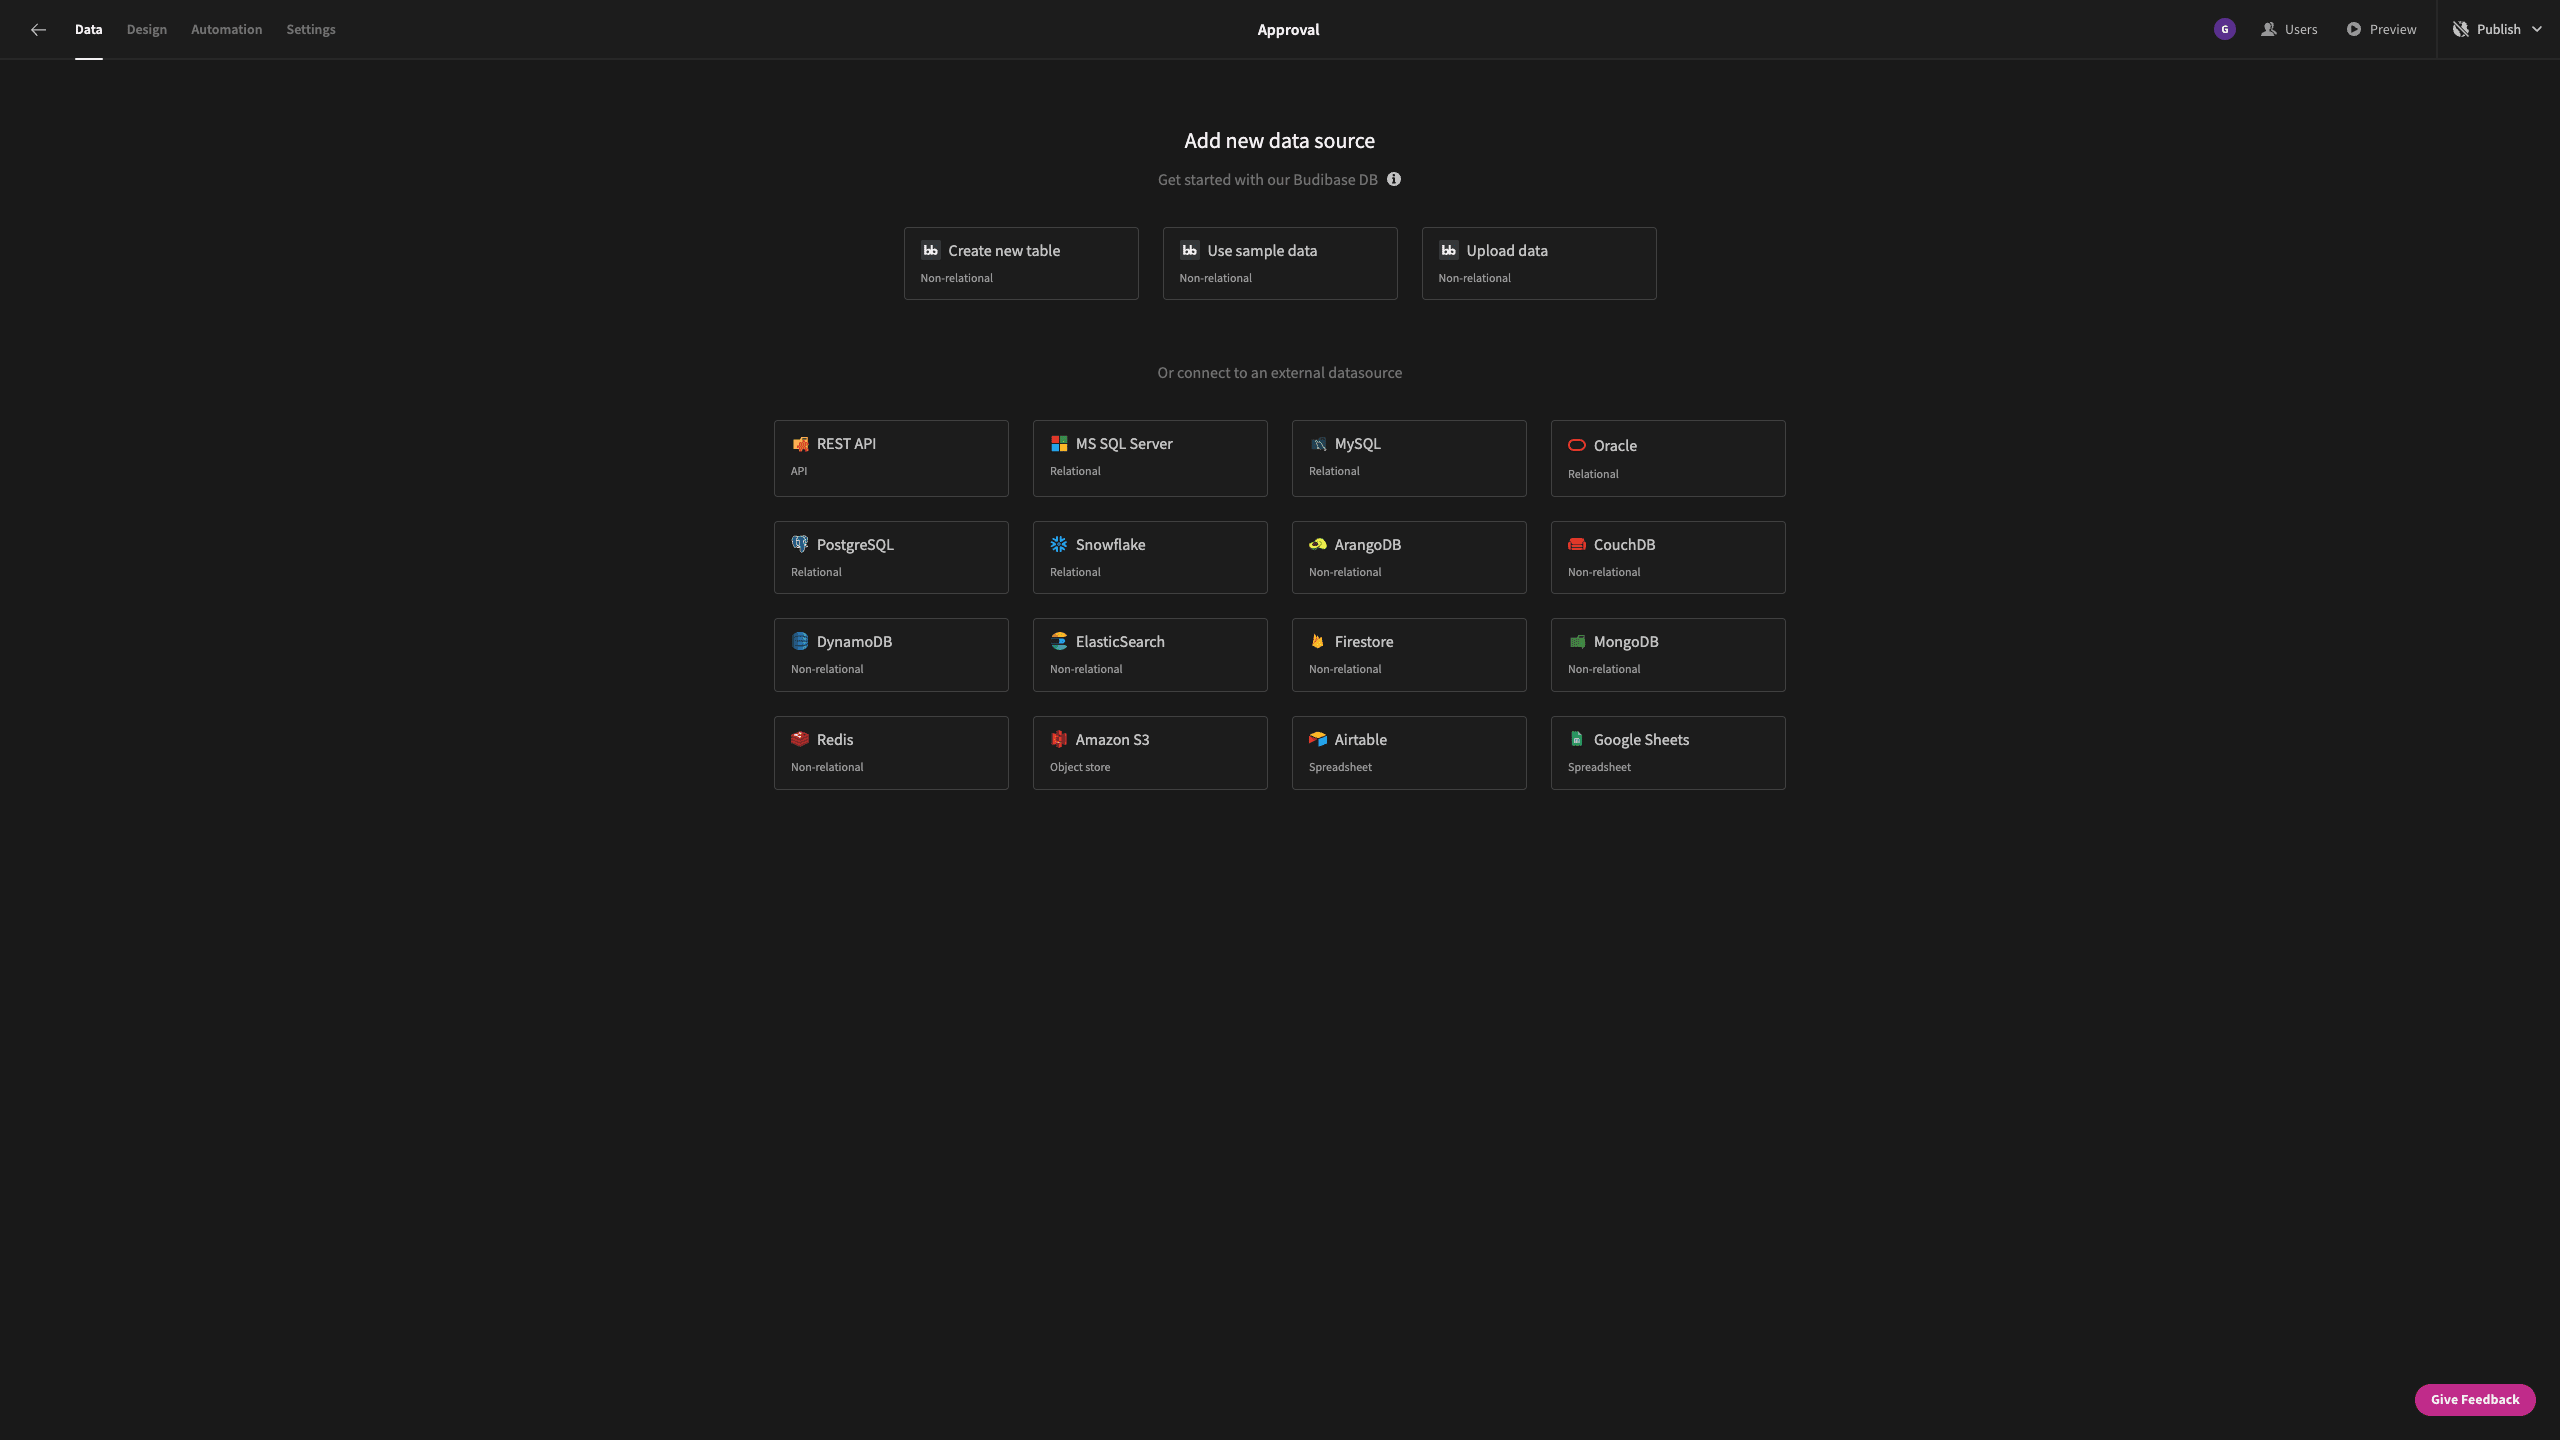
Budibase offers dedicated connectors for an enormous range of databases, as well as support for REST API, Google Sheets, and custom data sources. So, you can choose wherever your data lives.
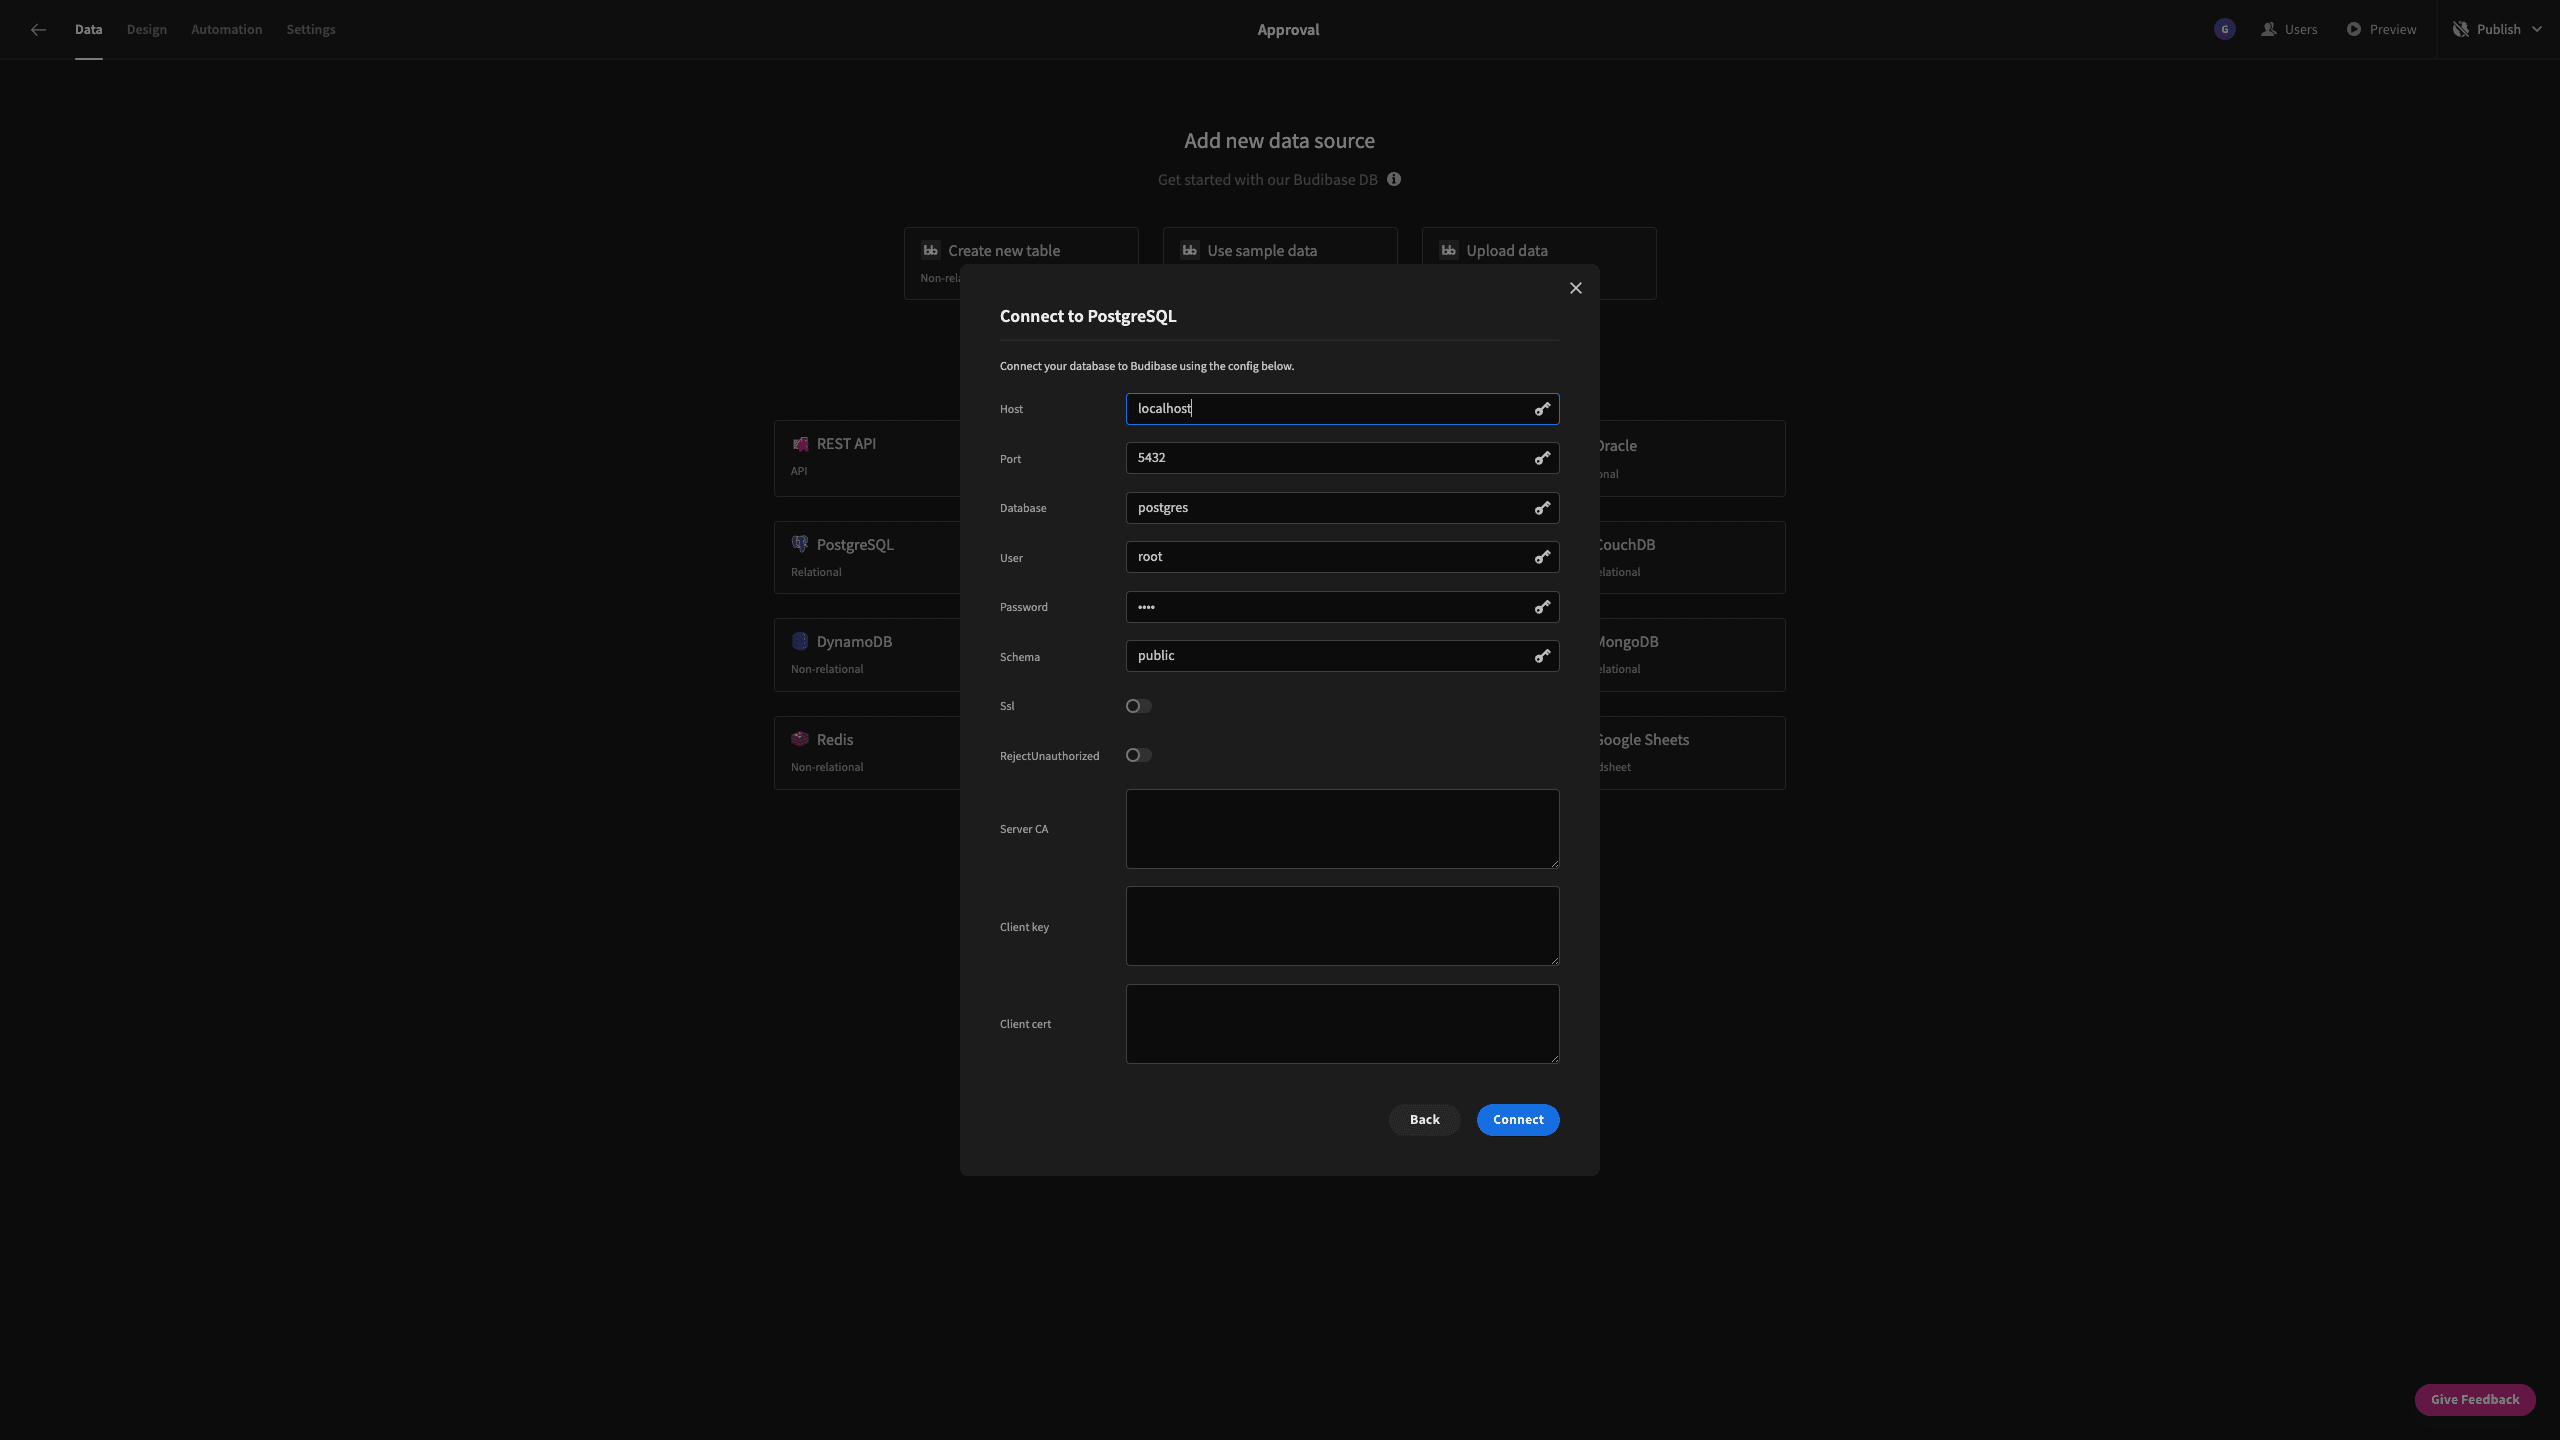
For our demo though, we’re going to choose Postgres.
Then, we’ll be prompted to add our database credentials:
2. Configure your data model
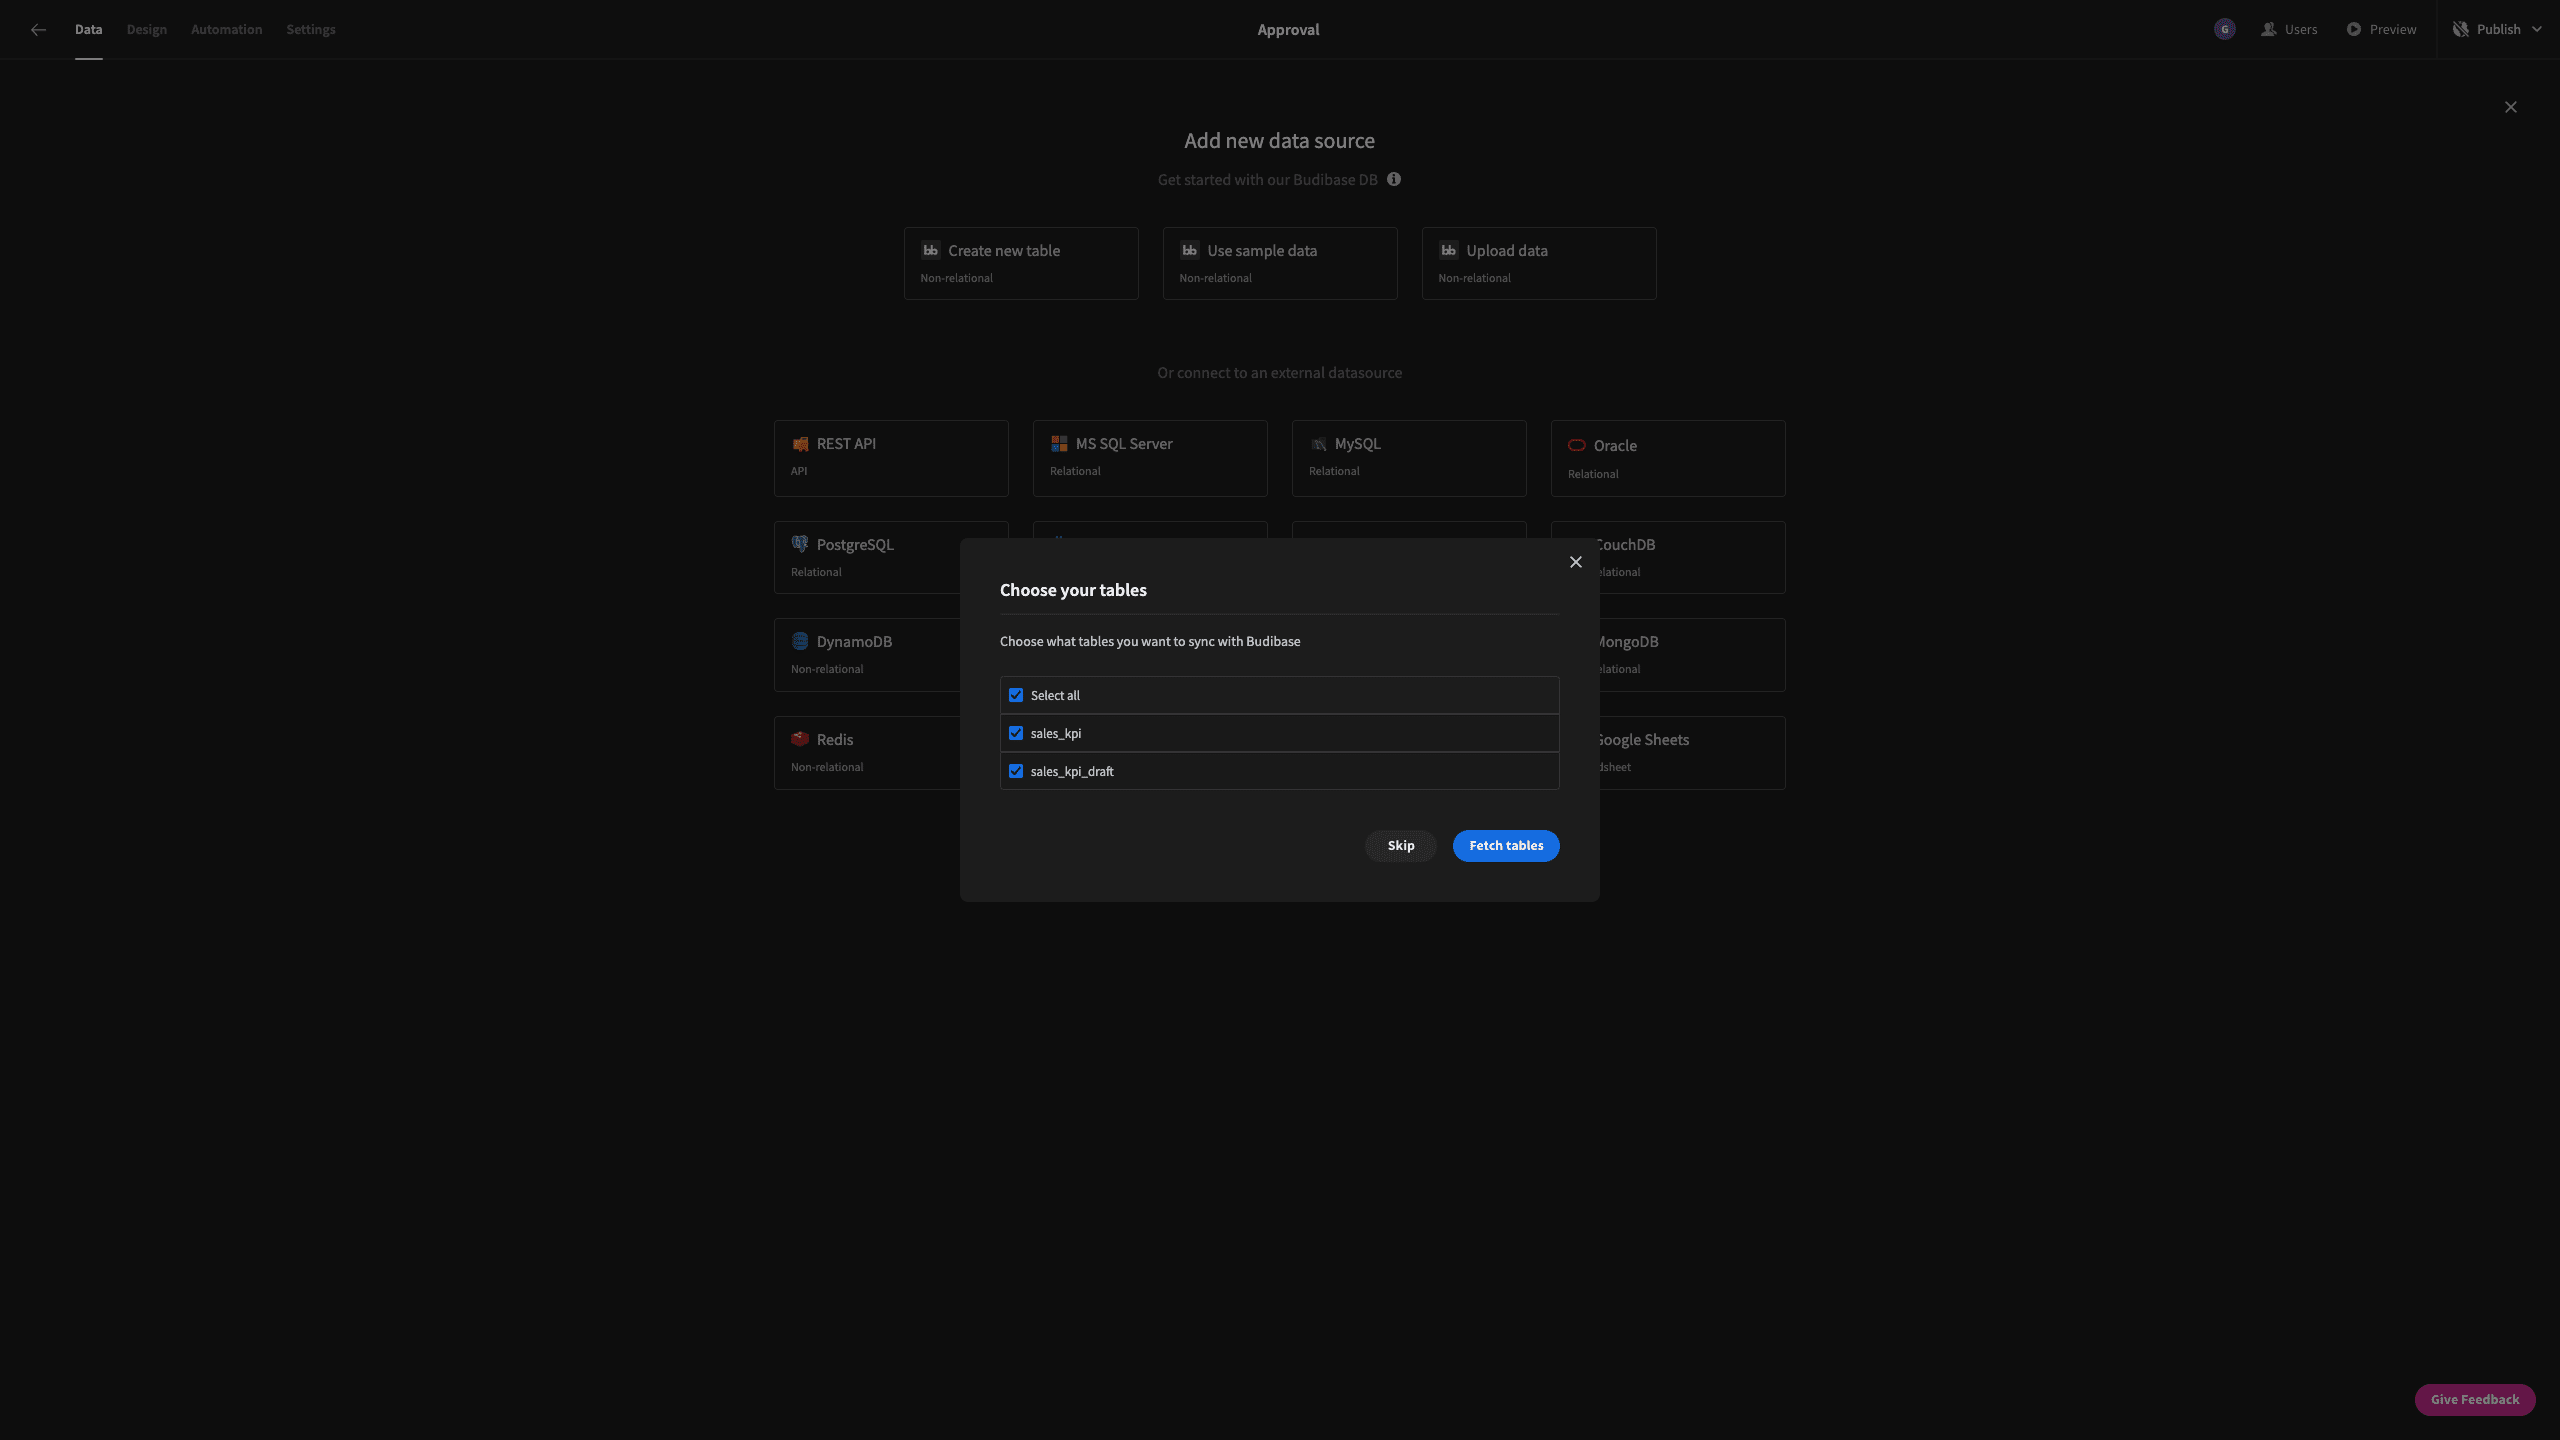
Once we input our credentials and connect to the database, we’ll be given the option to fetch tables. This pulls your database’s tables into Budibase, so you can edit them in our Data tab, or use the data contained in them in your UIs and automations.
We have the choice of fetching all of the tables in a connected database - or only specific ones.
Our database only has two tables, so we’re going to go ahead and fetch both:
Our data model will be built around these two tables, so let’s briefly discuss what each one is, what it includes, and how we’re going to use it.
We have:
- sales_kpi_draft - which stores information about individual region’s report submissions, including their marketing spend, revenue, the month and year, who has submitted the report, and who needs to approve it - as well as the current status of each submission in our approval workflow.
- sales_kpi - where the same information will be moved to once a particular submission is approved. Our dashboard will then be drawn from this table in the subsequent tutorial.
This is how our tables will look once they’ve been fetched into Budibase:
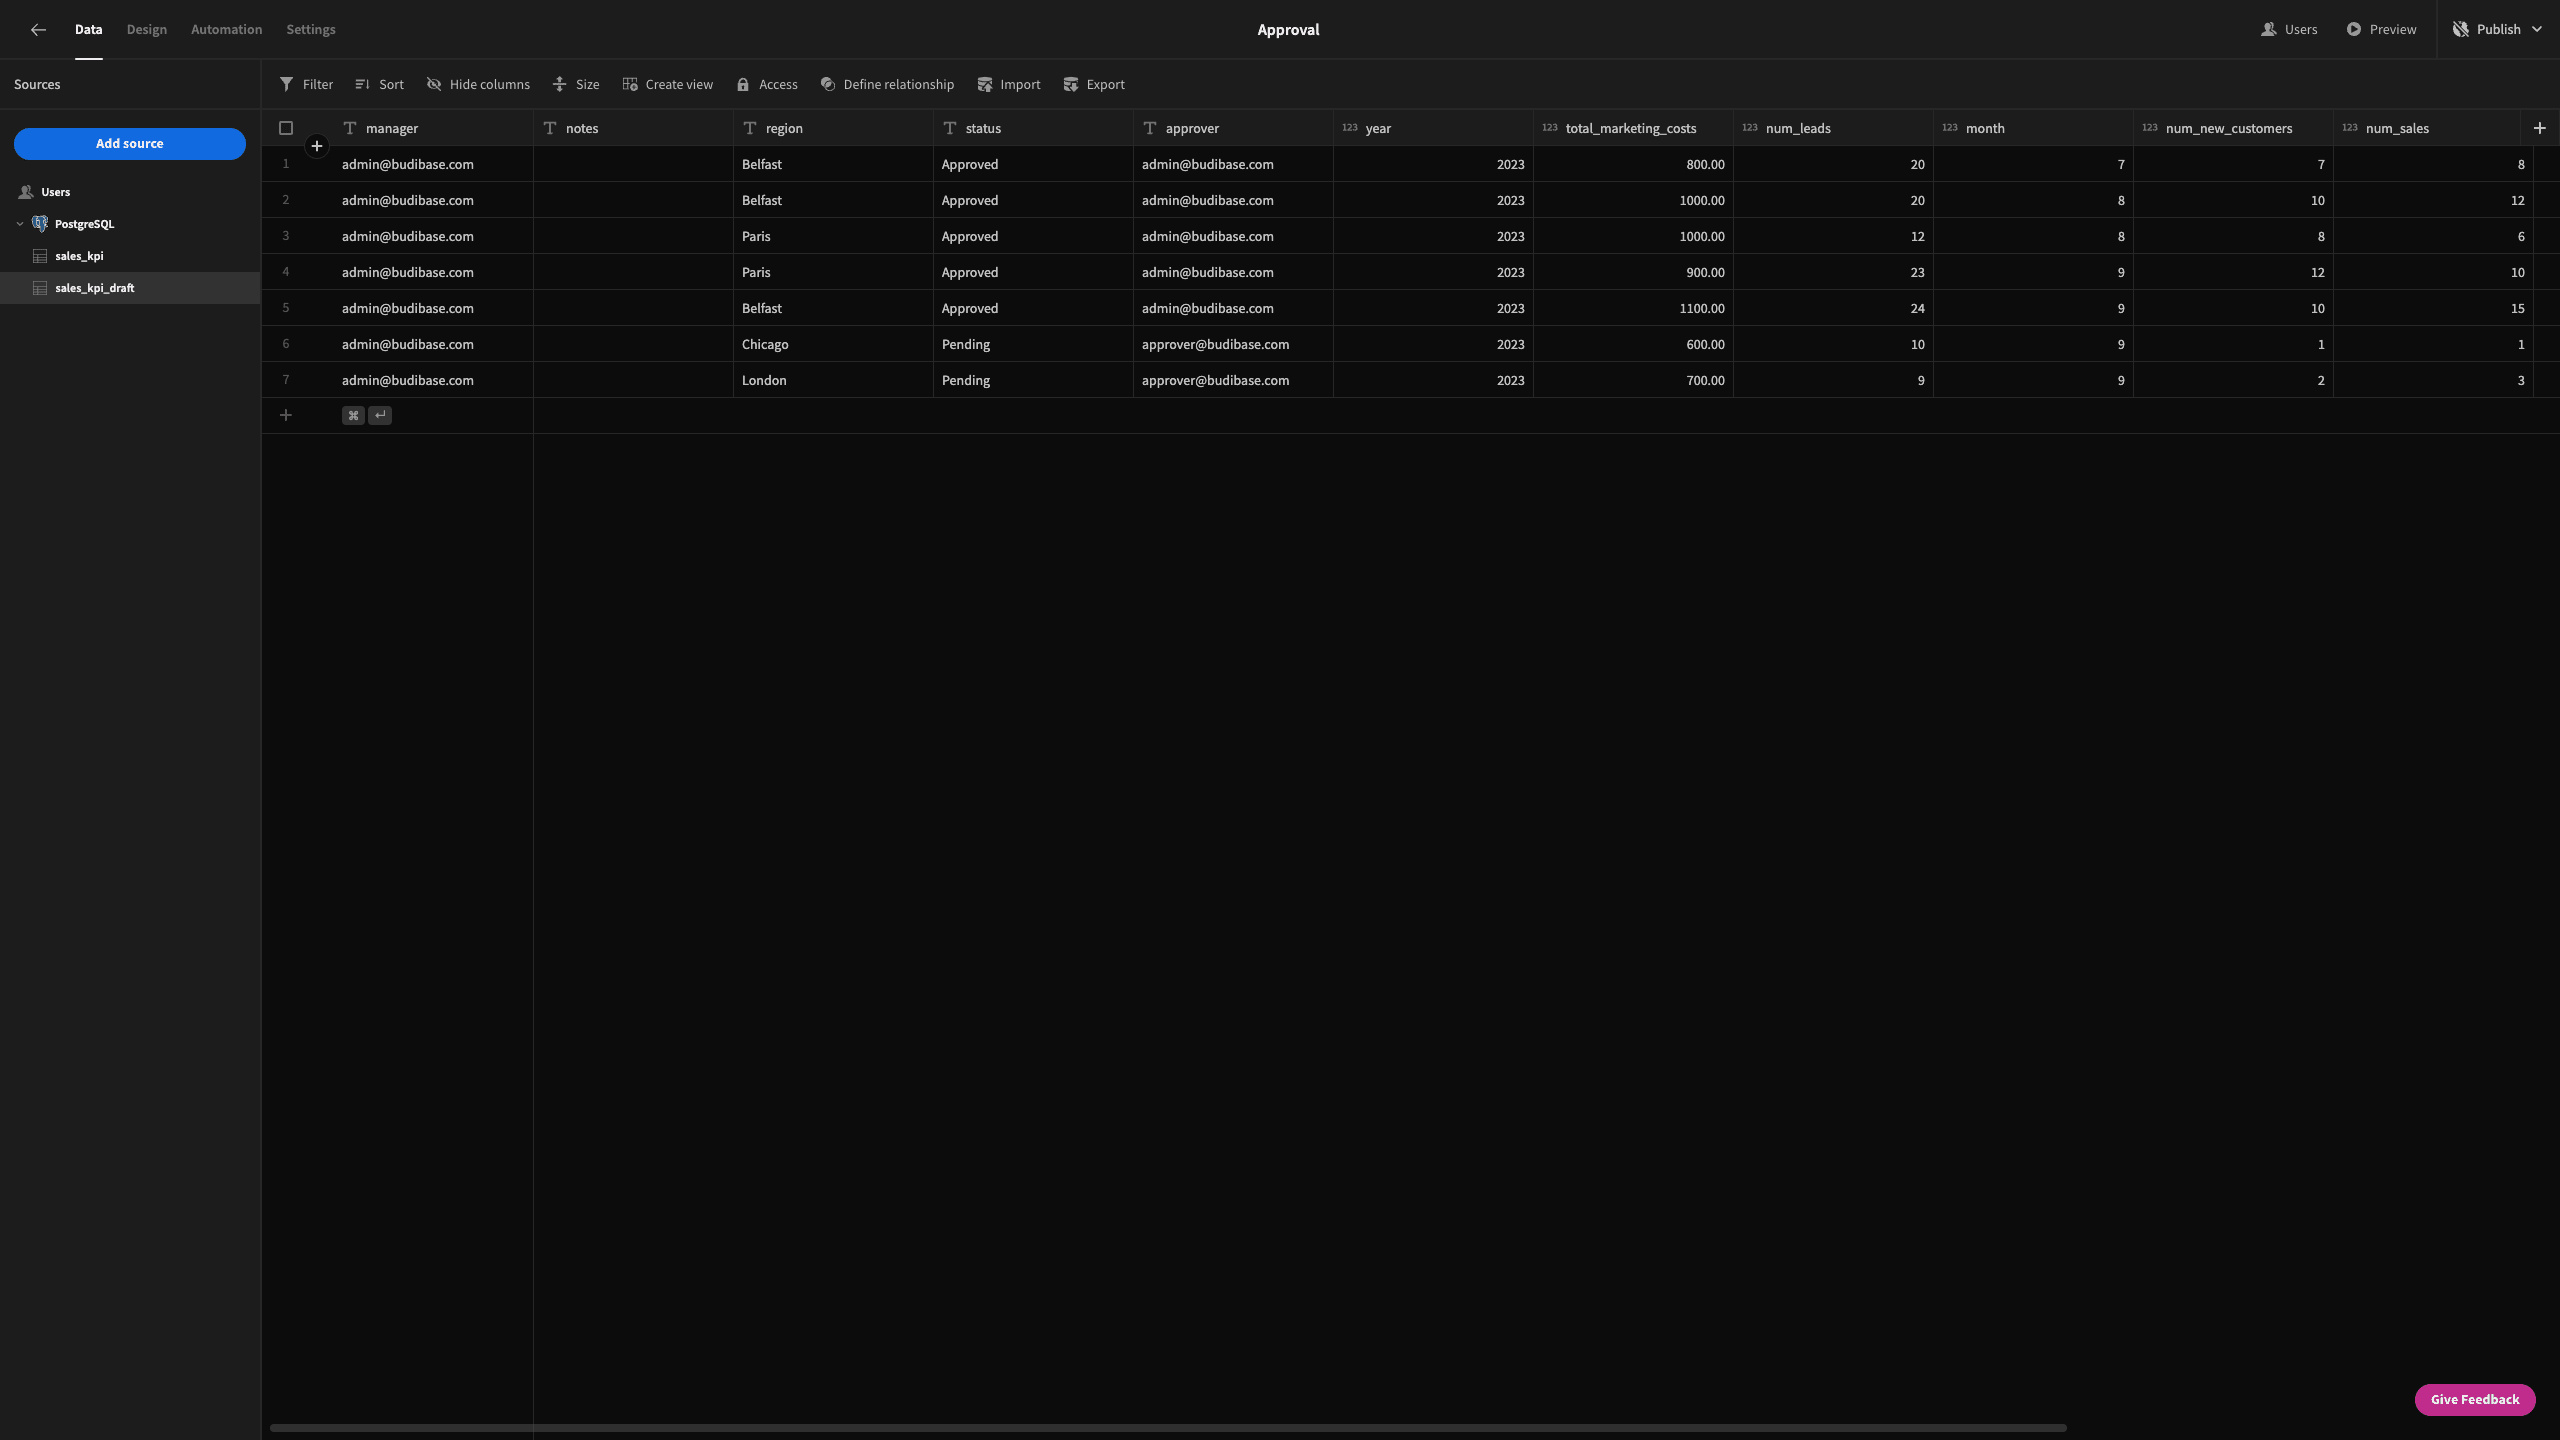
But, we want to make a couple of changes to our data tables as they are in situ, just to make things a little bit easier for ourselves down the line.
See, in Postgres, some of our attributes are stored as text fields - whereas we’d only like a set number of options to be available to users.
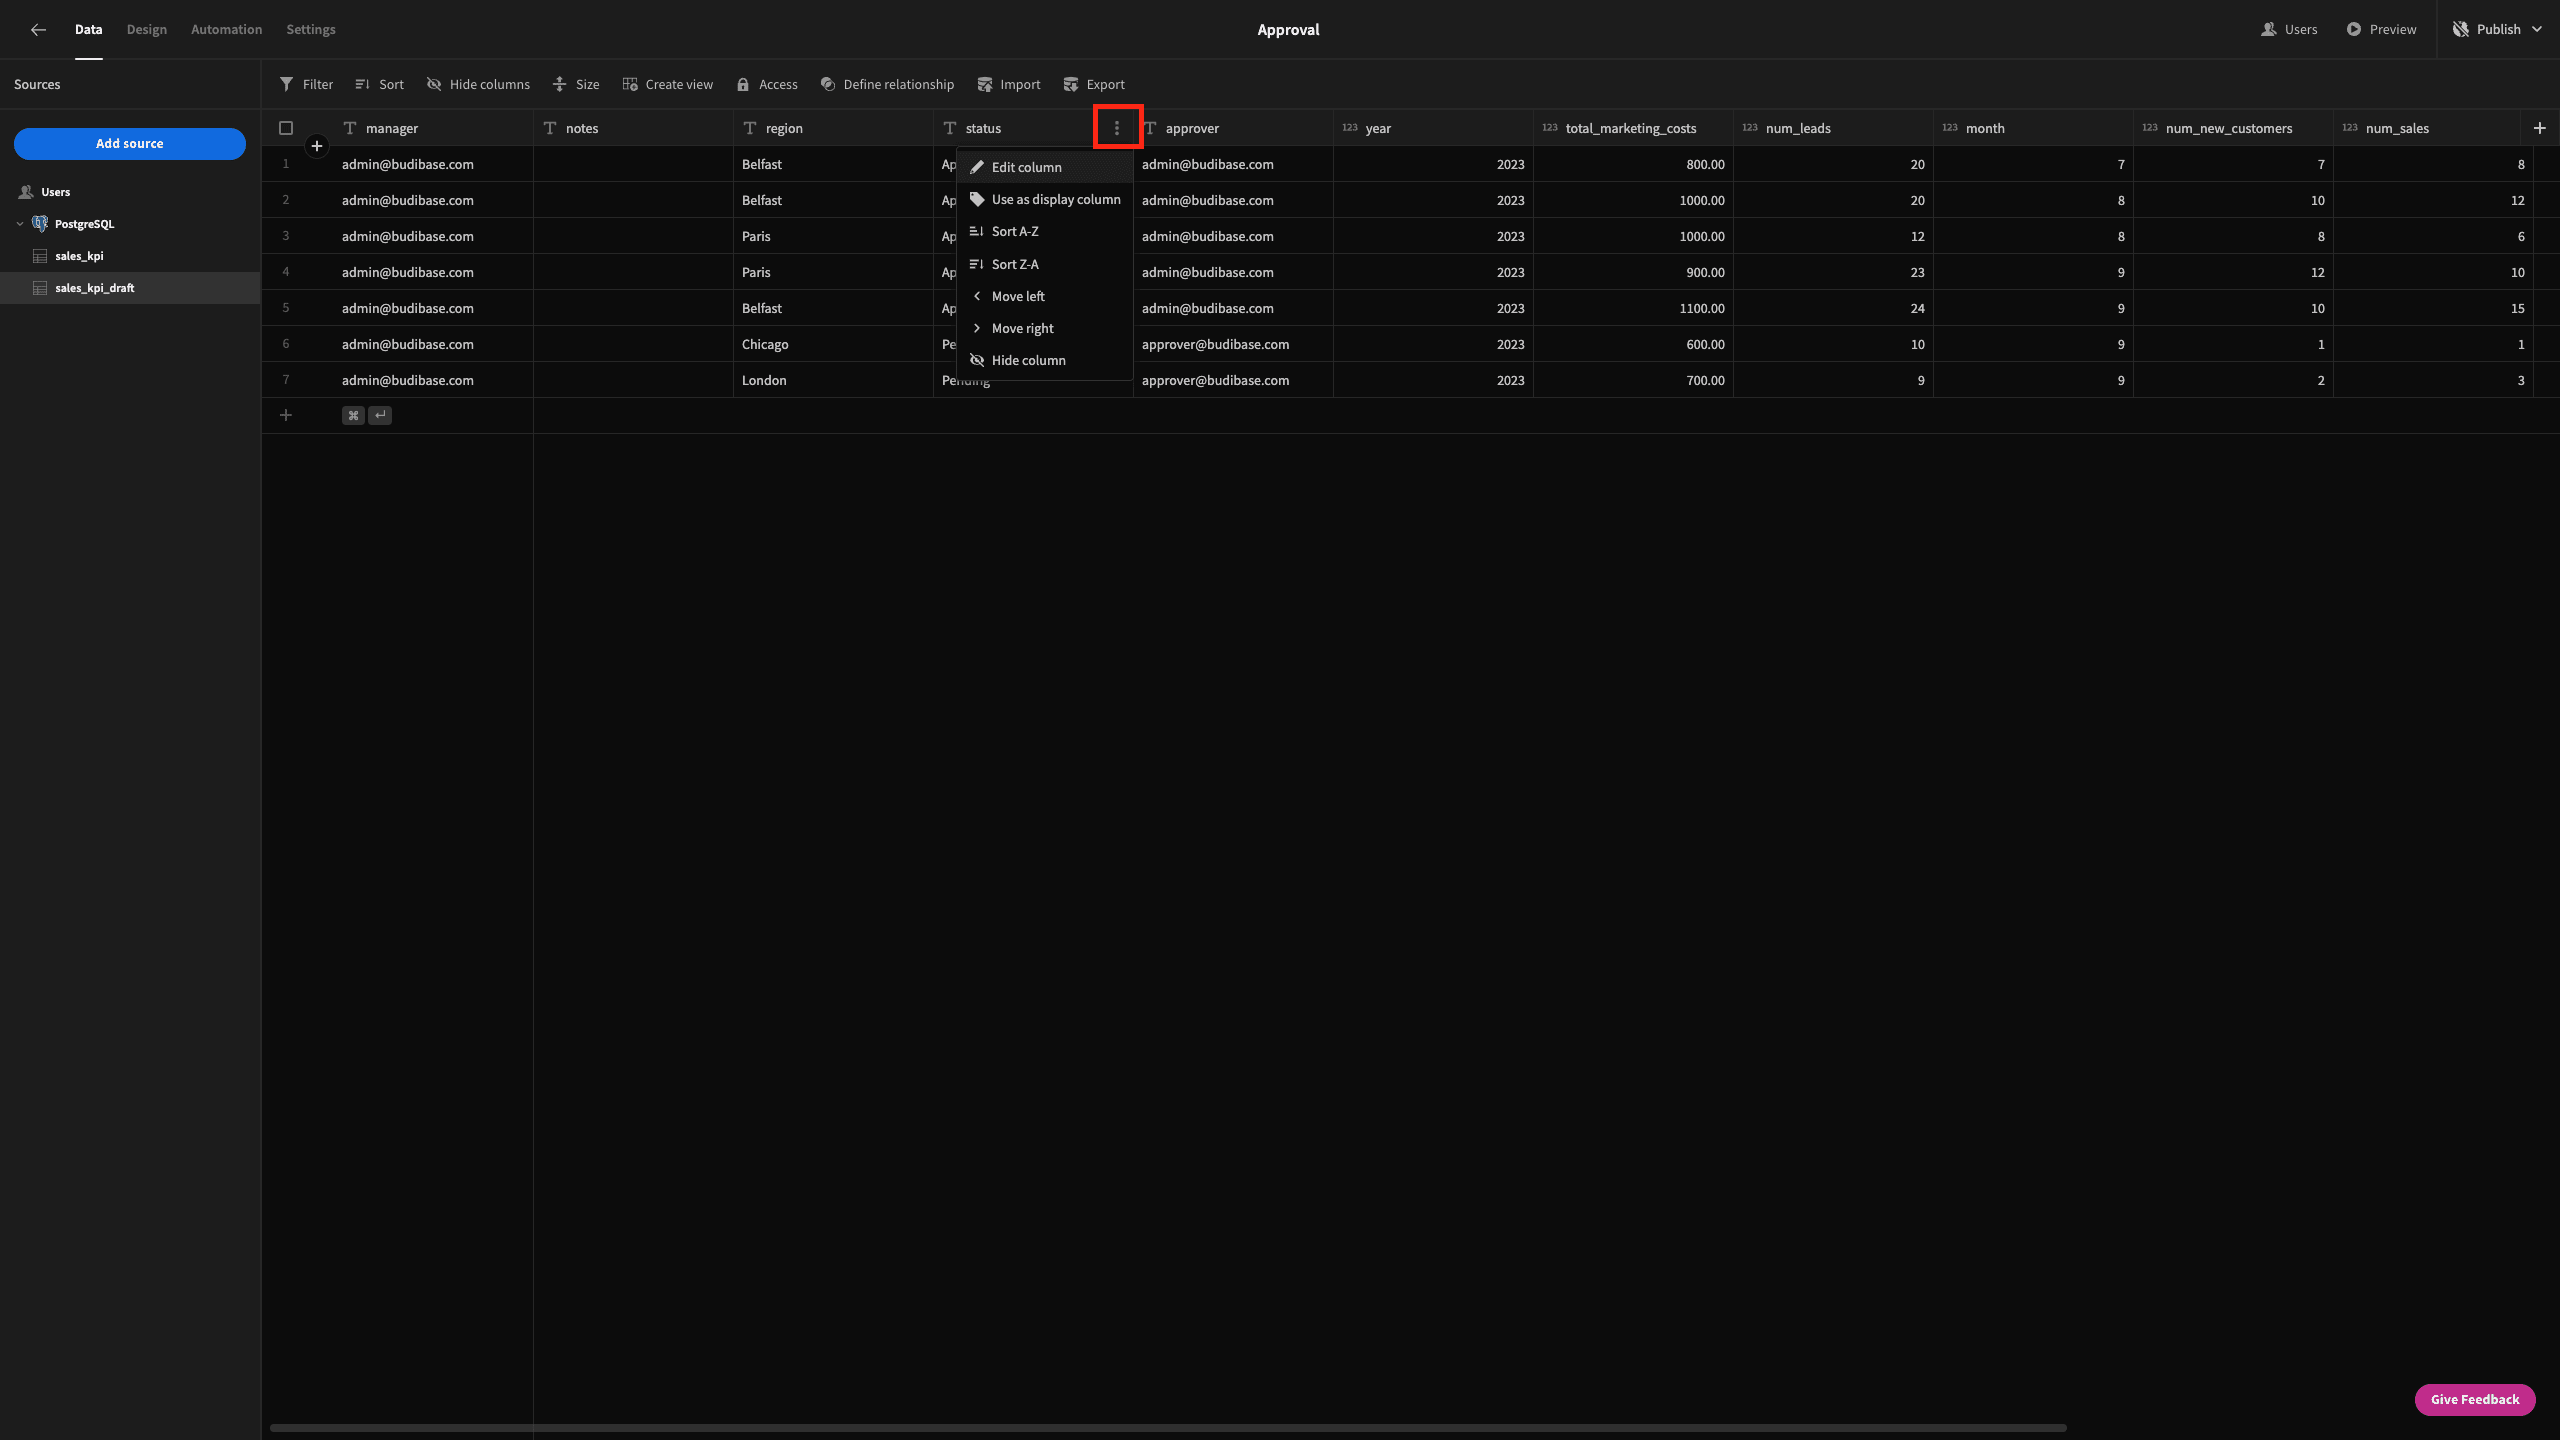
So, we’ll start by hitting the three dots next to the status attribute in one of our tables and hitting edit column:
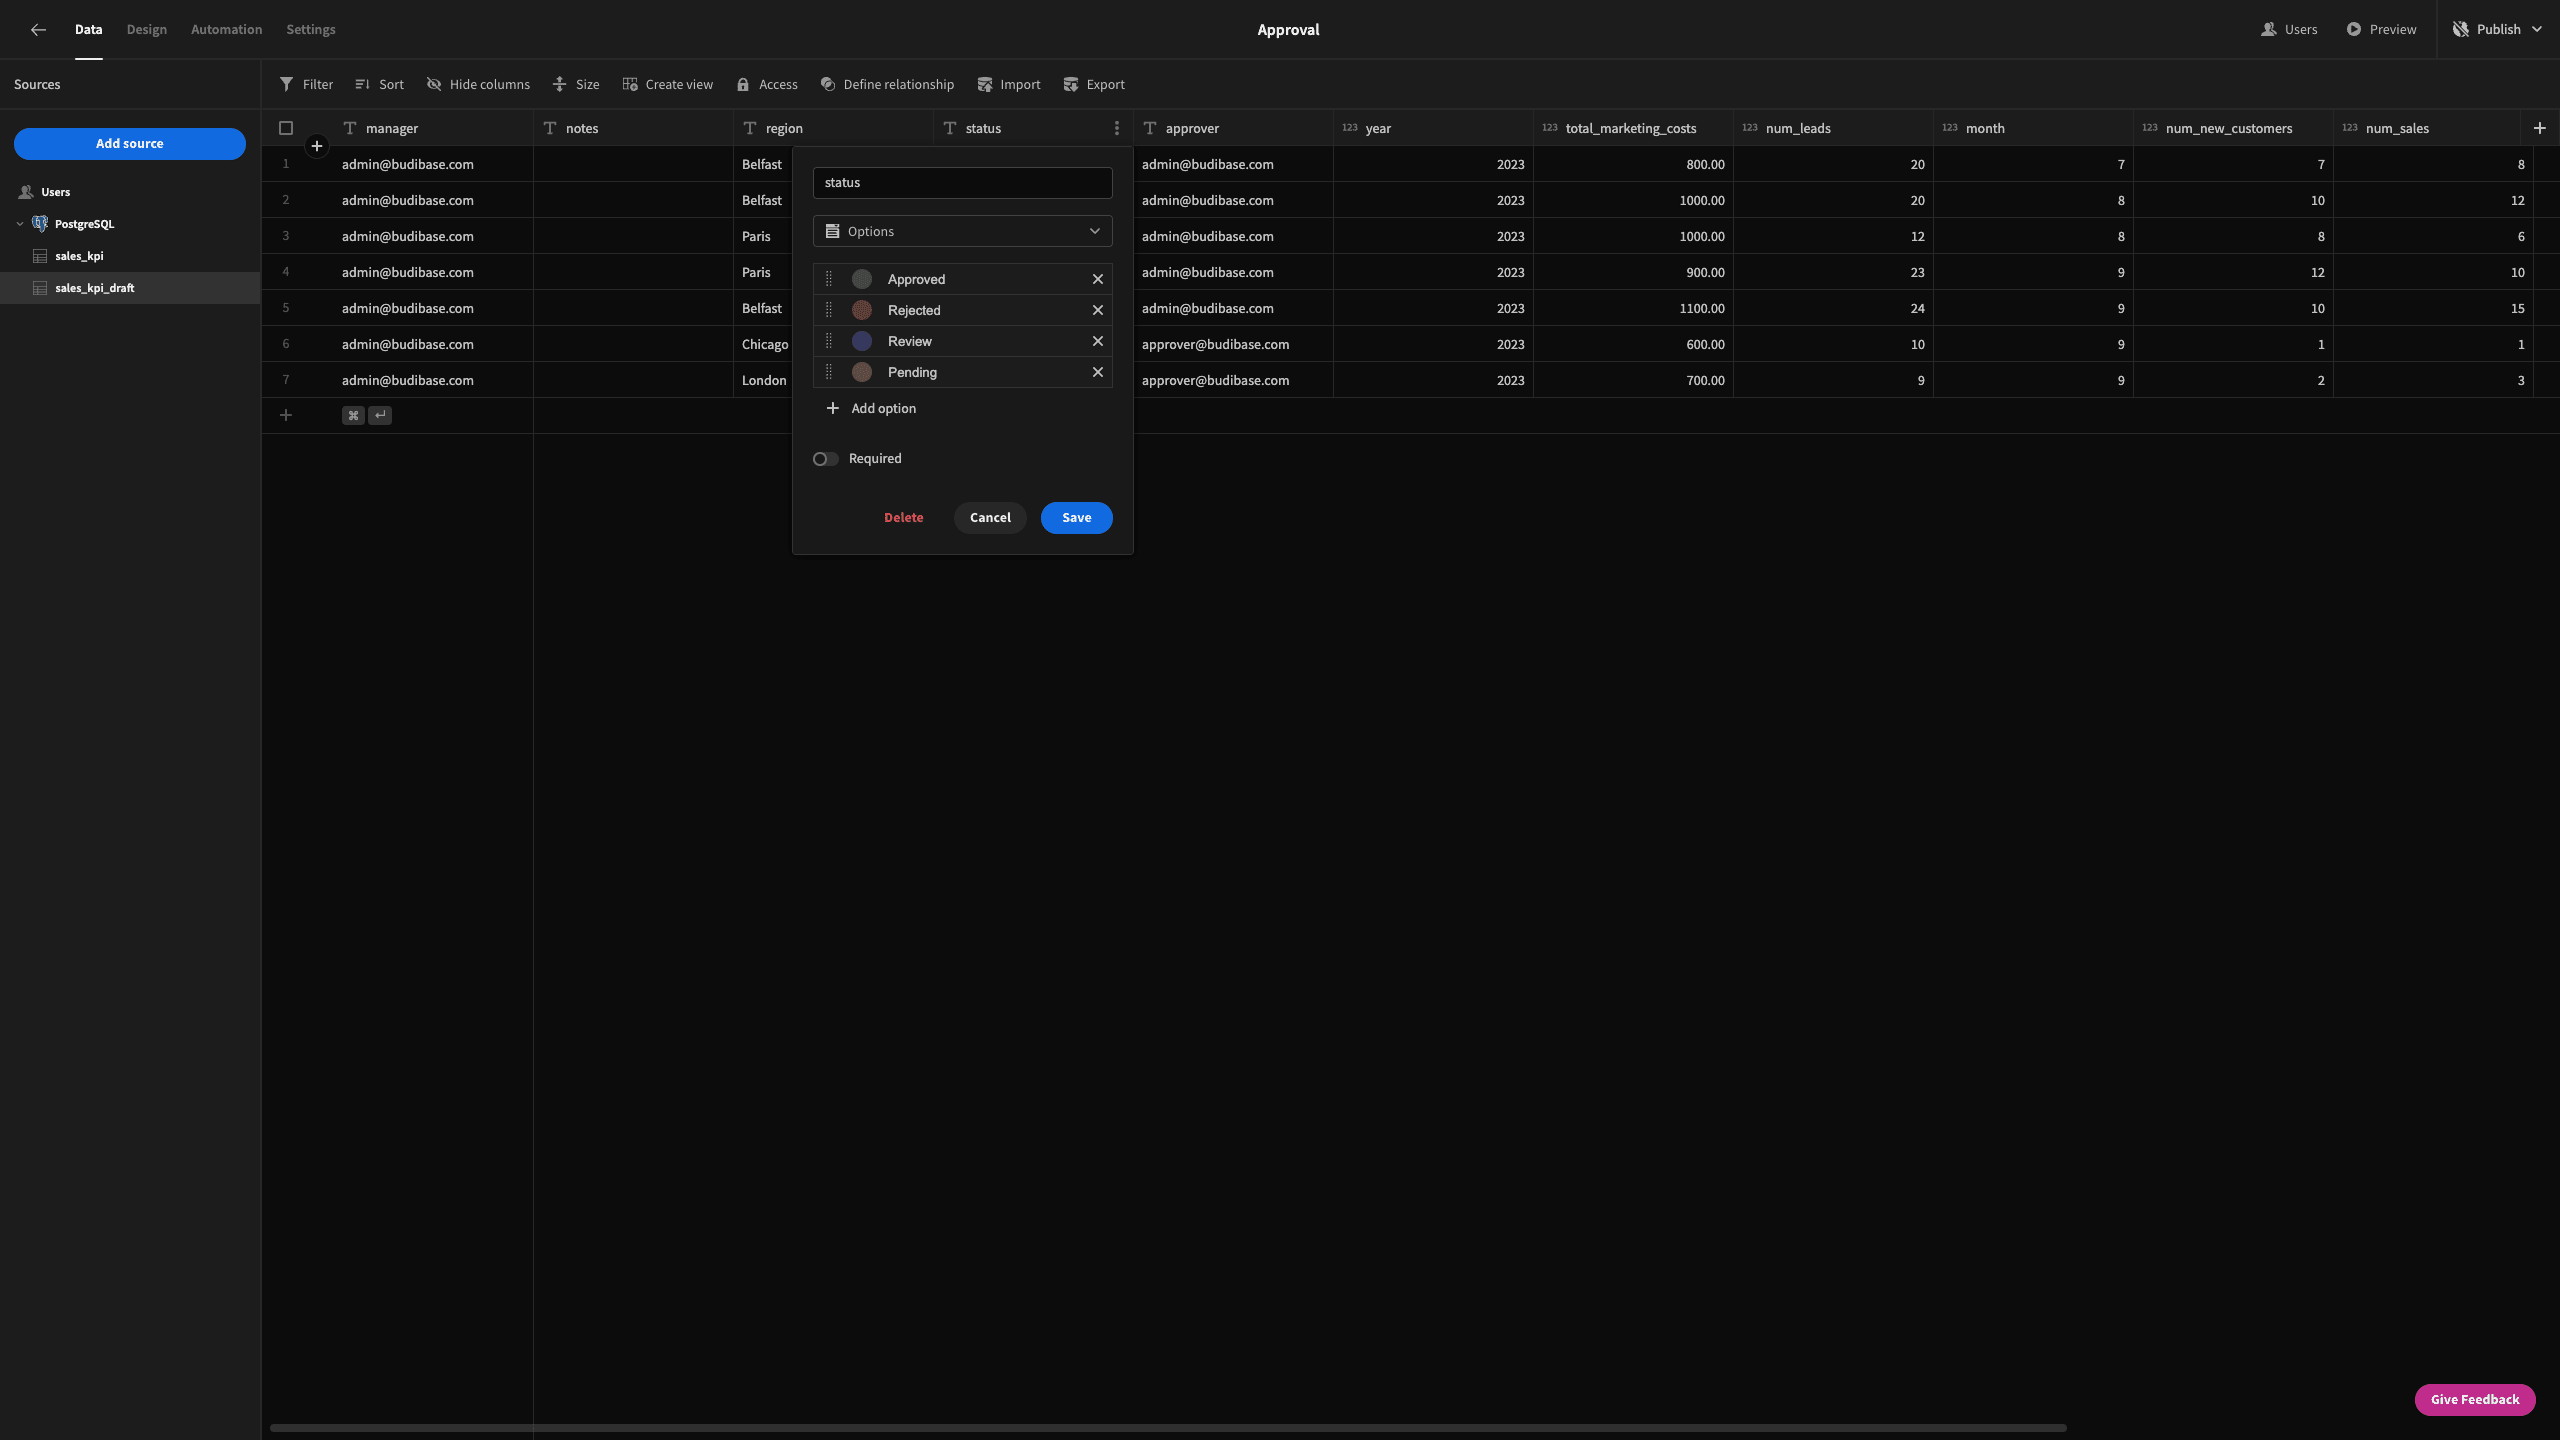
We’ll change the data type from text to options. Then, we can input the options that we want users to be available. Our possible statuses are approved, rejected, review, and pending. We’ll also give each one a distinct color:
Now, repeat that same step for the other table so that their data models are exactly the same.
Next, we want to set our approver attribute to be an options field too, as we want to ensure that users select a valid, responsible colleague to review their submission.
We’ll do the exact same thing again, this time populating our options with the emails of the appropriate colleagues. Remember to repeat this step for both tables as well.
Here’s what our tables will looks like once we’ve updated both of these fields:
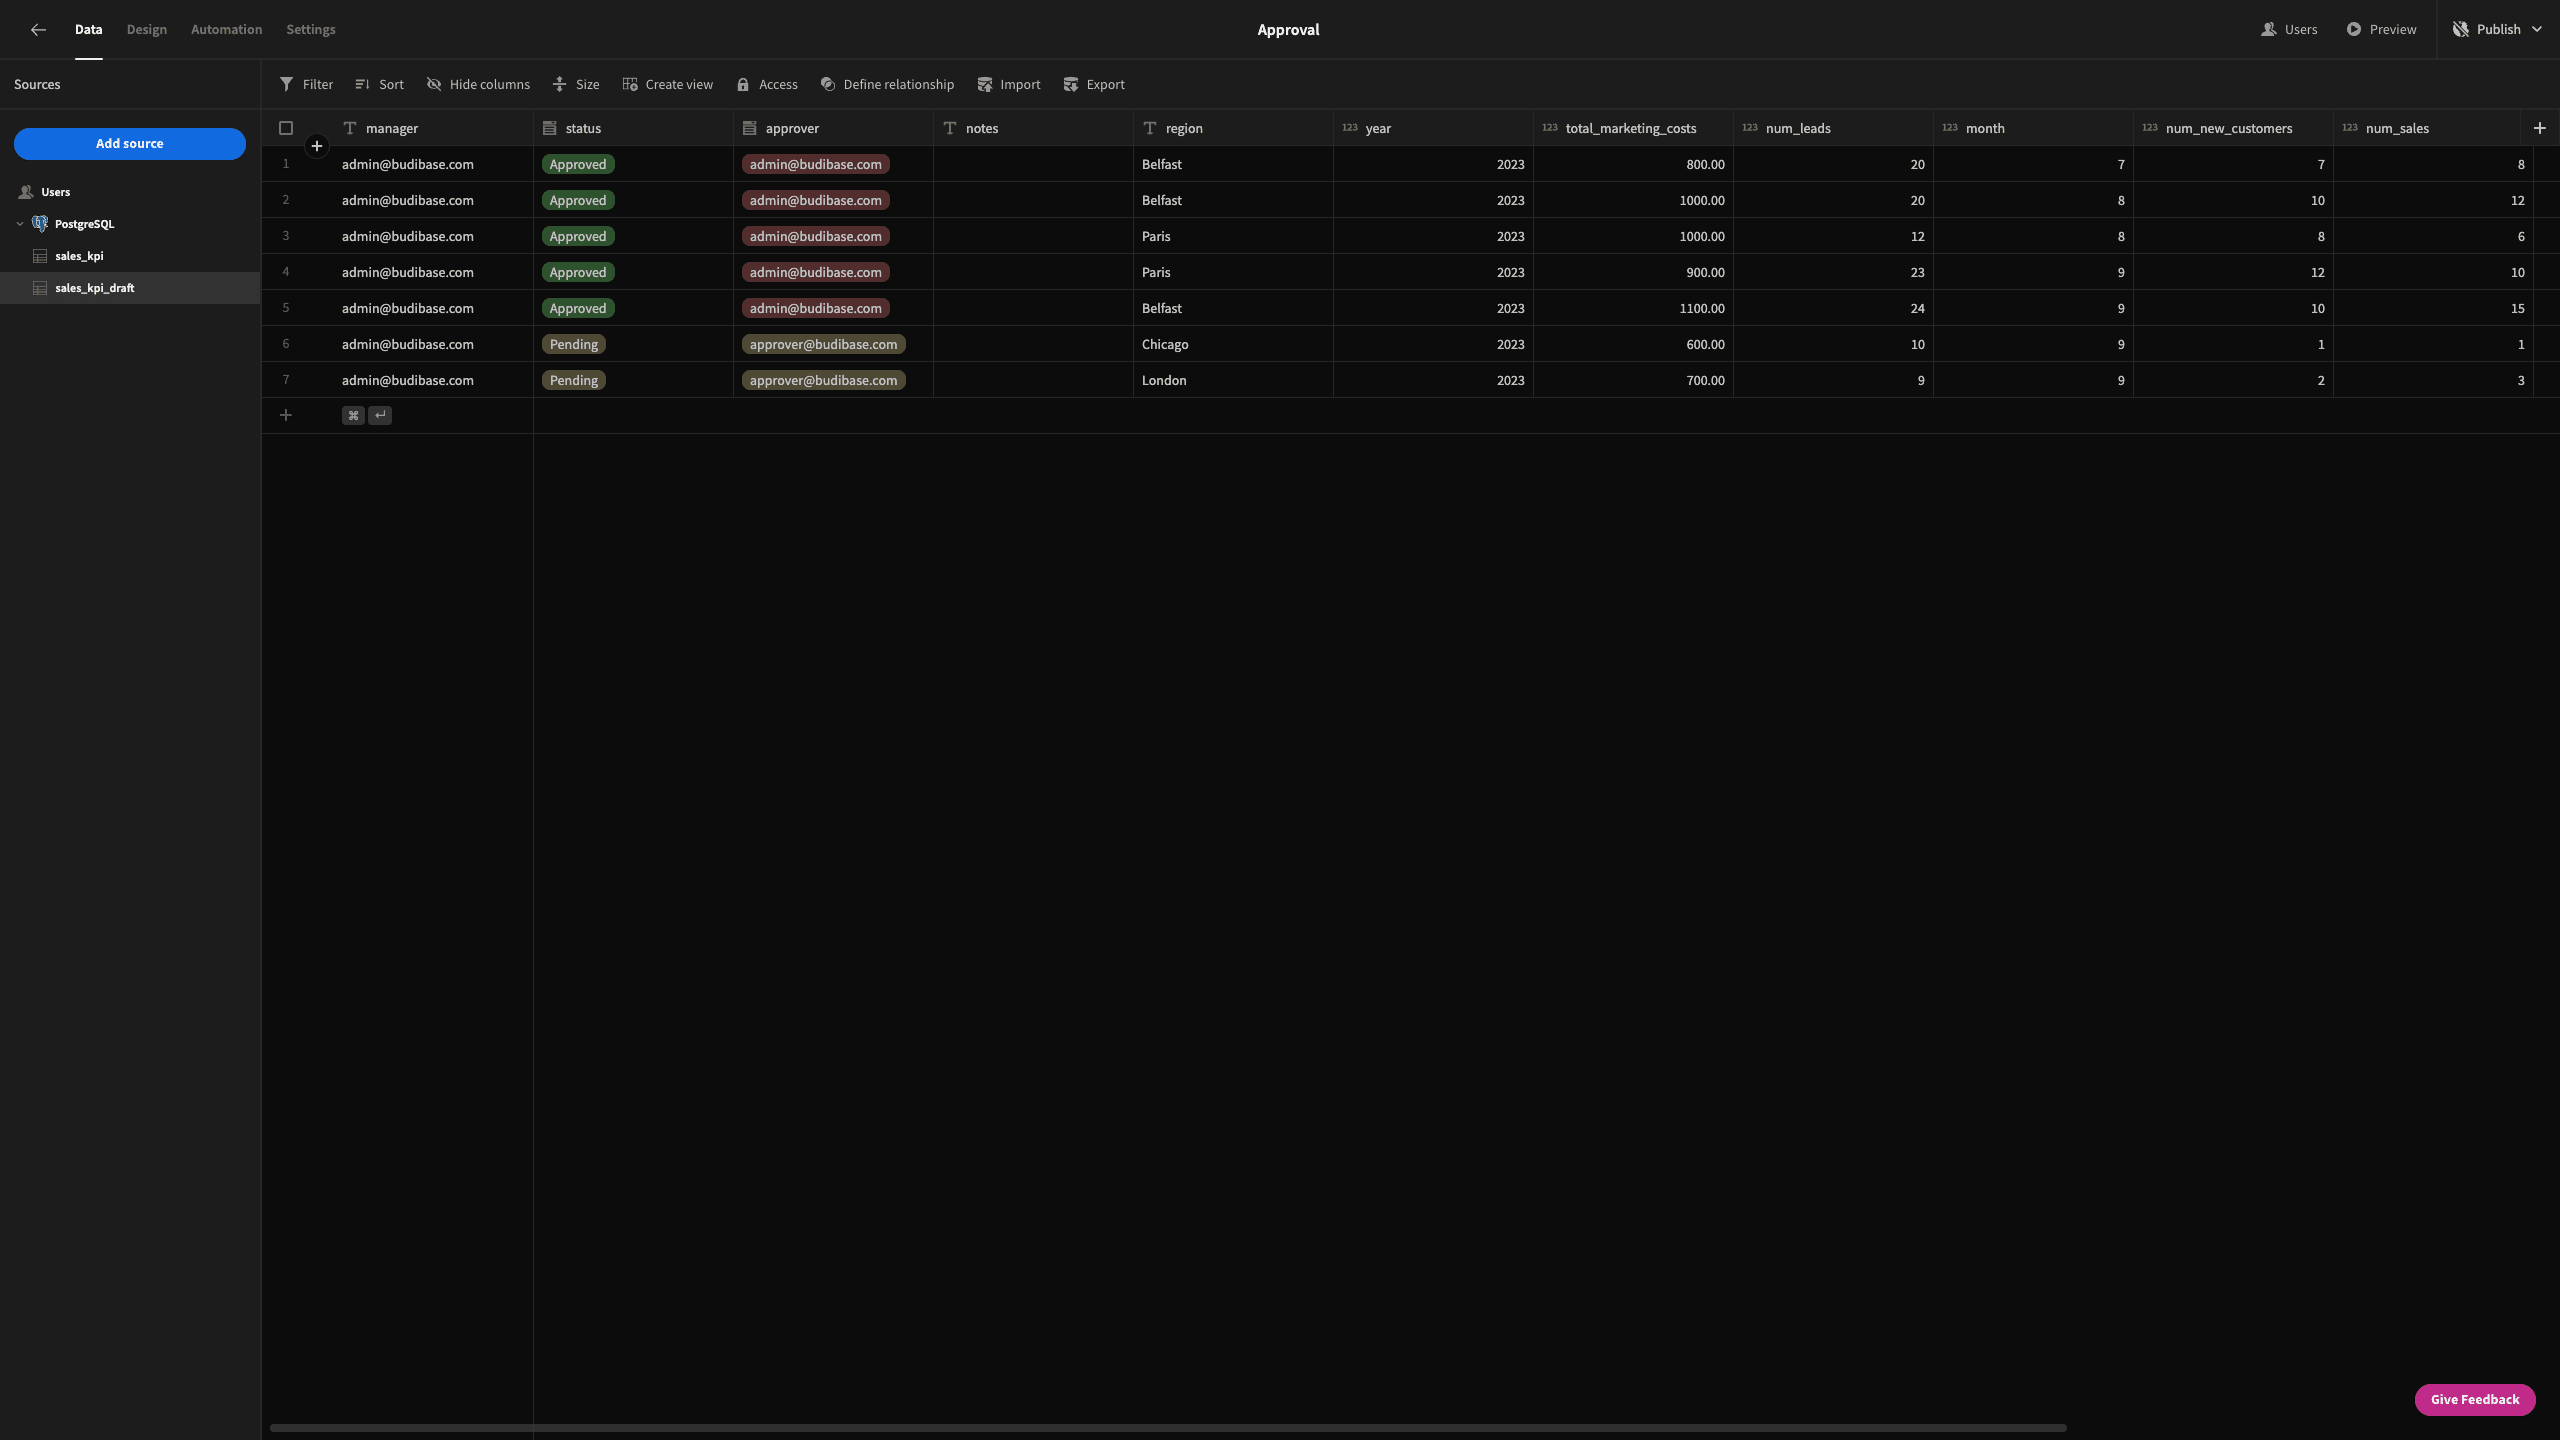
And that’s our data model ready to go. Next, we can start to build some UIs for our approval tool.
3. Build a submission form
The first screen we want to build is going to enable regional sales teams to submit report data for review.
We’ll navigate to Budibase’s Design tab. Since we don’t have any screens yet, we’ll be offered the choice of creating a blank one - or using our built-in table UI. We’ll choose blank screen, as we’re going to build our form from scratch.
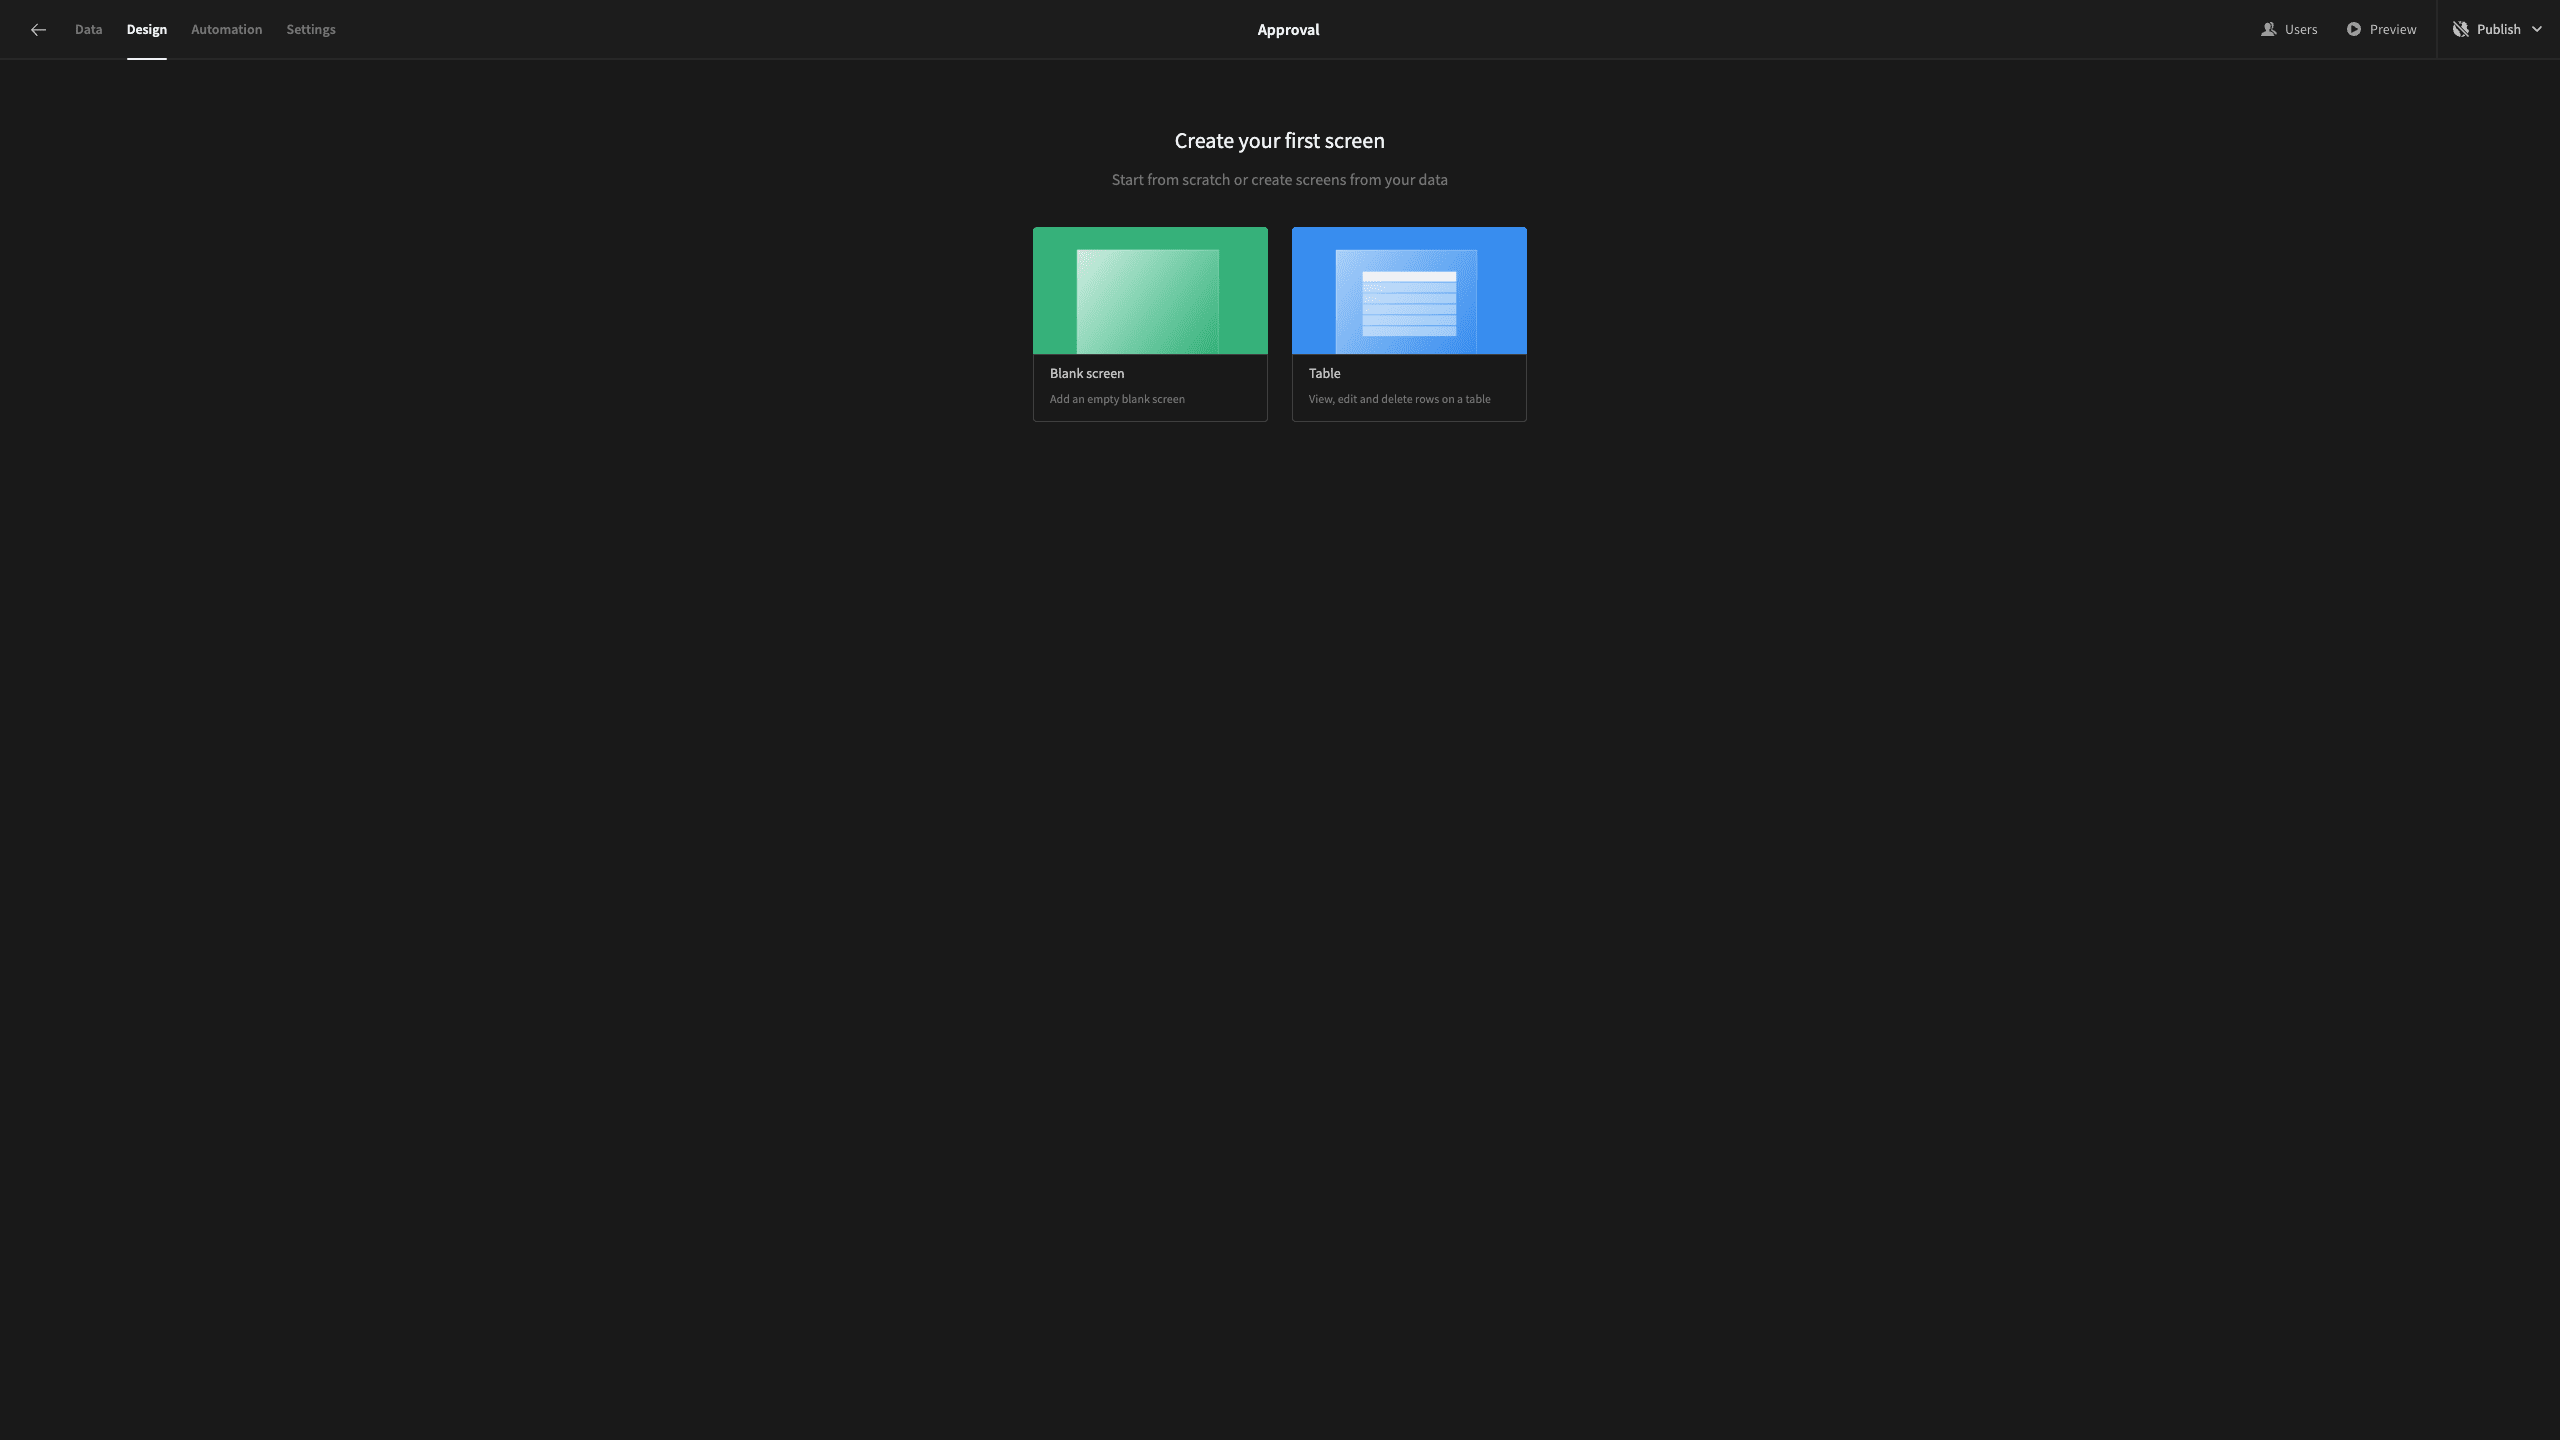
When we do this, we’re prompted to give our new screen a URL extension. We’ll choose /data-collection. We also need to choose an access role. This determines which kinds of users will be able to access this particular screen within our RBAC framework.
We’re going with basic.
Here’s what our blank screen will look like:
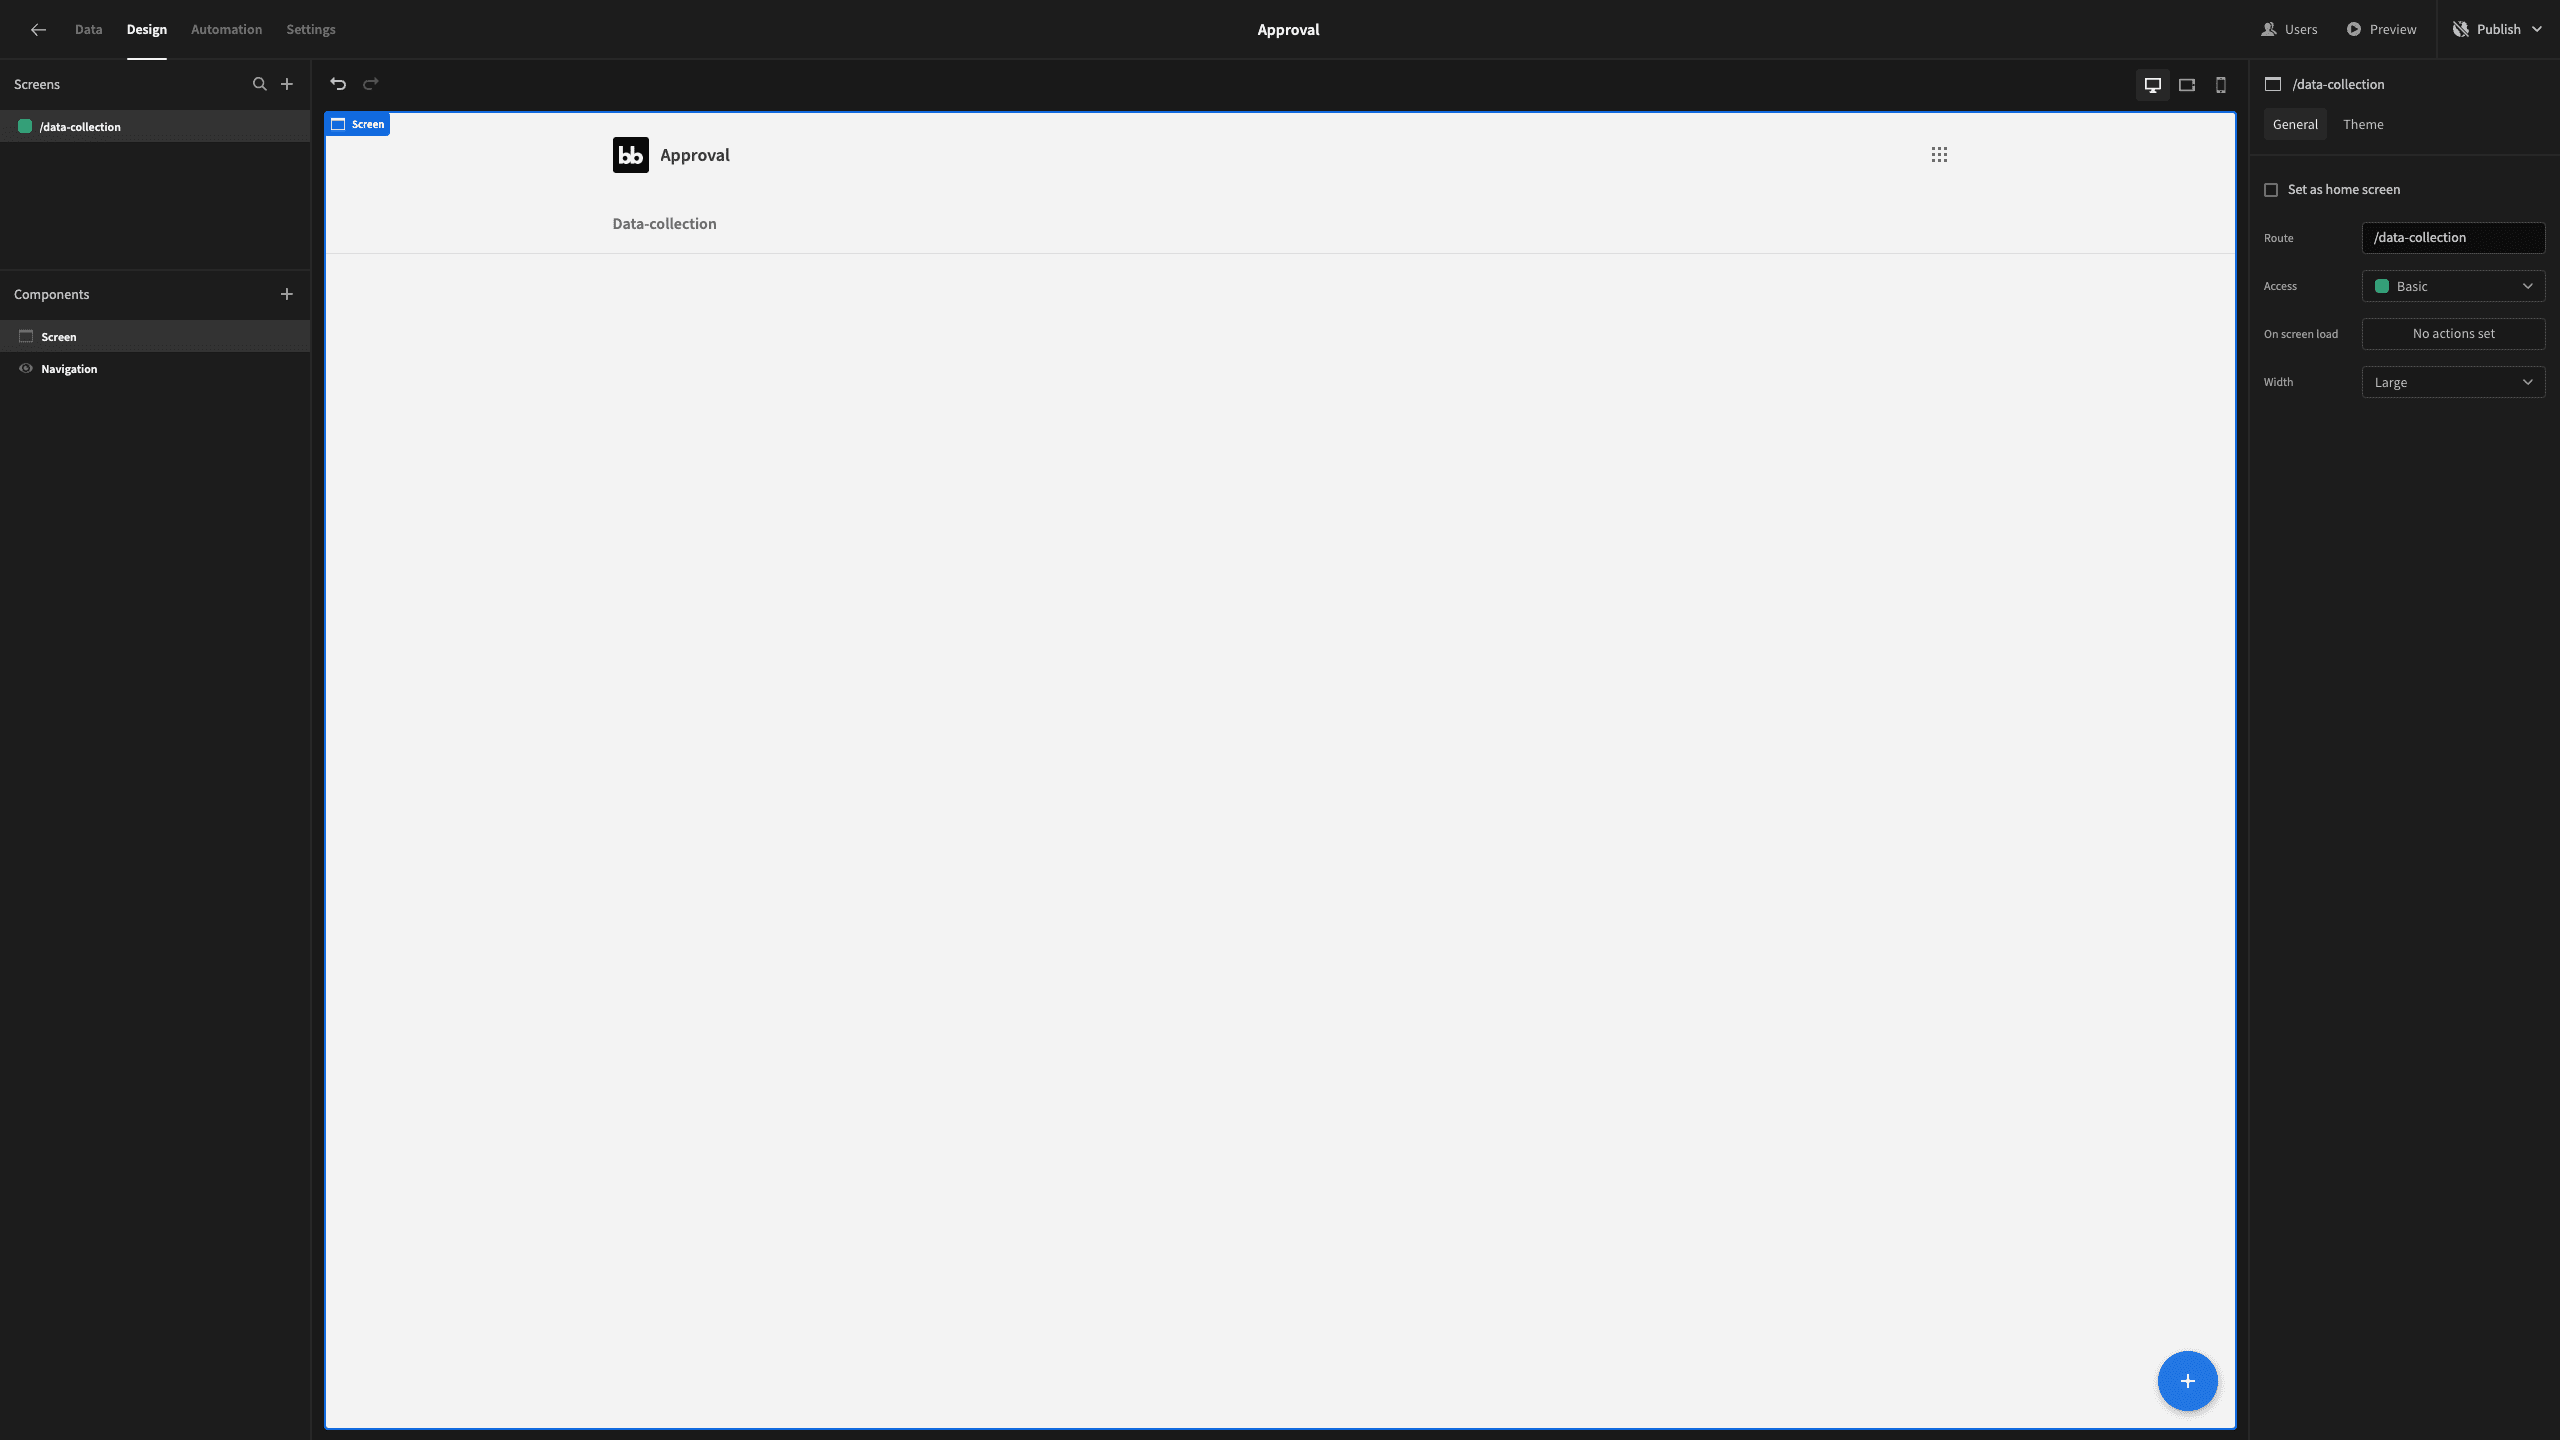
So, time to start adding some components.
First off, we need a form component. We also have the option of using a pre-built form block, but we want to build everything from scratch for a little bit more control.
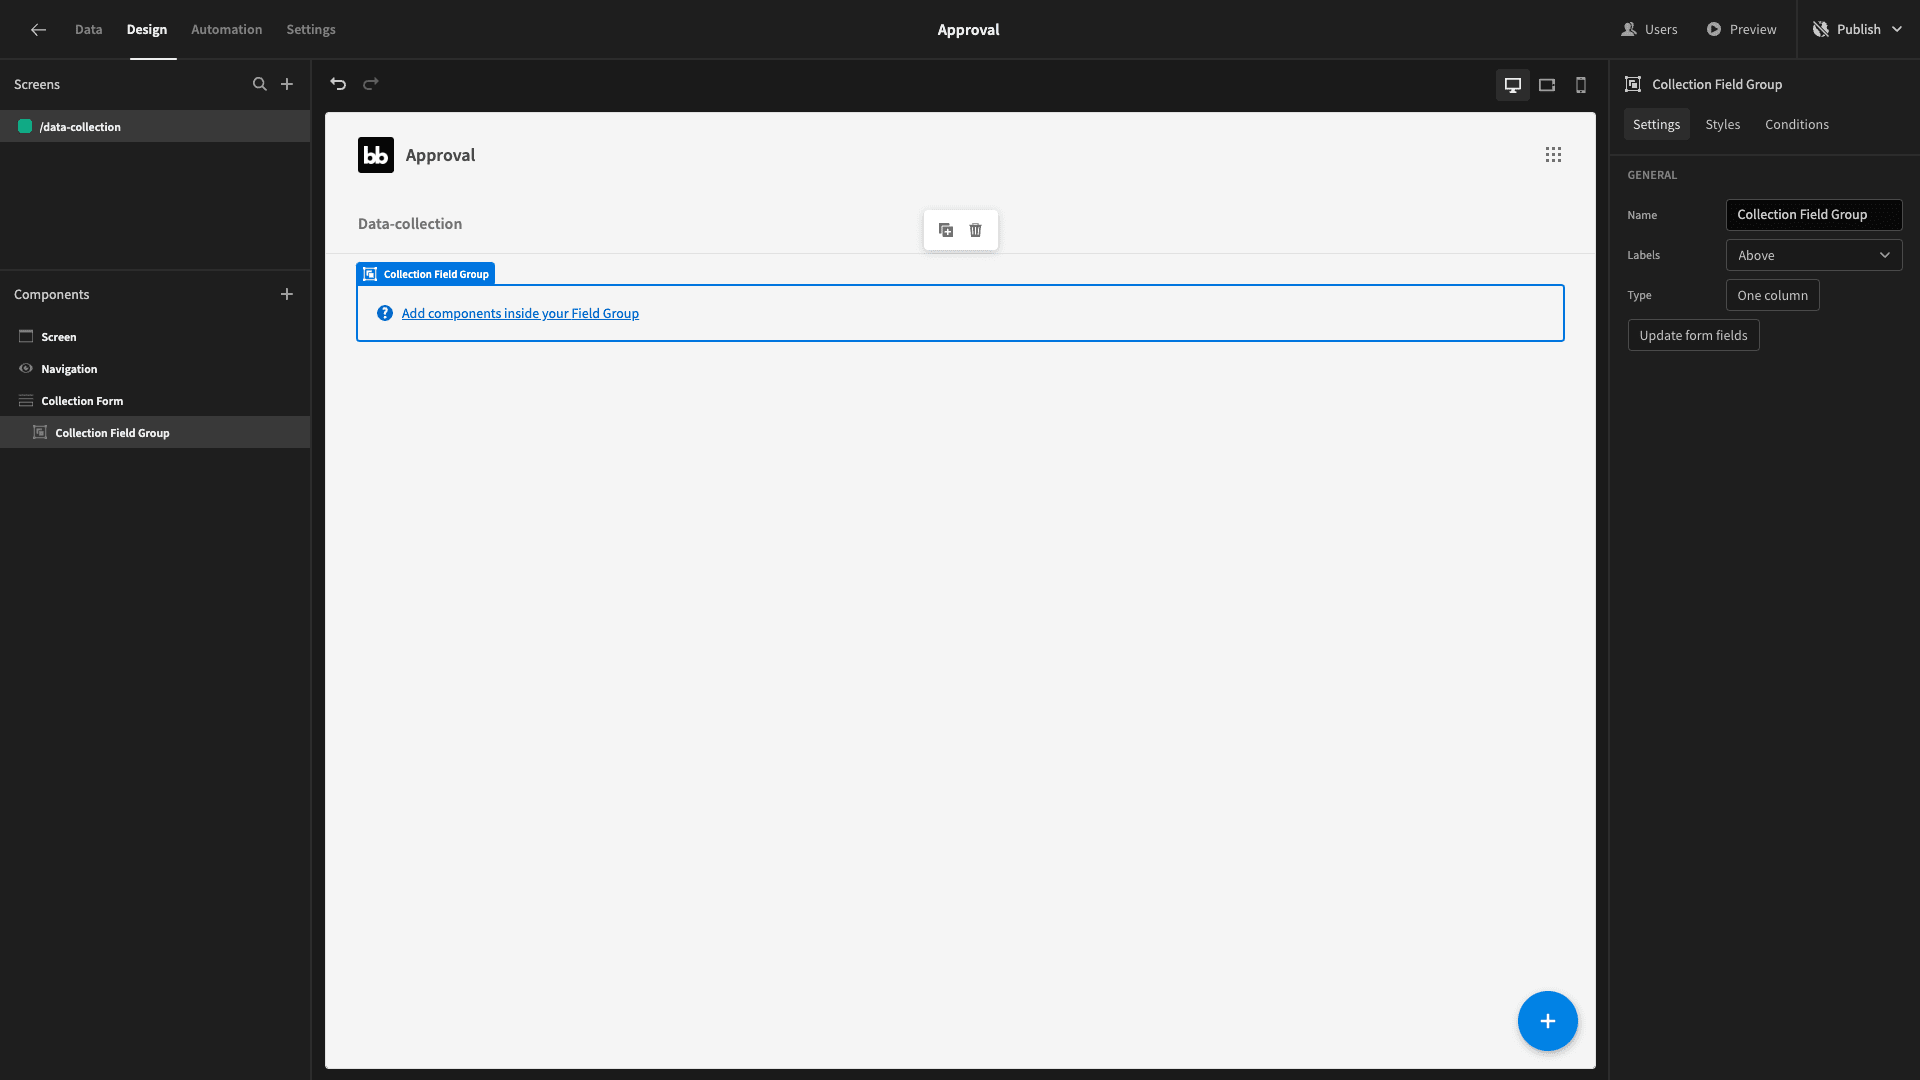
Hit the blue plus icon to add a component and select form. Inside this, we’ll place a field group.
Once we give each of these a name, we have:
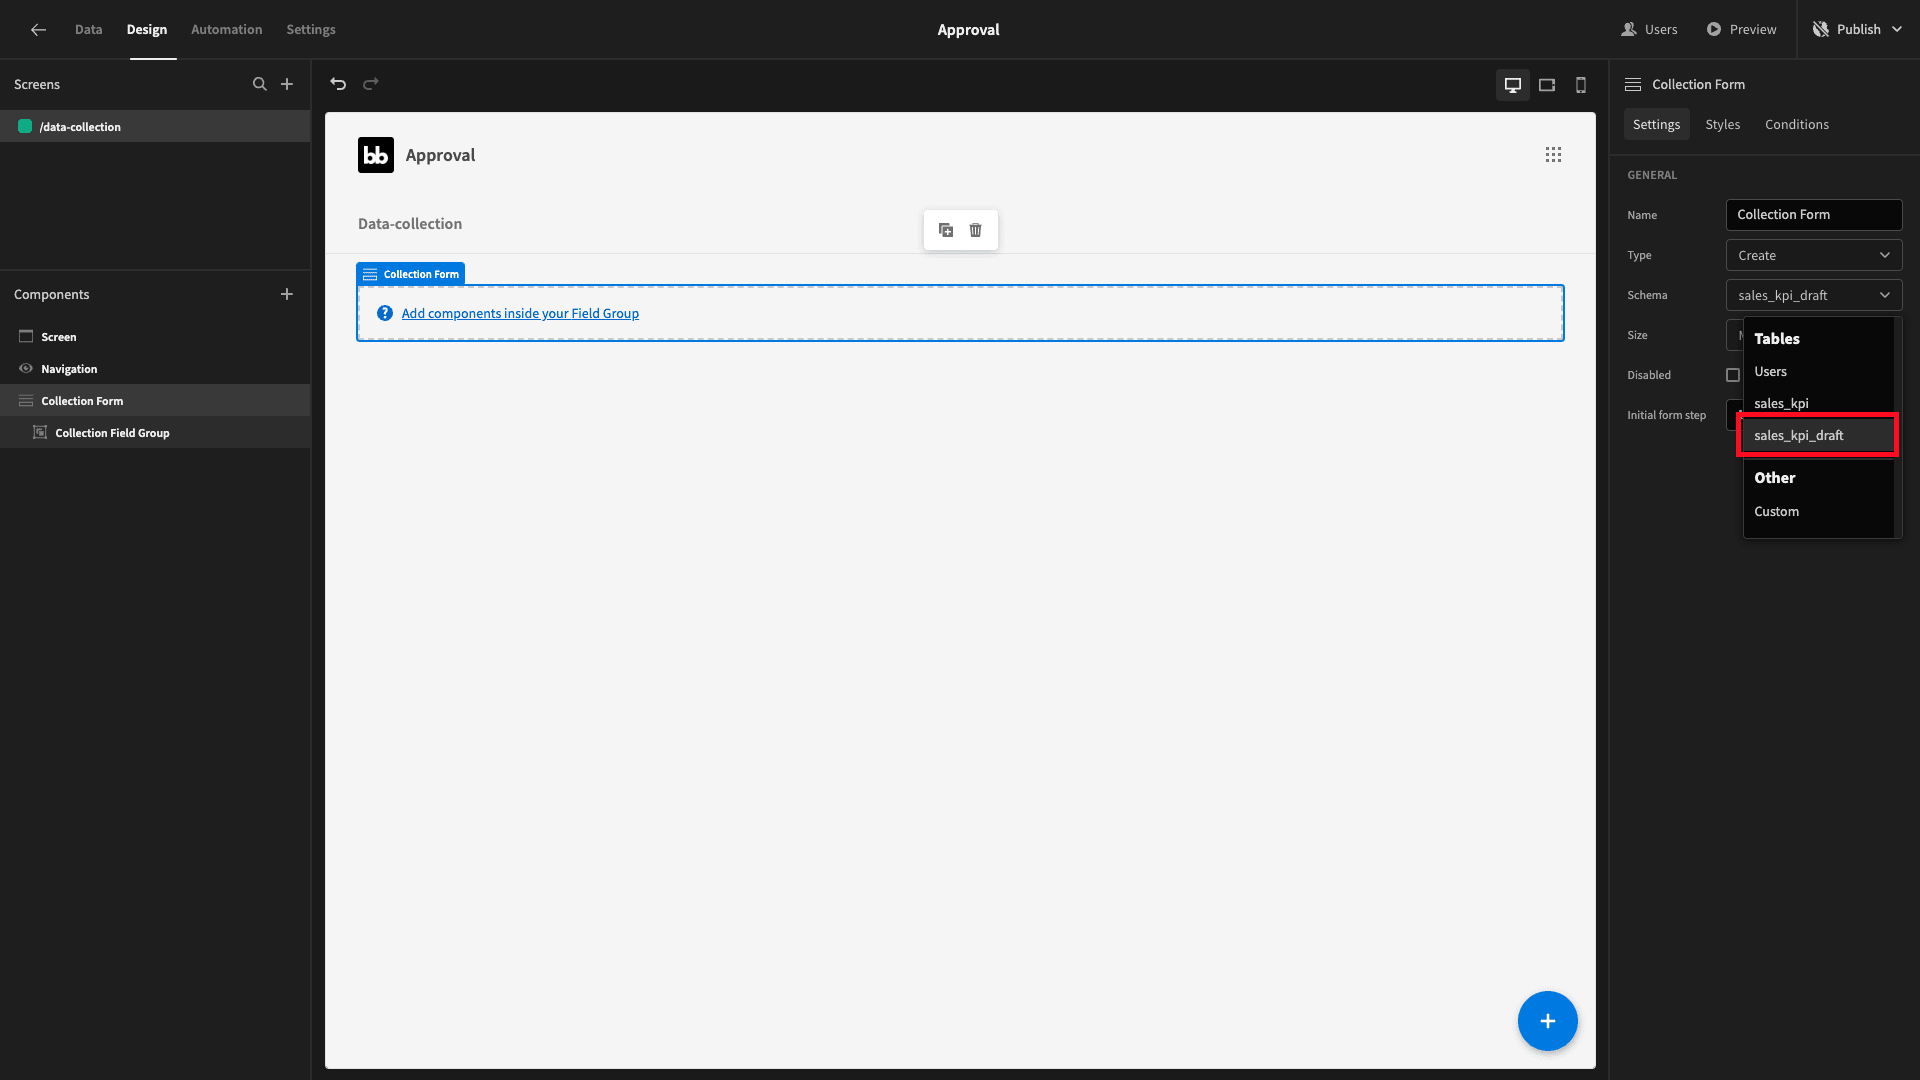
Next, we need to tell Budibase what data our form relates to and what it does.
So, select the form component again. Its type is already set to create, which is right because we’re going to use this for adding new records. We want to add its schema to our sale_kpi_draft_ table:
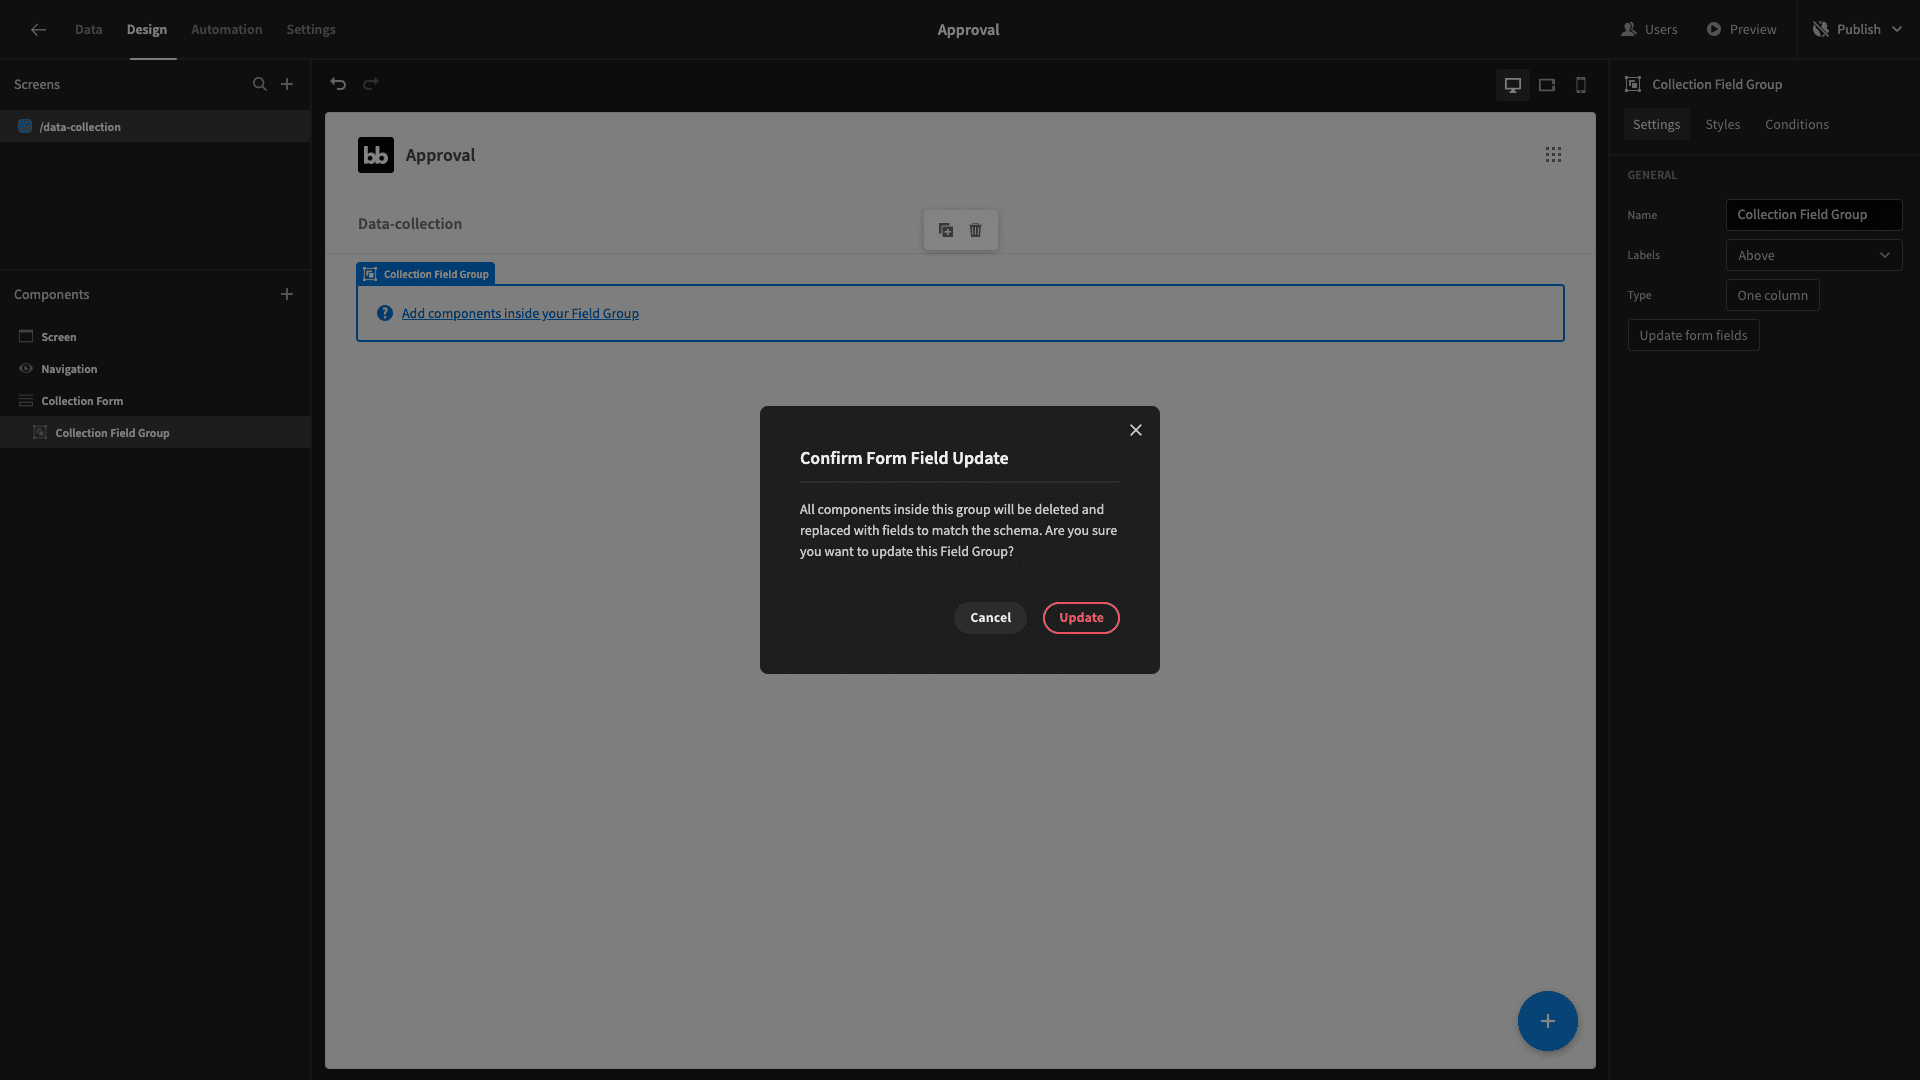
Now, we can simply hit Update form fields on the right-hand sidebar when we have our field group selected.
We’ll see a warning message that says doing this will delete any existing components inside our field group. We don’t need to worry about that though, since it’s empty.
Now we have an appropriate form field for each of the attributes stored in our table:
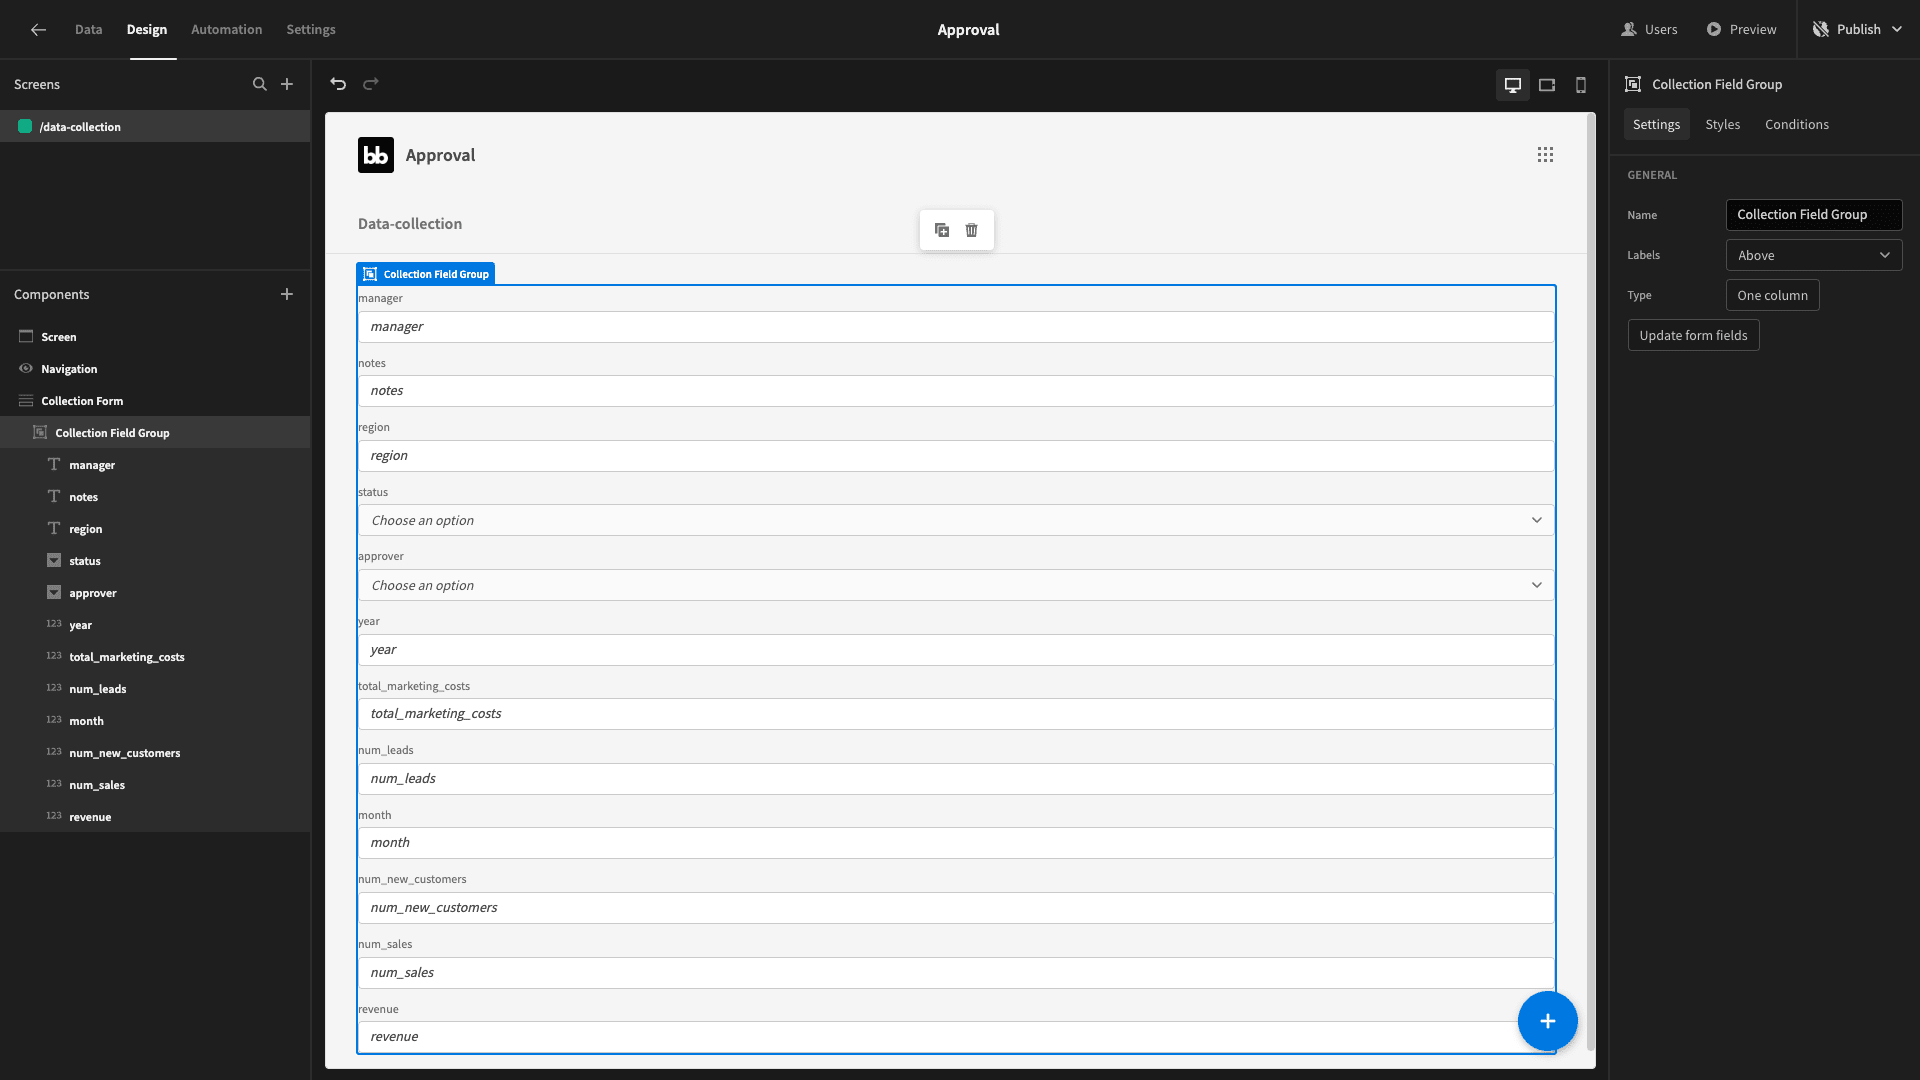
This is viable, but it’s not quite how we’d like it to look for a finished product. We’re going to make a couple of changes to tidy things up a bit.
First of all, the month attribute is stored in our database as a number. This is good because it will make doing calculations and data visualization easier when we come to building a dashboard.
However, from a UX experience, it’s not quite ideal. In short, asking users to type in the numeric month is asking for trouble, so we’d rather give them a drop-down of options to choose from.
So, we’ll start by selecting the existing numeric field for the month attribute - and hitting delete.
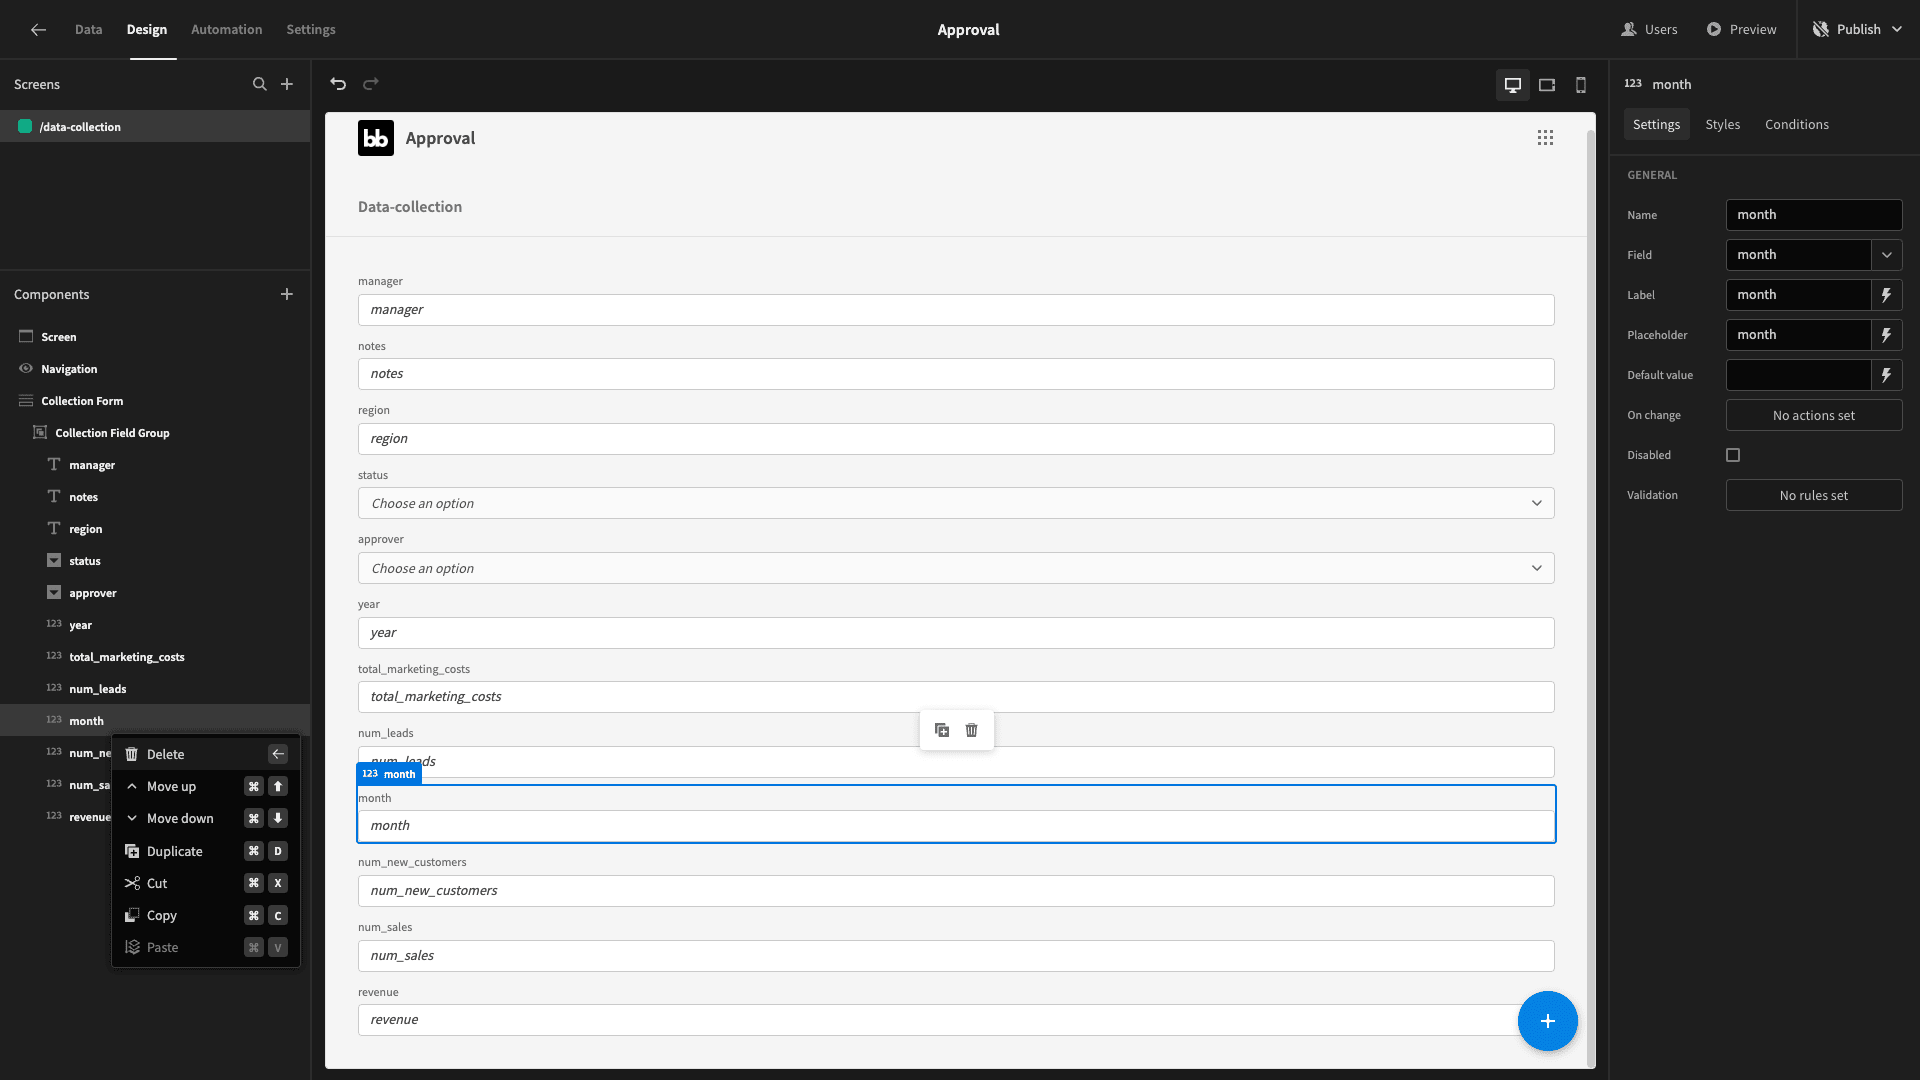
We’ll replace this with an options picker component.
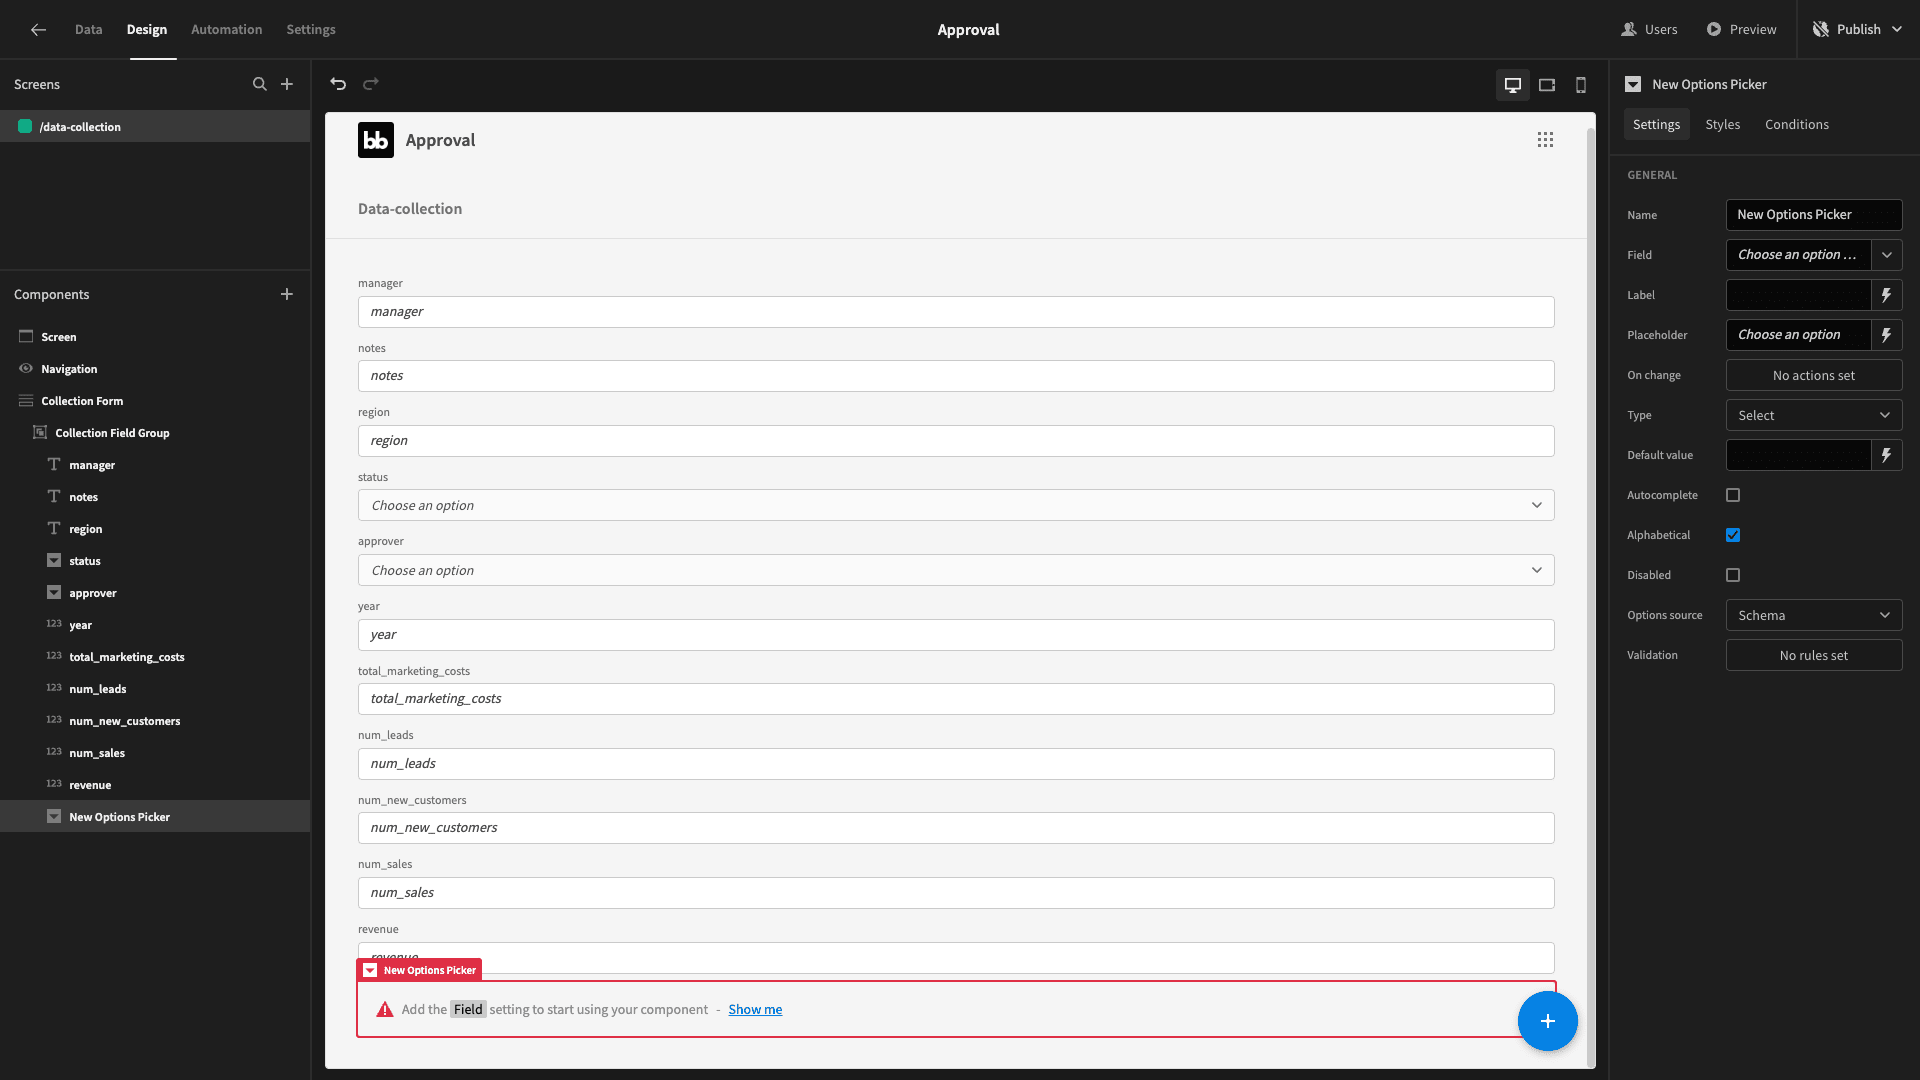
We’ve got a few options we need to configure here to get this working properly. We’ll start by giving it a better name to stop things from getting confusing.
We’ll set the field to month and the schema to custom. Then we’ll hit the define options button:
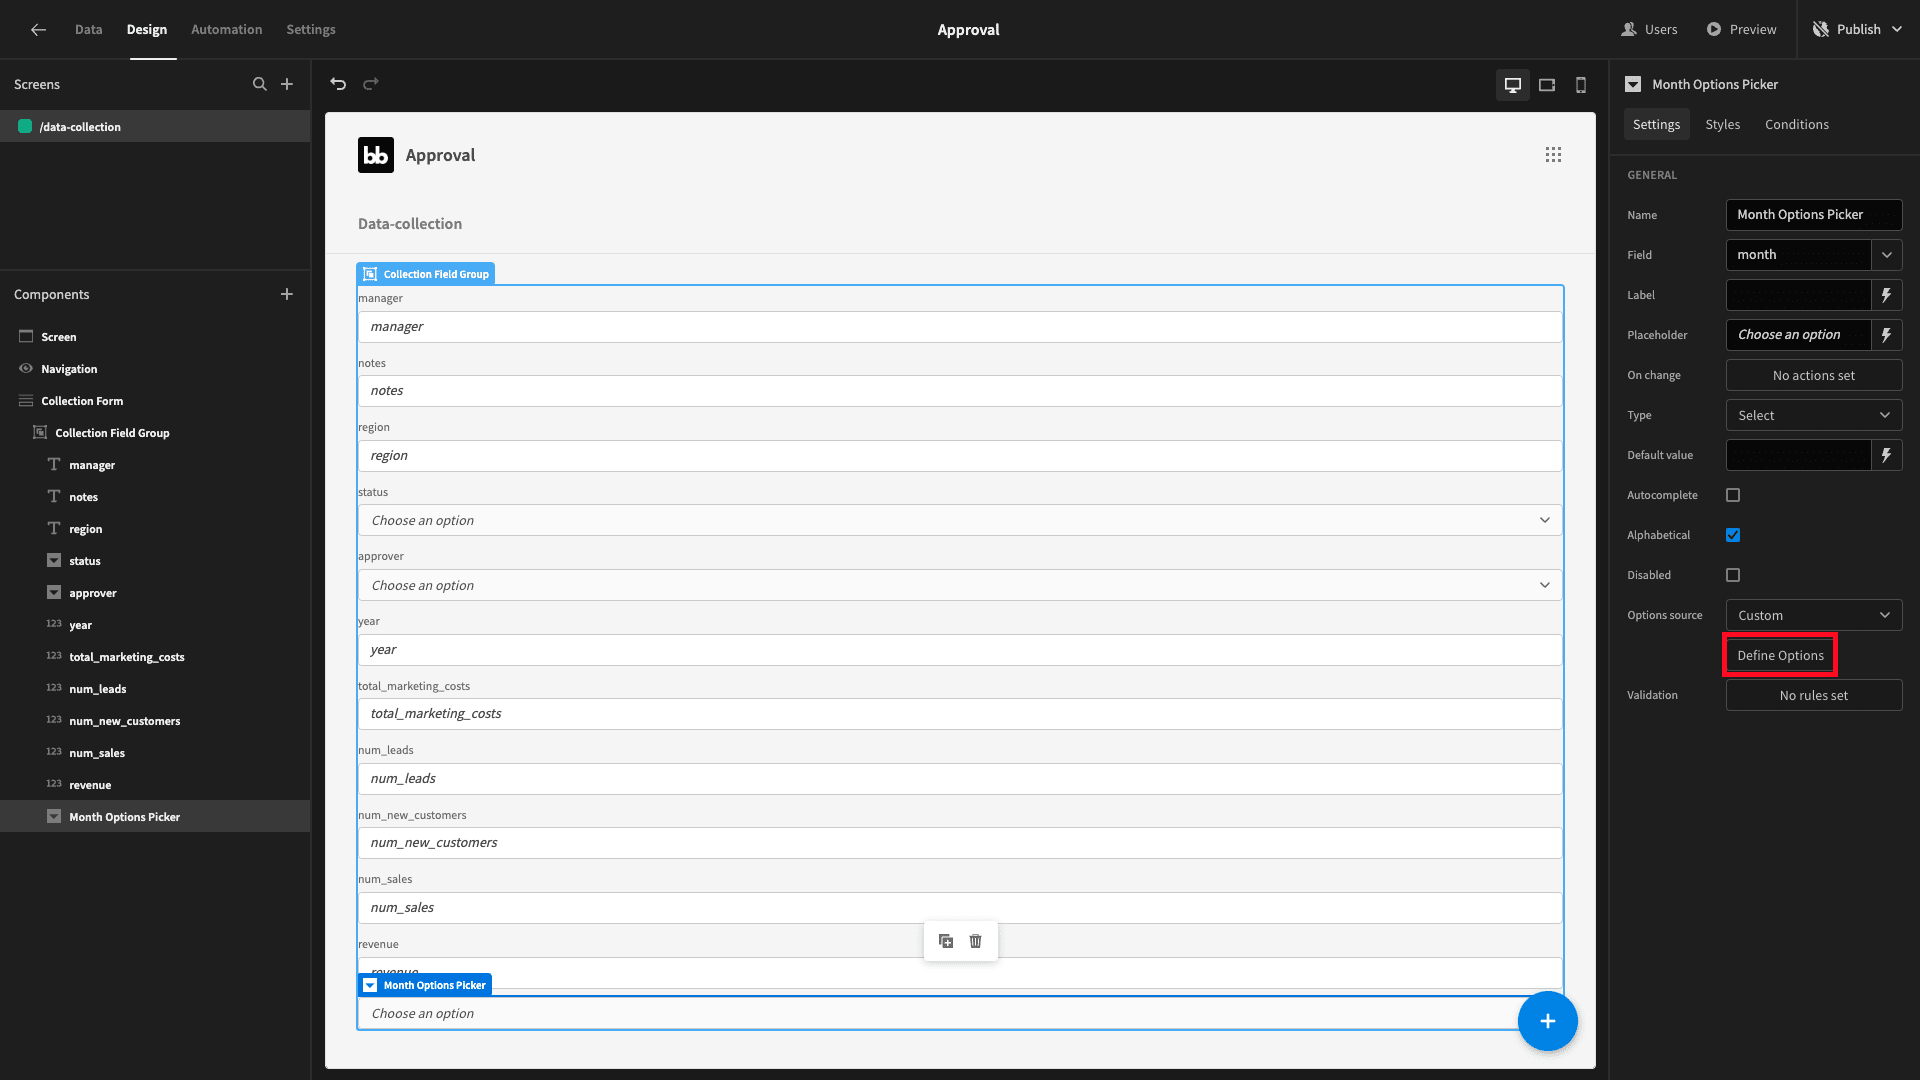
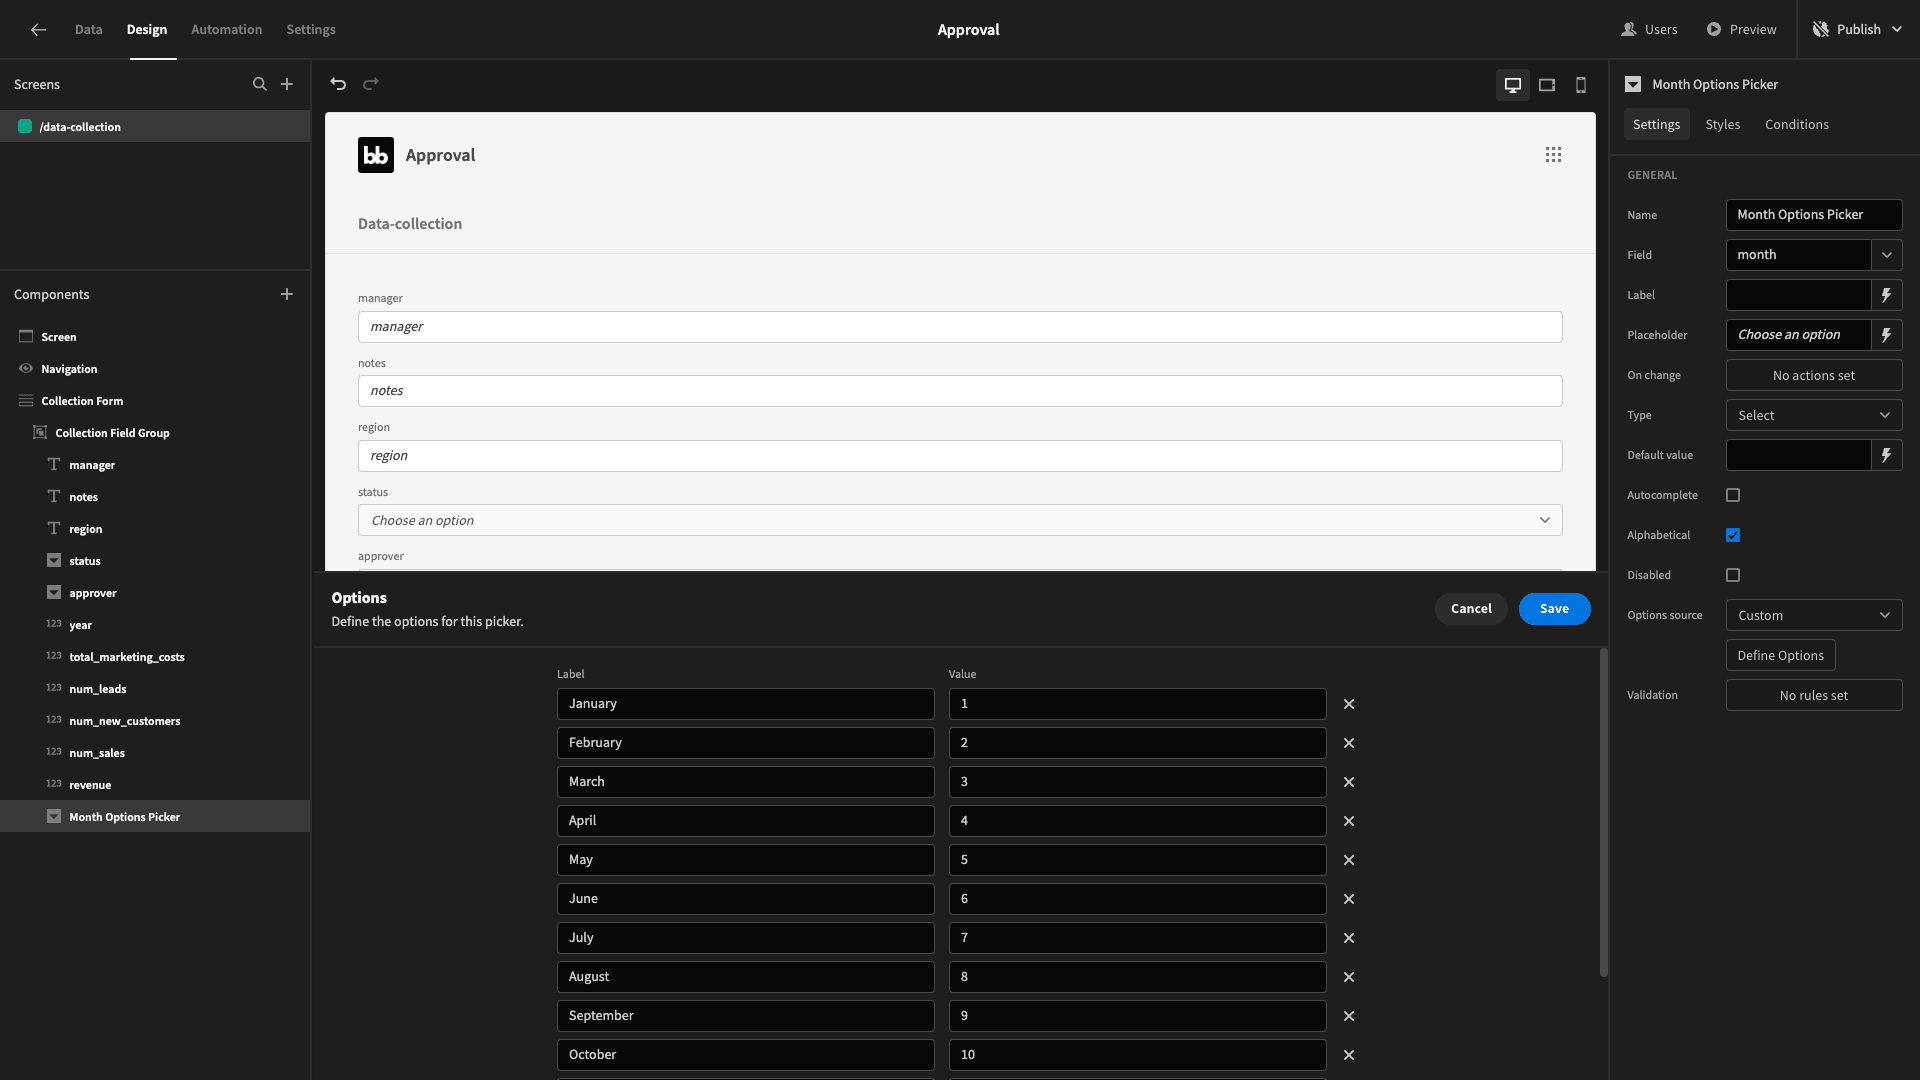
This will open a drawer where we can set labels and values for our options. The label is what’s displayed to users and the value is what’s saved in the database when an option is selected.
We want to use the full names of the months for the labels and their respective numeric values for their values, like so:
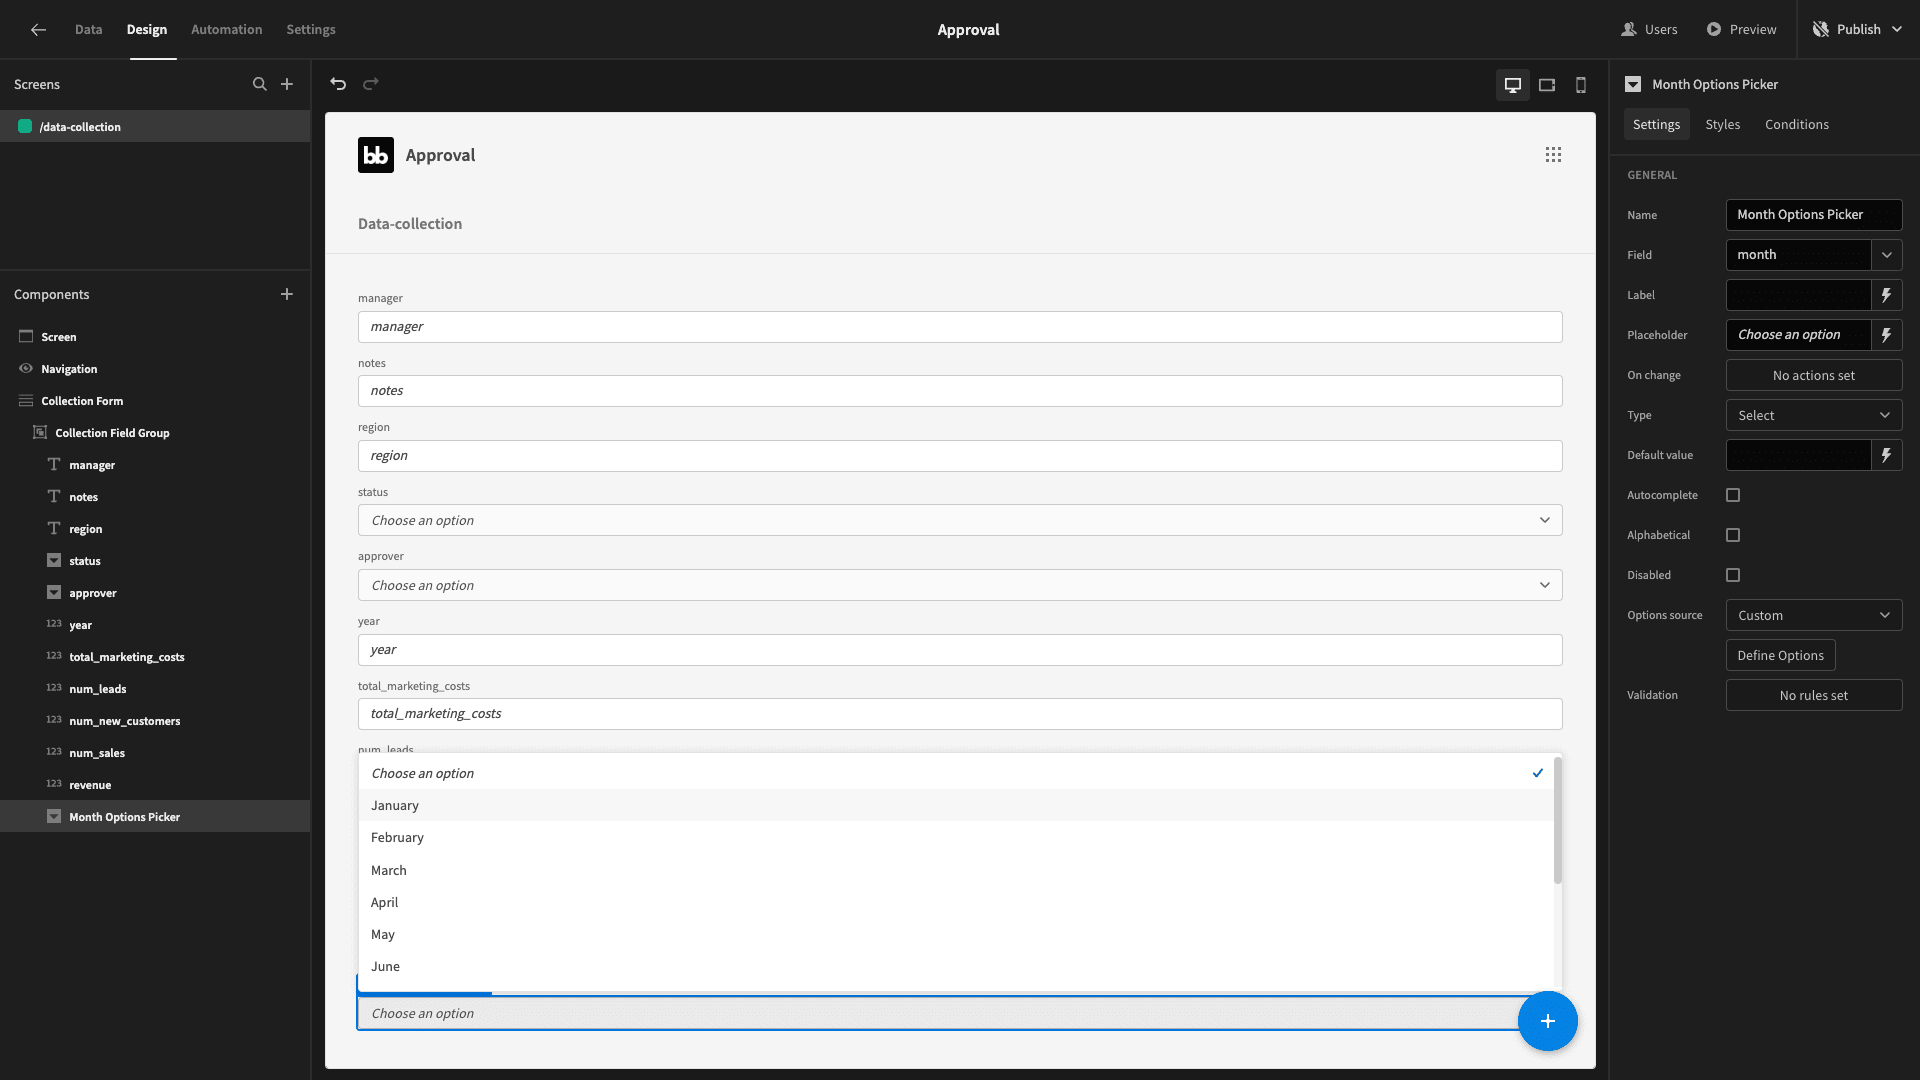
Hit save and now we have a much nicer UX for selecting the month:
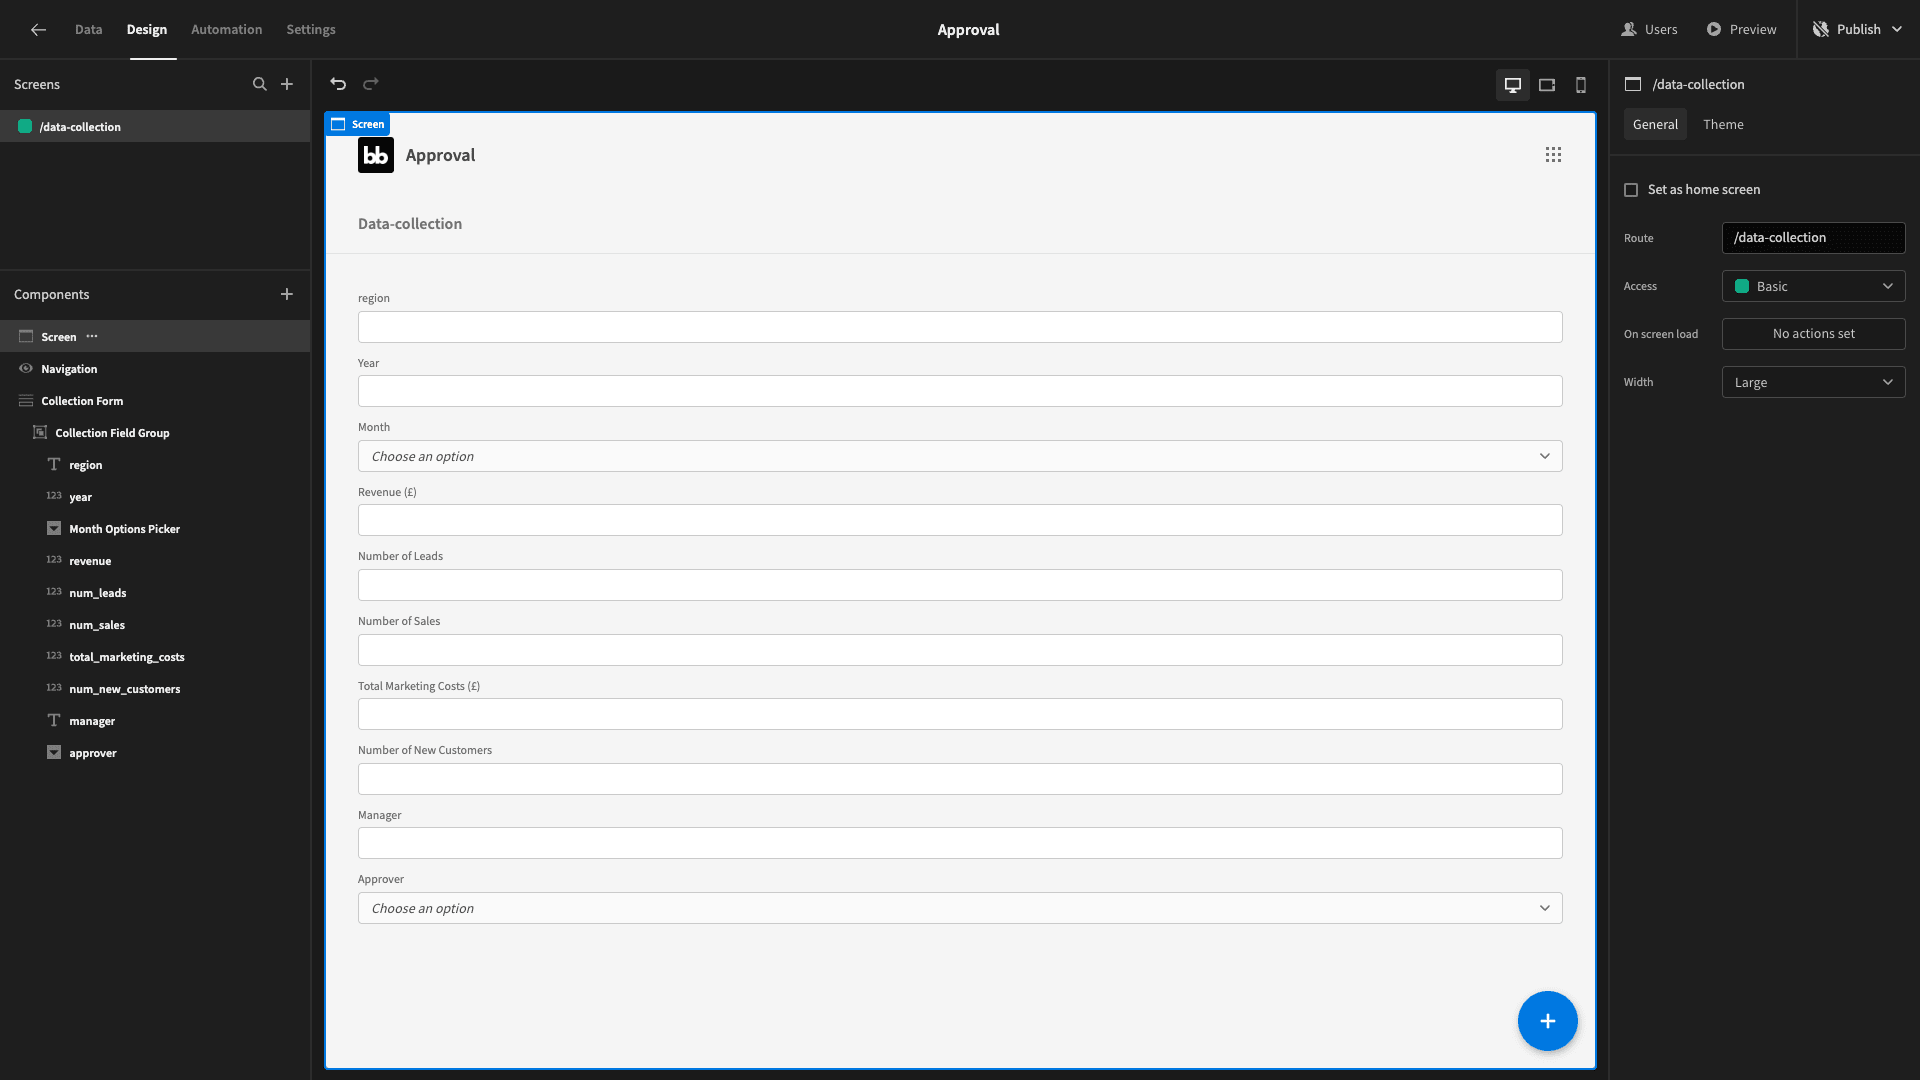
Next, we’re simply going to tidy our form up a bit. Basically, we’re going to use Budibase’s drag-and-drop UI to rearrange our fields, as well as editing their labels to look more professional.
While we’re doing this, we’ll delete the notes and status fields, because we don’t want users to be able to set these for new entries.
We’ll set the status automatically in a second.
Now we have:
The manager attribute is the manager of the team whose region is submitting the report. This might be the same as the user who’s filling in the form, or it might not.
For instance, if the manager is away and they need to delegate this task to a deputy.
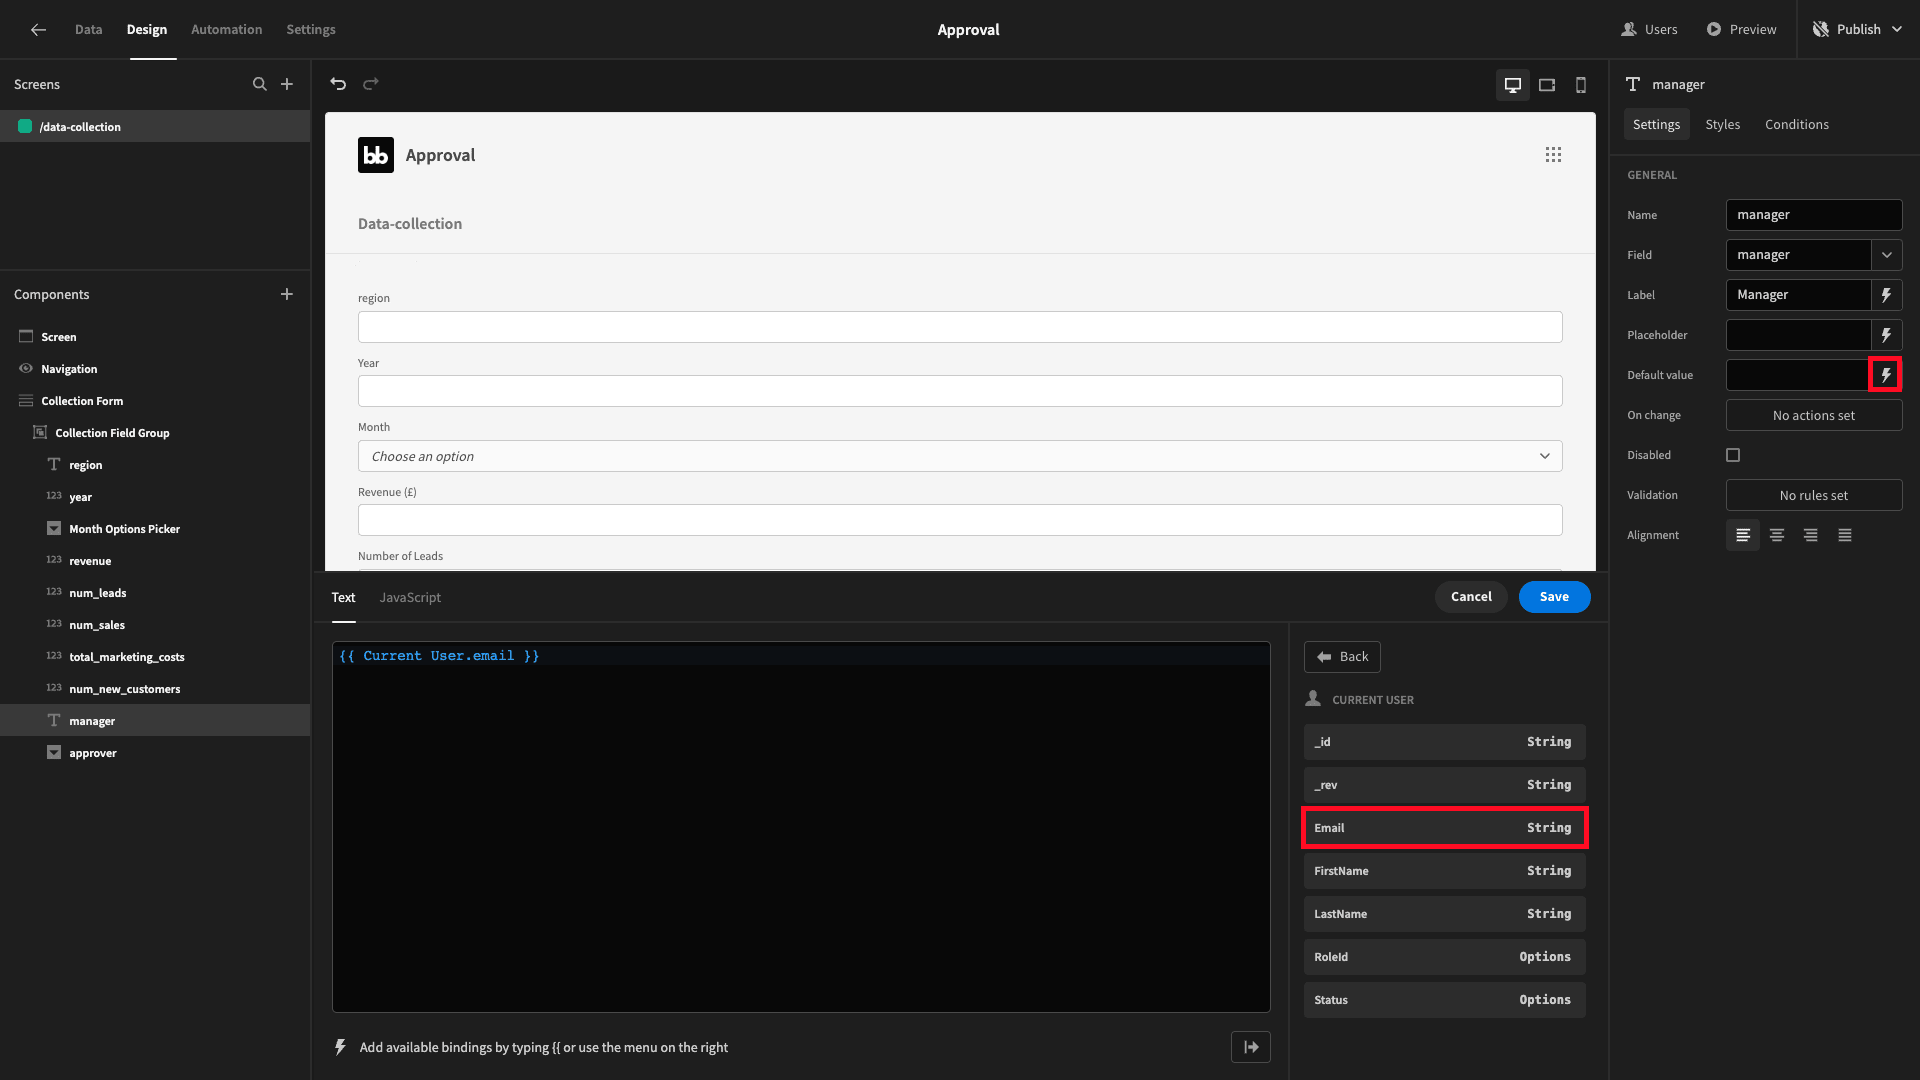
To reflect this fact, we’re going to set the current user’s email address as a default value for this form field.
Hit the lightning bolt beside the default value setting to access the bindings drawer. Then, under current user hit email.
That’s our form mostly finished. The last thing we need is some way for users to actually save their submissions.
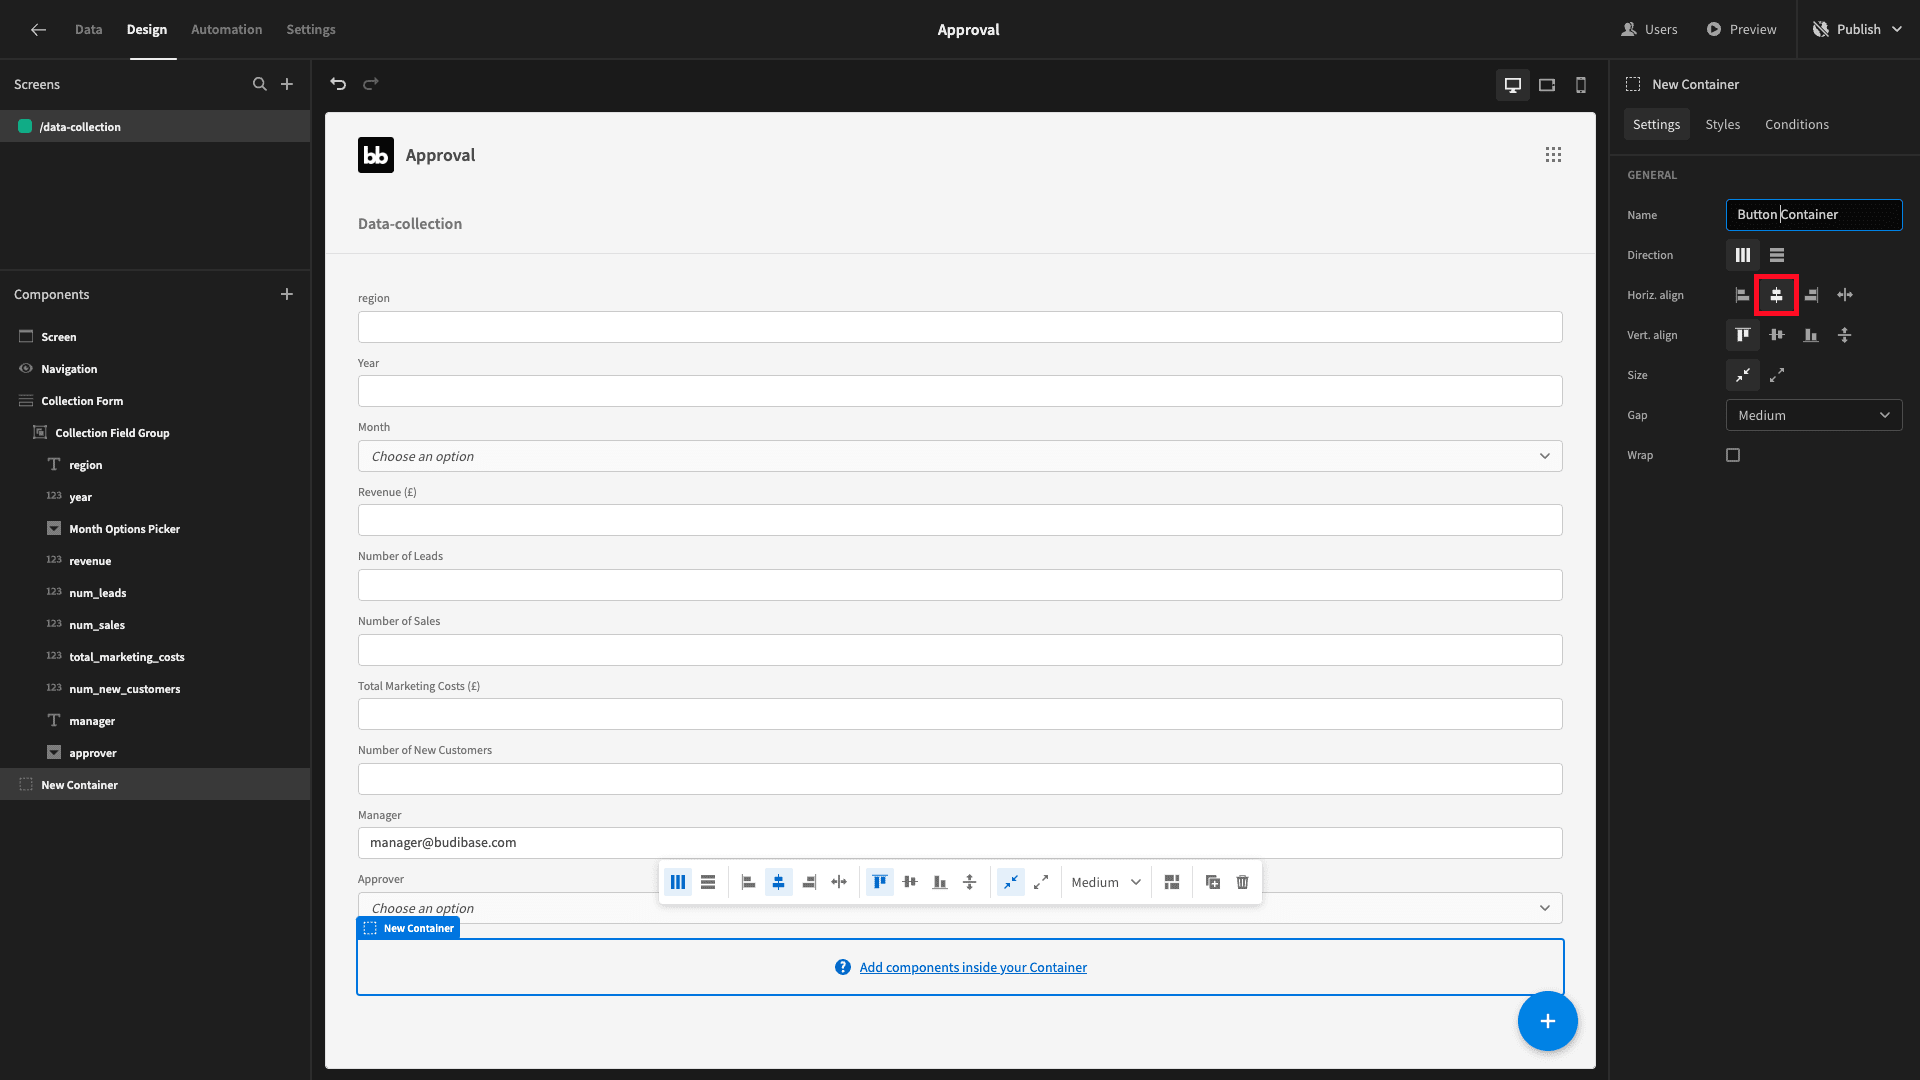
We’ll start by adding a container component, and setting it so that any components nested inside are horizontally centered:
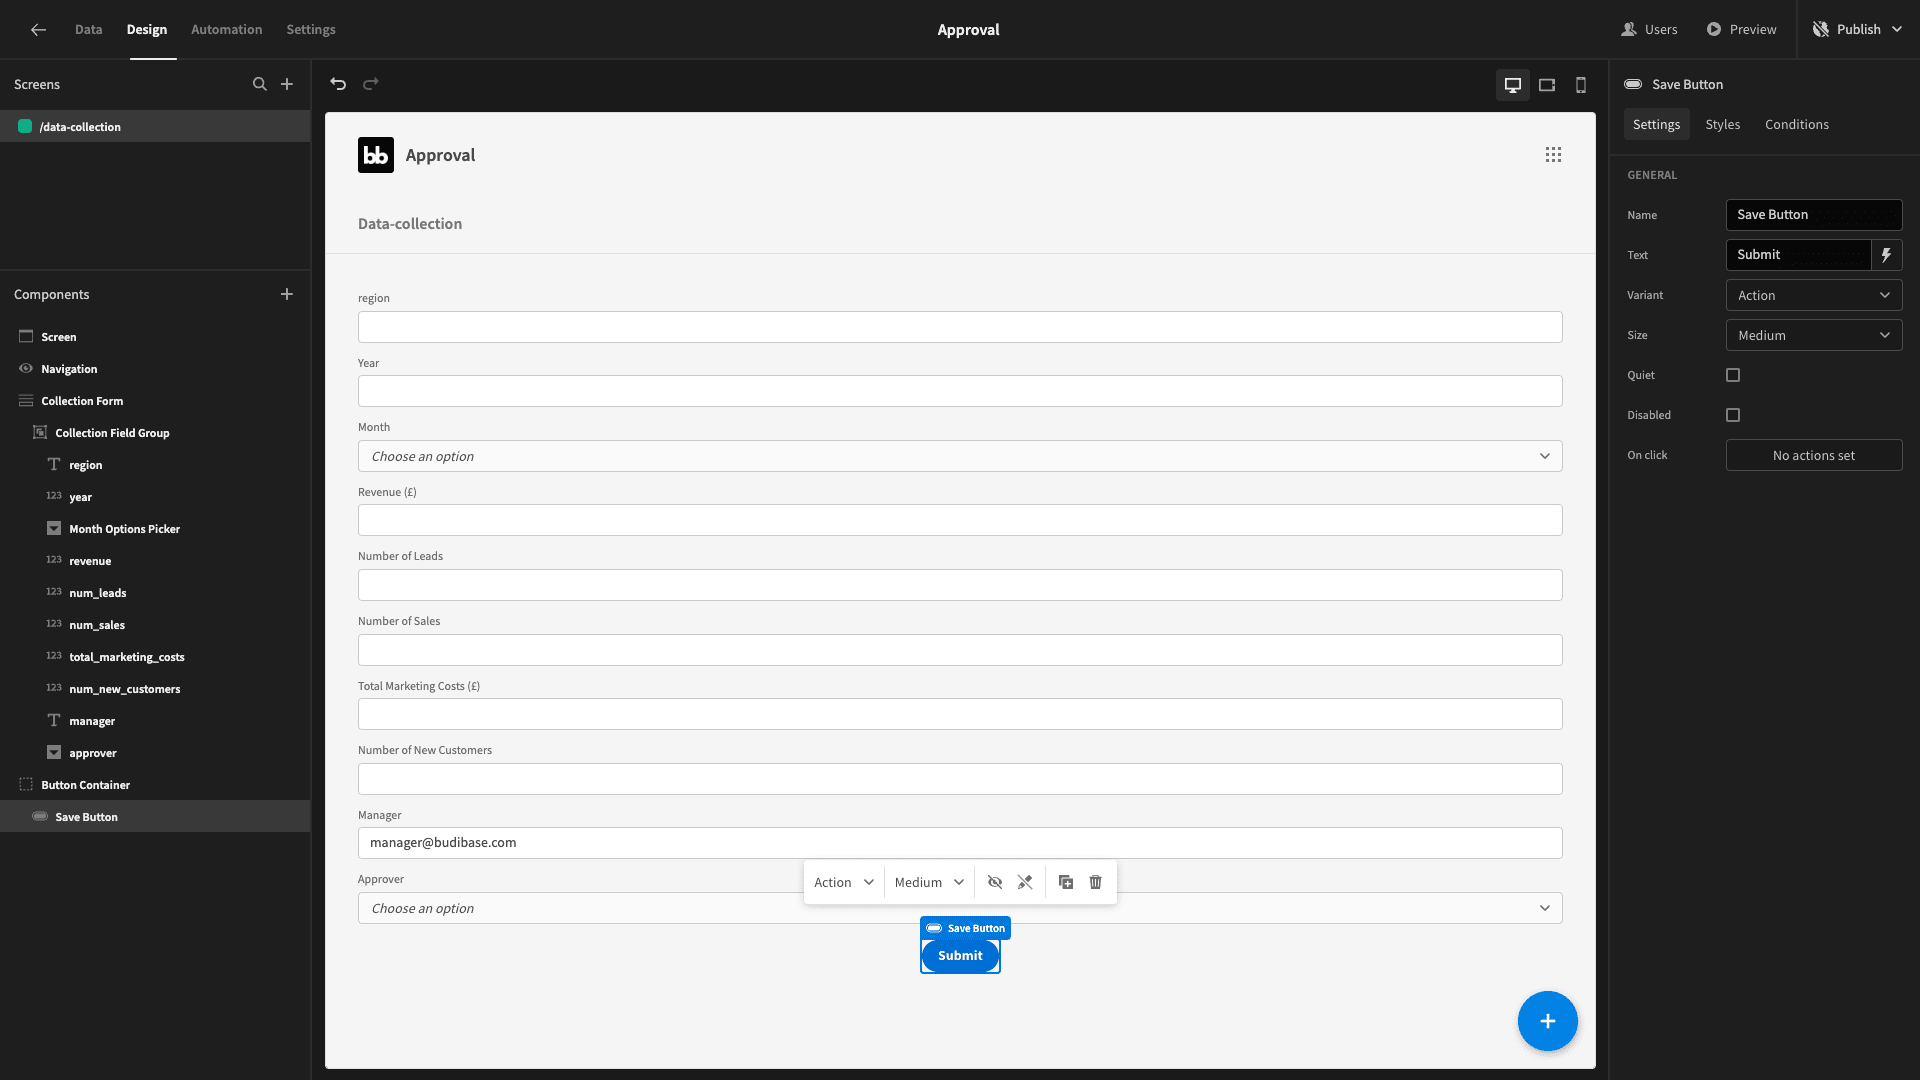
Inside, we’re going to place a button. We’ll set its variant to action and its text to Submit, giving us a nice clear CTA.
Lastly, we need to determine what’s going to happen when a user presses our submit button. We’ll open the on-click actions drawer and start by adding a save row action, pointed at our sales_kpi_draft table:
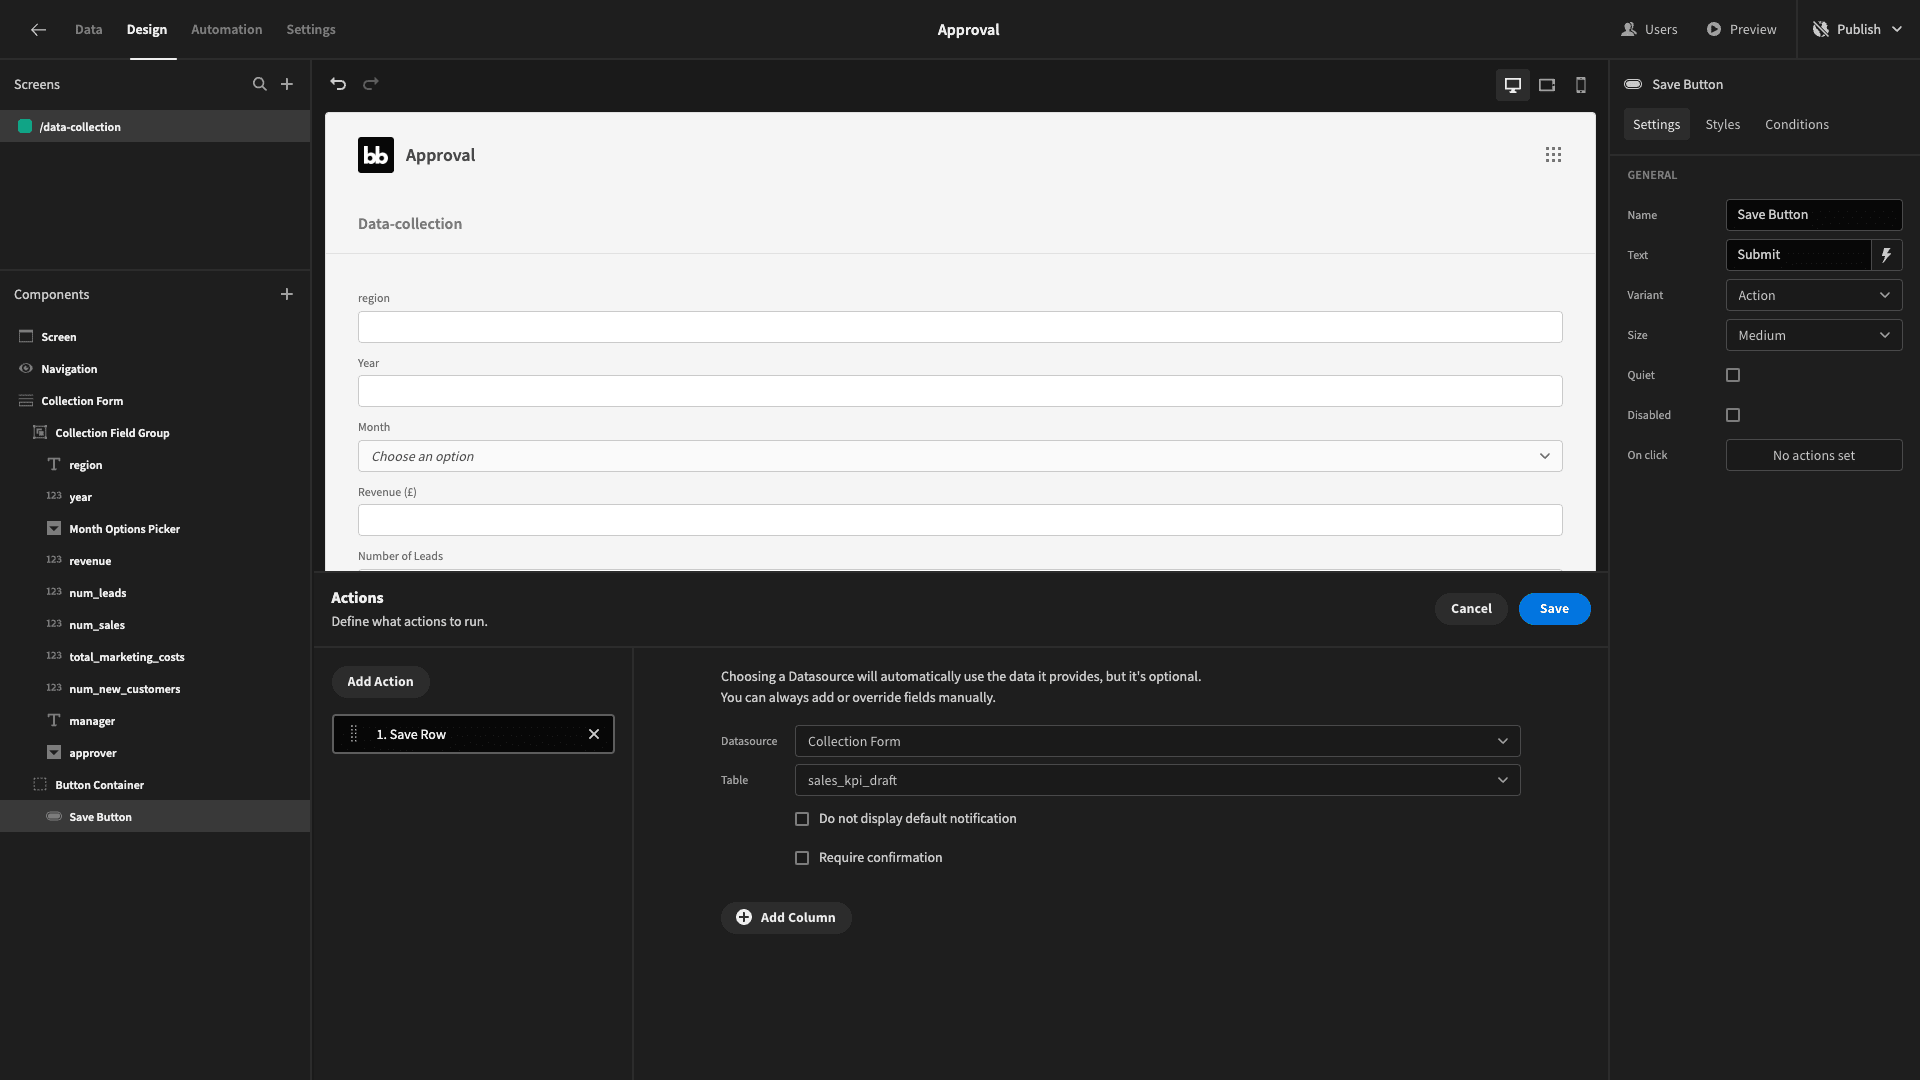
Note, make sure your button is nested inside your form component, or this won’t work.
We’re also going to hit add column to set an automatic value for the status attribute - so that all new submissions get the pending status.
Then, we’ll add a second action to clear our form.
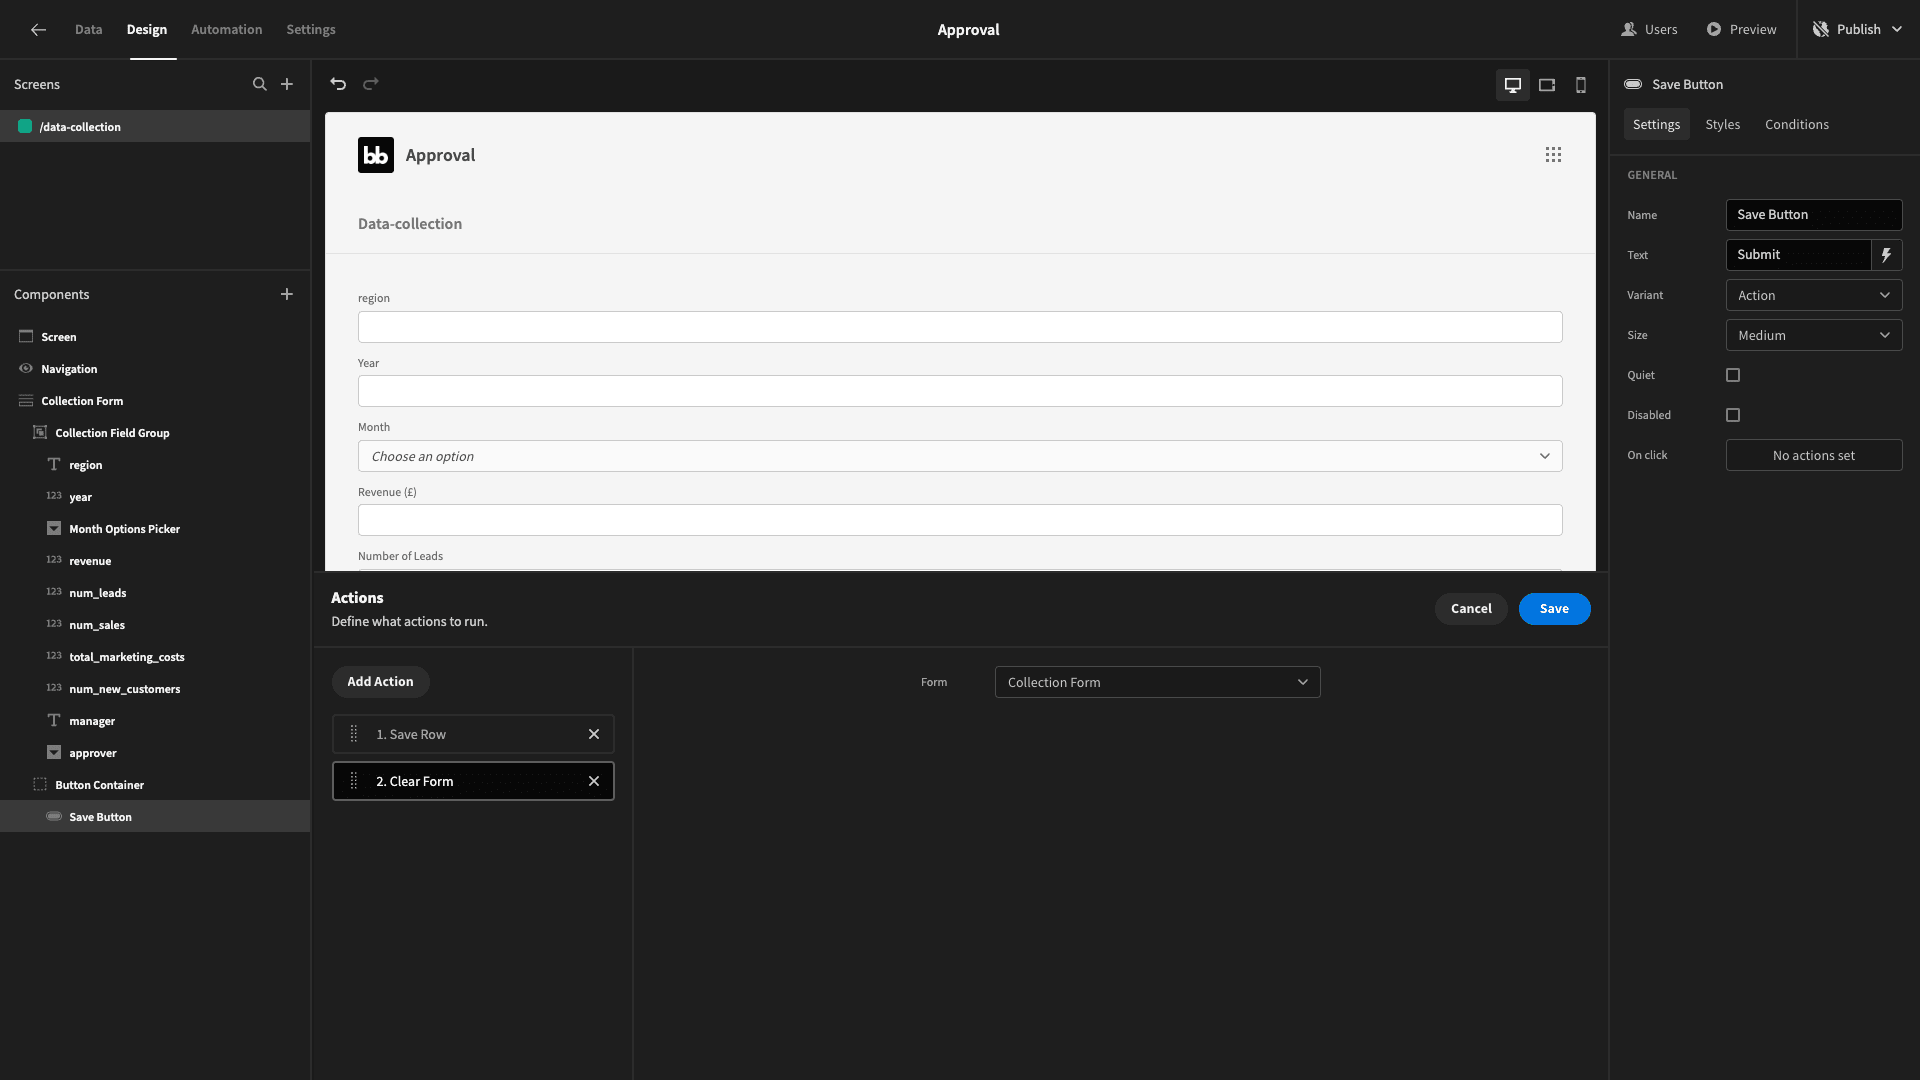
That way, users can add multiple submissions without having to navigate back and forth to our form.
Finally, head to the navigation panel and hit configure links. Here we can add a navigation item for users to get to this screen:
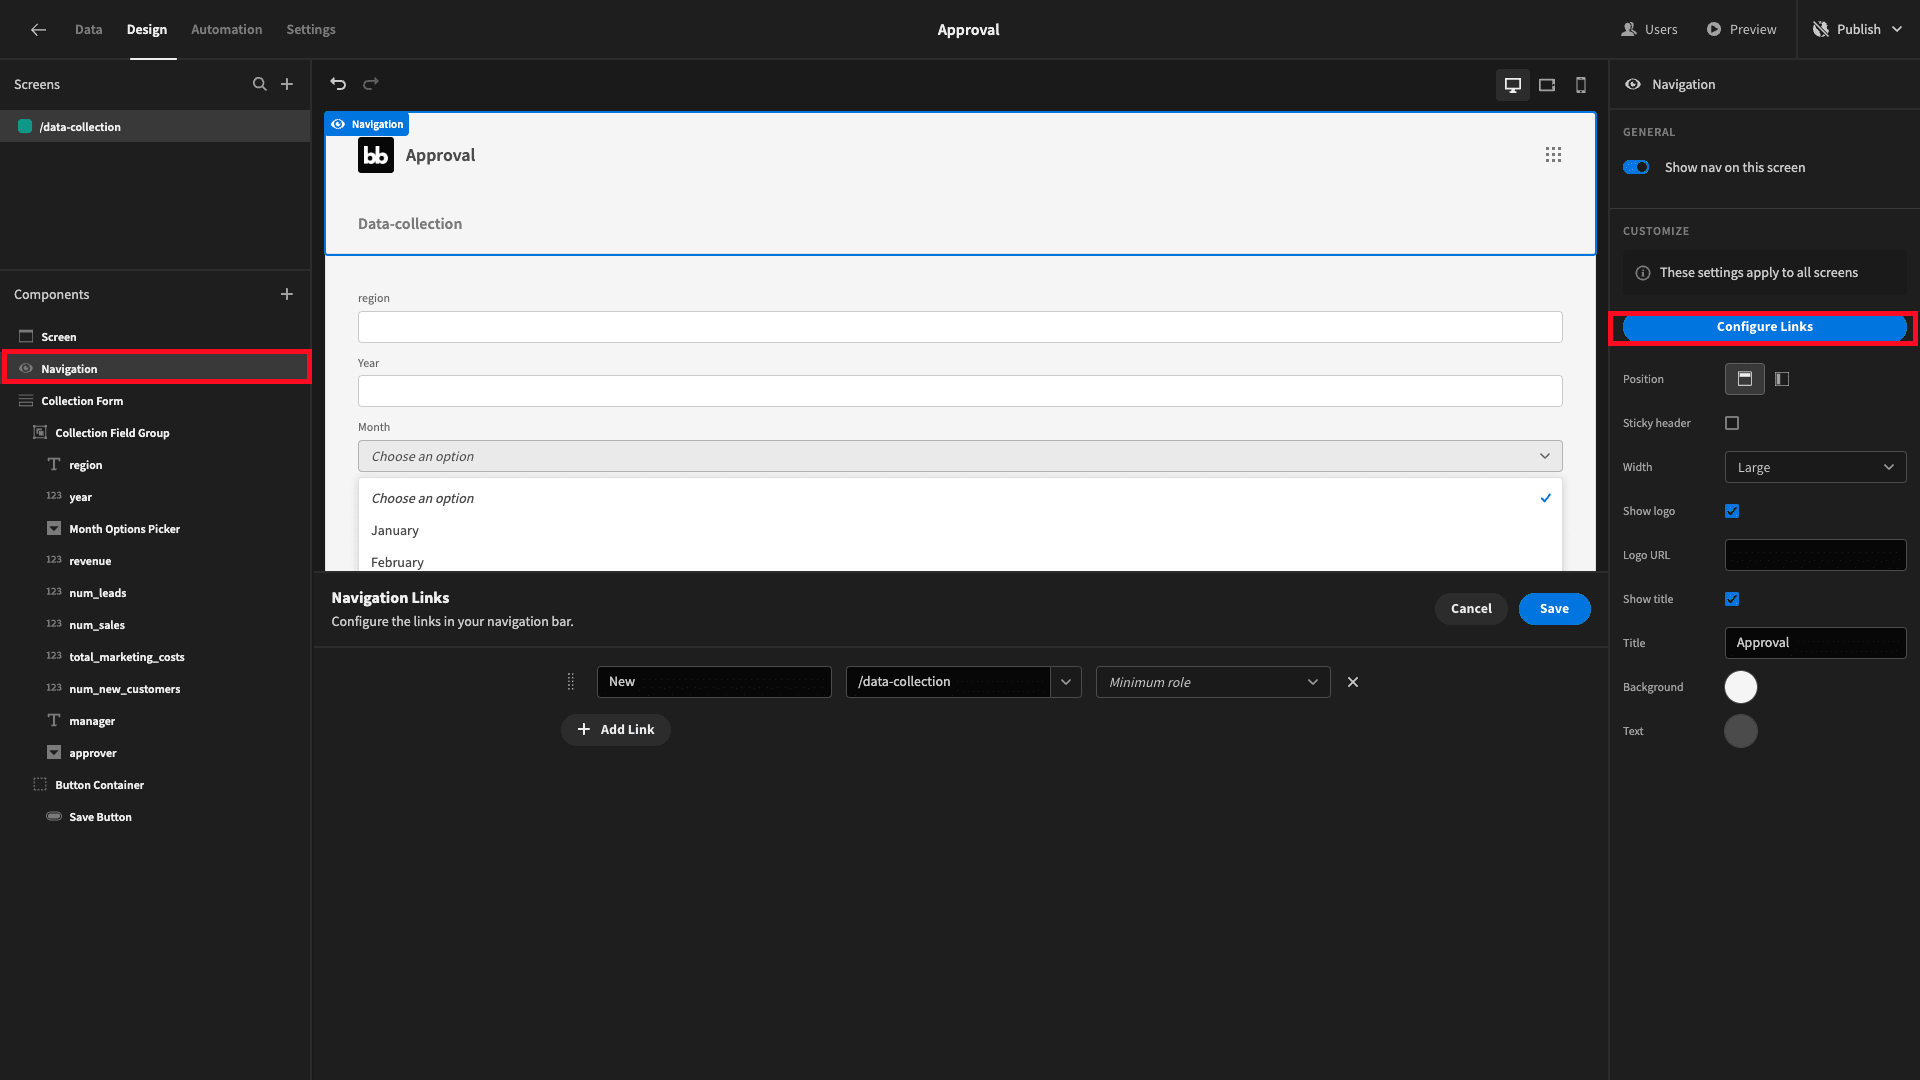
And that’s our form completed!
4. Add notification automation
Next, we can start building out our complex approval process a little bit more, using Budibase’s built-in automation editor.
We’re actually going to build two automation flows as representative examples, but you could add more to create more sophisticated rules for your approval app - depending on your own business logic.
The first one we’re going to build is a flow for sending notifications to responsible employees when a new submission needs their attention. So, a regional manager submits report data - we want to tell head office to go and check it out.
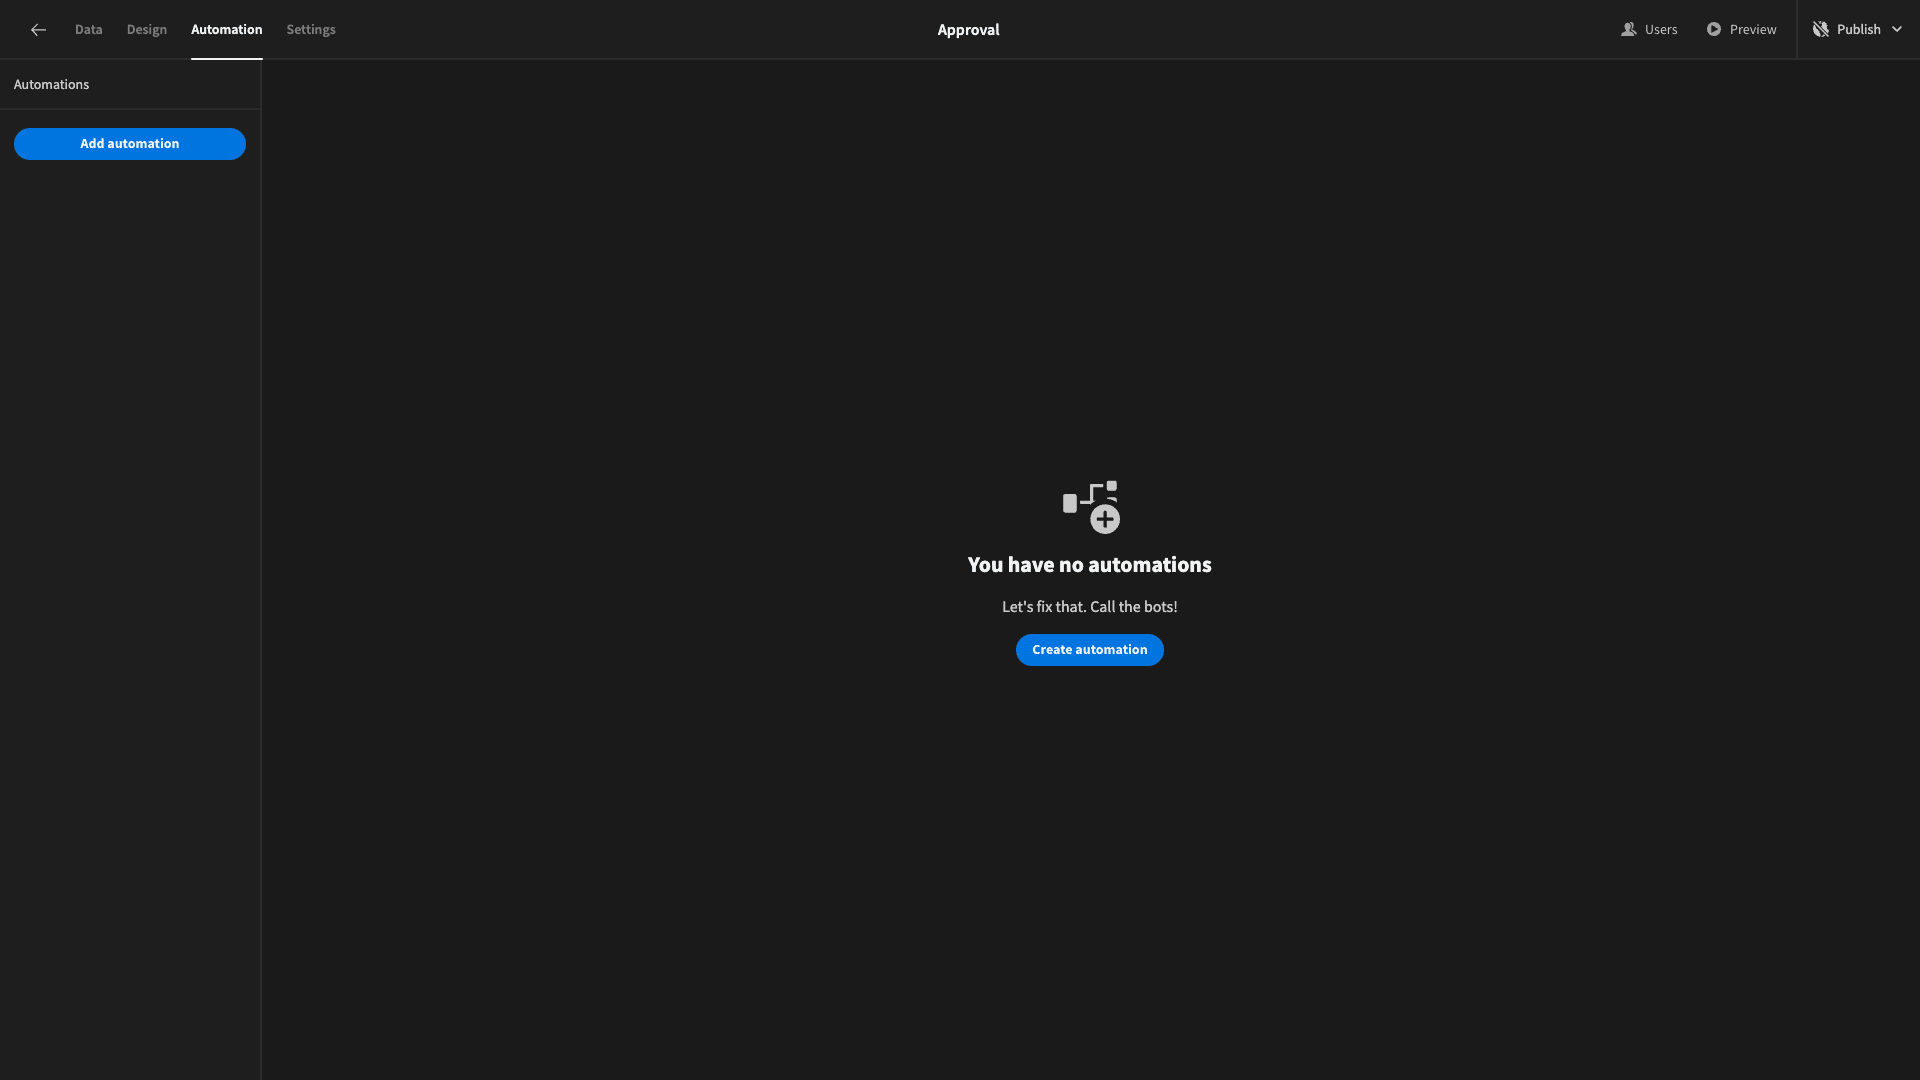
Start by heading to Budibase’s Automation tab and hit create automation:
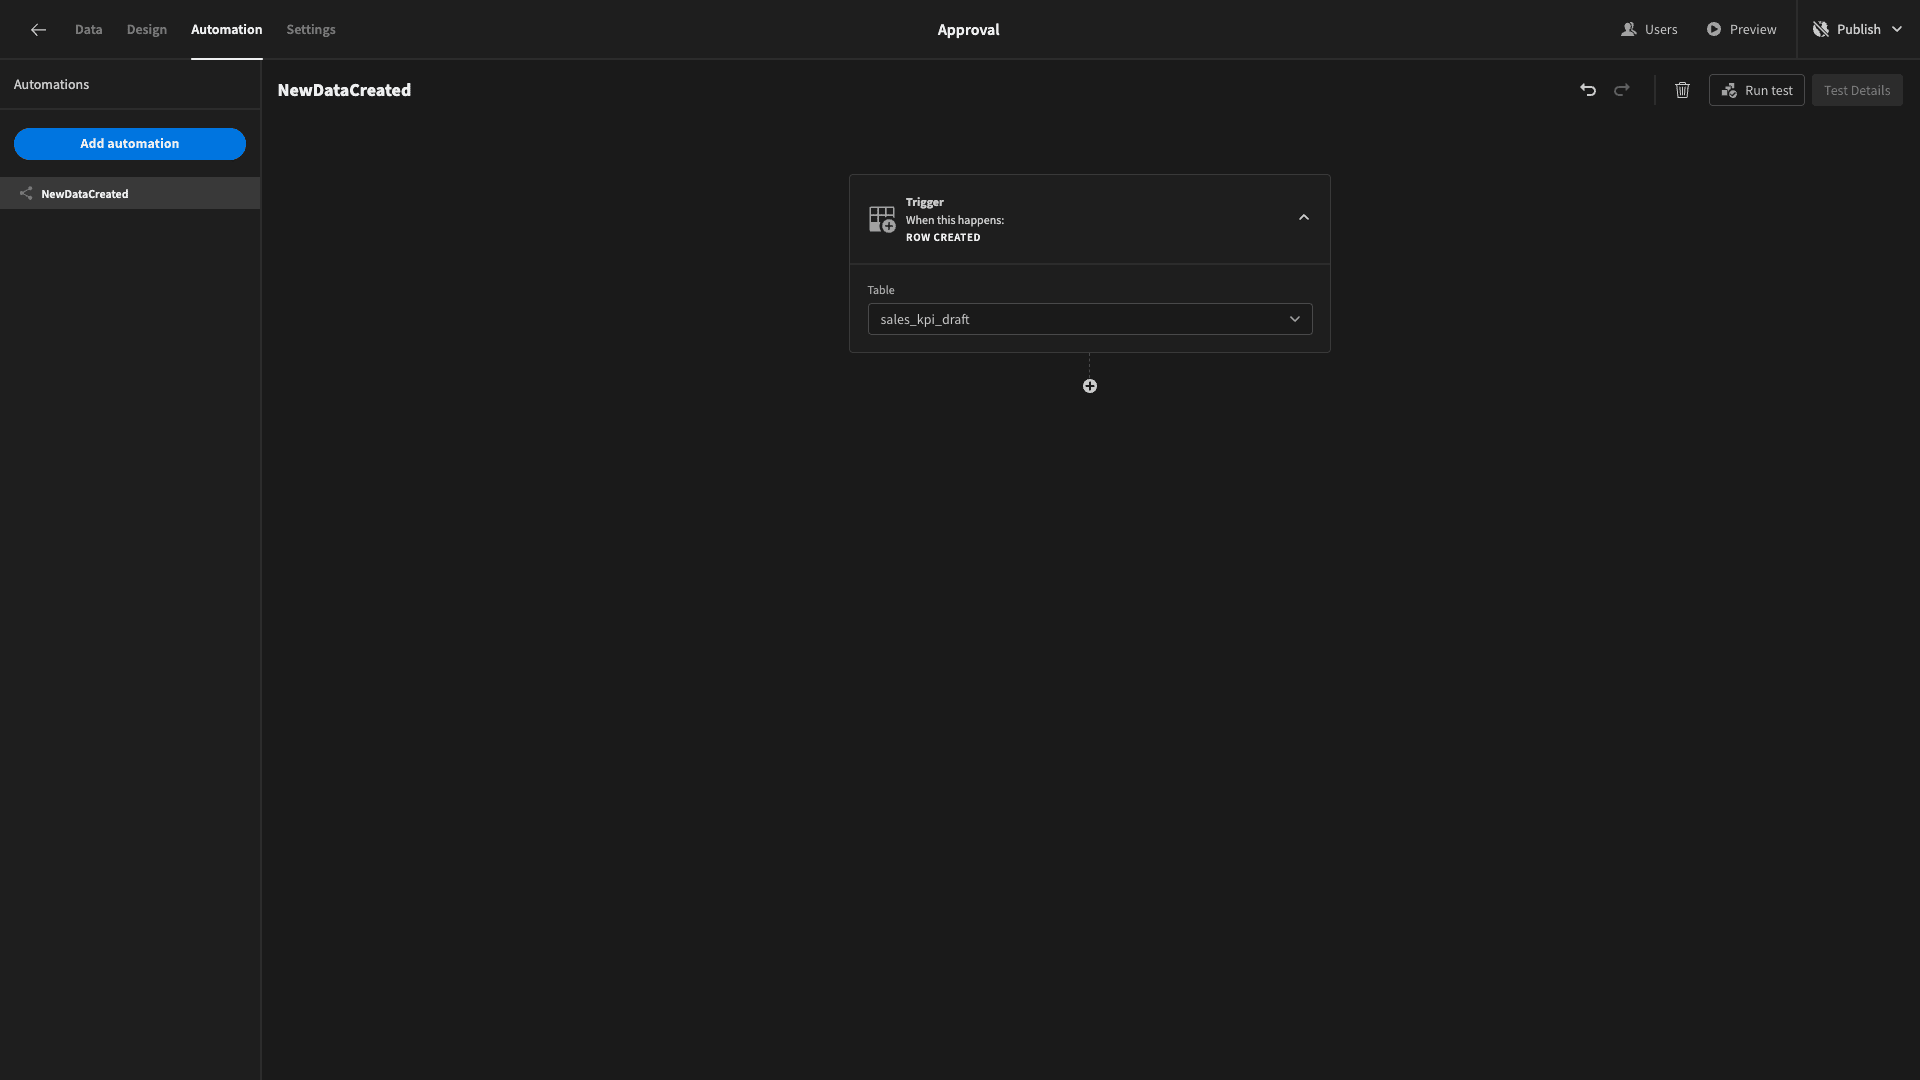
Then, we’ll be prompted to give our rule a name and choose a trigger. We’ll call our automation NewDataCreated and use a row created trigger:
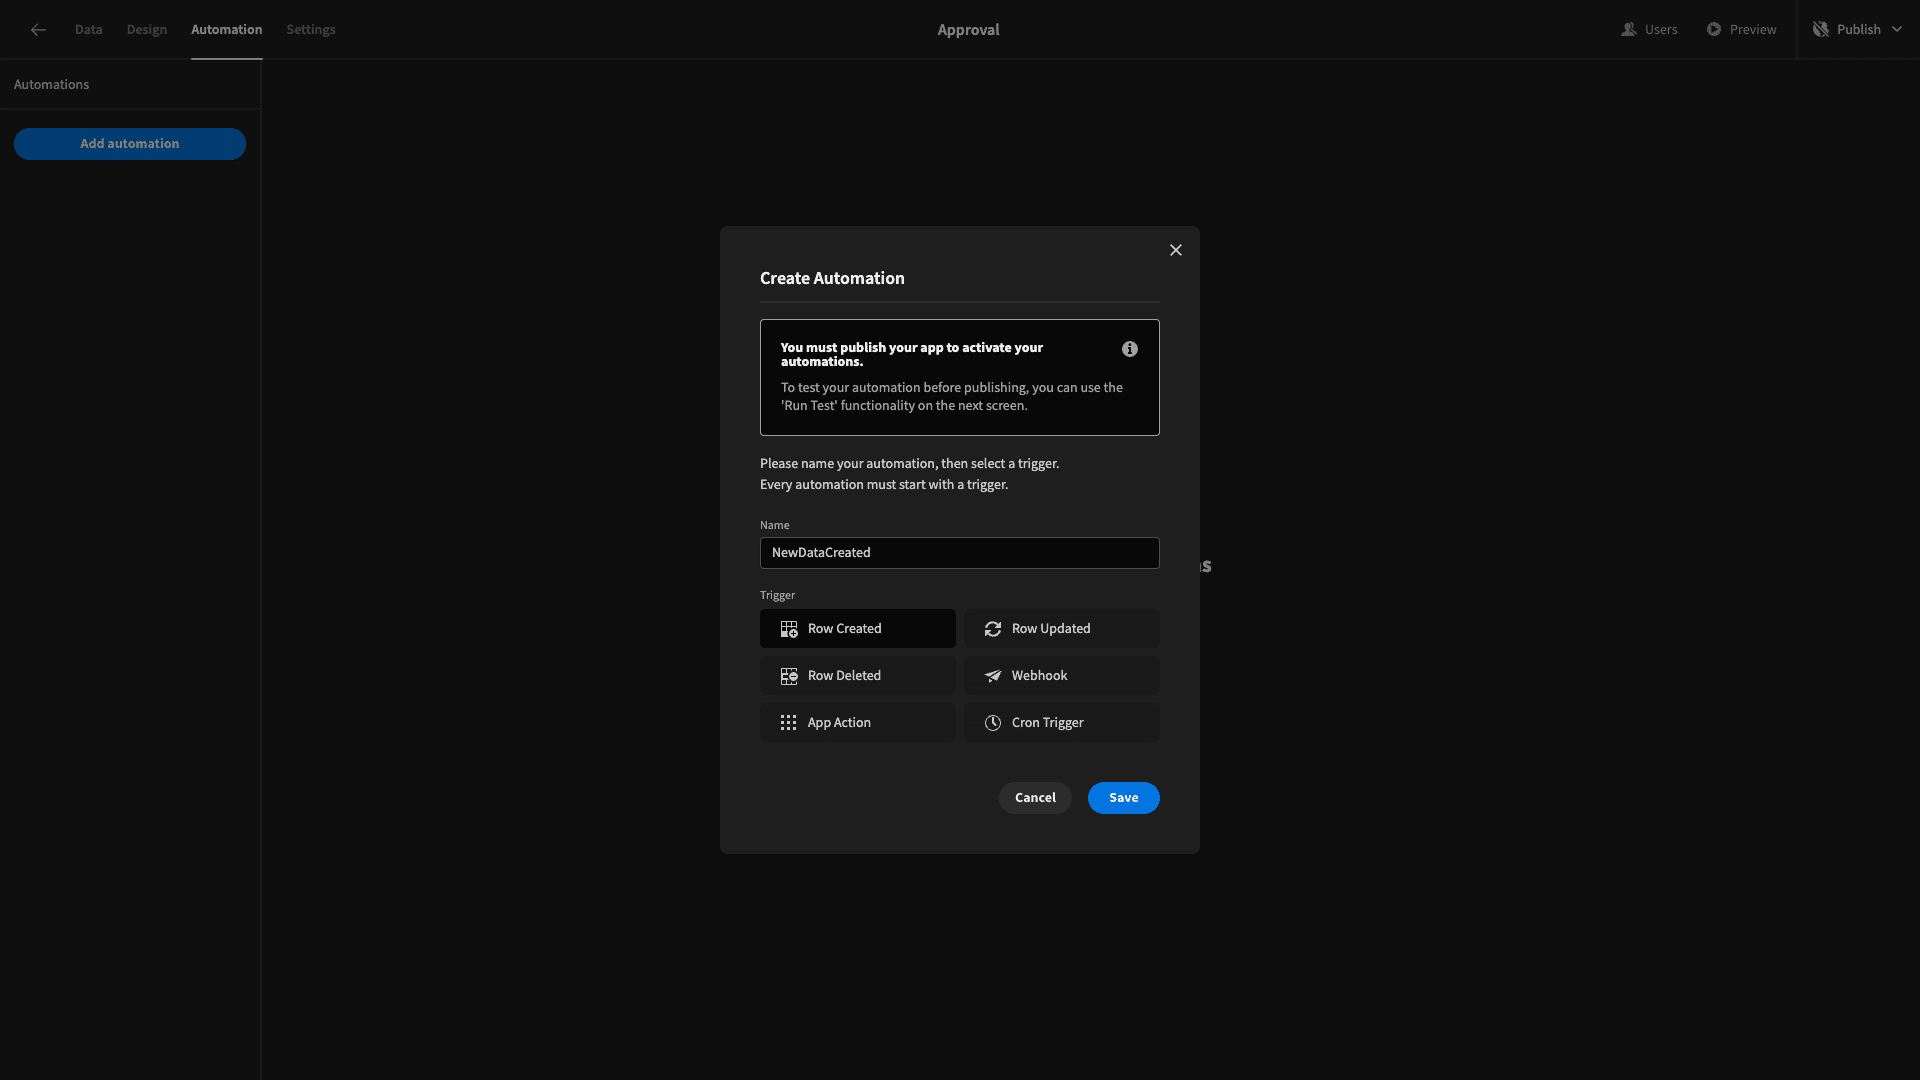
Then, we’ll need to configure our trigger. But, all this involves is selecting the table that a new row will trigger the automation. We’re using sales_kpi_drafts:
Next, we need to define what’s going to happen when our automation is triggered. Remember, we want to notify approvers that there’s a new submission for them to check out.
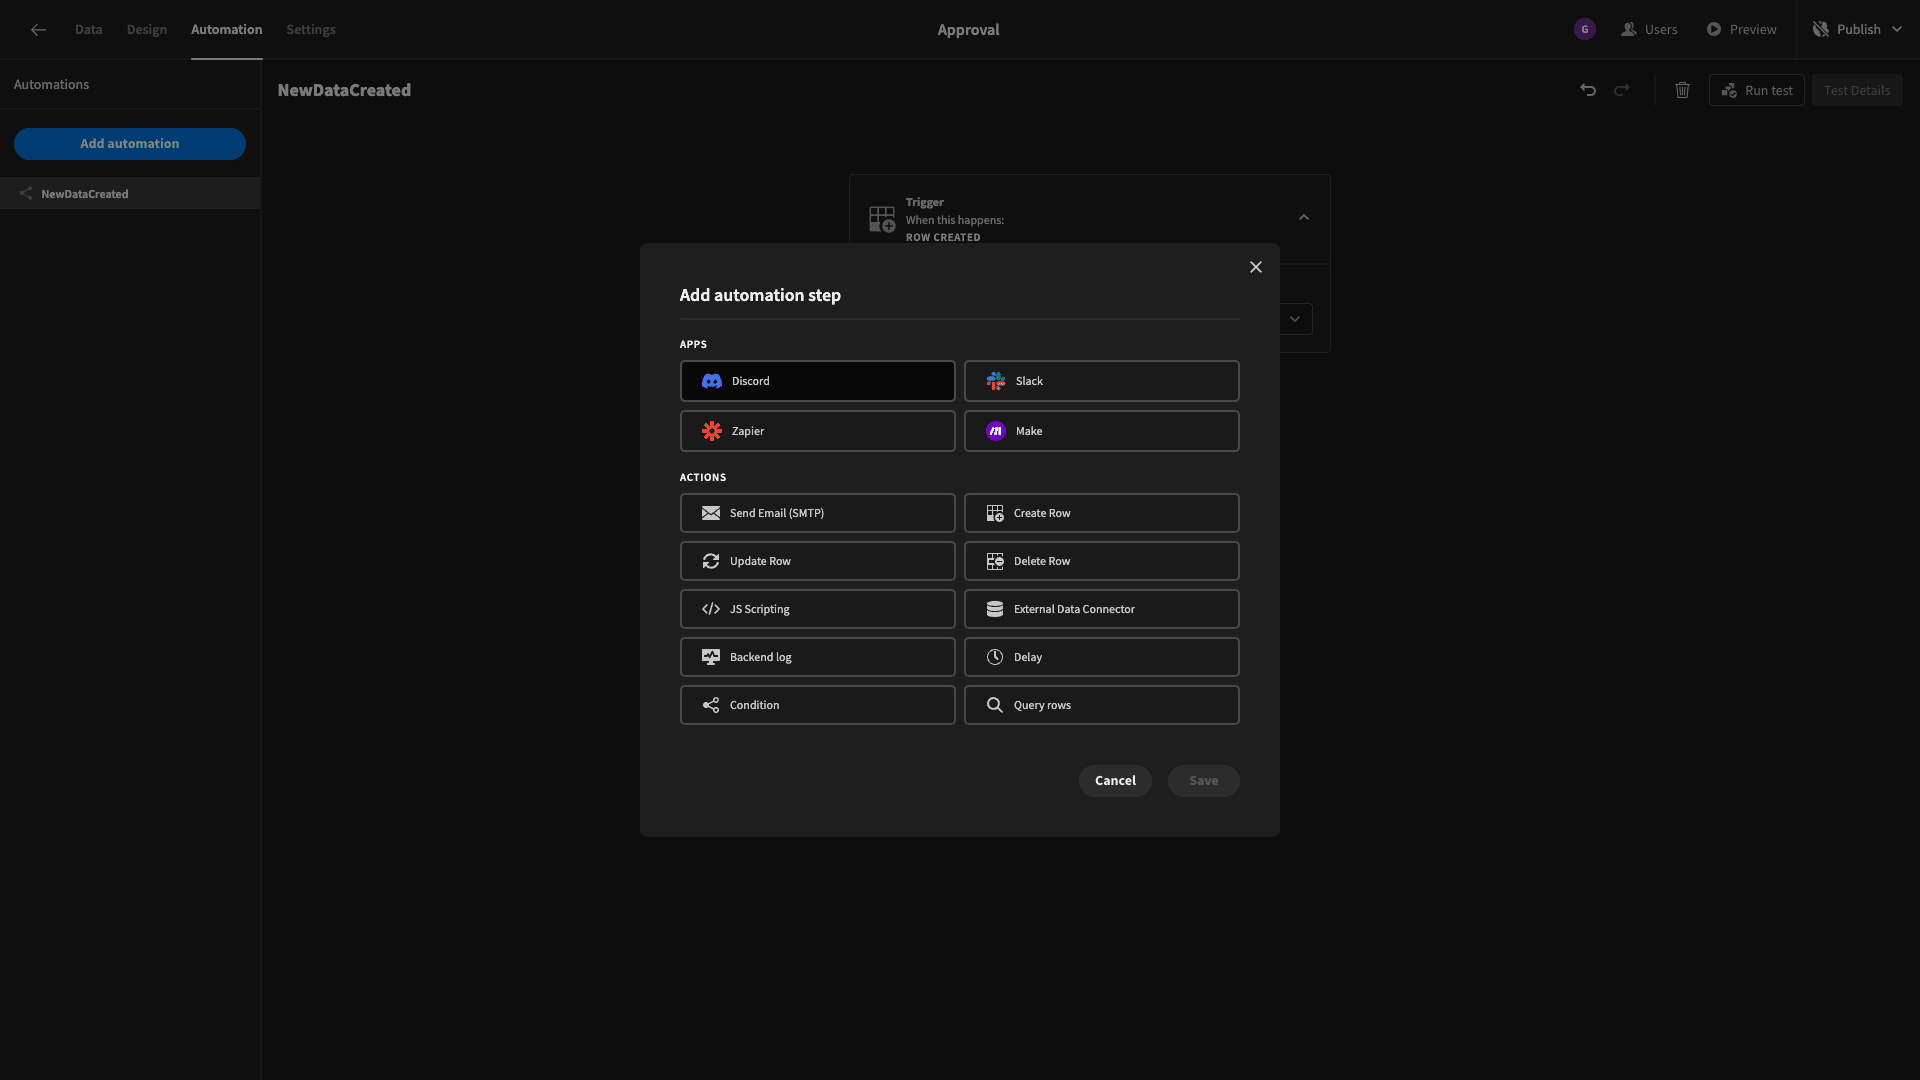
We could do this via email, Slack, or some other communication channel. We’re going with Discord.
Budibase has a dedicated automation action for this:
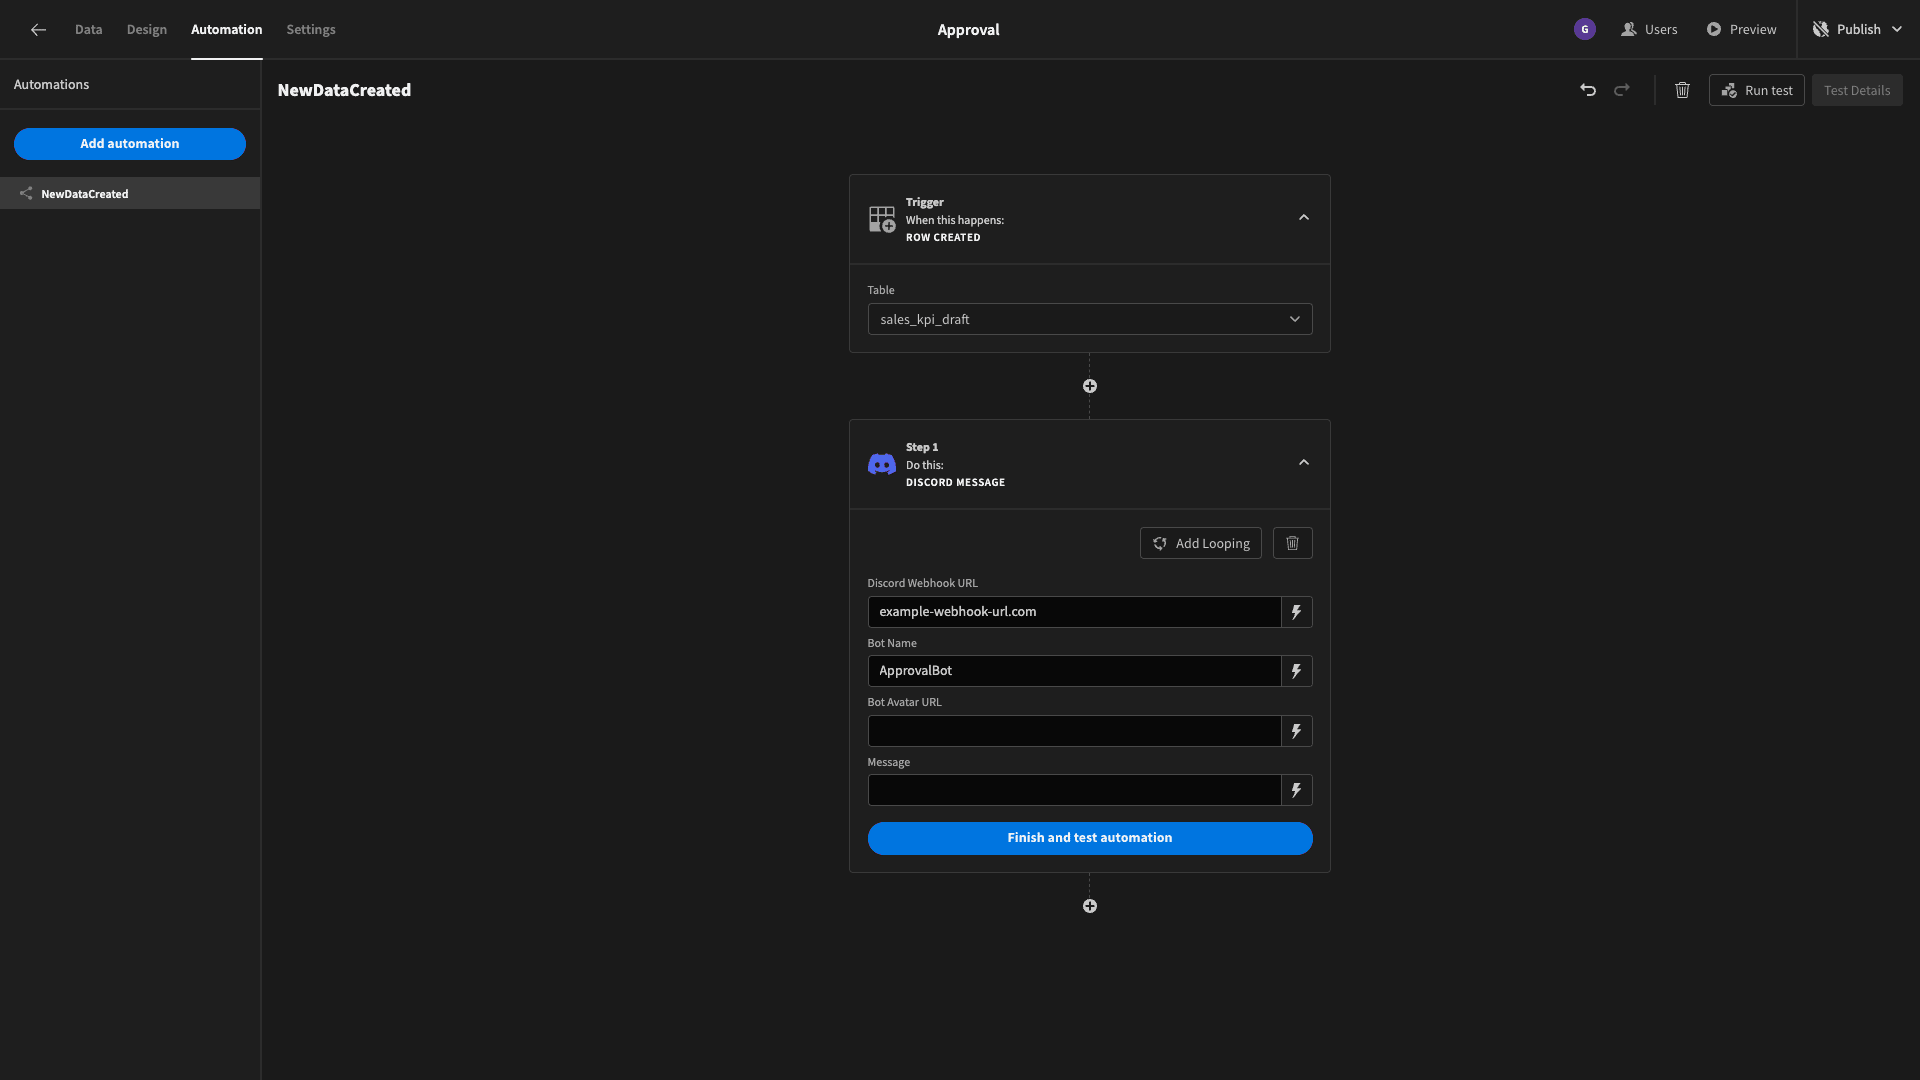
Now for this to work, we’re going to need to populate three values:
- A webhook from our target Discord server. We need to be an admin to get this.
- A name for our Discord bot.
- A message.
We can also optionally add a URL for an avatar.
Obviously, your webhook will be unique to your Discord server. We’ll call our bot ApprovalBot.
Now, we can use bindings in our message body to personalize our automation output.
Hit the lightning bolt to access the bindings drawer, and we’ll be able to use contextual data from the trigger row to populate this:
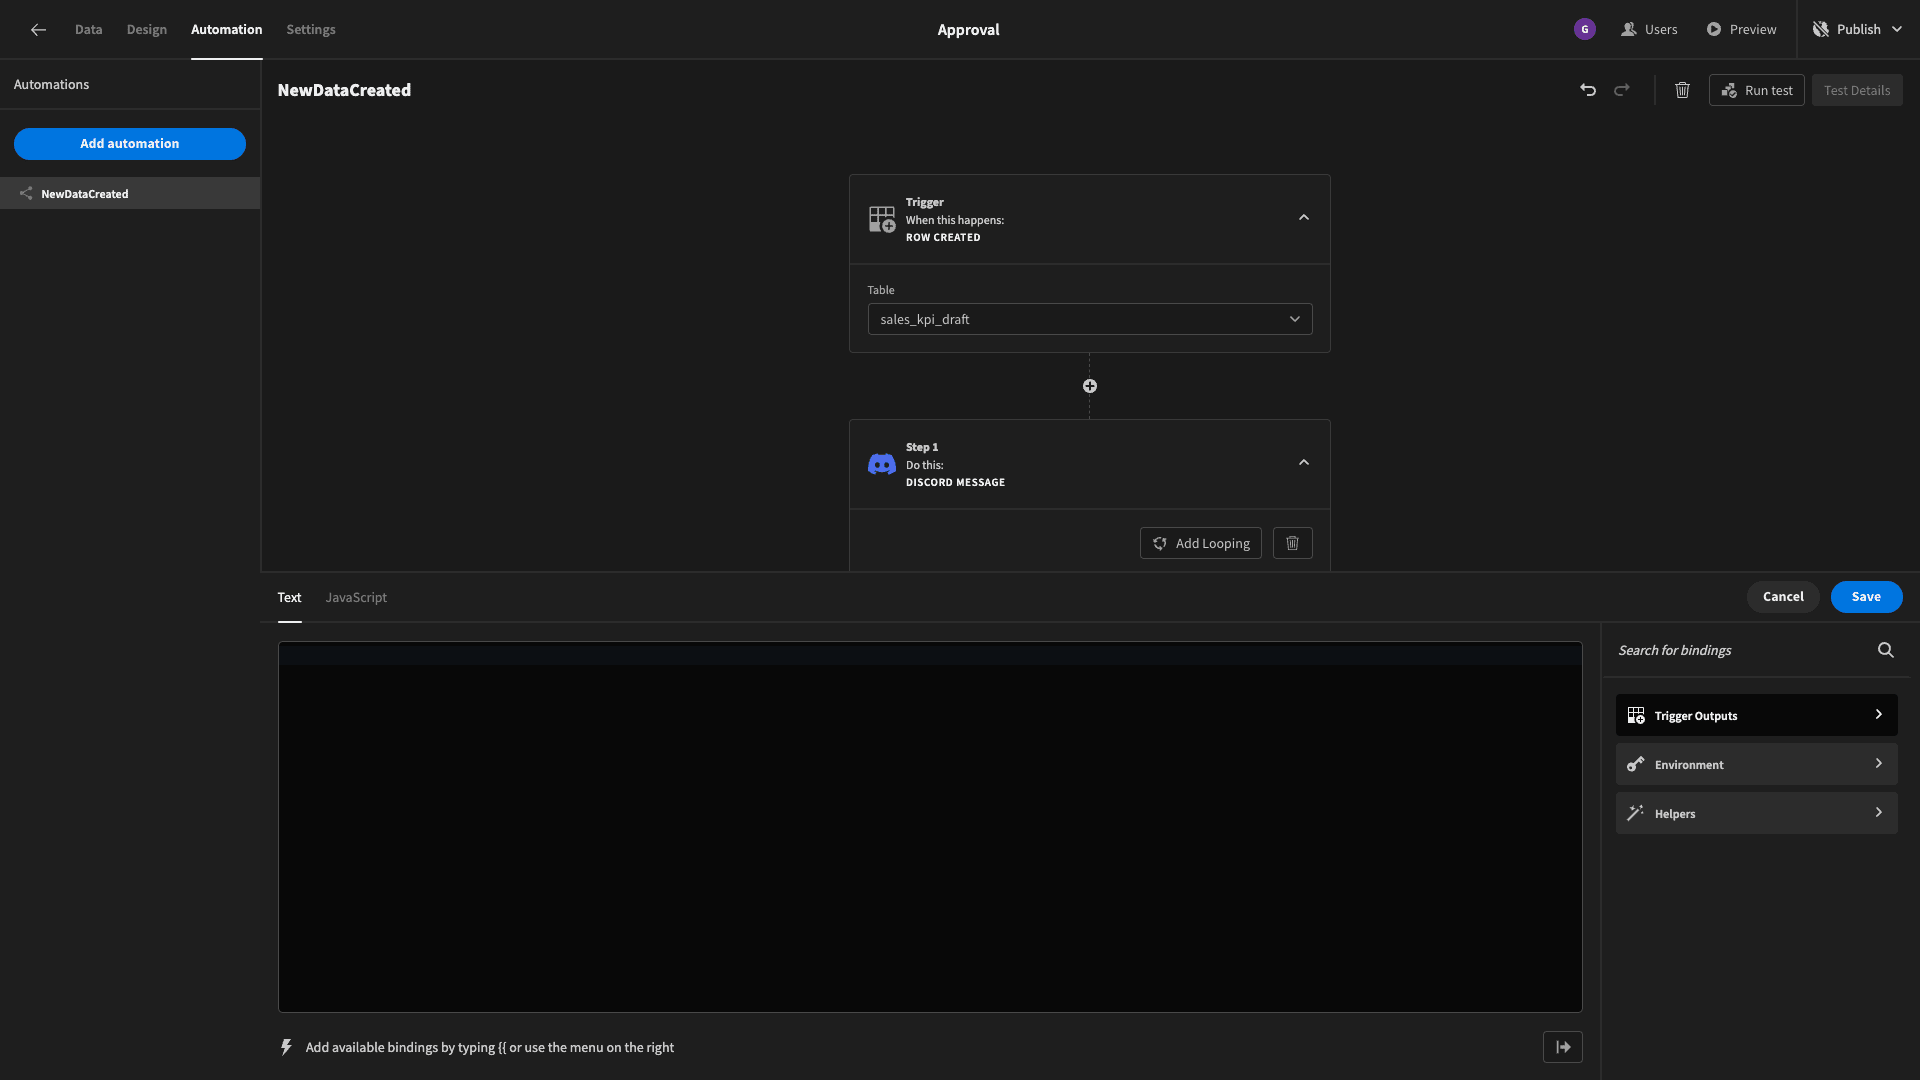
Our full text will be:
1{{ trigger.row.approver }}, you have a new record to check and approve. Check it out here yourbudibaseaccount.budibase.app/your-appThat last part can be swapped out for whatever the URL of your complex approval app will be - including the specific screen you want to direct users to.
We can test that to make sure it’s working. When we’re satisfied, we need to publish our application and the automation will start working in situ.
That’s our first automation finished. We’ll come back and complete the second a little later.
5. Build an approvals screen
Next, we want to build a UI where approvers can review submissions and decide what happens to do with them.
We’ll build this around a table that helps users see the relevant data about each new submission. Then, they’ll need a way to open up specific entries to approve and update them.
Start by creating a new screen. We’ll call this one /approval.
First, we’ll add a table block to our screen and set its data to our sale_kpi_draft table.
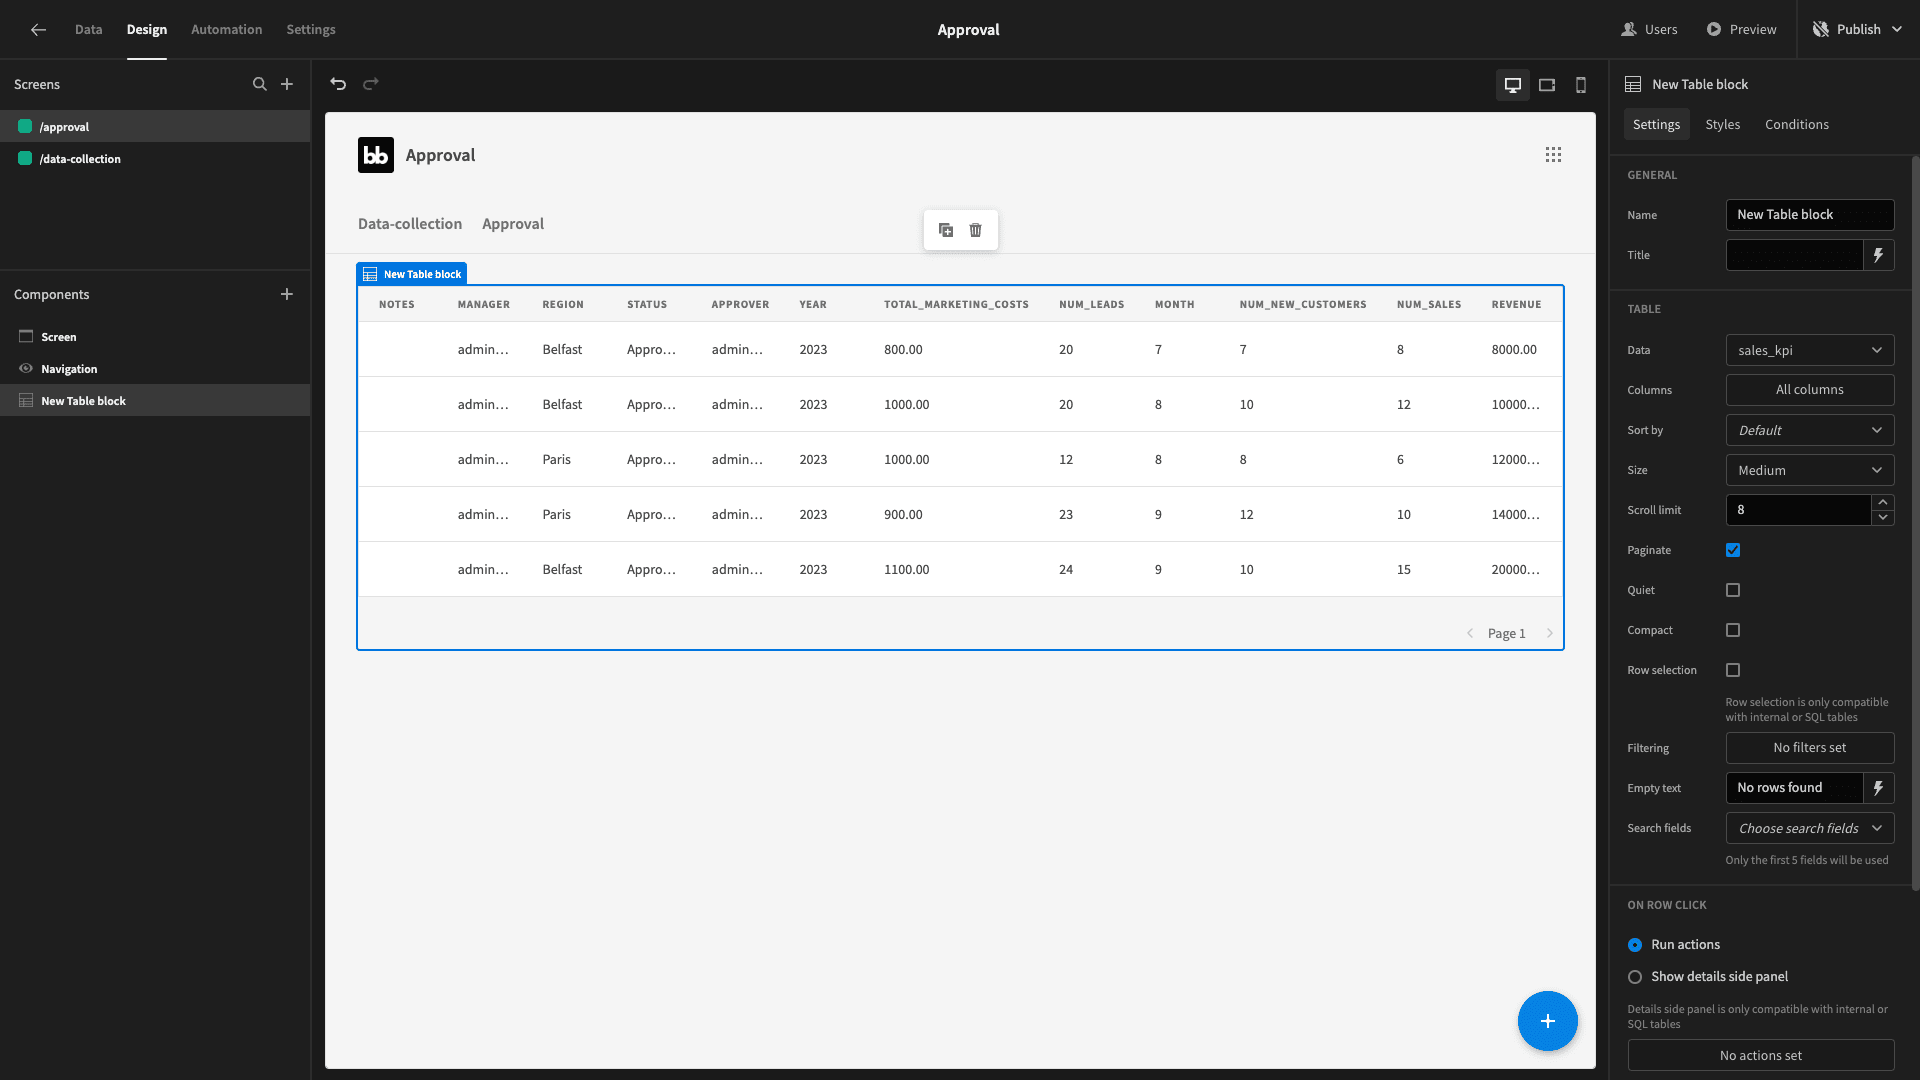
We also want to filter this, so that it only displays rows that are relevant to the current users. So, the approver field needs to be set to the current user’s email address. Open up the filtering drawer from the right side panel:
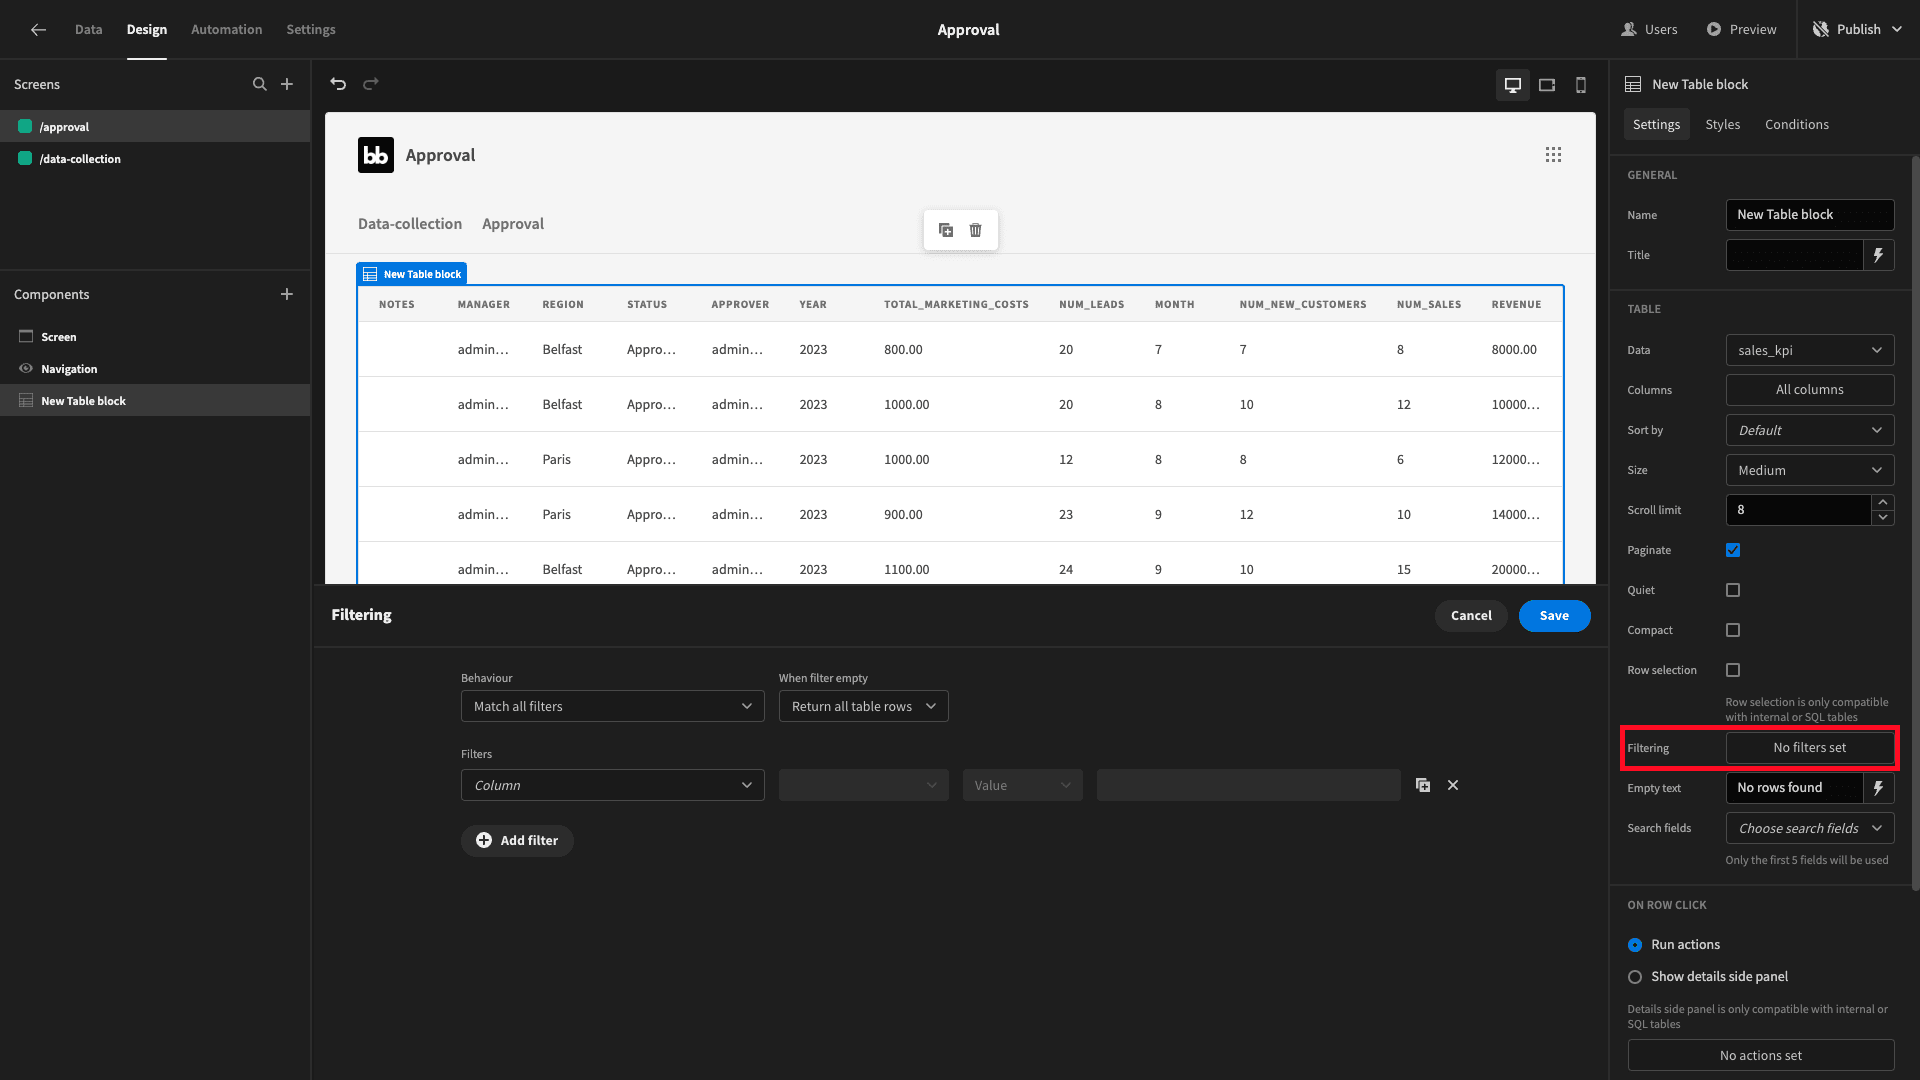
We also need to add a filter to only display the entries that have their status attribute set to pending.
So, with both of our filtering expressions configured, it should look like this:
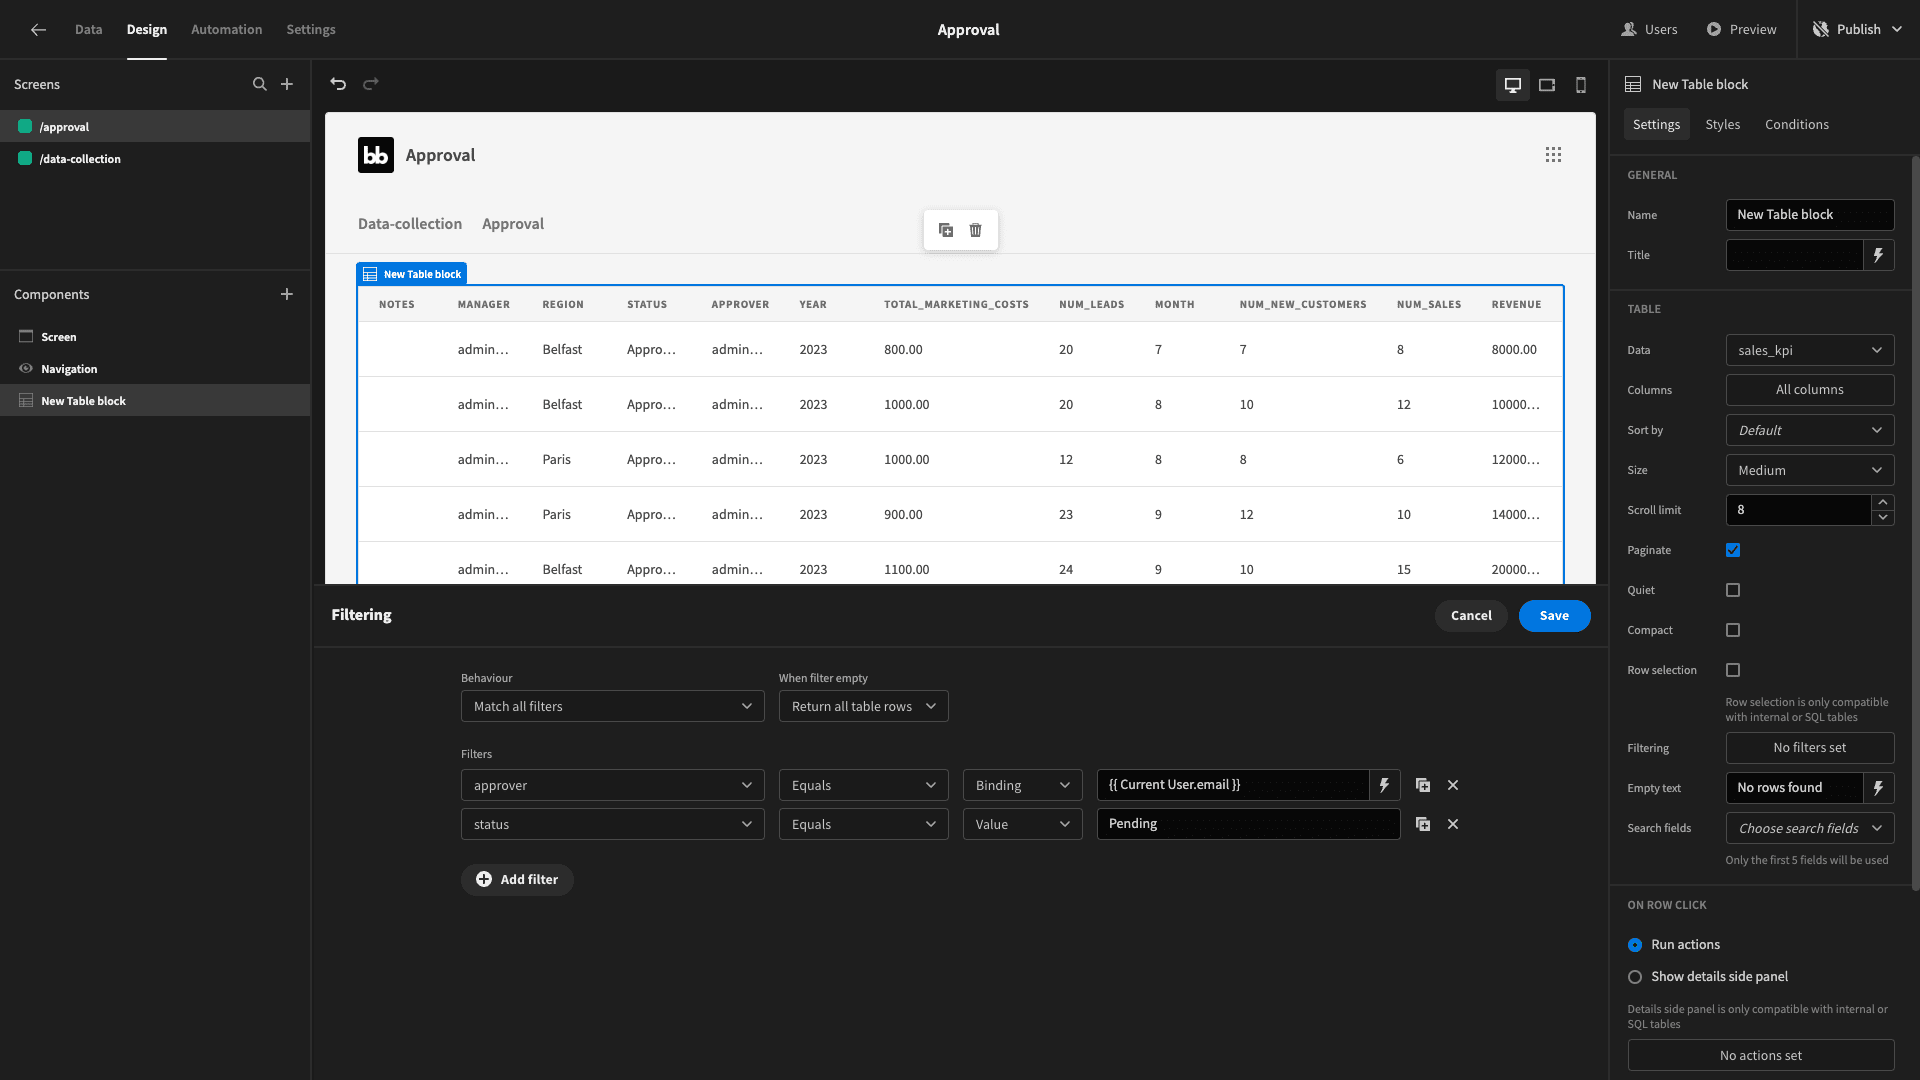
Now, our table will display the right data, but it’s still a little bit messy. We want to reduce the noise a bit by cutting the displayed columns down to the bare minimum.
Start by opening the column configuration drawer. Then hit add all columns:
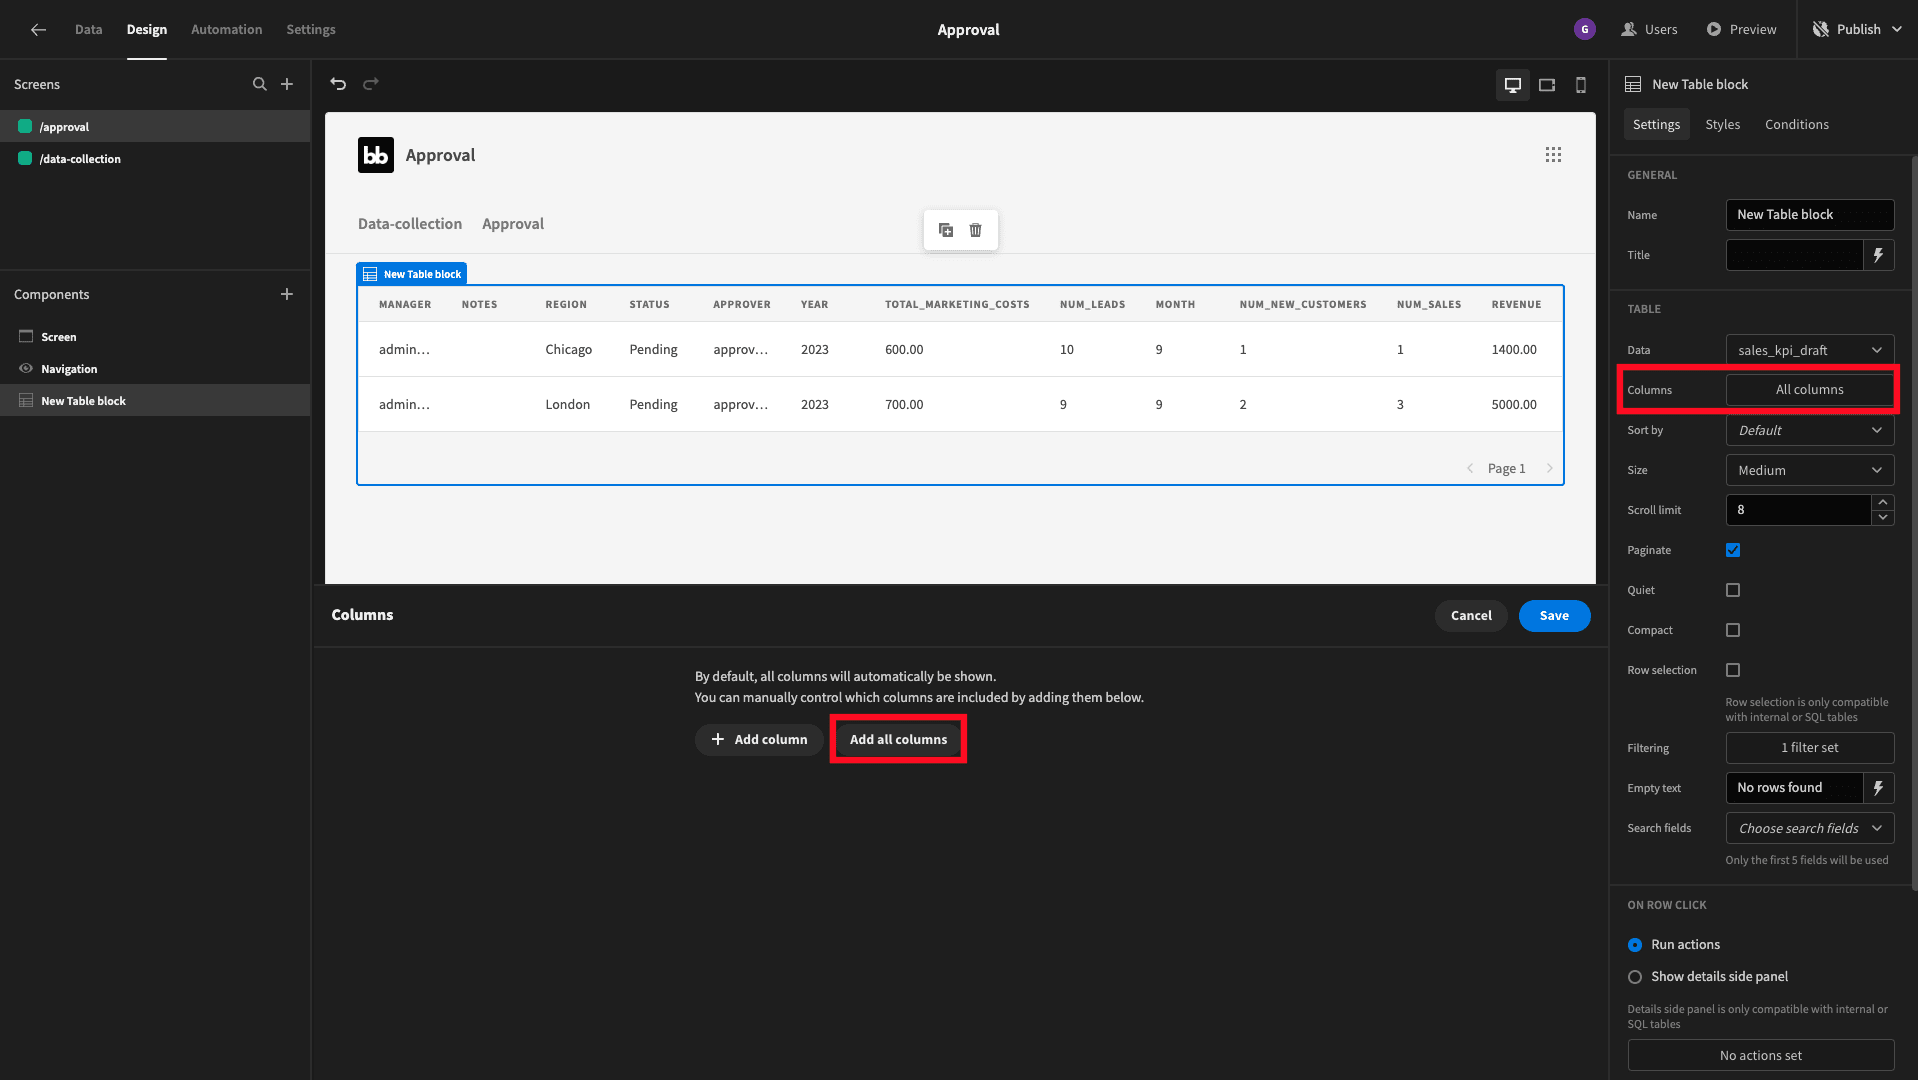
We’re going to remove everything except the region, year, month, and revenue attributes. We’ll also capitalize the labels again.
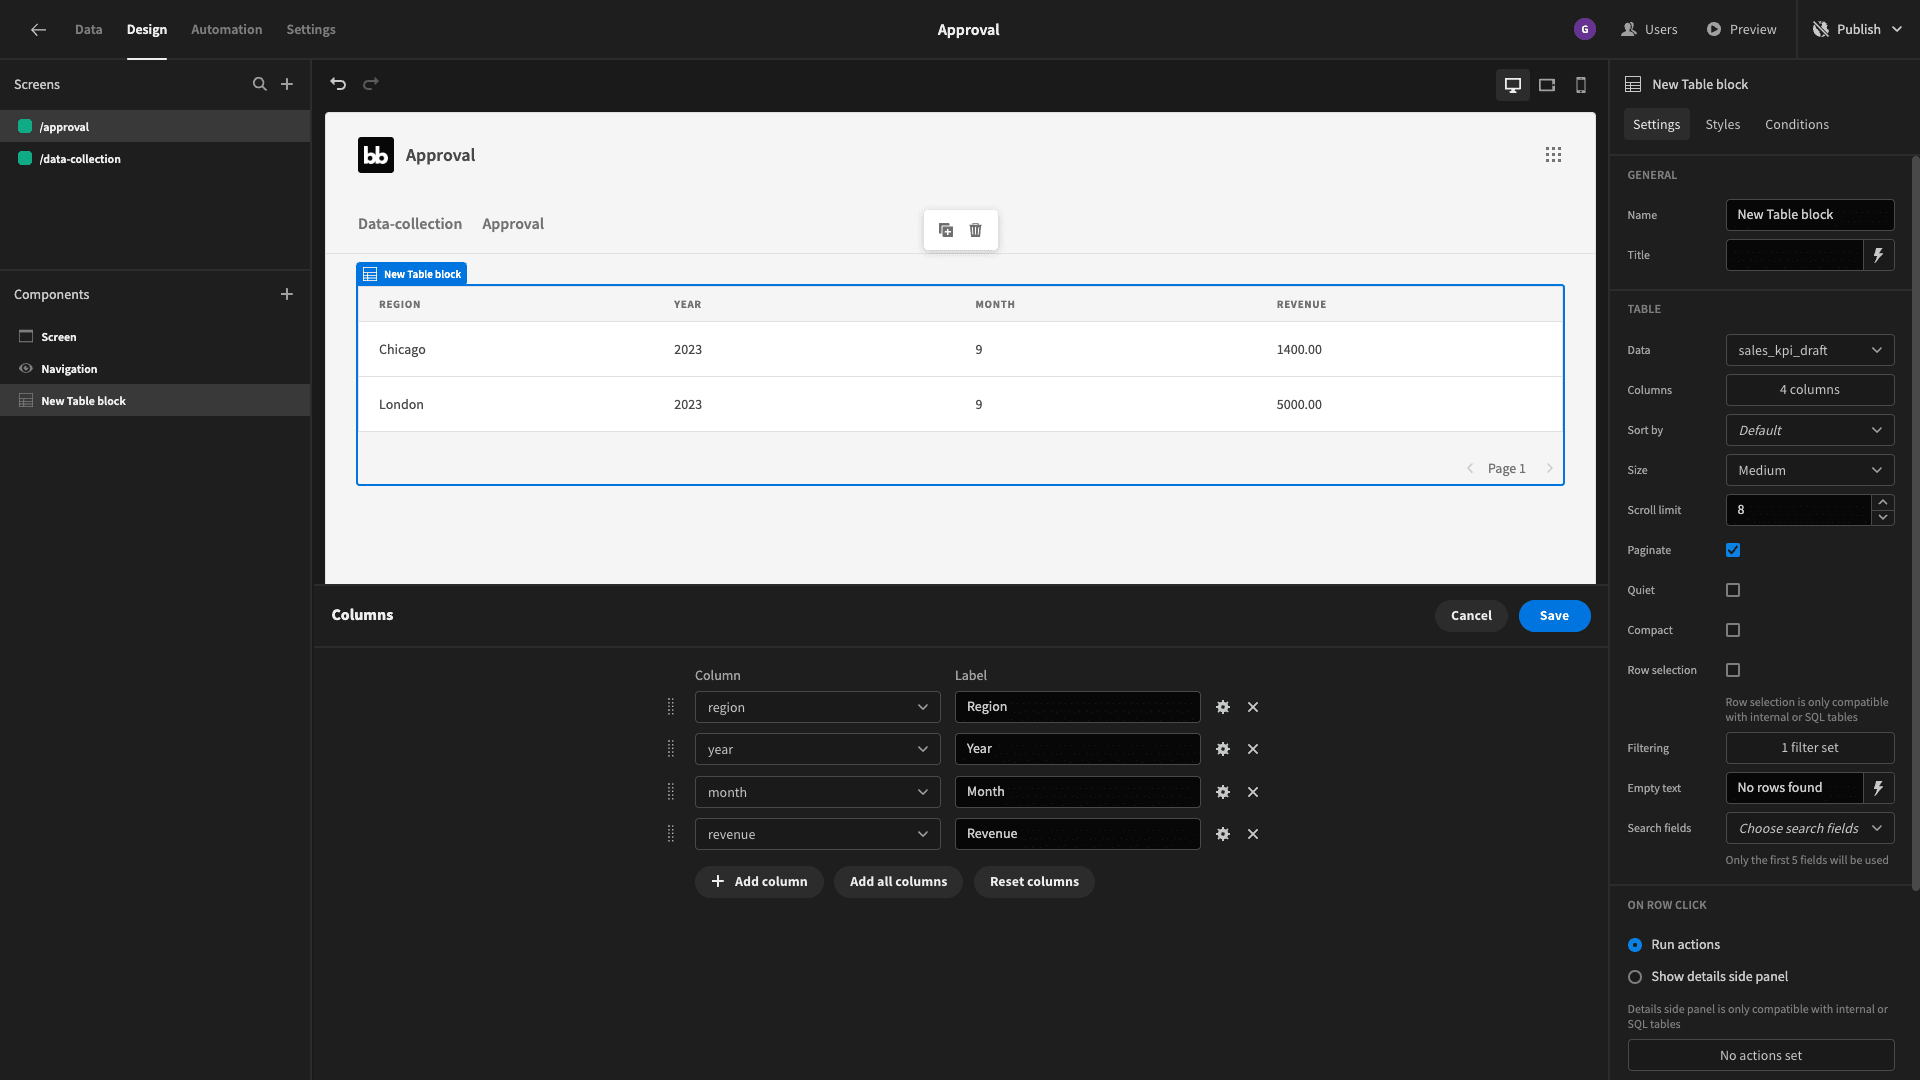
Now, users can easily view new records. But we still need some way for them to drill into the full information to review, edit, or approve submissions.
First, we’ll add a form component and nest our table block inside of this. This gives us the ability to perform data entry and update actions from within our table.
We’ll set the type to update and the schema to sales_kpi_table:
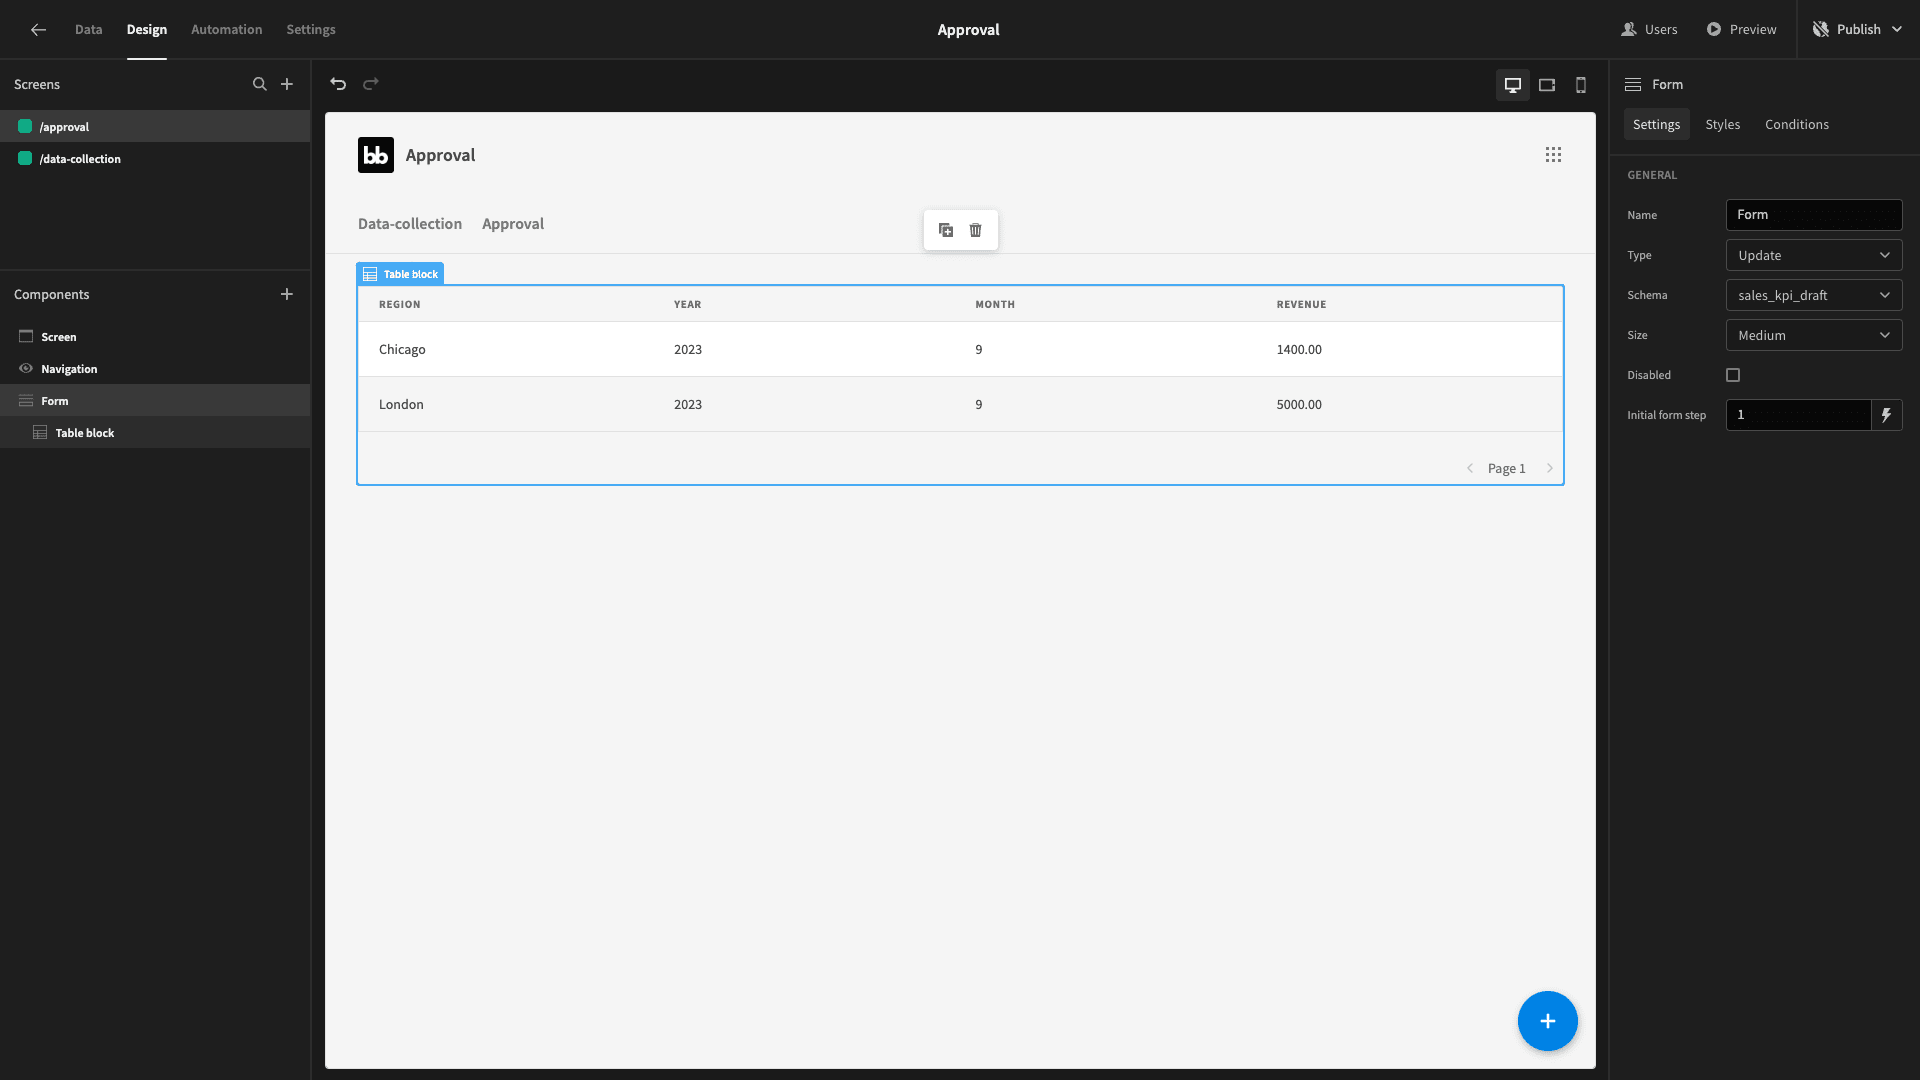
Normally, we’d use the prebuilt details side panel in the table block for adding an update form. But, we need a bit of extra customization for our field groups, so we’re going to build ours from scratch instead.
So, next, we’ll add a side panel component under our table. We’ll call this UpdateFormPanel. Inside this, we’ll add a field group, just like before:
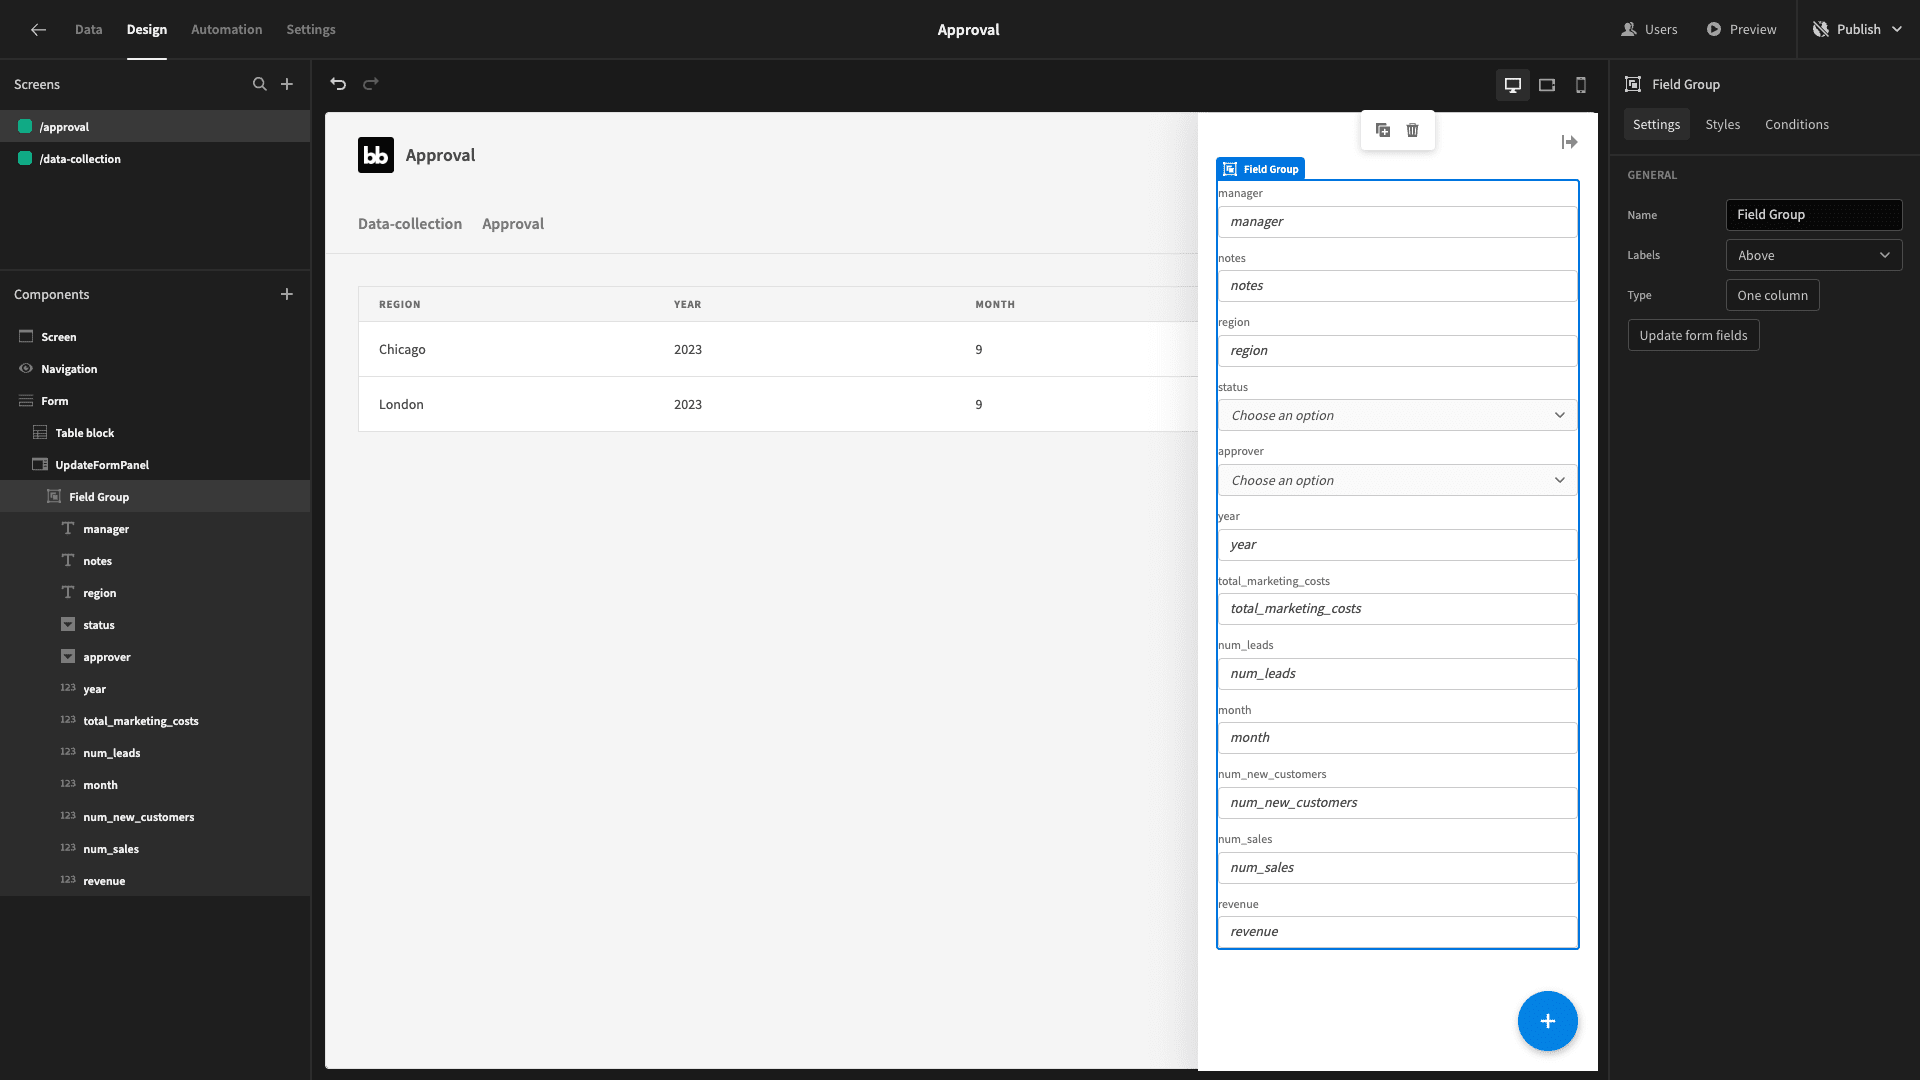
We’ll make the same changes we did earlier, including swapping the month attribute’s text field for an options picker, as well as rearranging our fields and capitalizing their labels.
This time, we won’t delete anything. But, we want to give our users a bit more room to leave notes, so we’ll remove the standard text box and swap it for a long-form text field for the same data.
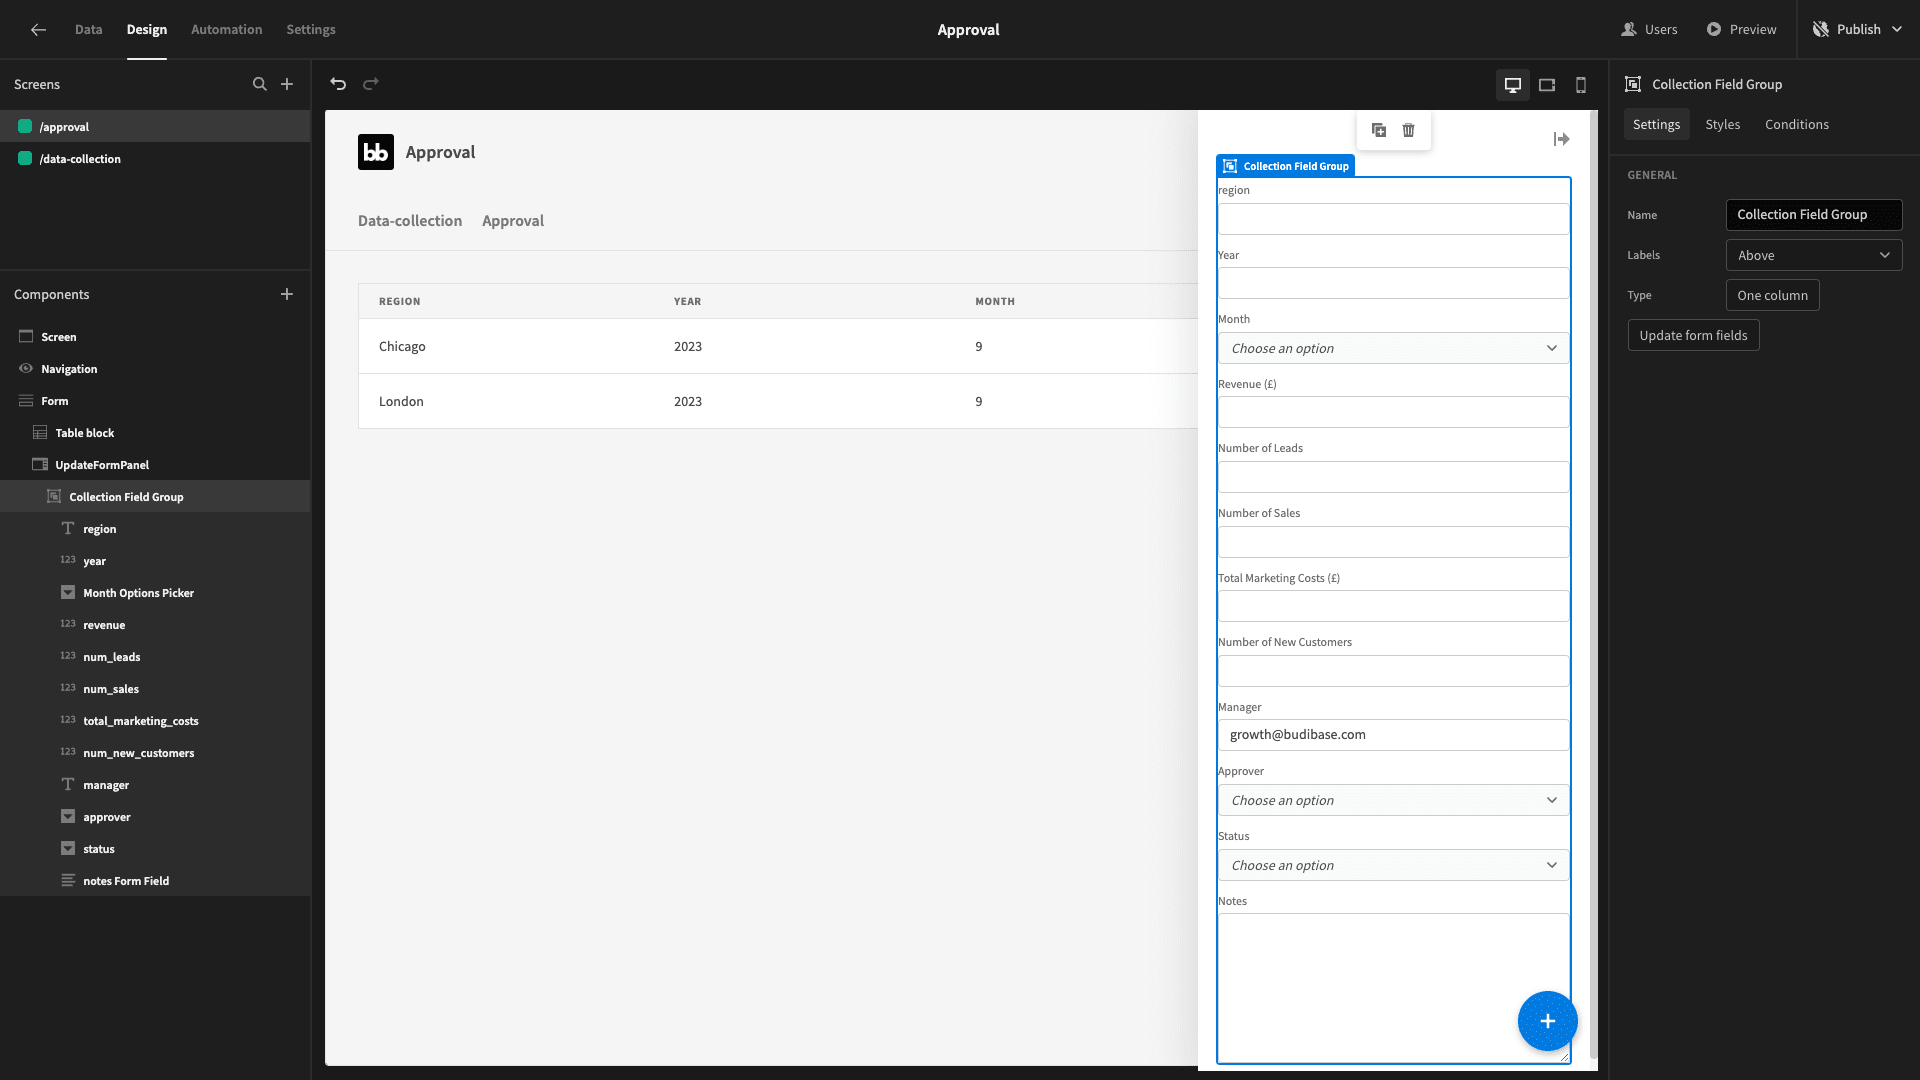
Now, we need to populate with form with our existing data for that row.
Head back to the table block and open the on-click actions drawer. First, we’ll set an action to open the side panel.
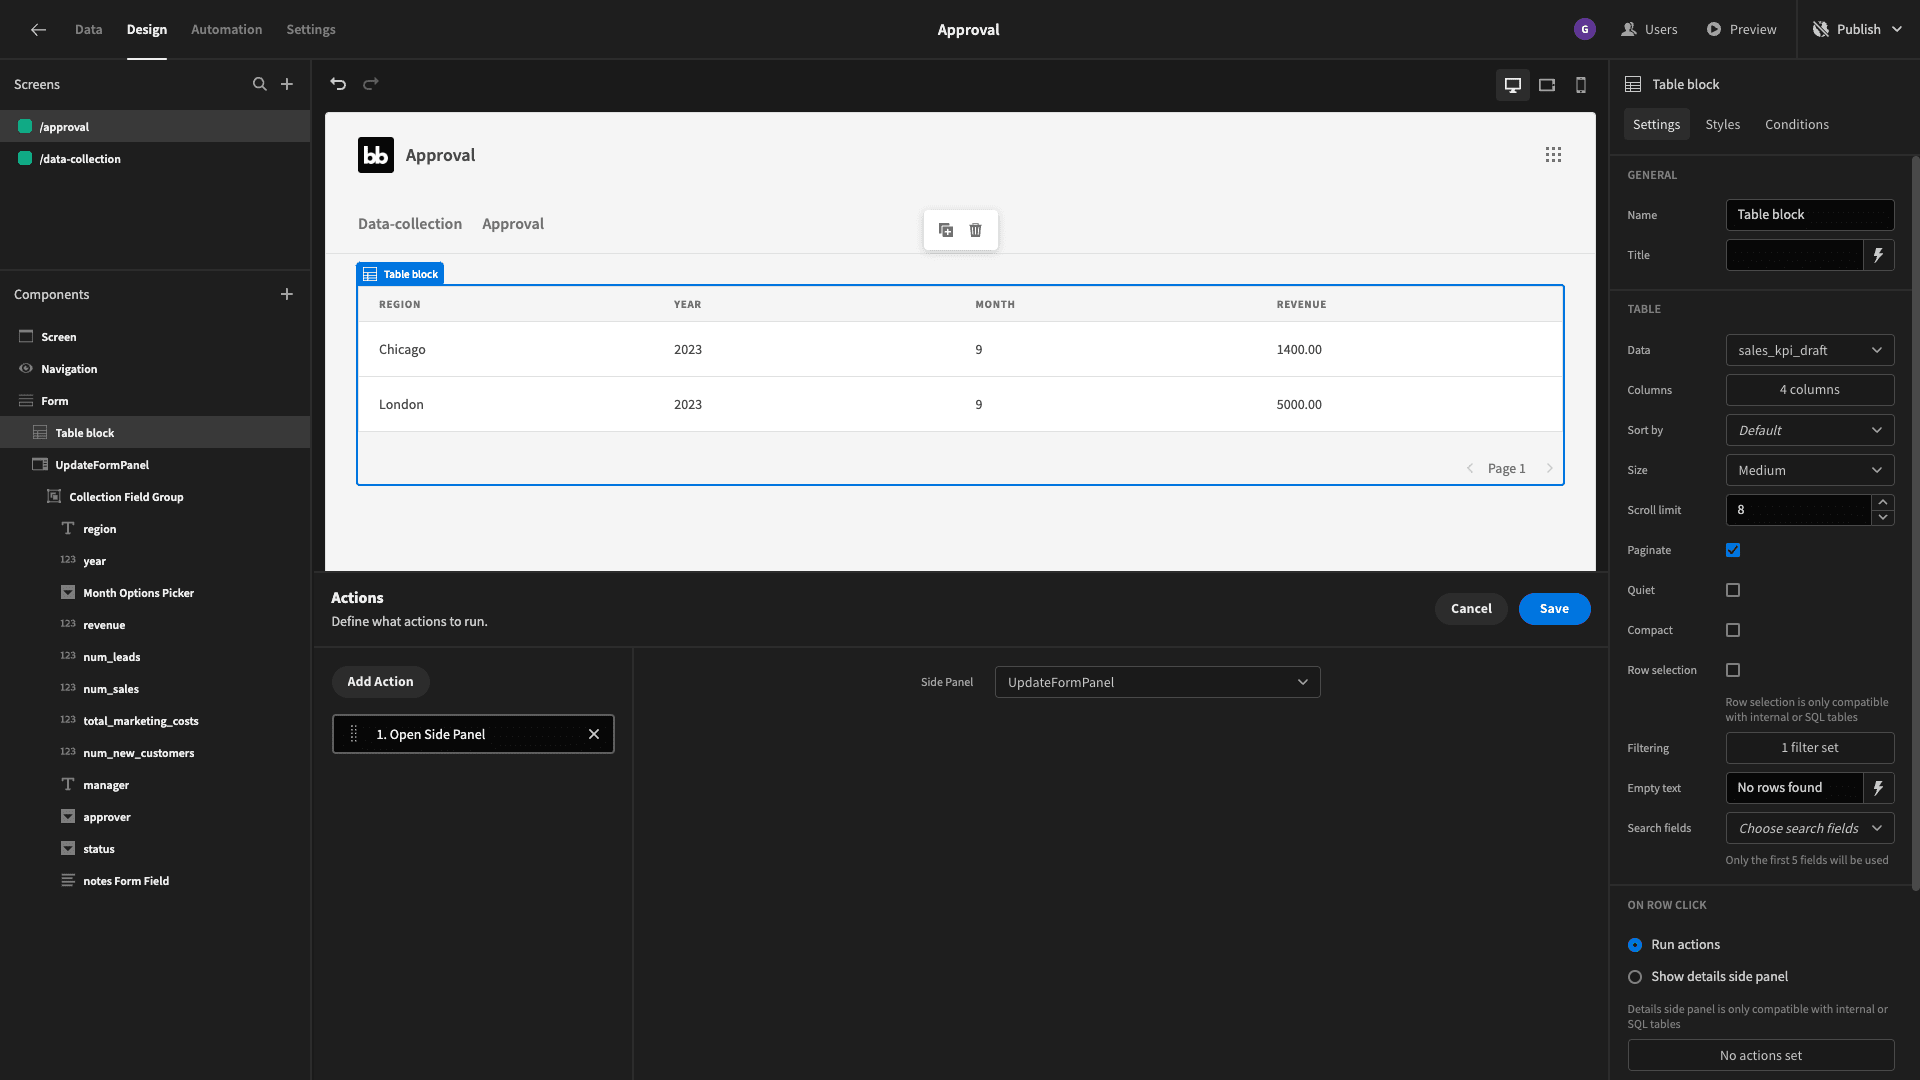
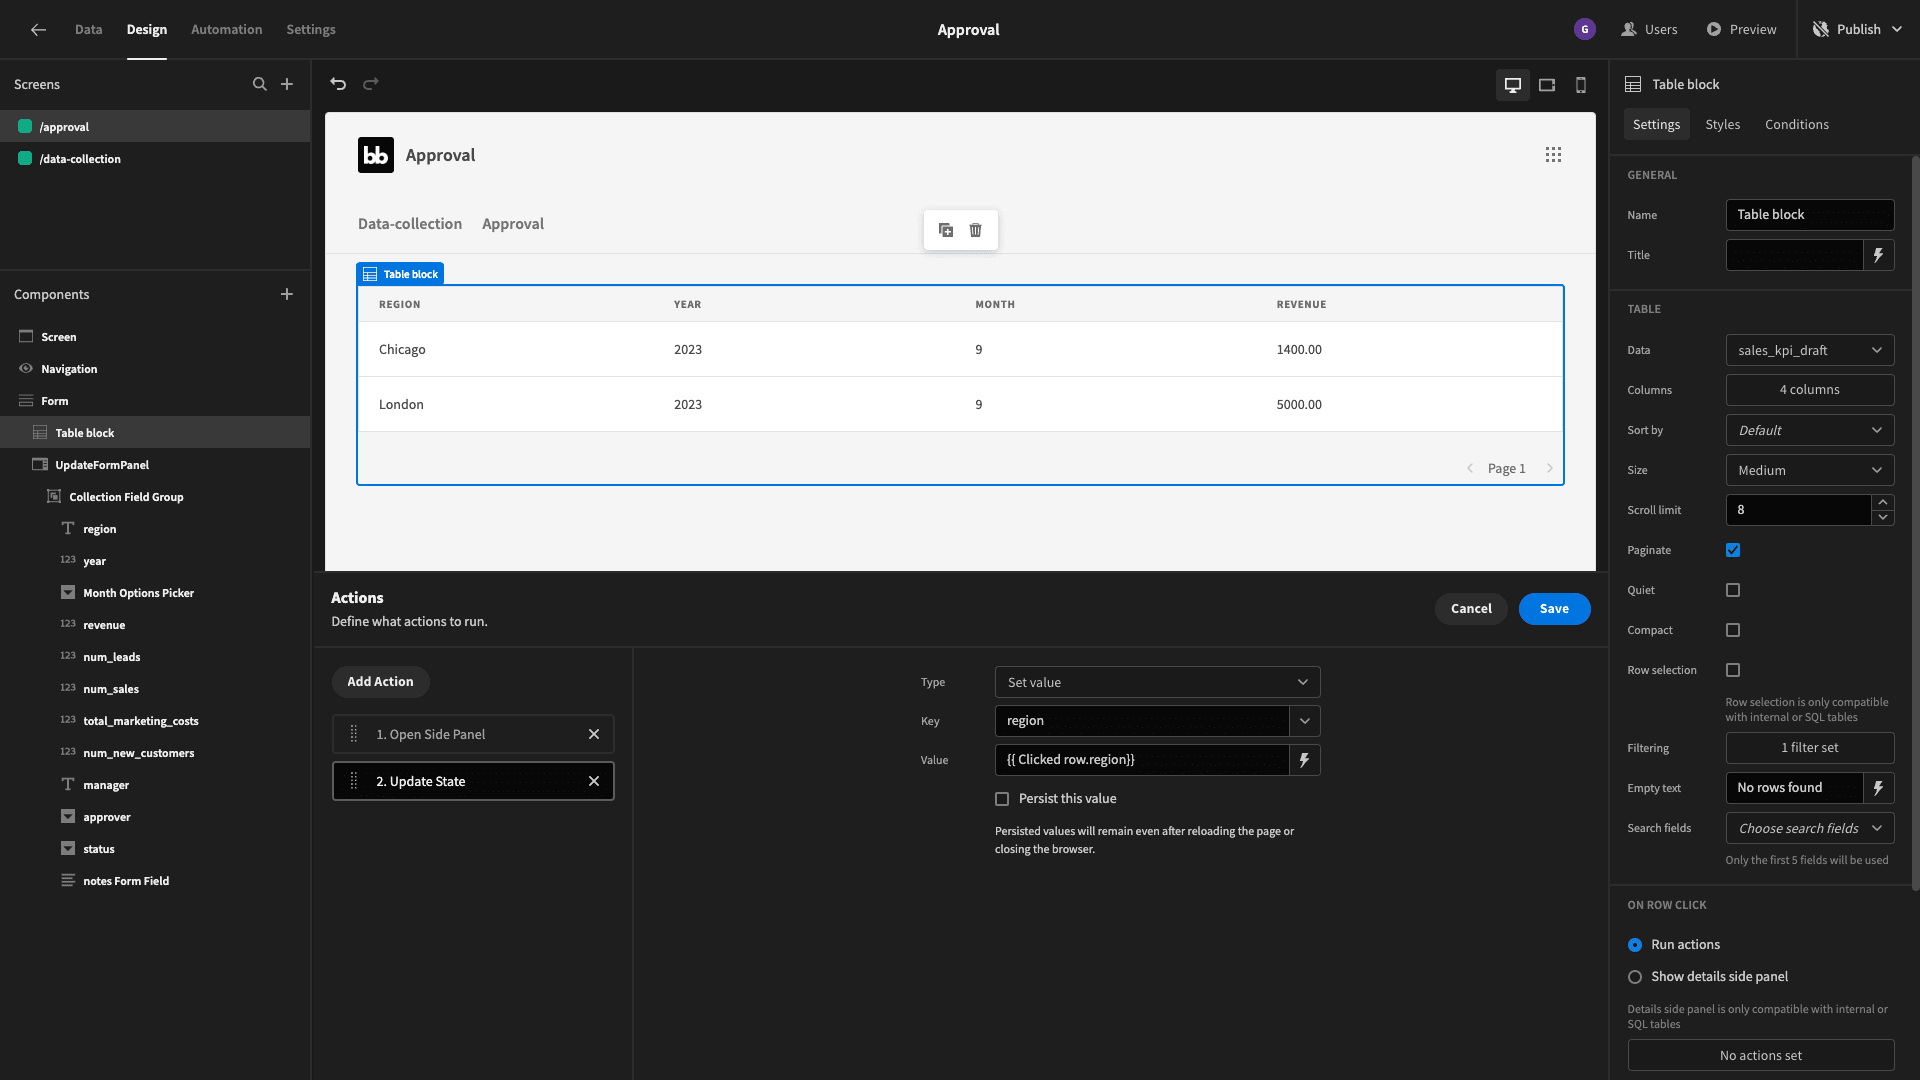
We’ll also add one more set state action to save the ID of the clicked row.
We’ll then set state variables for each of our fields, that we can use as default values in the form, using bindings from the clicked row, like so:
Then, we’ll go back to the form and add these new states as bindings to the respective fields’ default values.
Lastly, we need to add a save button. This time we have two actions. First, we need to save the row to our form to our draft table, with the ID attribute set equal to our ID state binding. This ensures the relevant row is updated:
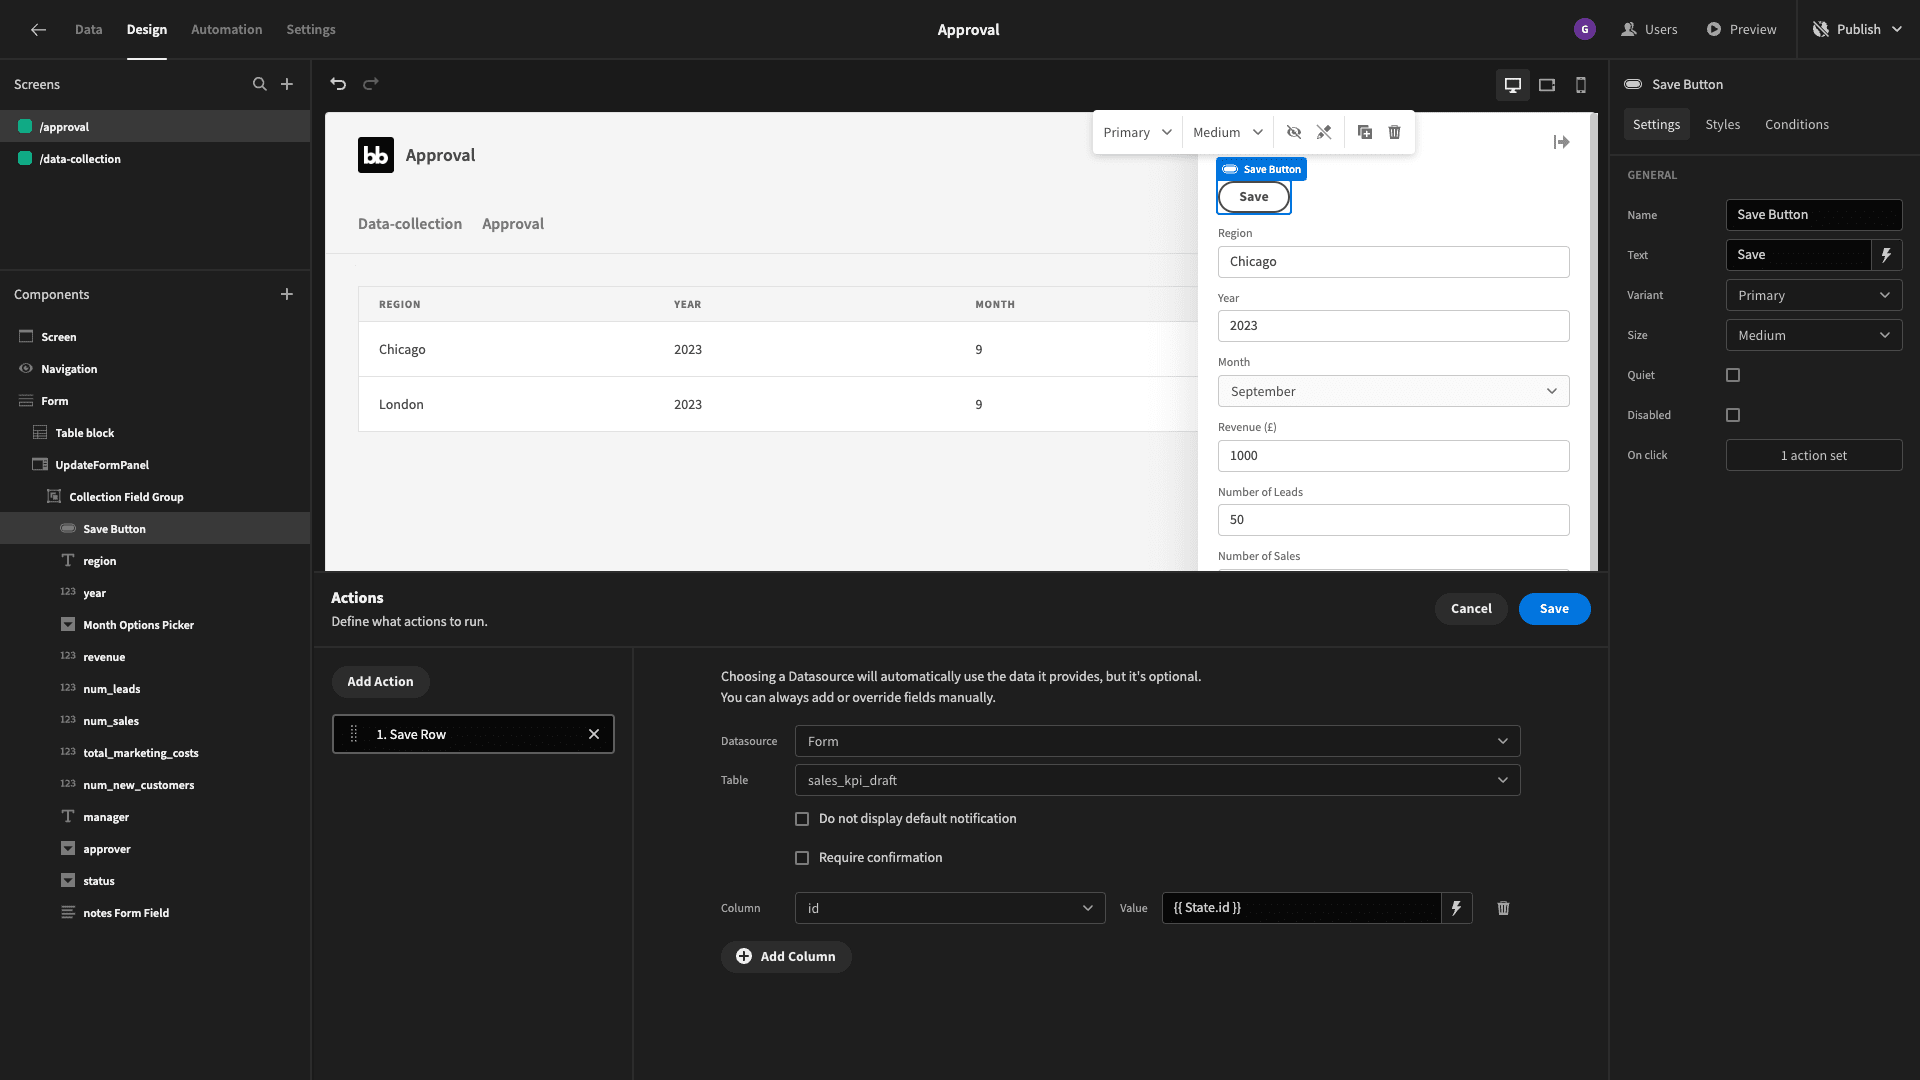
We’ll follow this with a second action to close the side panel.
And that’s our approvals screen done!
6. Create follow-on automations
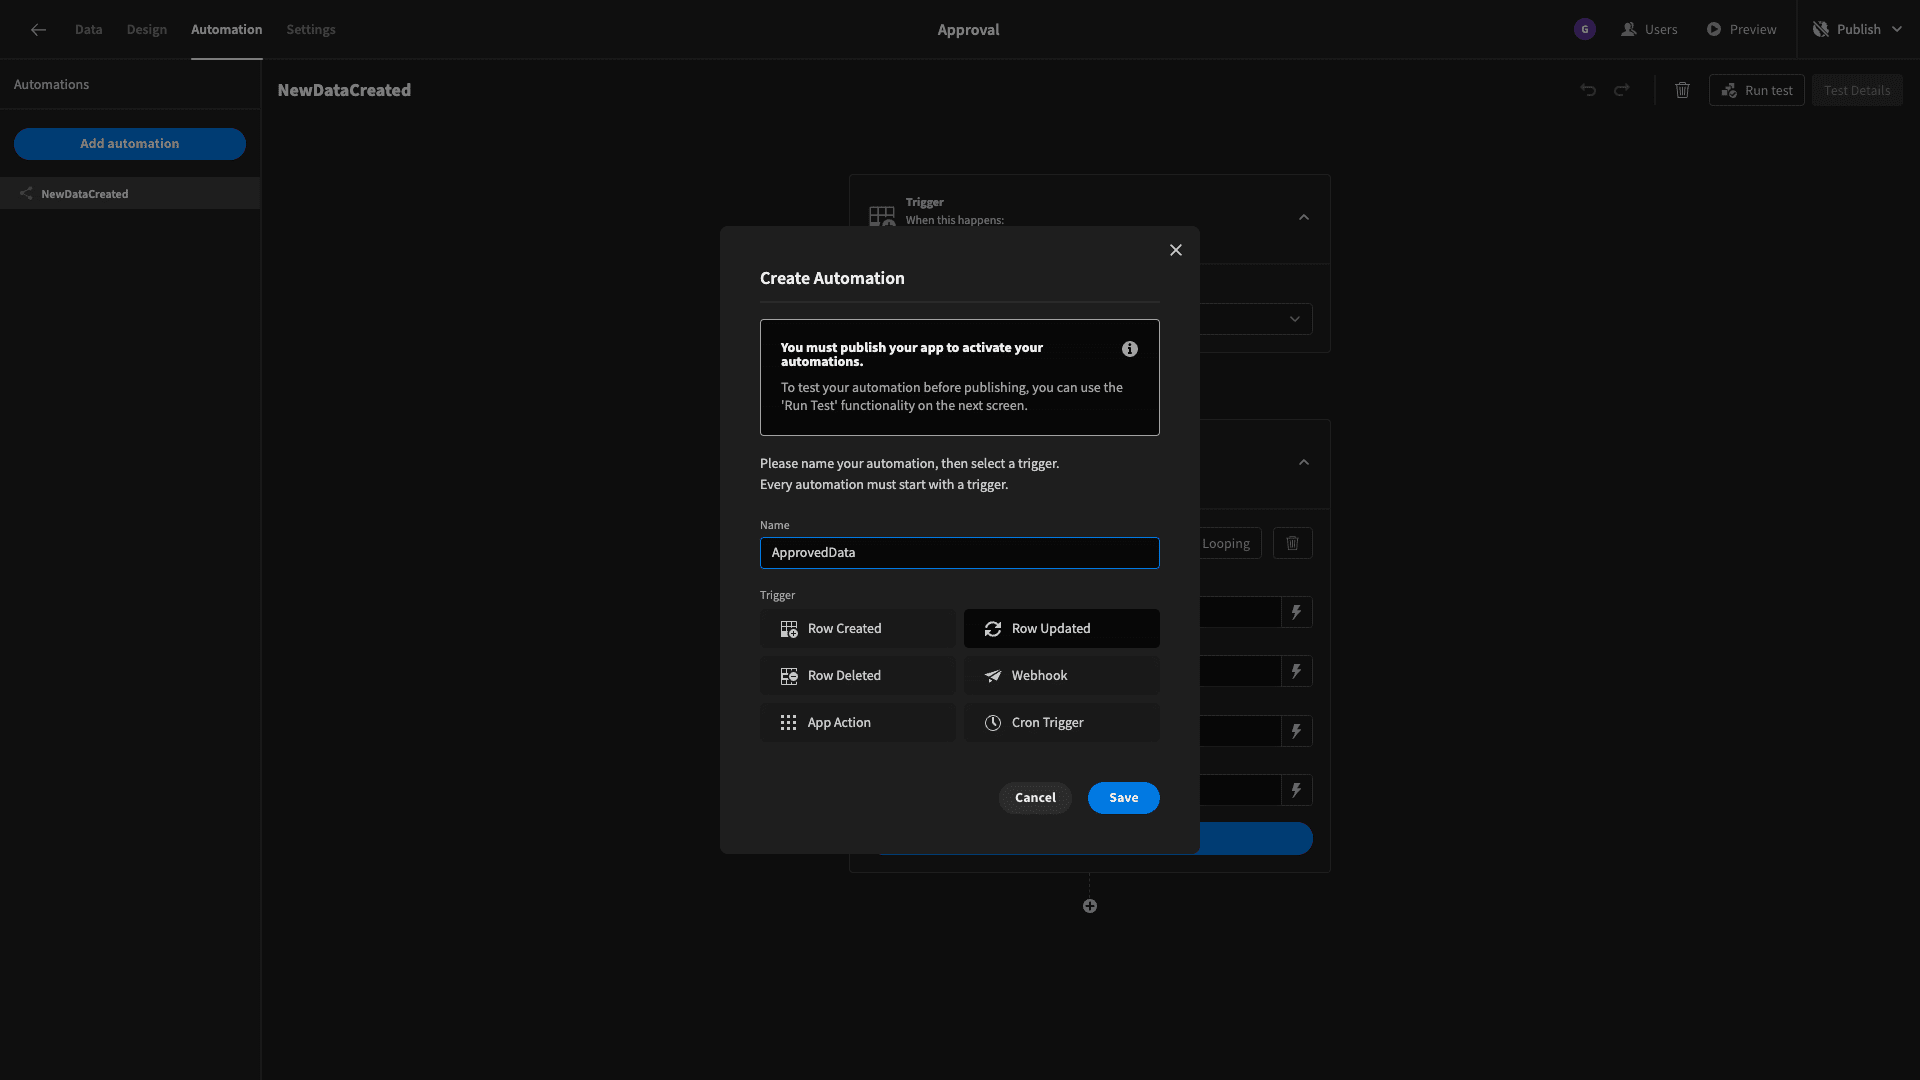
Finally, we’re going to add our second automation. What this will do is quite simple. When a row on the sales_kpi_draft table is updated, we’ll check its status. If this equals approved, we’ll add the row to our other table sale_kpi.
We’ll create another automation row, this time using the row updated trigger, setting its table to sales_kpi_draft:
Next, we’ll add a condition block to check if the trigger row’s status attribute is equal to approved:
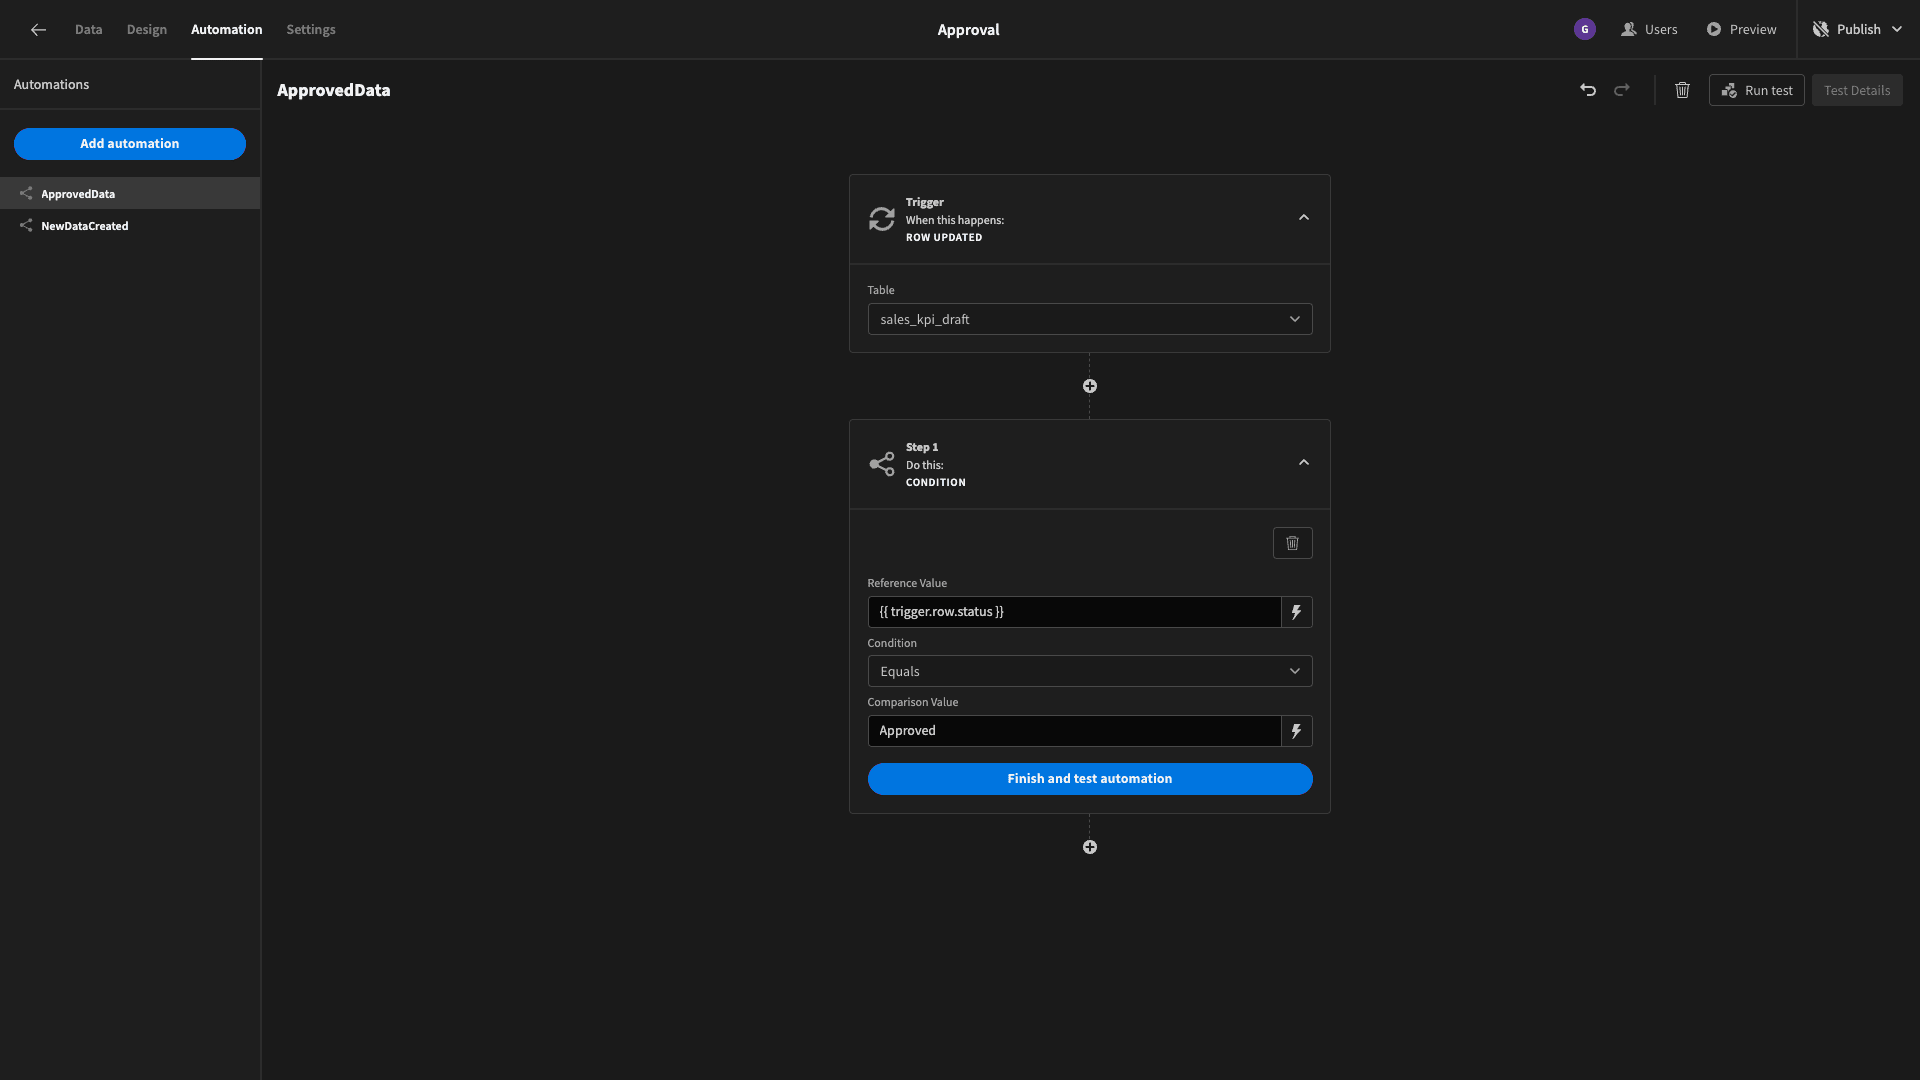
The automation will only carry on to the next step if this condition is met. If the row has any other status, it will stop here.
If the condition is met, we want to create a new row in the sales_kpi table. Here, we’ll bind each of the values for our new row to their corresponding values in our trigger row:
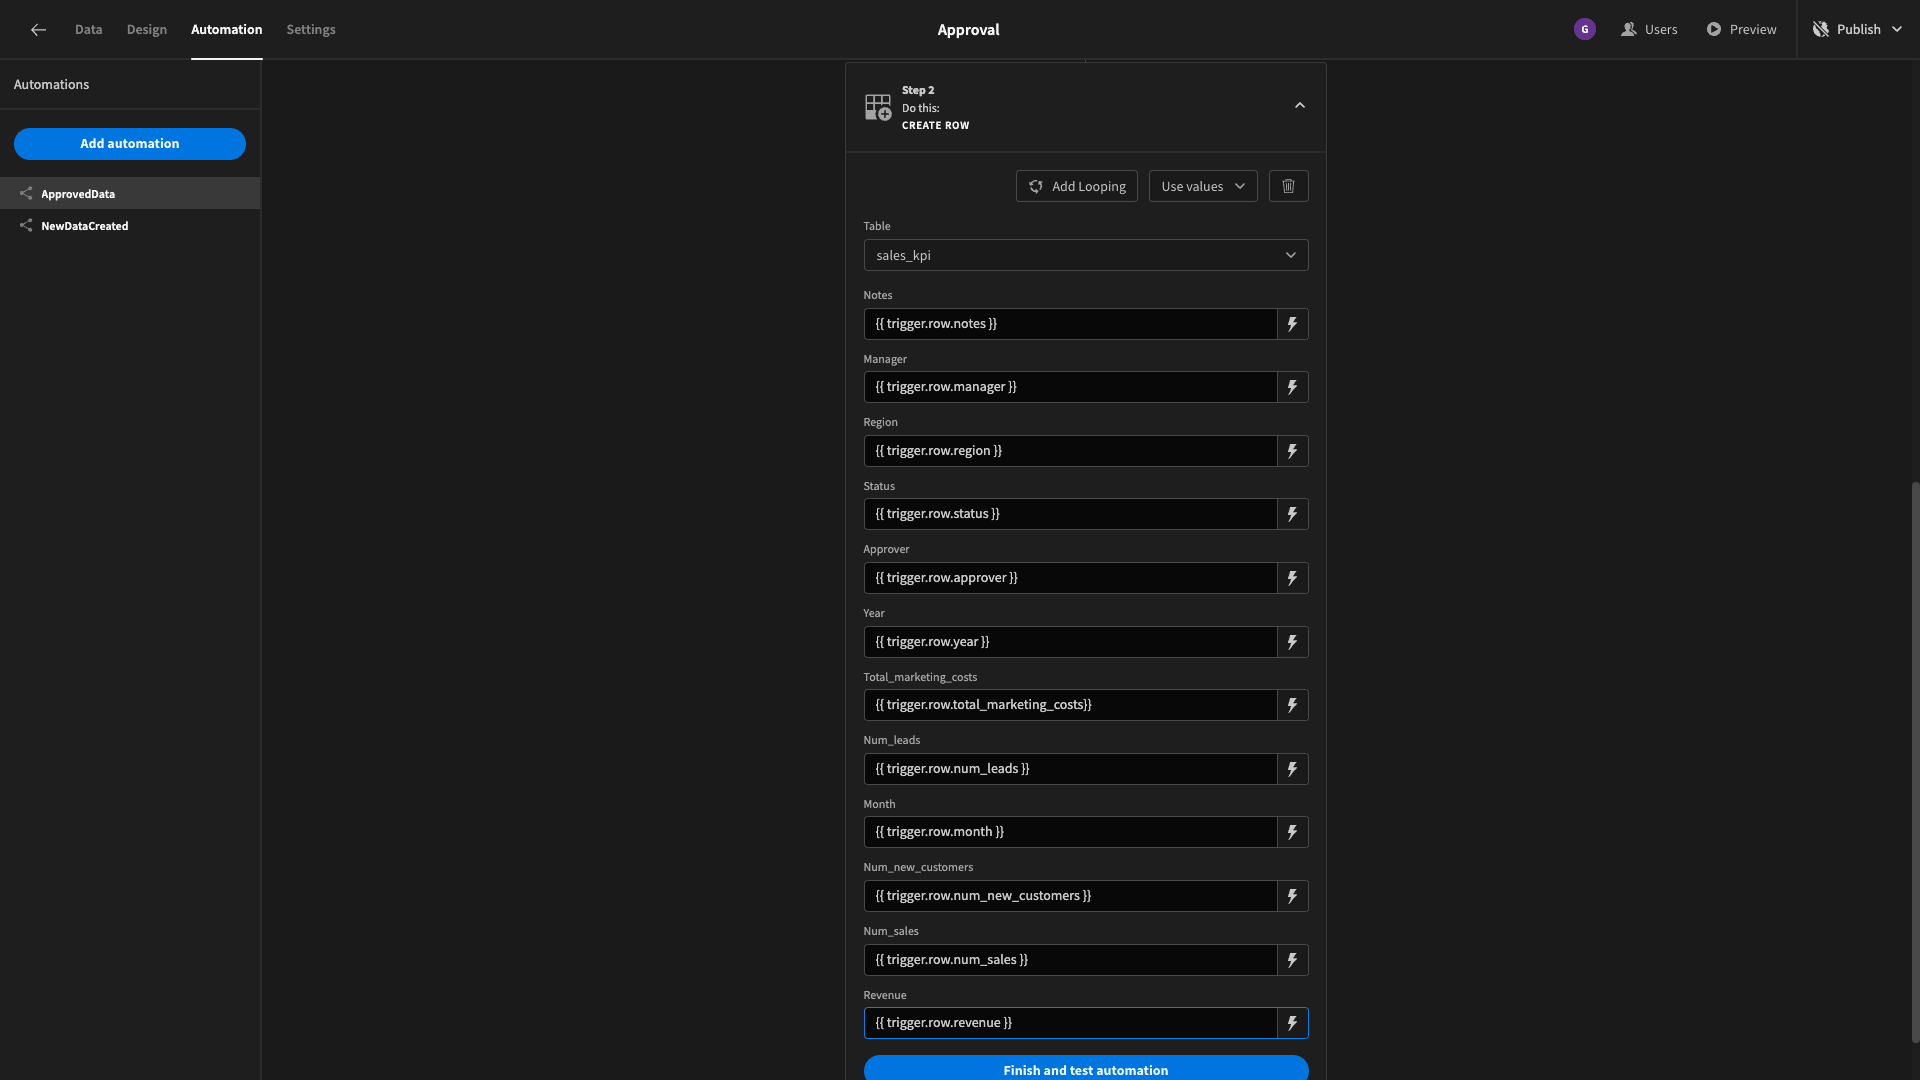
We can test this out to make sure it works, and when we’re happy, we need to publish our app for it to work in the field.
As we said earlier, the nature of more complex approval processes is that they’re highly specific to your actual business rules and logic.
You can use Budibase to implement your own real-world business logic, for seamless approval workflow tools.
Check out our follow-on tutorial, where we create a bespoke sales dashboard using our existing approval tool as a jumping-off point.