How to Build Inventory Automations with Budibase
Inventory automation is potentially the most transformative tool that logistics teams have at their disposal.
See, managing inventories can be incredibly tricky - owing largely to the complexity of the data and processes involved.
Not only does this make it difficult to understand the current state of our inventory - it can also create mountains of administrative work and introduce unnecessary scope for error.
Inventory automation seeks to address all three of these problems simultaneously.
Today, we’re checking out how we can use Budibase to build custom automation solutions around existing data sets - with minimal custom code.
Specifically, we’re going to build an application to track and collate stock levels based on sales, returns, and procurement.
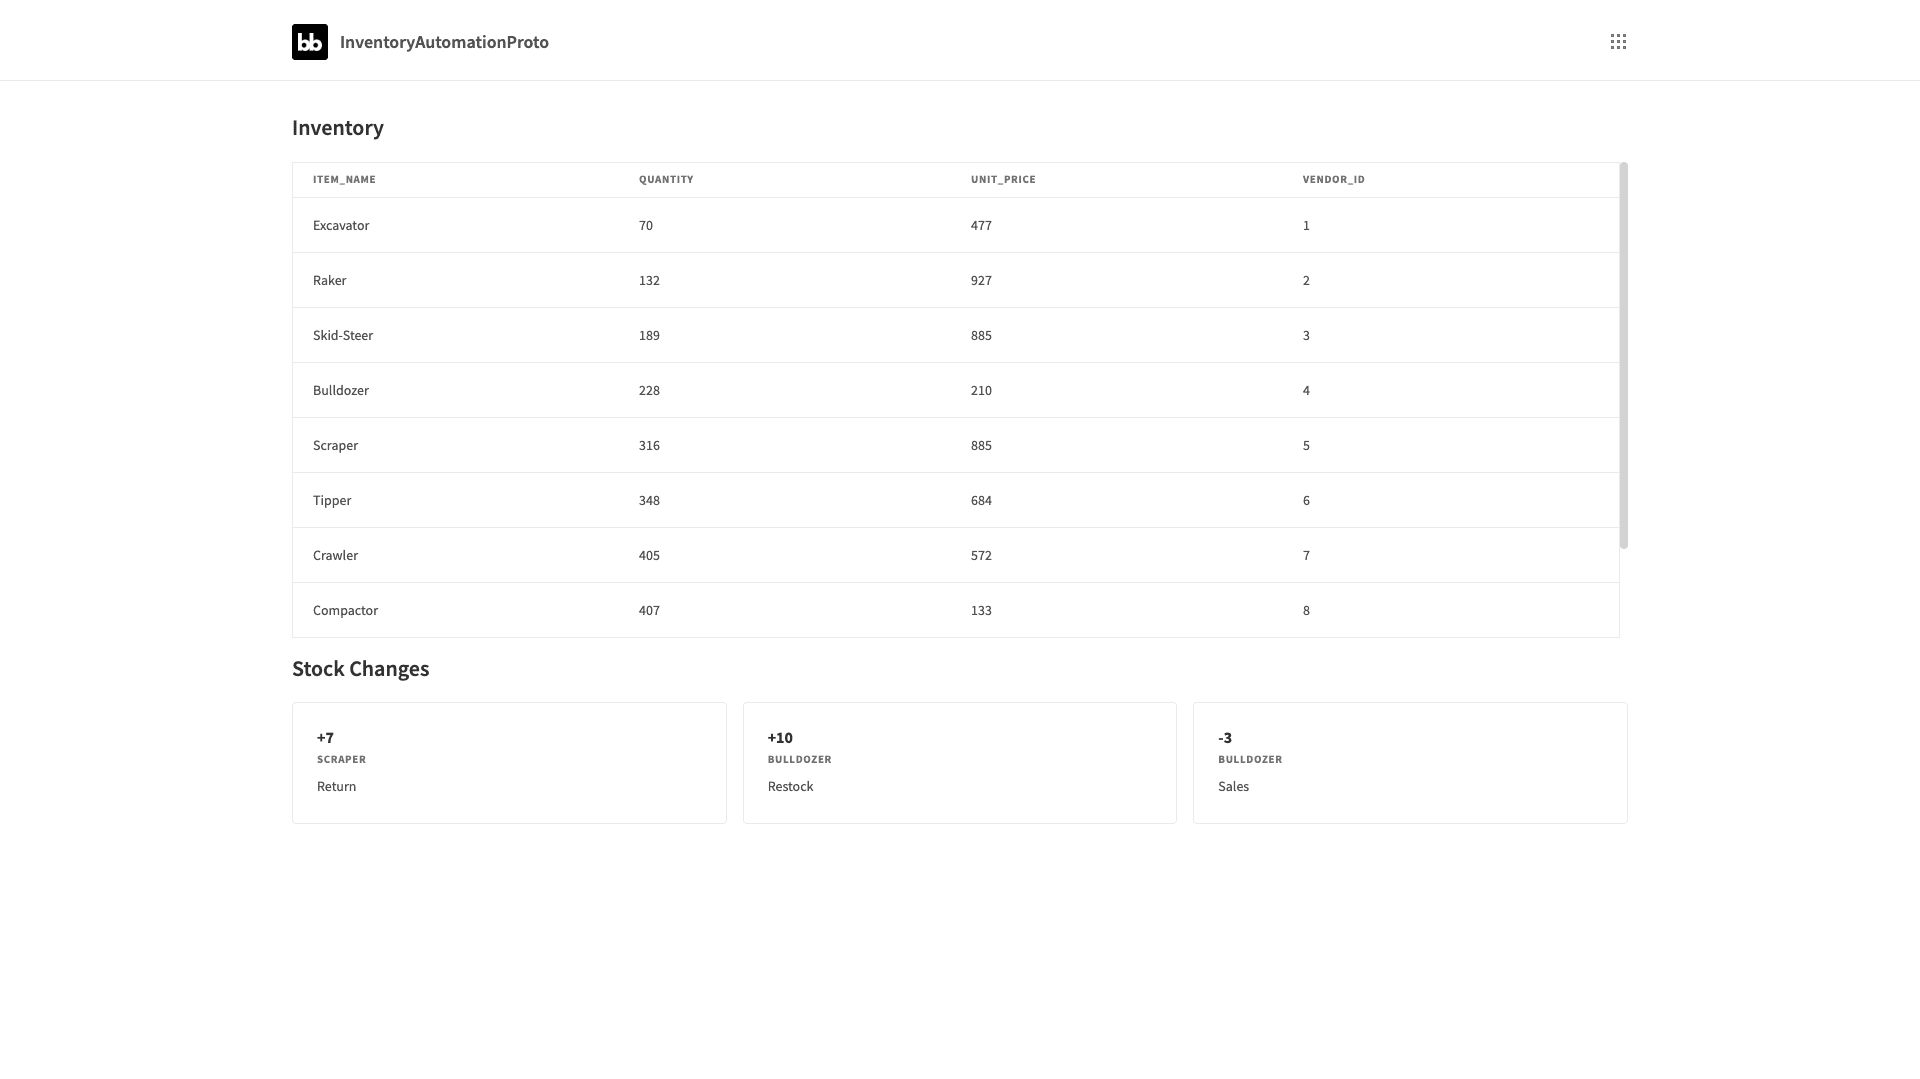
We’ll also add an admin panel UI so that users can check stock, track stock changes, and restock items by emailing the vendor.
But first, let’s check out a little bit of background information.
What is inventory automation?
Inventory automation means using digital technology to replace or support manual interactions within your inventory management workflows.
This can range from individual tasks to full-scale processes.
We might also be dealing with relatively generic tasks, like data centralization or order processing. Or, we could be dealing with processes that are highly specific to your particular internal operations.
In any case, the goal is to maximize efficiency, accuracy, visibility, and reliability within inventory management workflows by reducing the need for human interventions.
What are we building?
Our inventory automation app is built around two related clusters of functionalities:
- Back-end automation to update our inventory records based on the outcomes of sales, returns, and procurement processes.
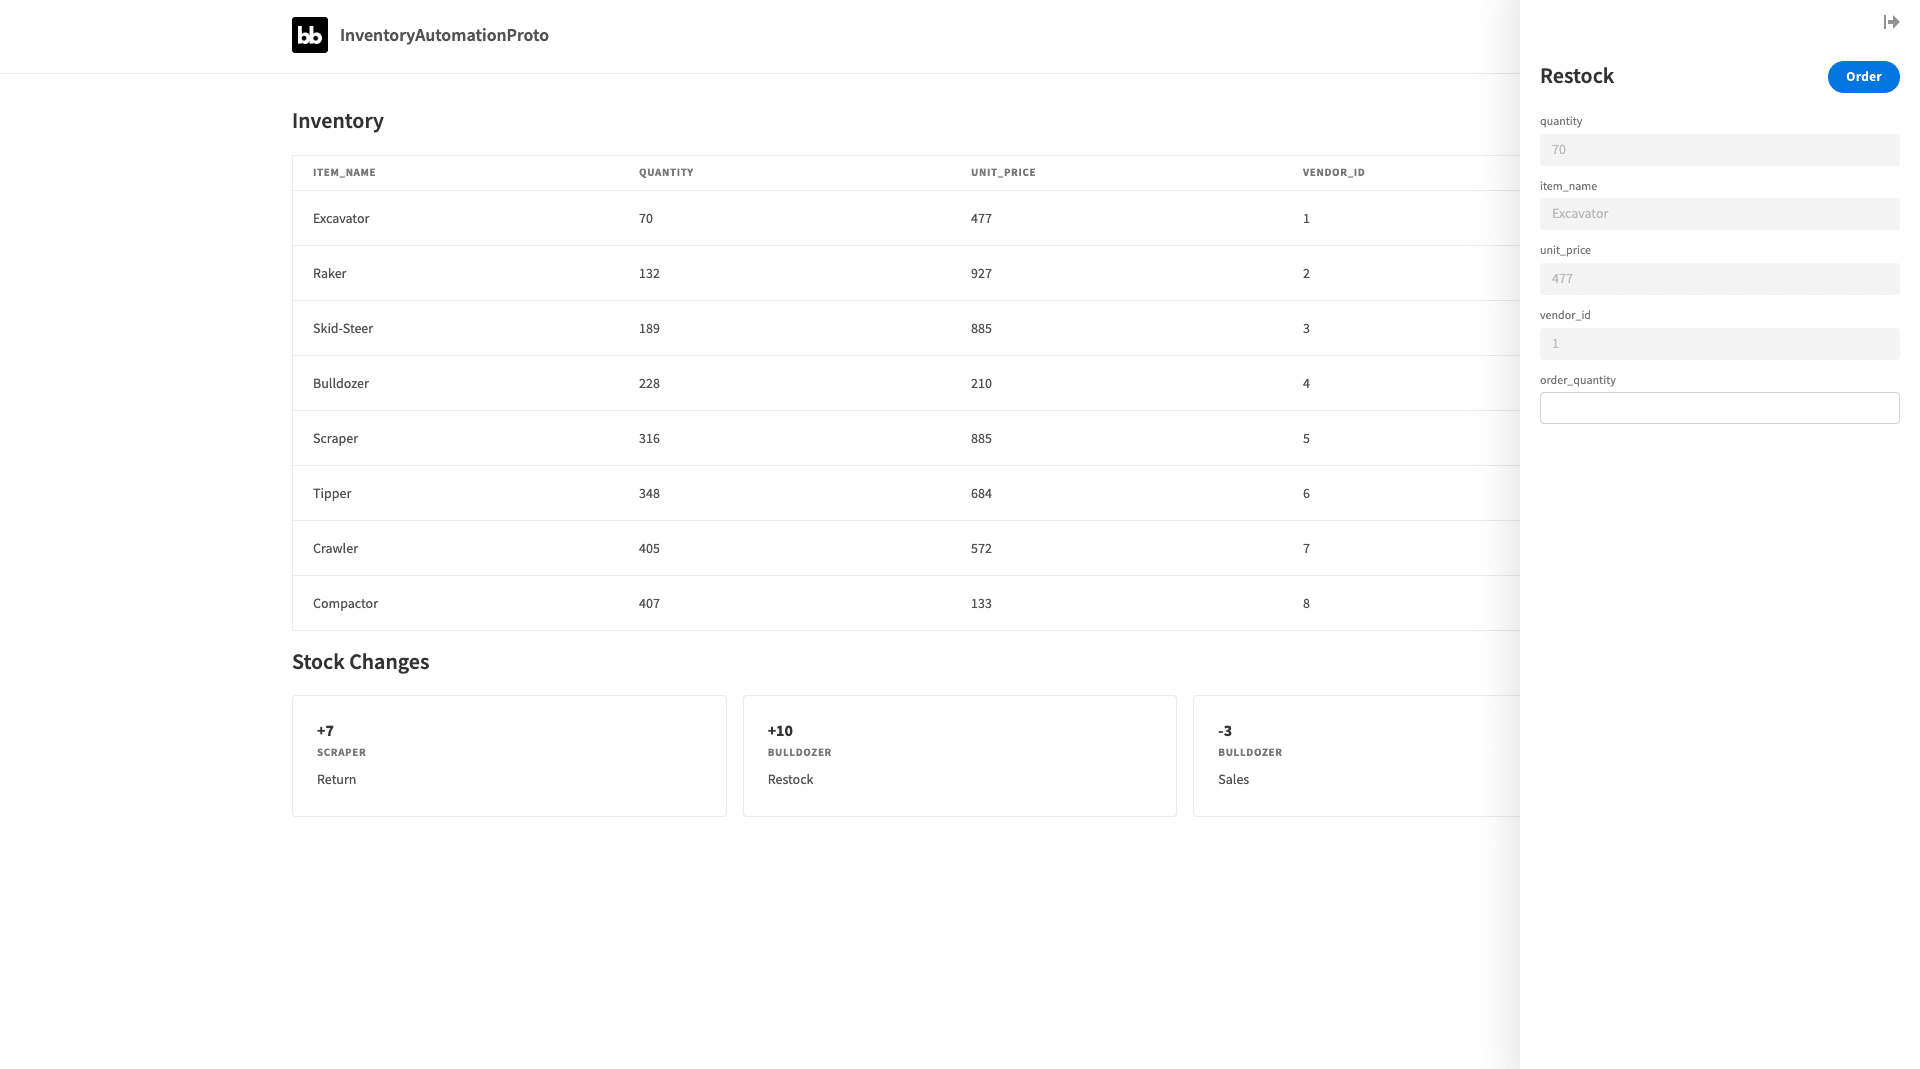
- A front-end admin panel where users can view stock level or recent stock changes - as well as contact vendors to order new items.
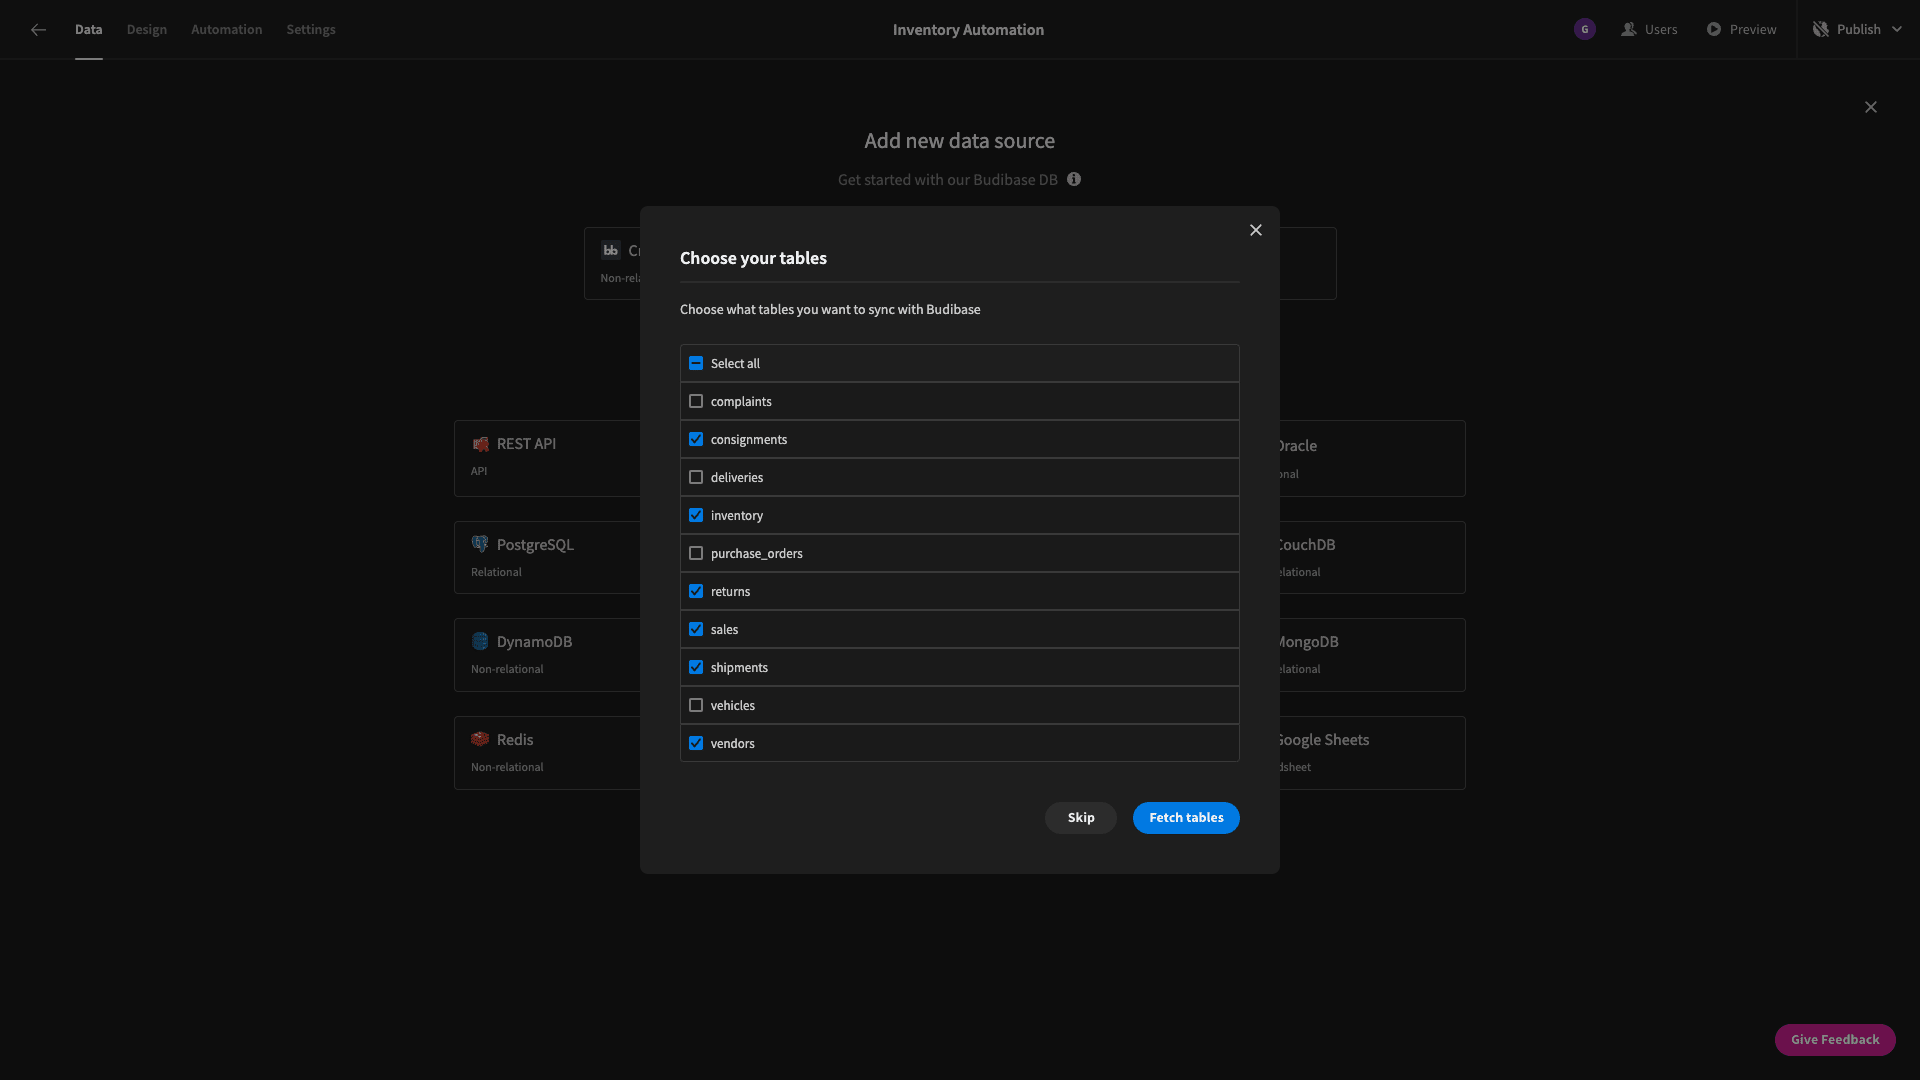
We’re going to build this around an existing Postgresql database, with separate tables representing our inventory, sales, shipments, consignments, vendors, and returns. Alongside this, we’ll create a new BudibaseDB table for storing information on inventory changes.
Of course, a lot of the functionality will be handled in the back-end, invisible to end-users. Here’s what the finished UI will look like:
Our inventory table also features clickable rows, where users can drill into information about each item and get in contact with the relevant vendor to order new stock - directly from within the application:
How to build an inventory automation solution with Budibase in 7 steps
Let’s dive right in.
If you haven’t already, sign up for a free Budibase application.
1. Create a new Budibase application
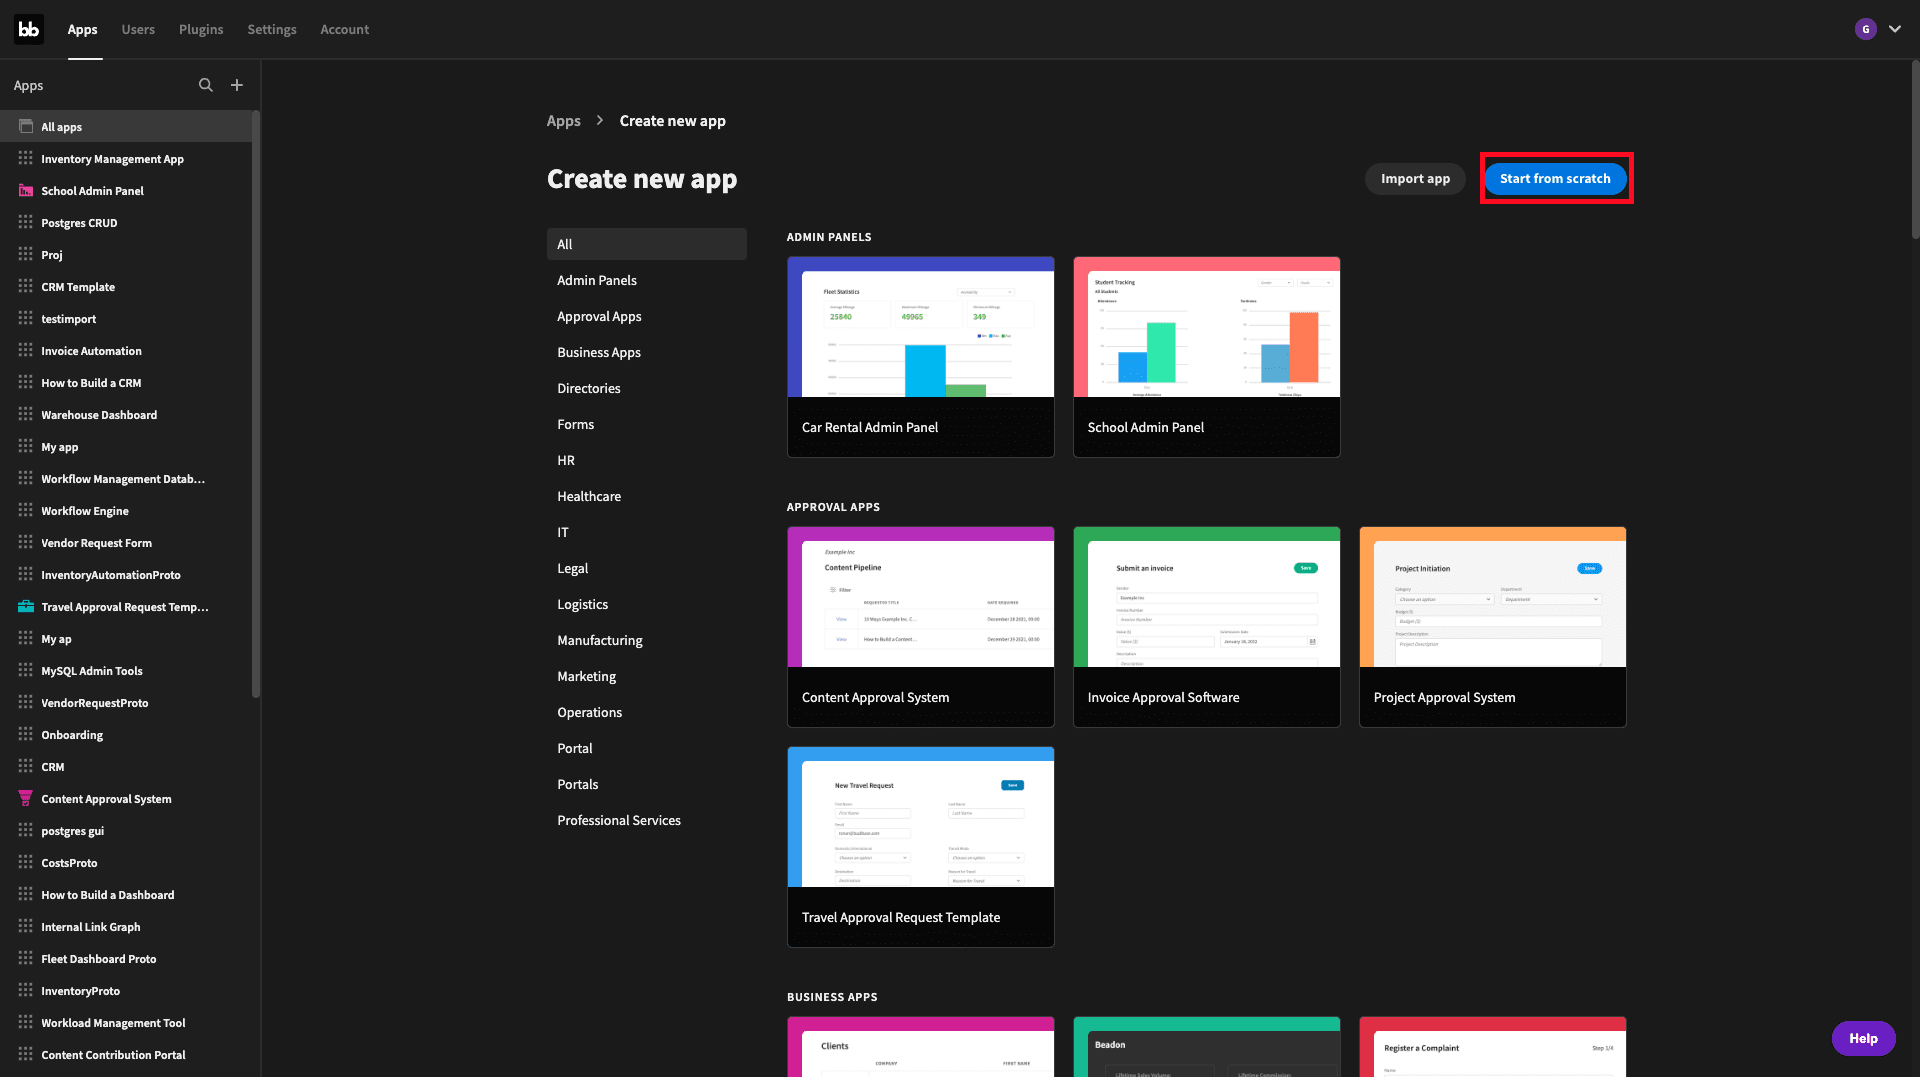
We’re going to start by creating a new Budibase application. As ever, we have the option of importing an existing app or using a template - but we’re starting from scratch:
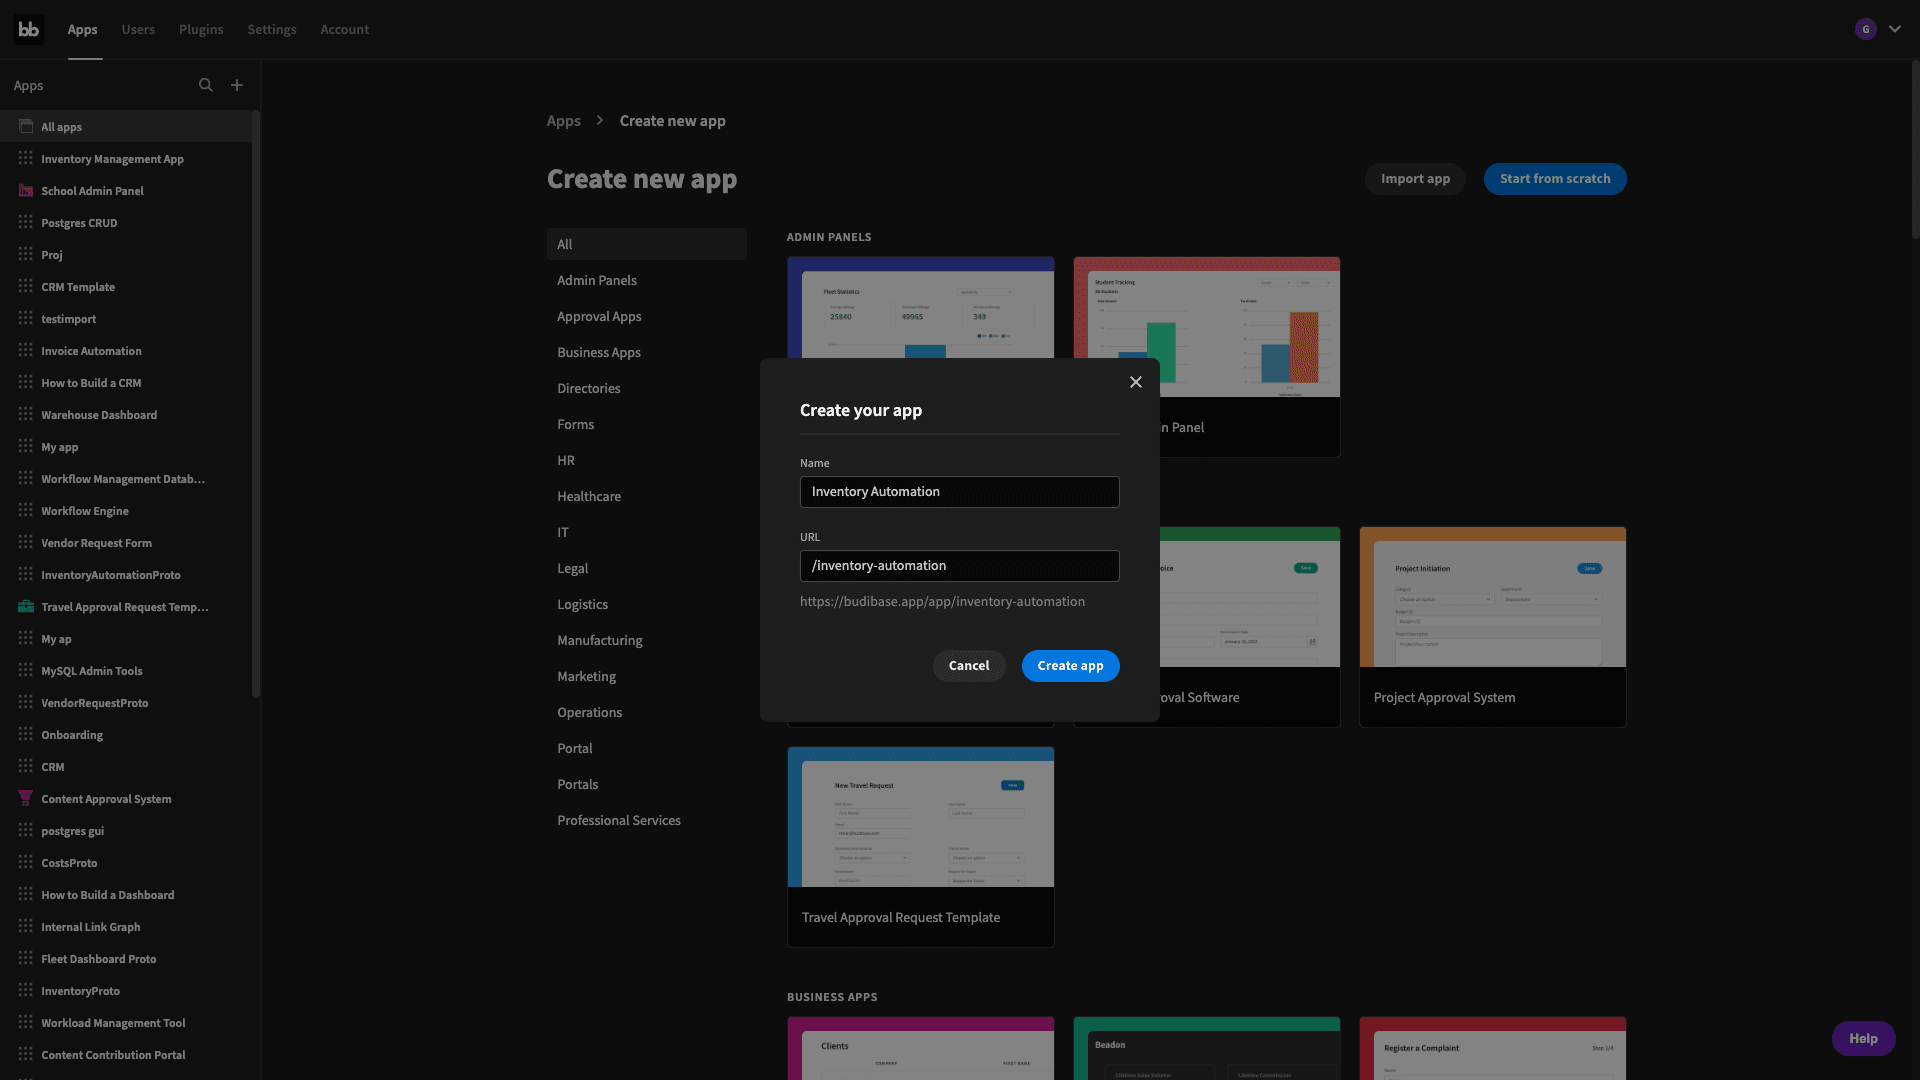
The first thing we need to do is choose a name for our app, which will also be used as its URL path:
2. Configuring our data
Next, we’ll be prompted to choose which type of data we want to start with. Budibase offers dedicated connectors for a range of SQL and NoSQL databases, alongside REST, Google Sheets, and our internal database.
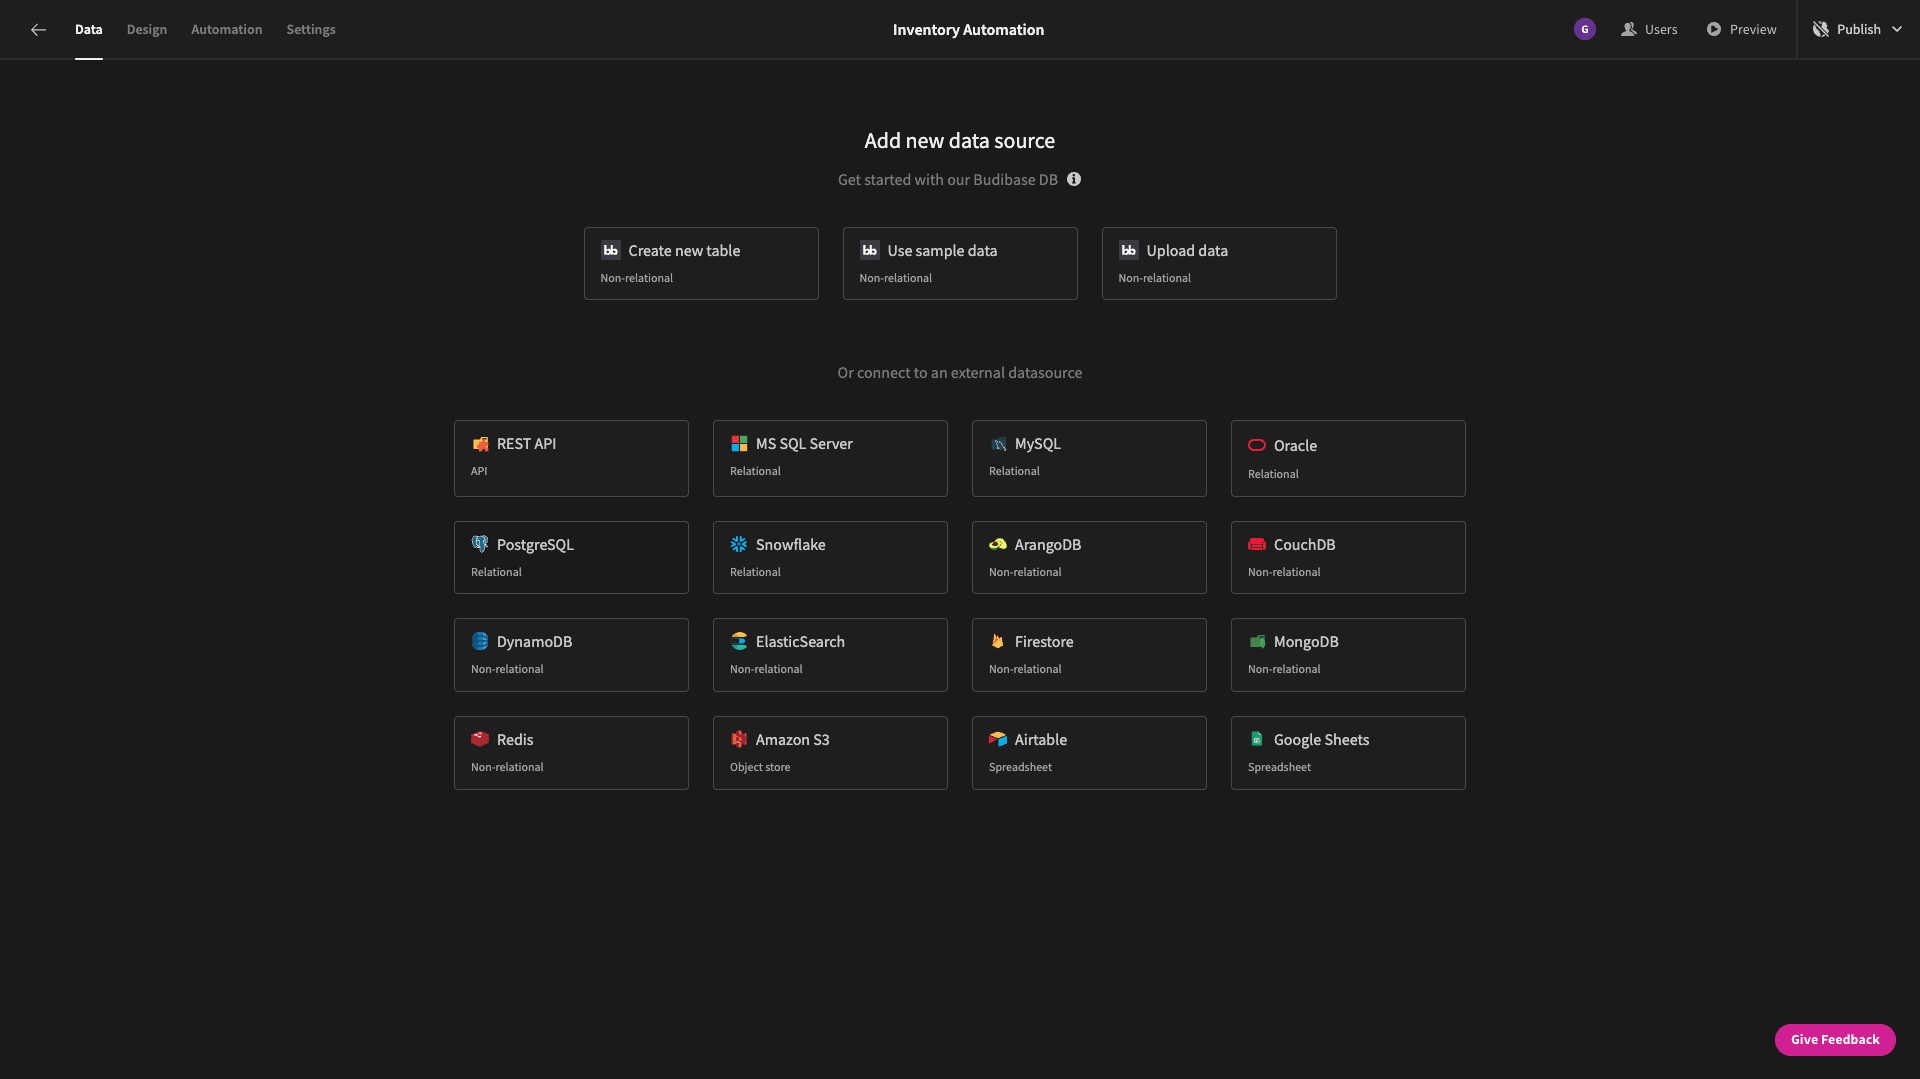
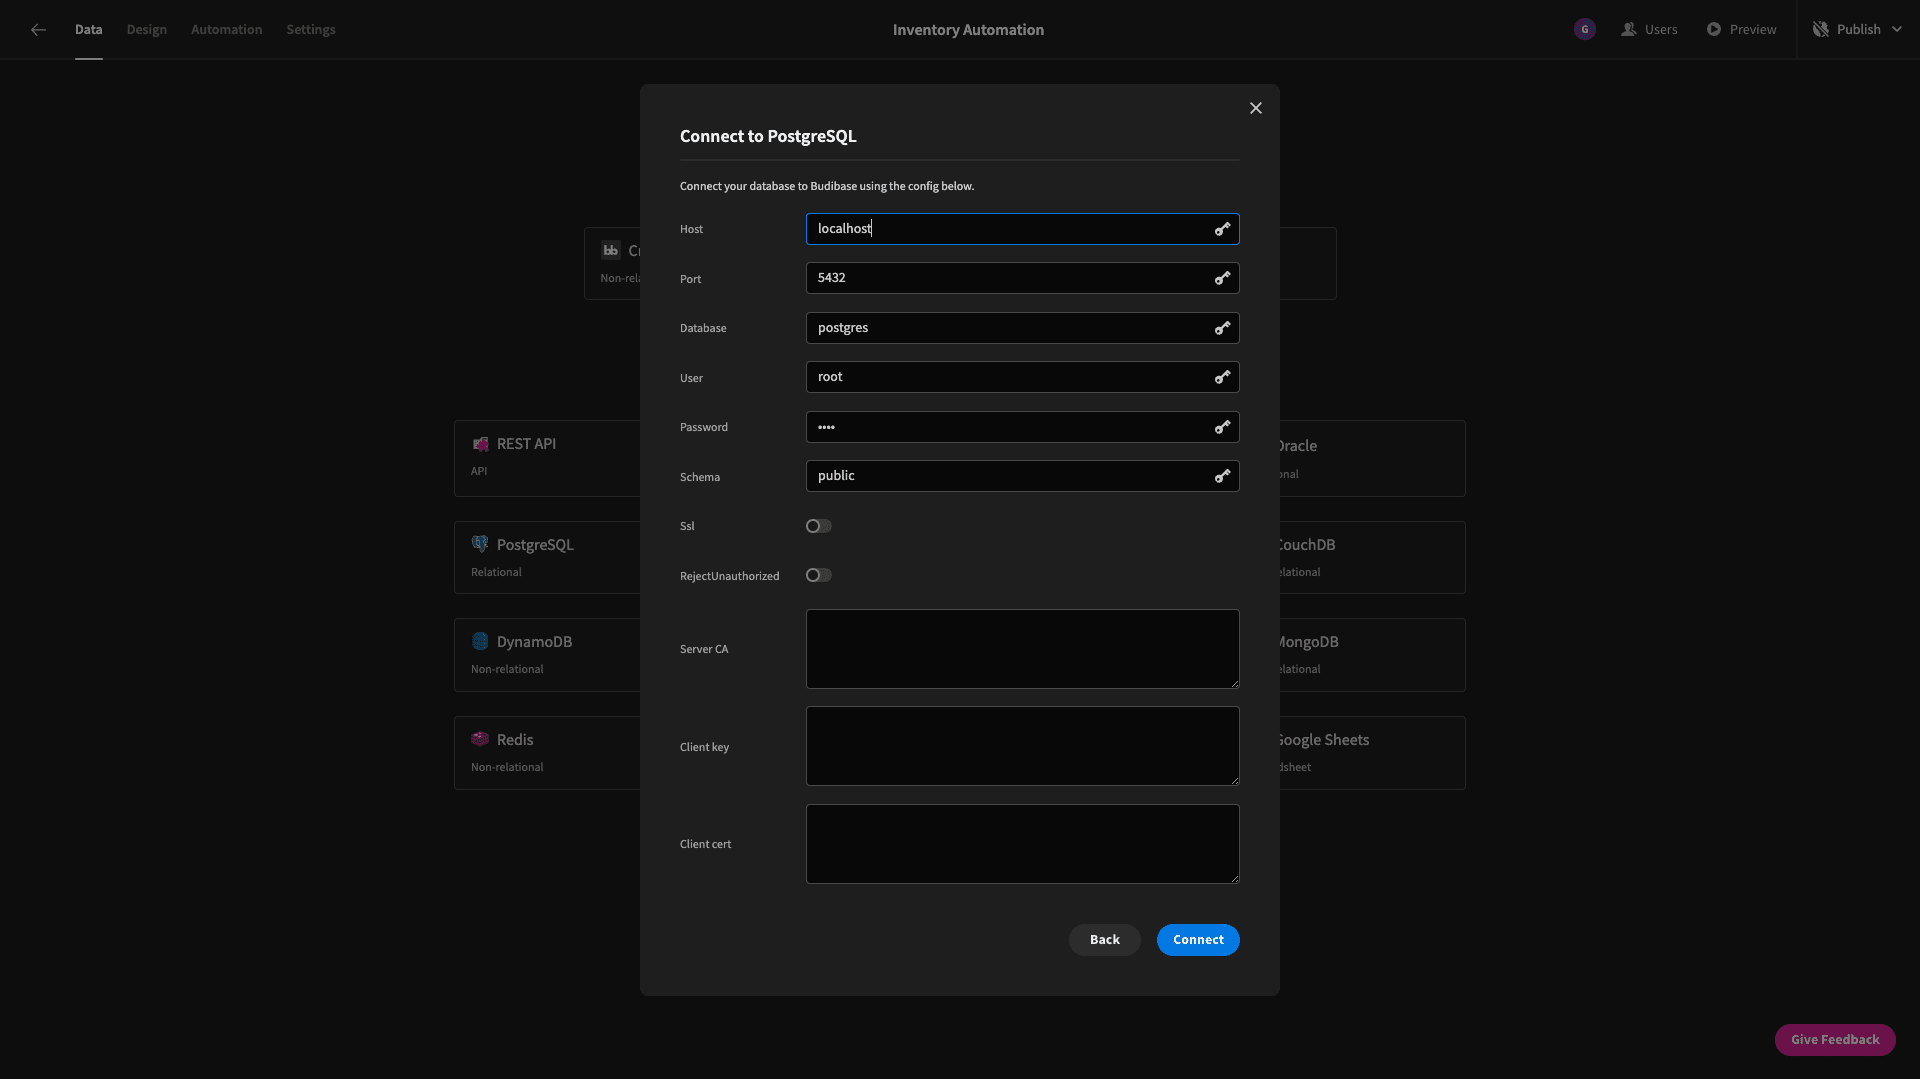
For our first data source, we’ll click on PostgreSQL. We’re then asked to input our configuration details.
We can then select which tables we’d like to fetch so that we can manipulate them within Budibase. Our database has several tables that we won’t need for this application. We’re only selecting the ones we listed earlier:
Straight away, we can use Budibase’s back-end to perform CRUD actions or edit the schema of any of our tables:

Each of our tables contains different data points that we’ll need to build our desired inventory automations - as well as foreign keys to denote relationships between them. We’ll outline these as and when we’re using them.
To finish off our data model, we need to add a second data source.
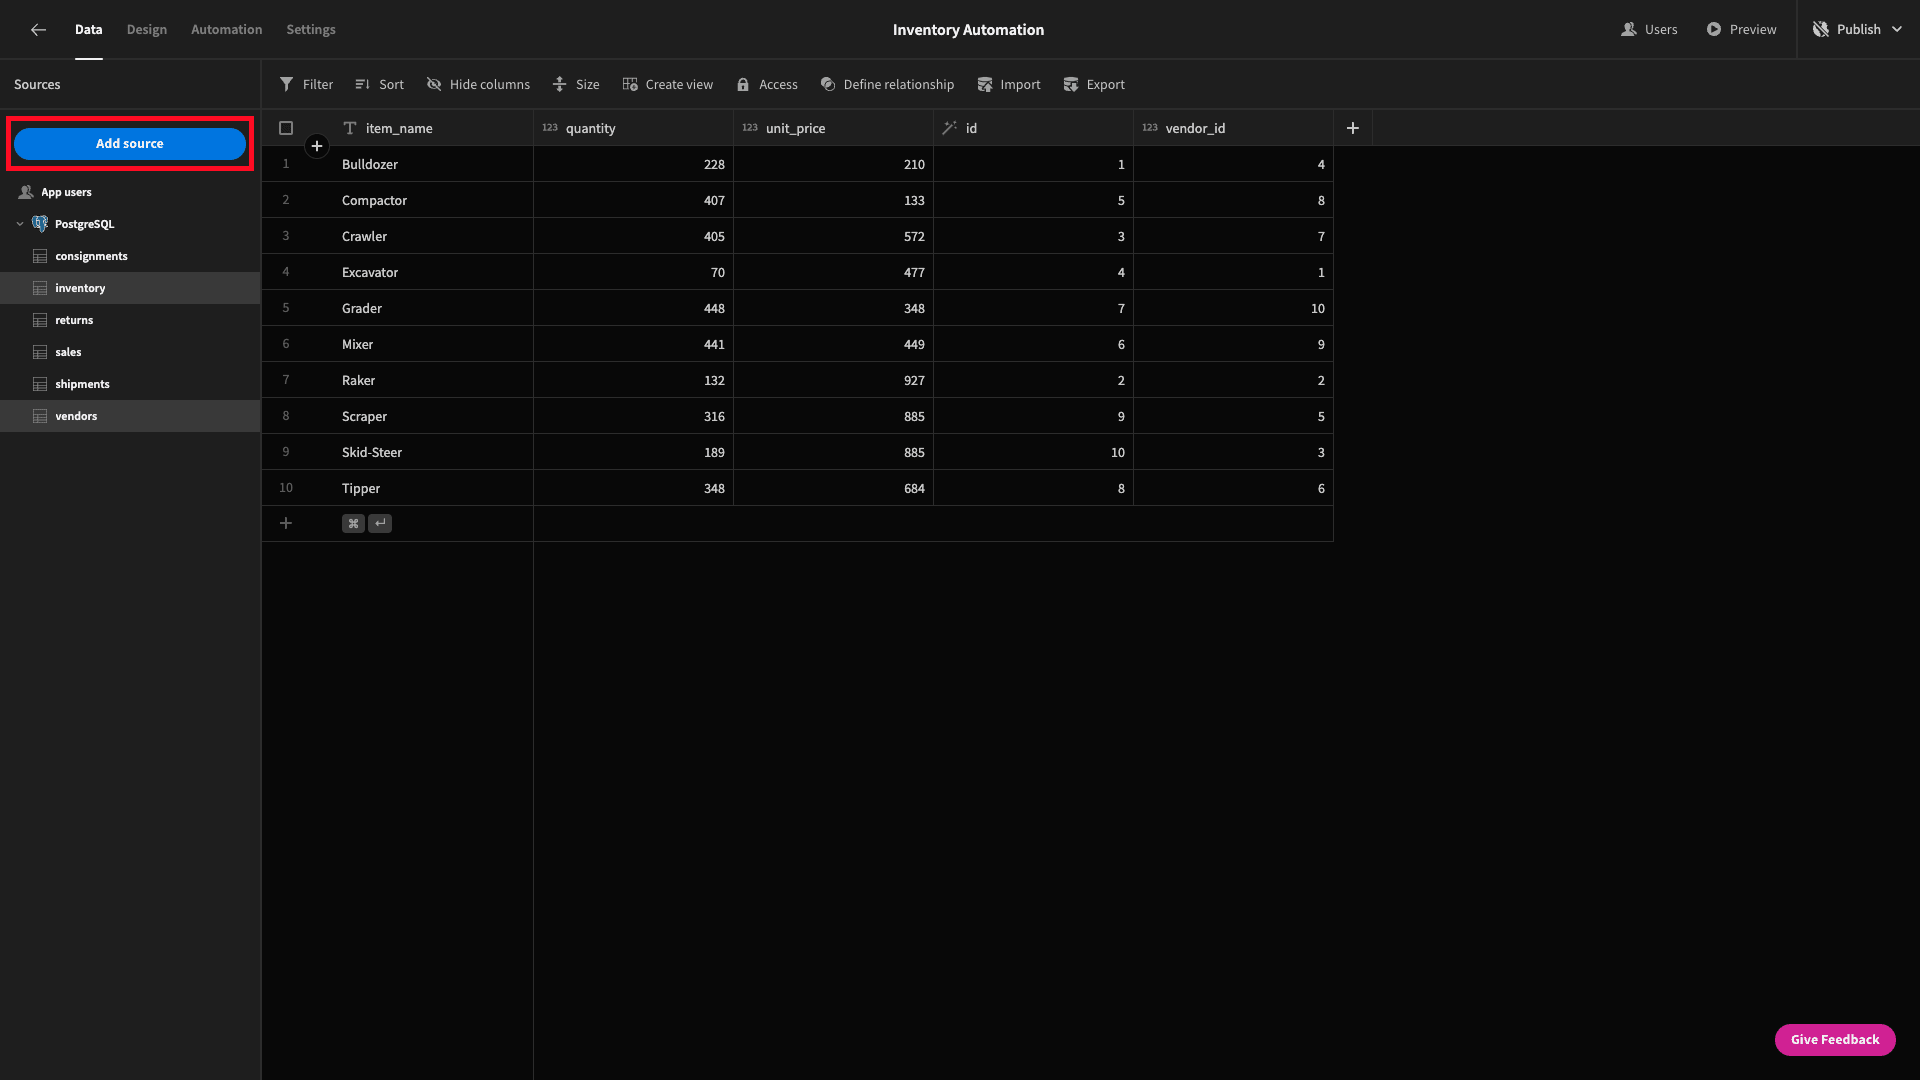
This time, when we’re prompted, we’ll choose an internal table.
We’ll call this inventory_changes.
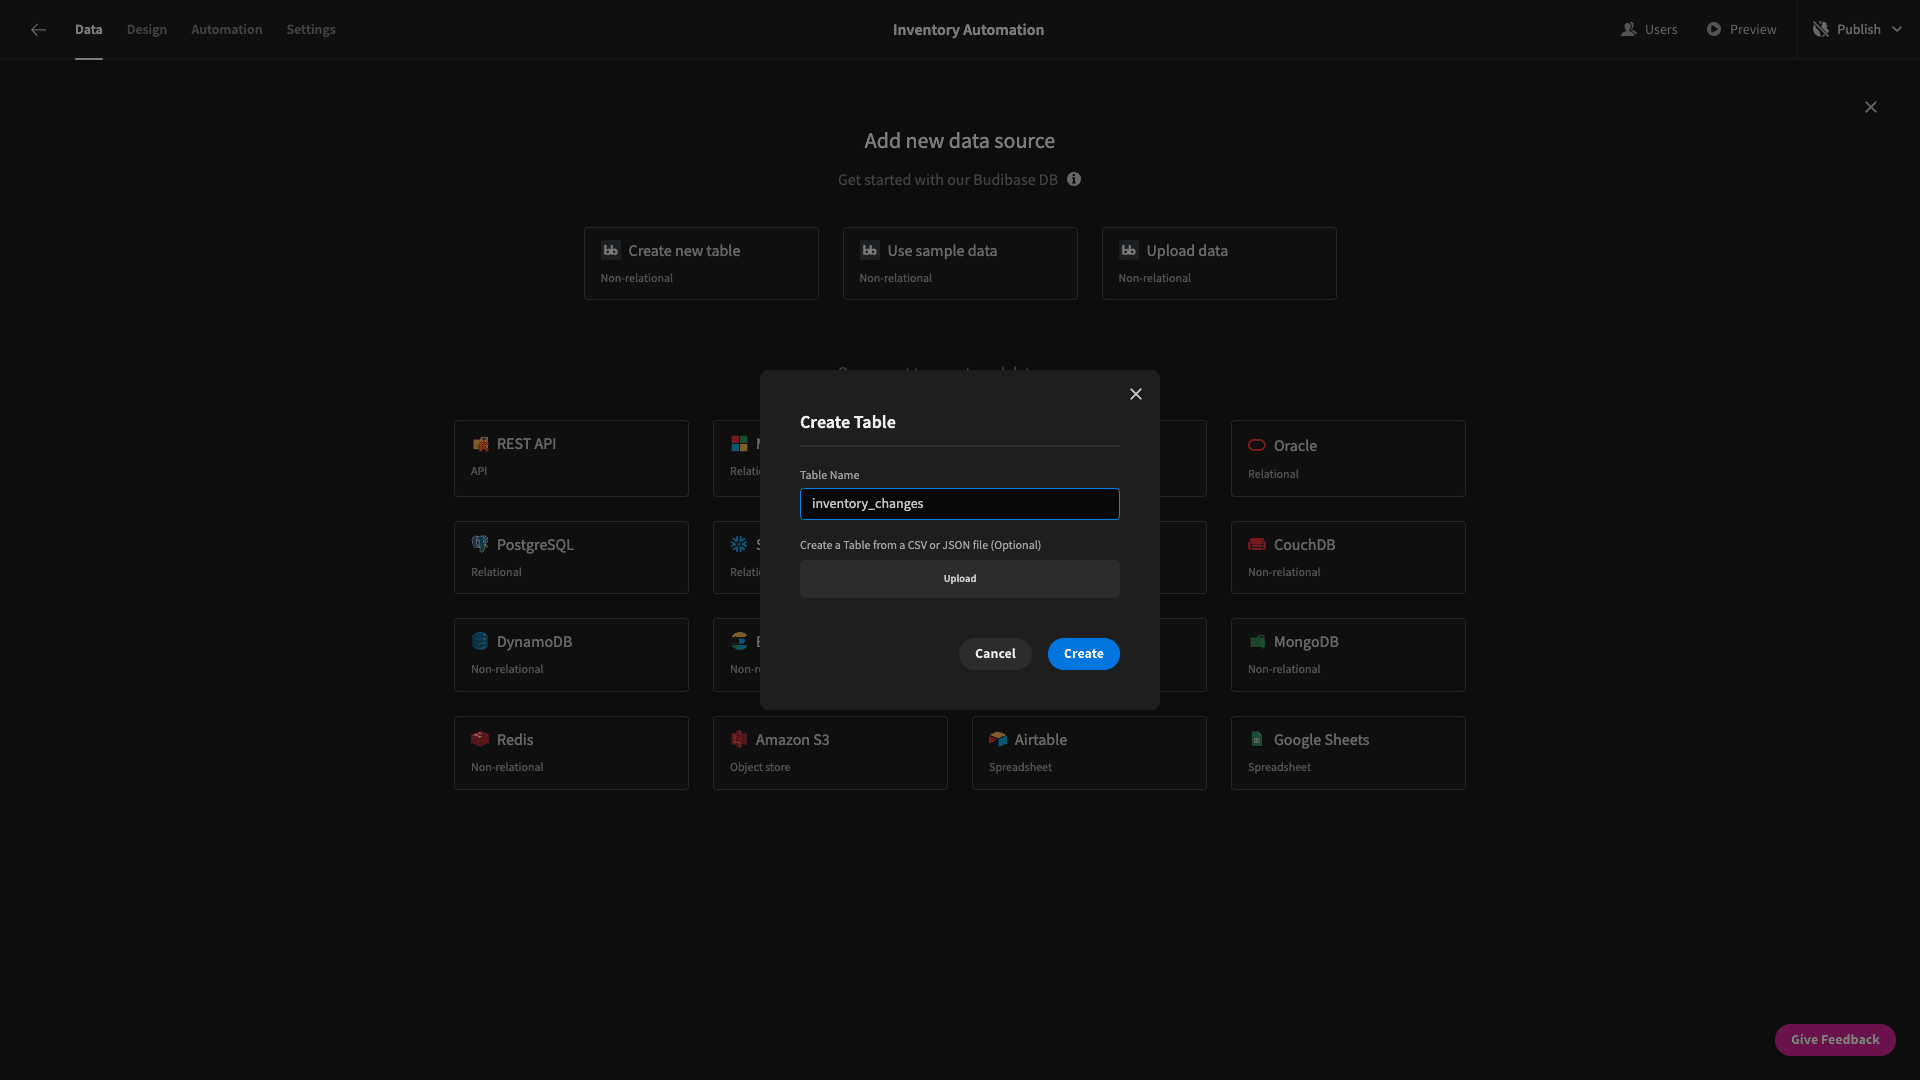
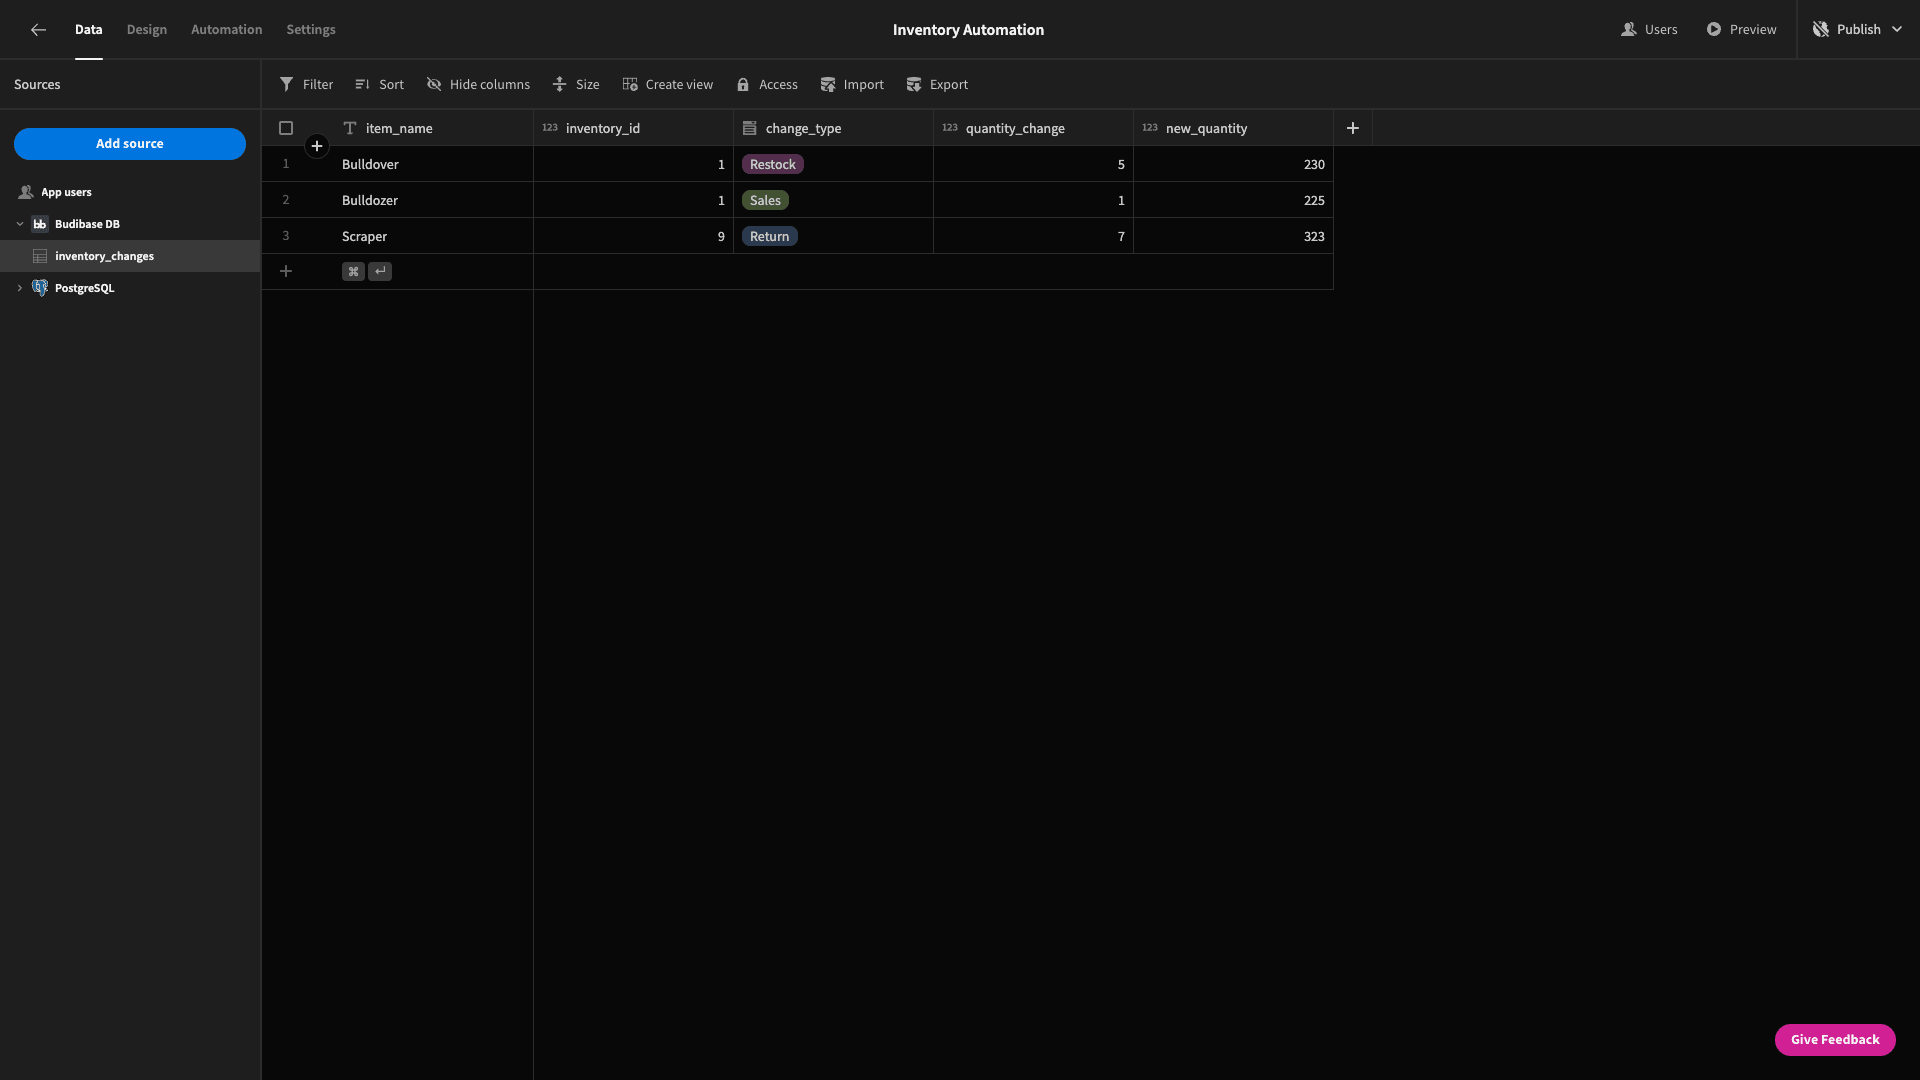
We’ll then need to populate the columns we want to store:
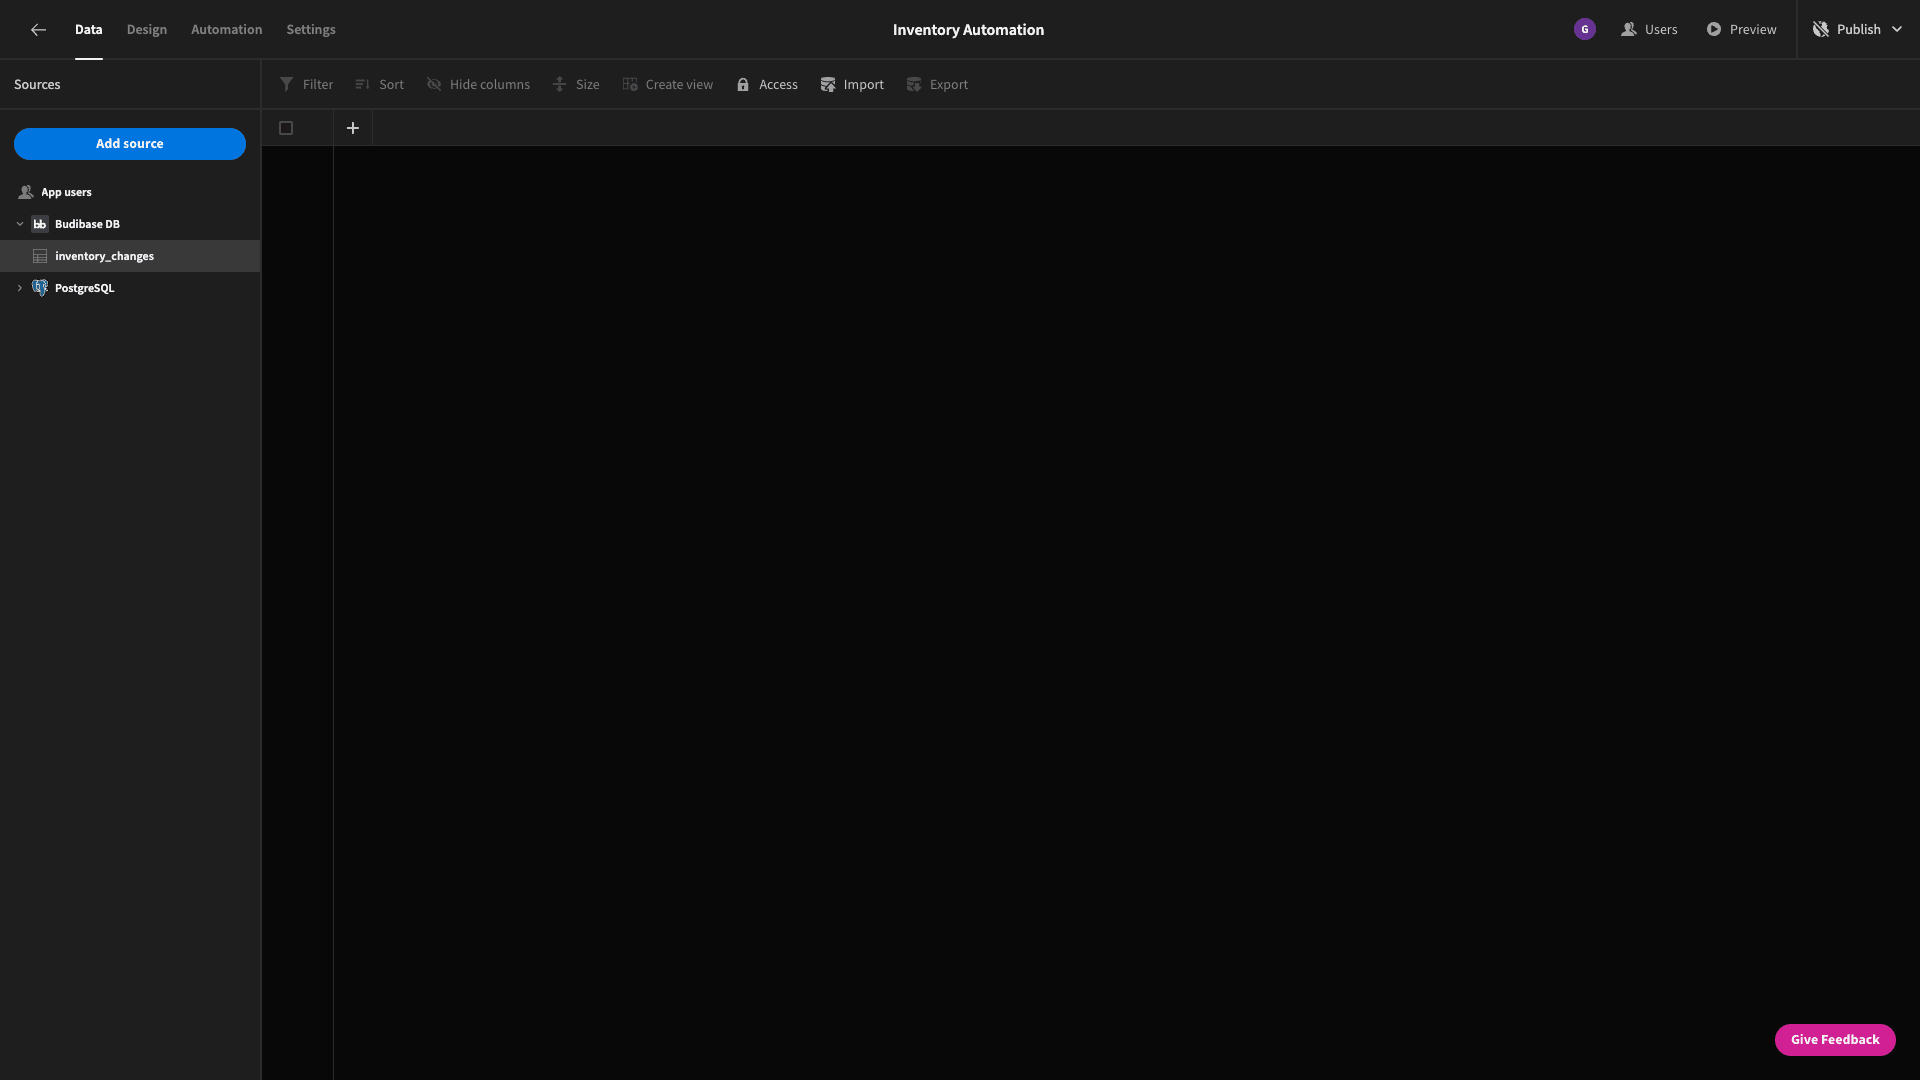
These are:
- item_name (text).
- inventory_id (number).
- change_type (options).
- quantity_change (number).
- new_quantity (number).
The options for the change_type attribute will be Return, Sales, and Restock.
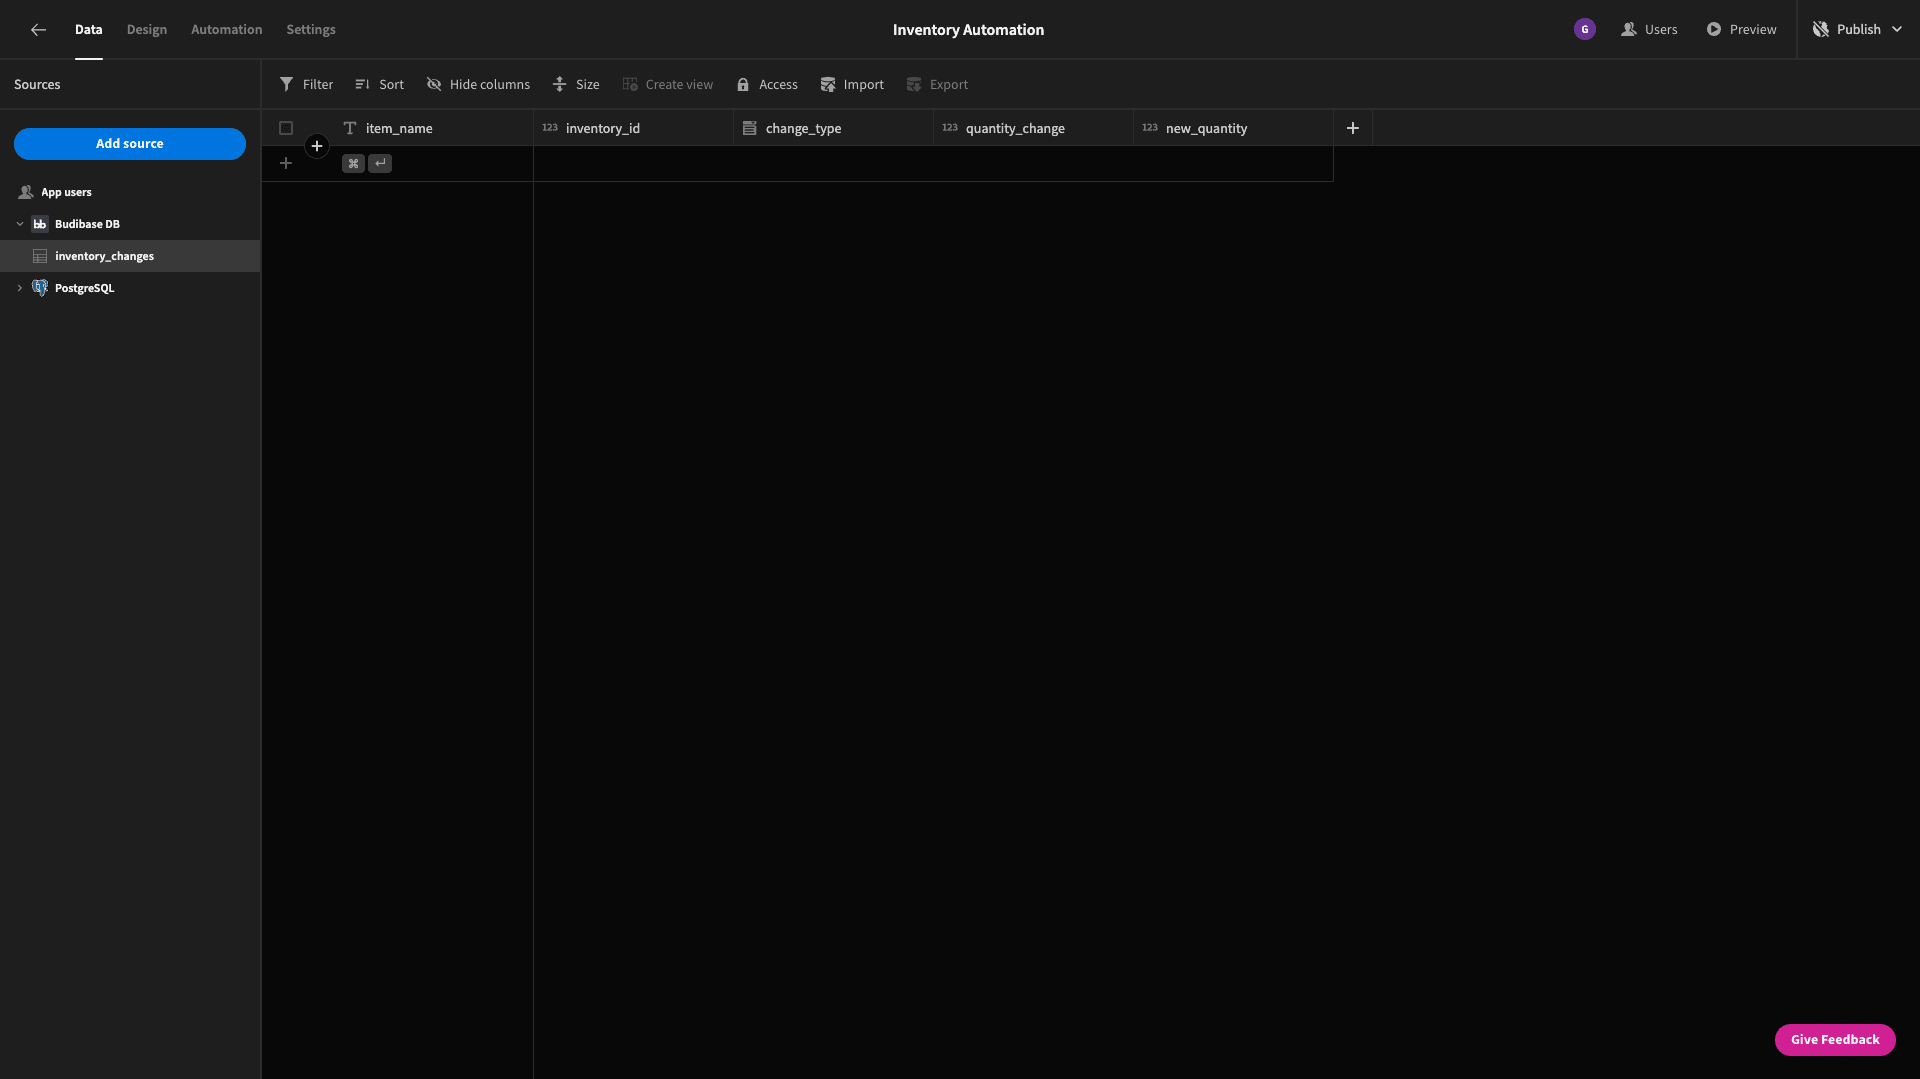
That’s our data model ready.
Next, we’ll start building automation rules. The basic logic of our app is that the inventory table stores the present stock levels of various items. We need automations to update this data, when a new sale, return, or incoming consignment is processed.
We’ll also record the details of these changes on our inventory_changes table.
3. Handling sales
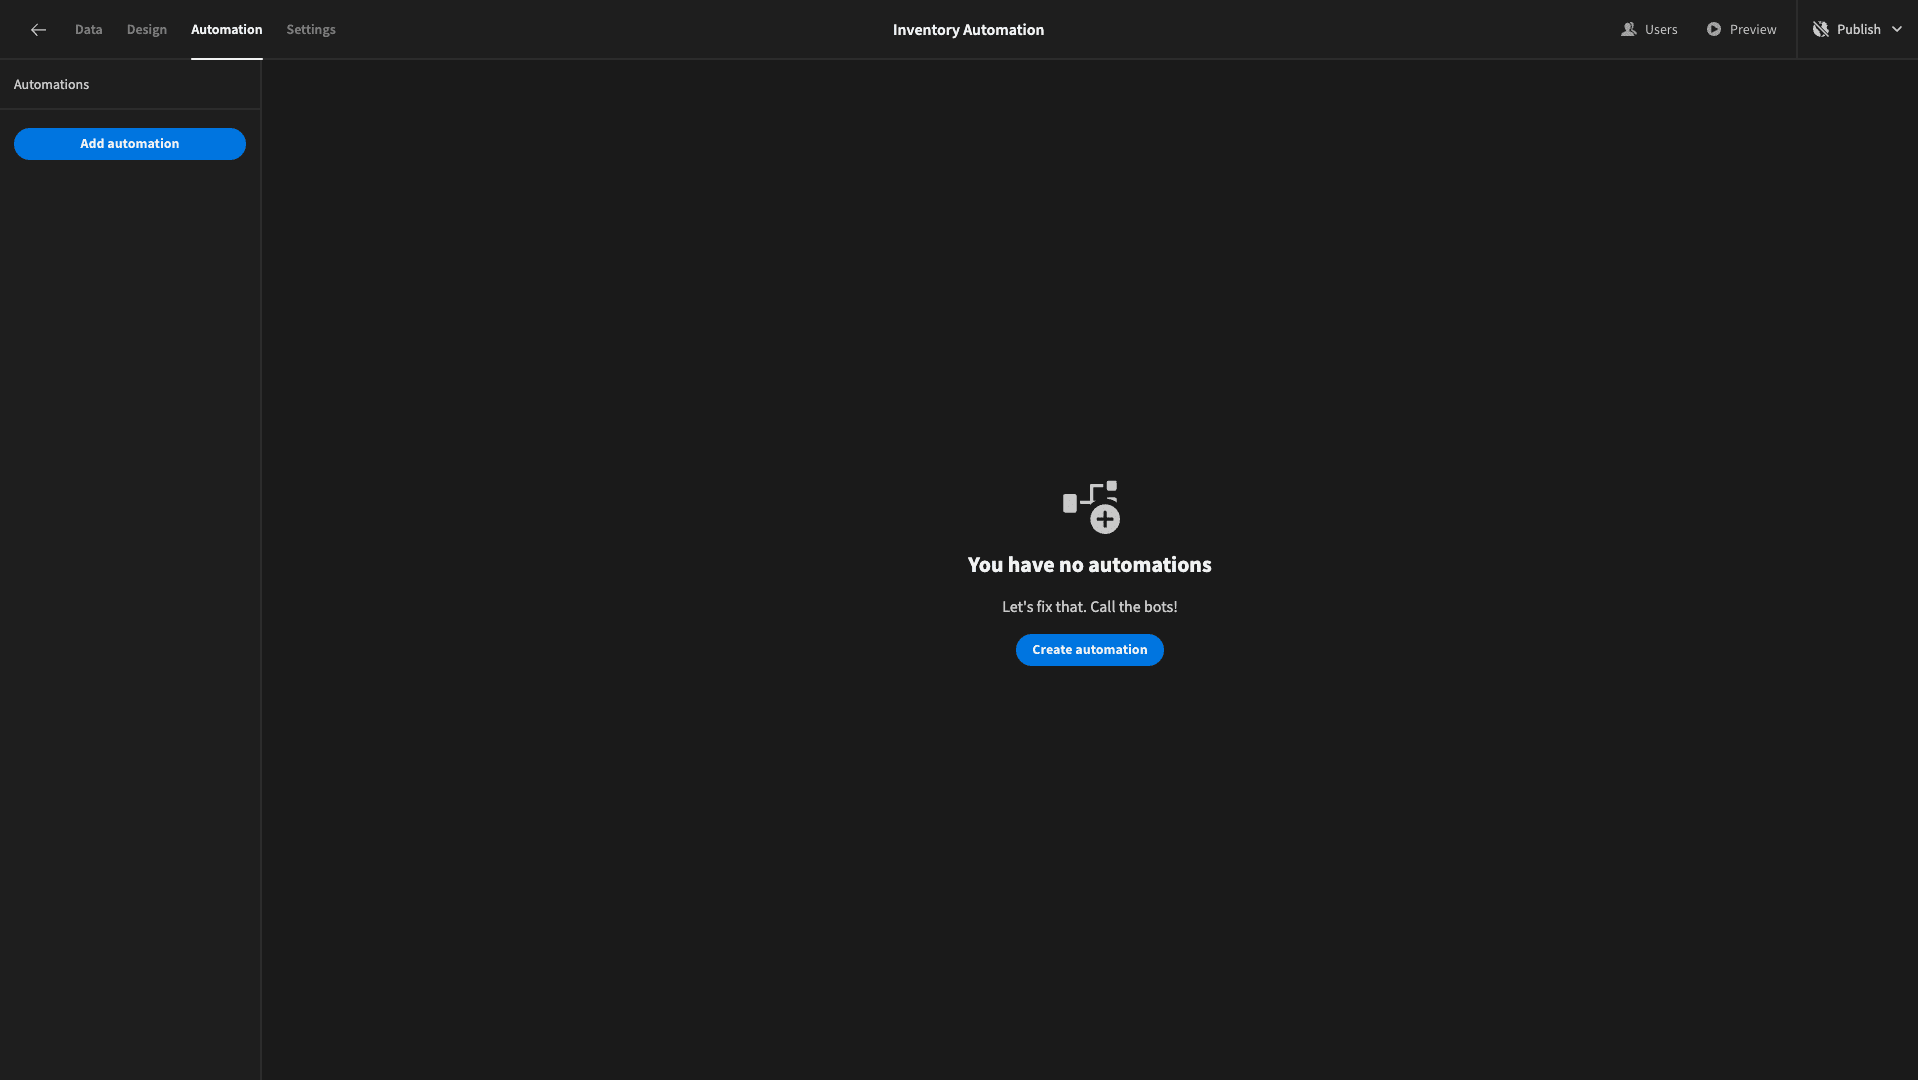
Let’s start with handling new sales. We’ll create a new automation:
We first need to give this a name and choose a trigger. We’re calling our SaleAdded and picking a row created trigger.

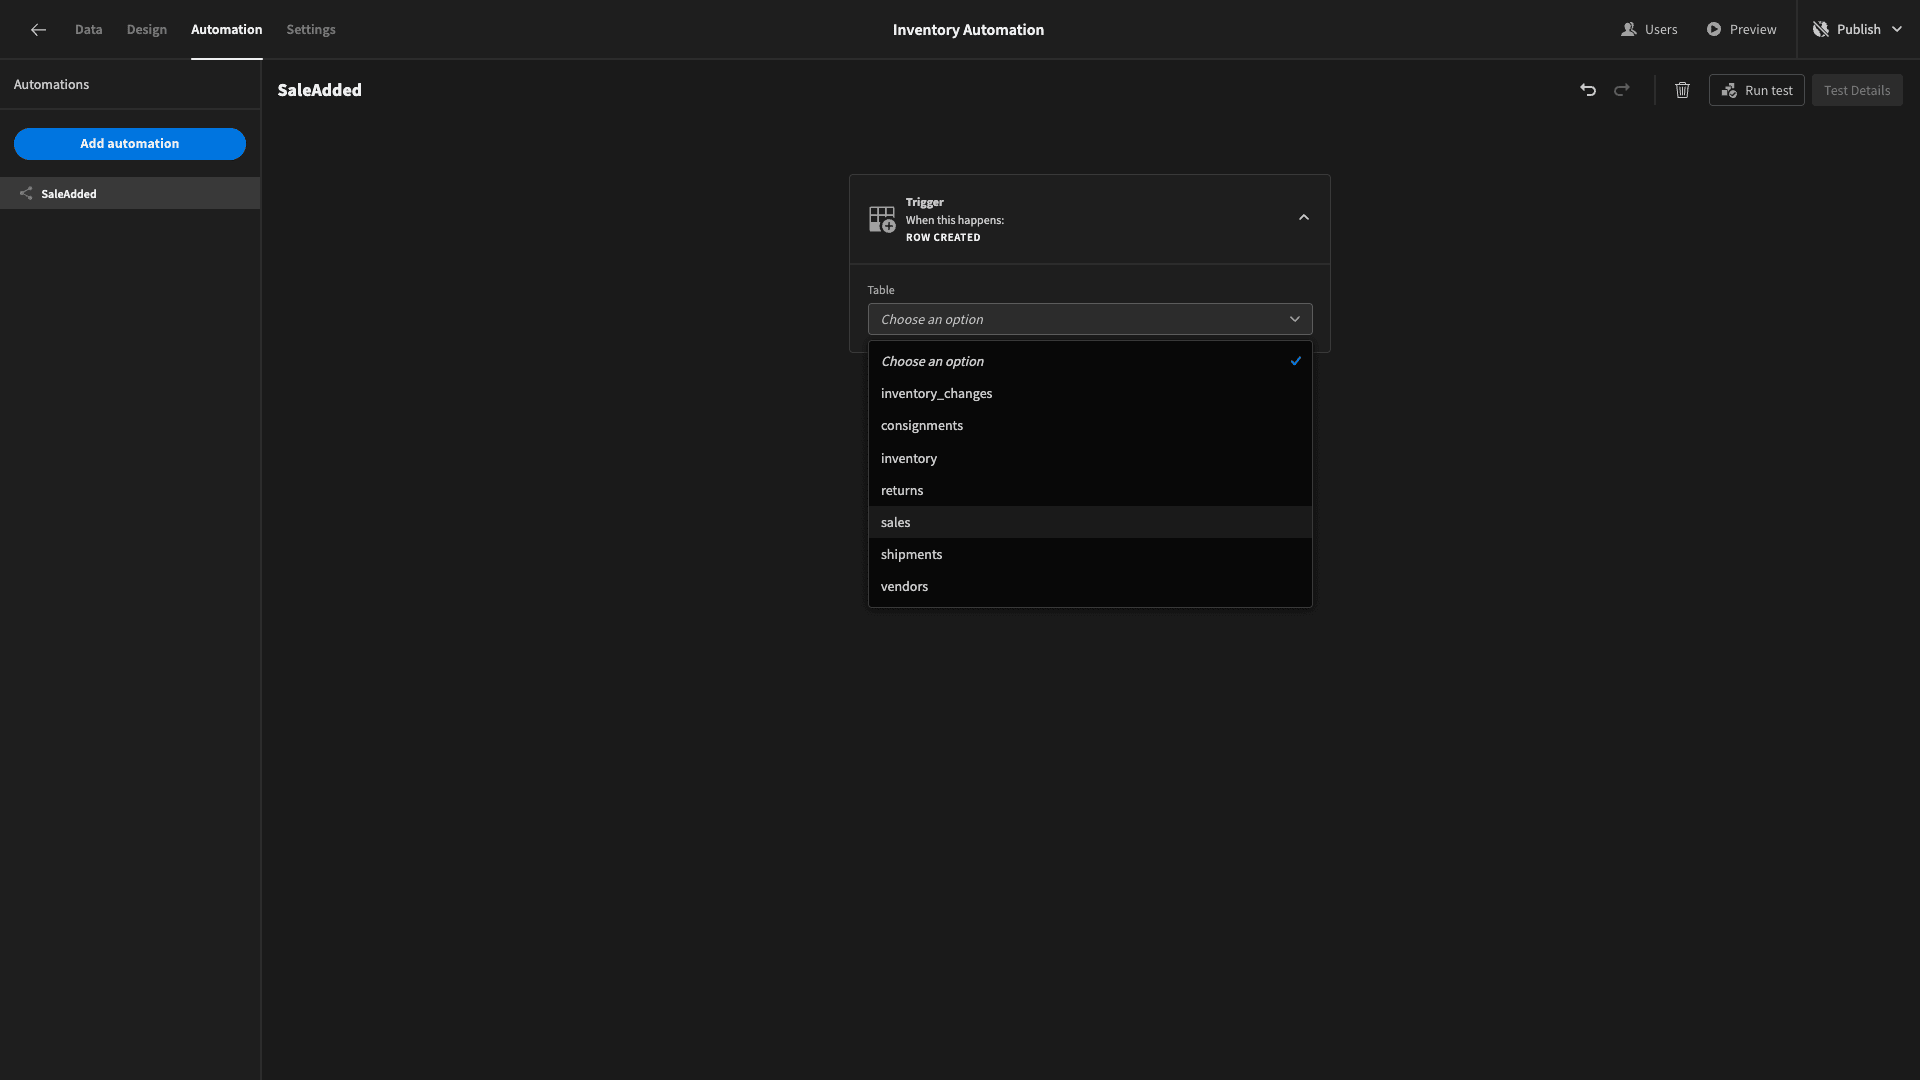
Then, we can choose which table to point our inventory automation trigger at. We’re picking sales. So, anytime a row is added to the sales table, any subsequent actions we configure will be carried out.
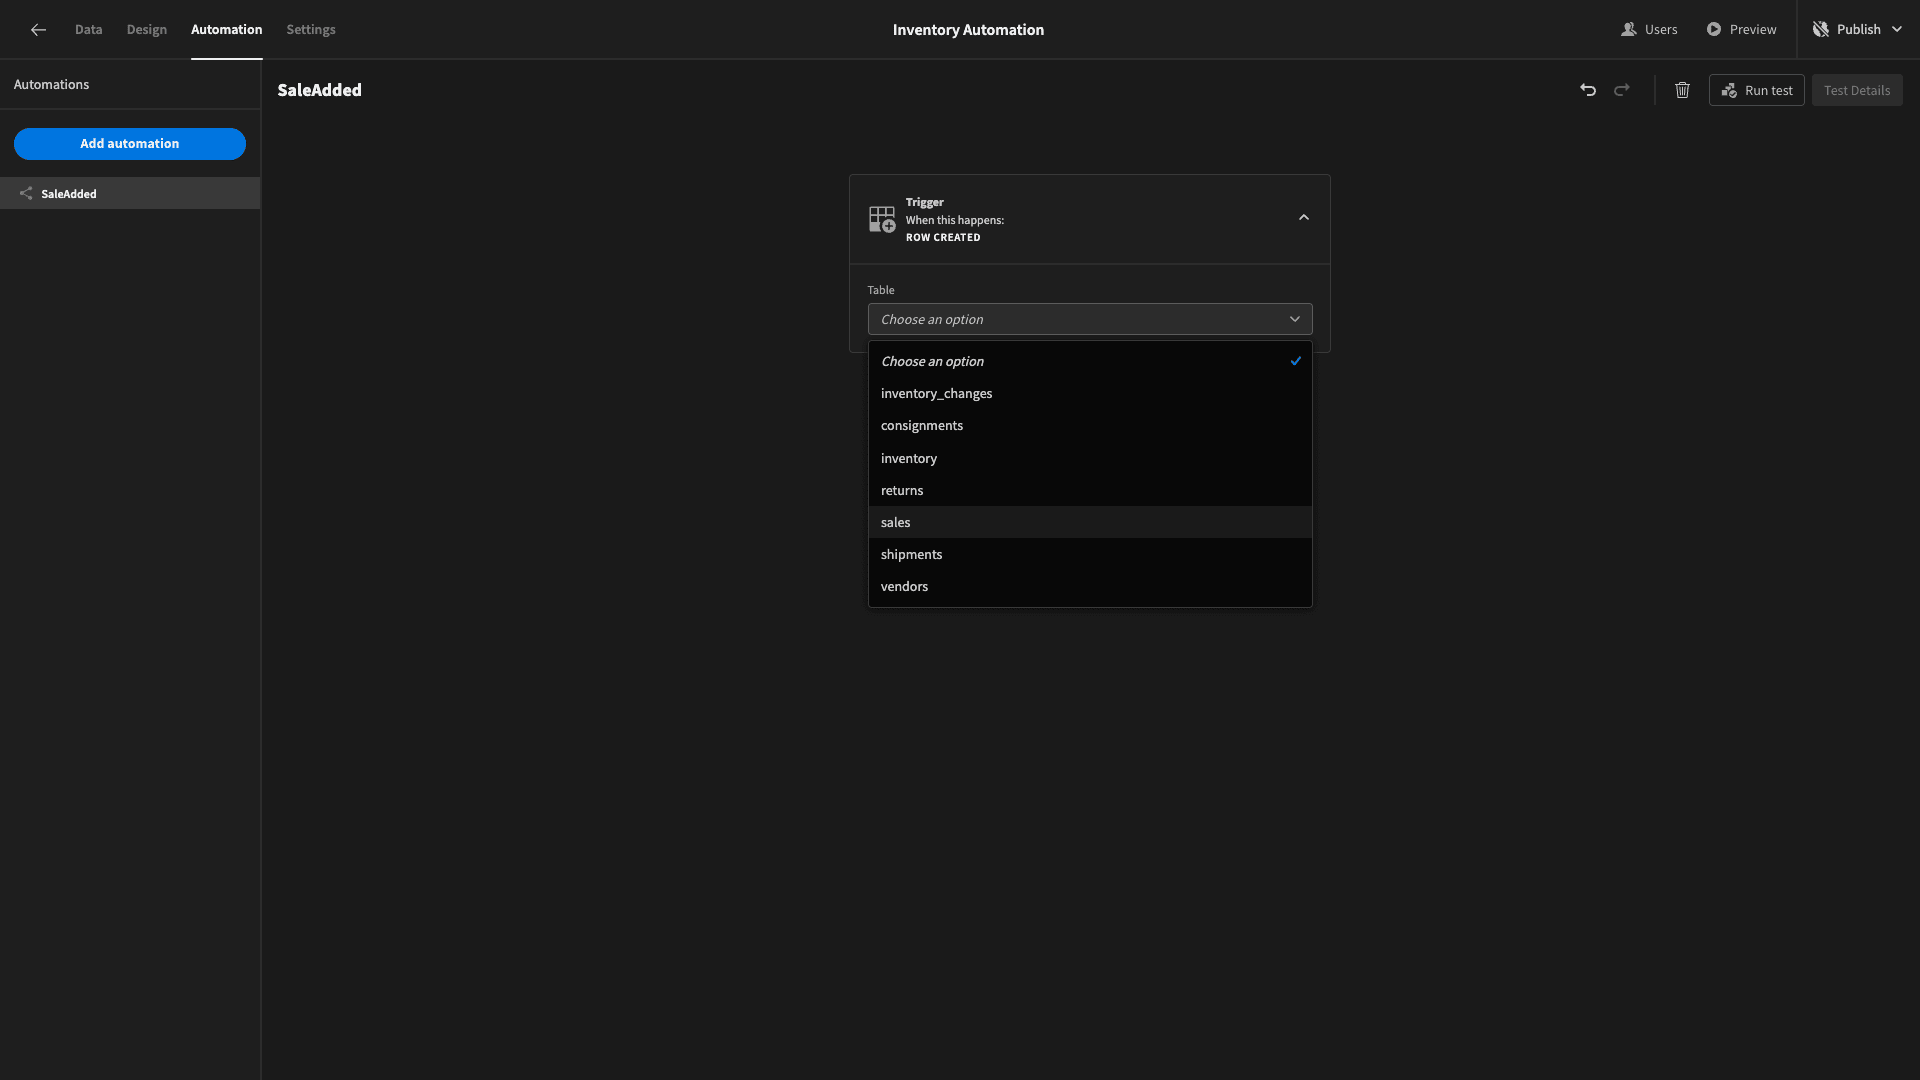
Now remember, for our inventory_changes table we’ll need the item_name, inventory_id, change_type, quantity_change, and new_quantity. We can get most of this information from the sales table.
However, we’re going to need to know how many of the items in question we had in stock before the sale in order to figure out the new quantity.
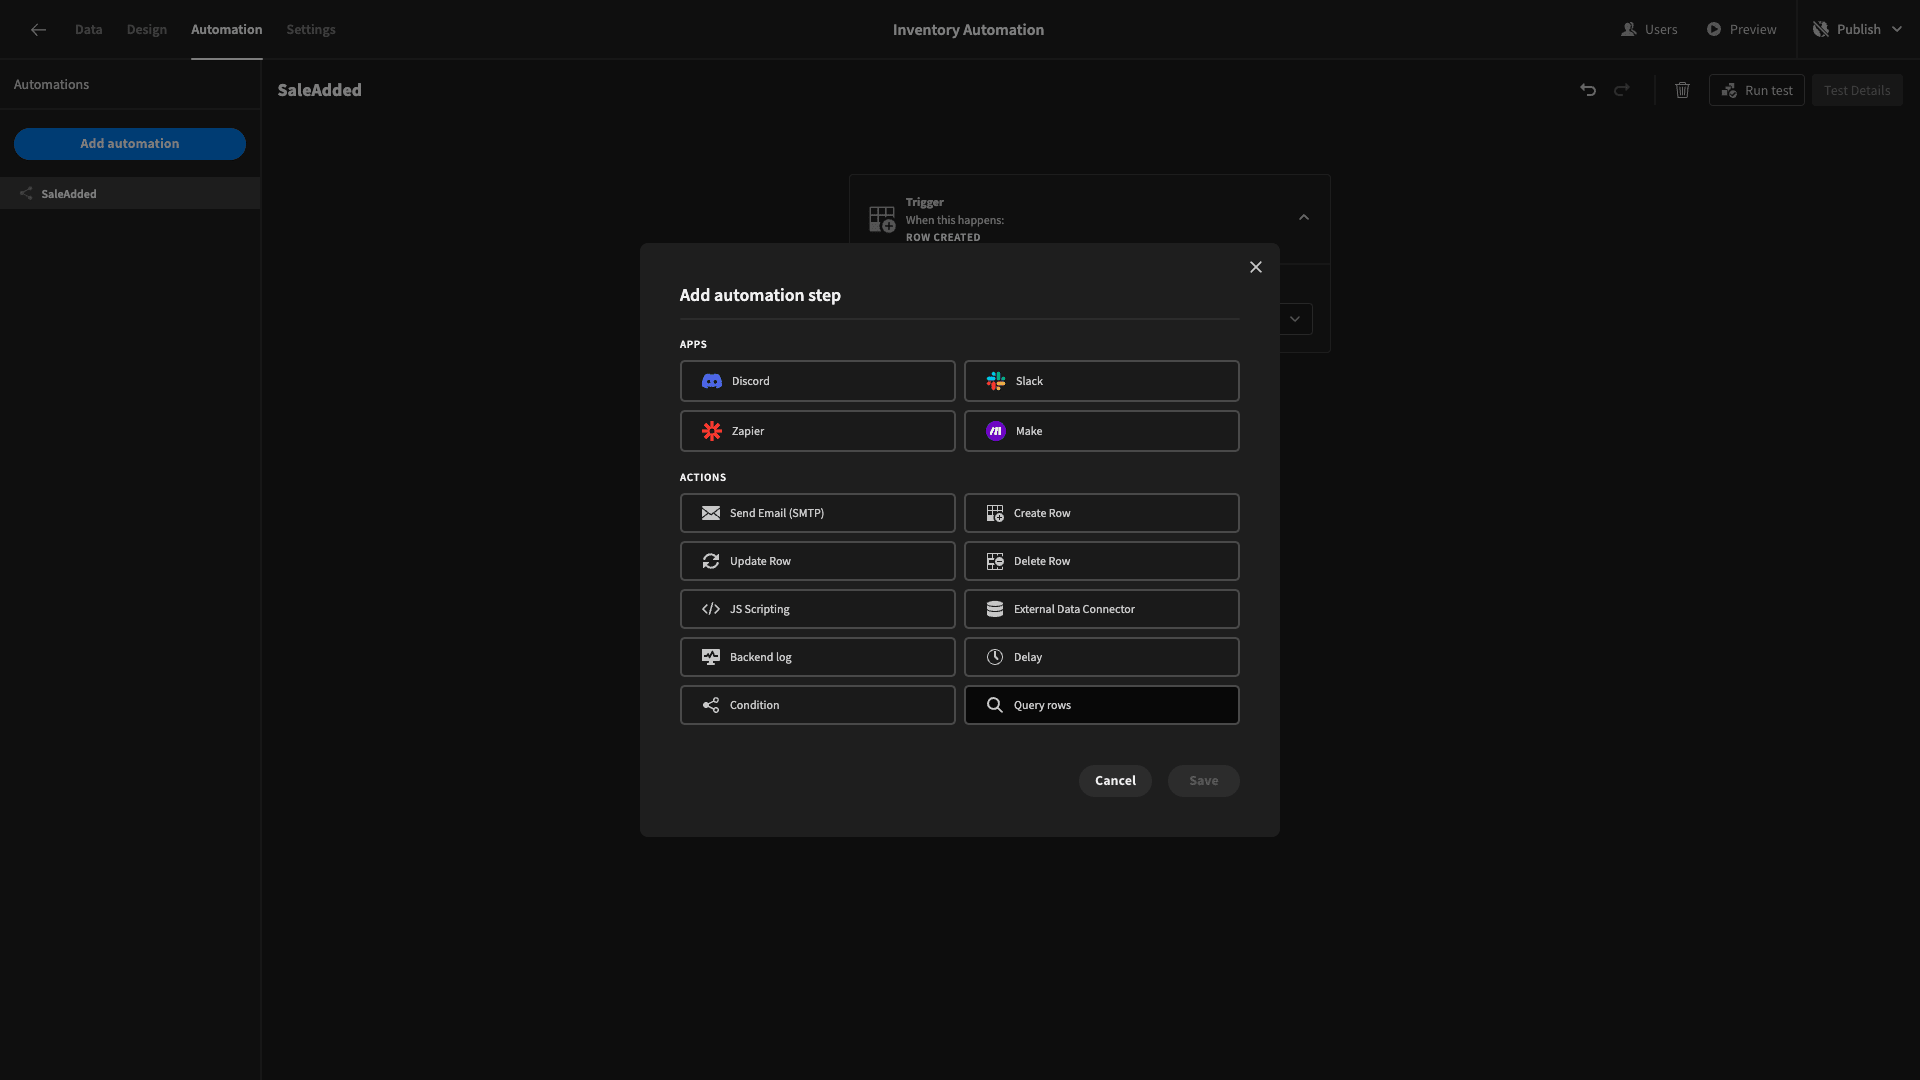
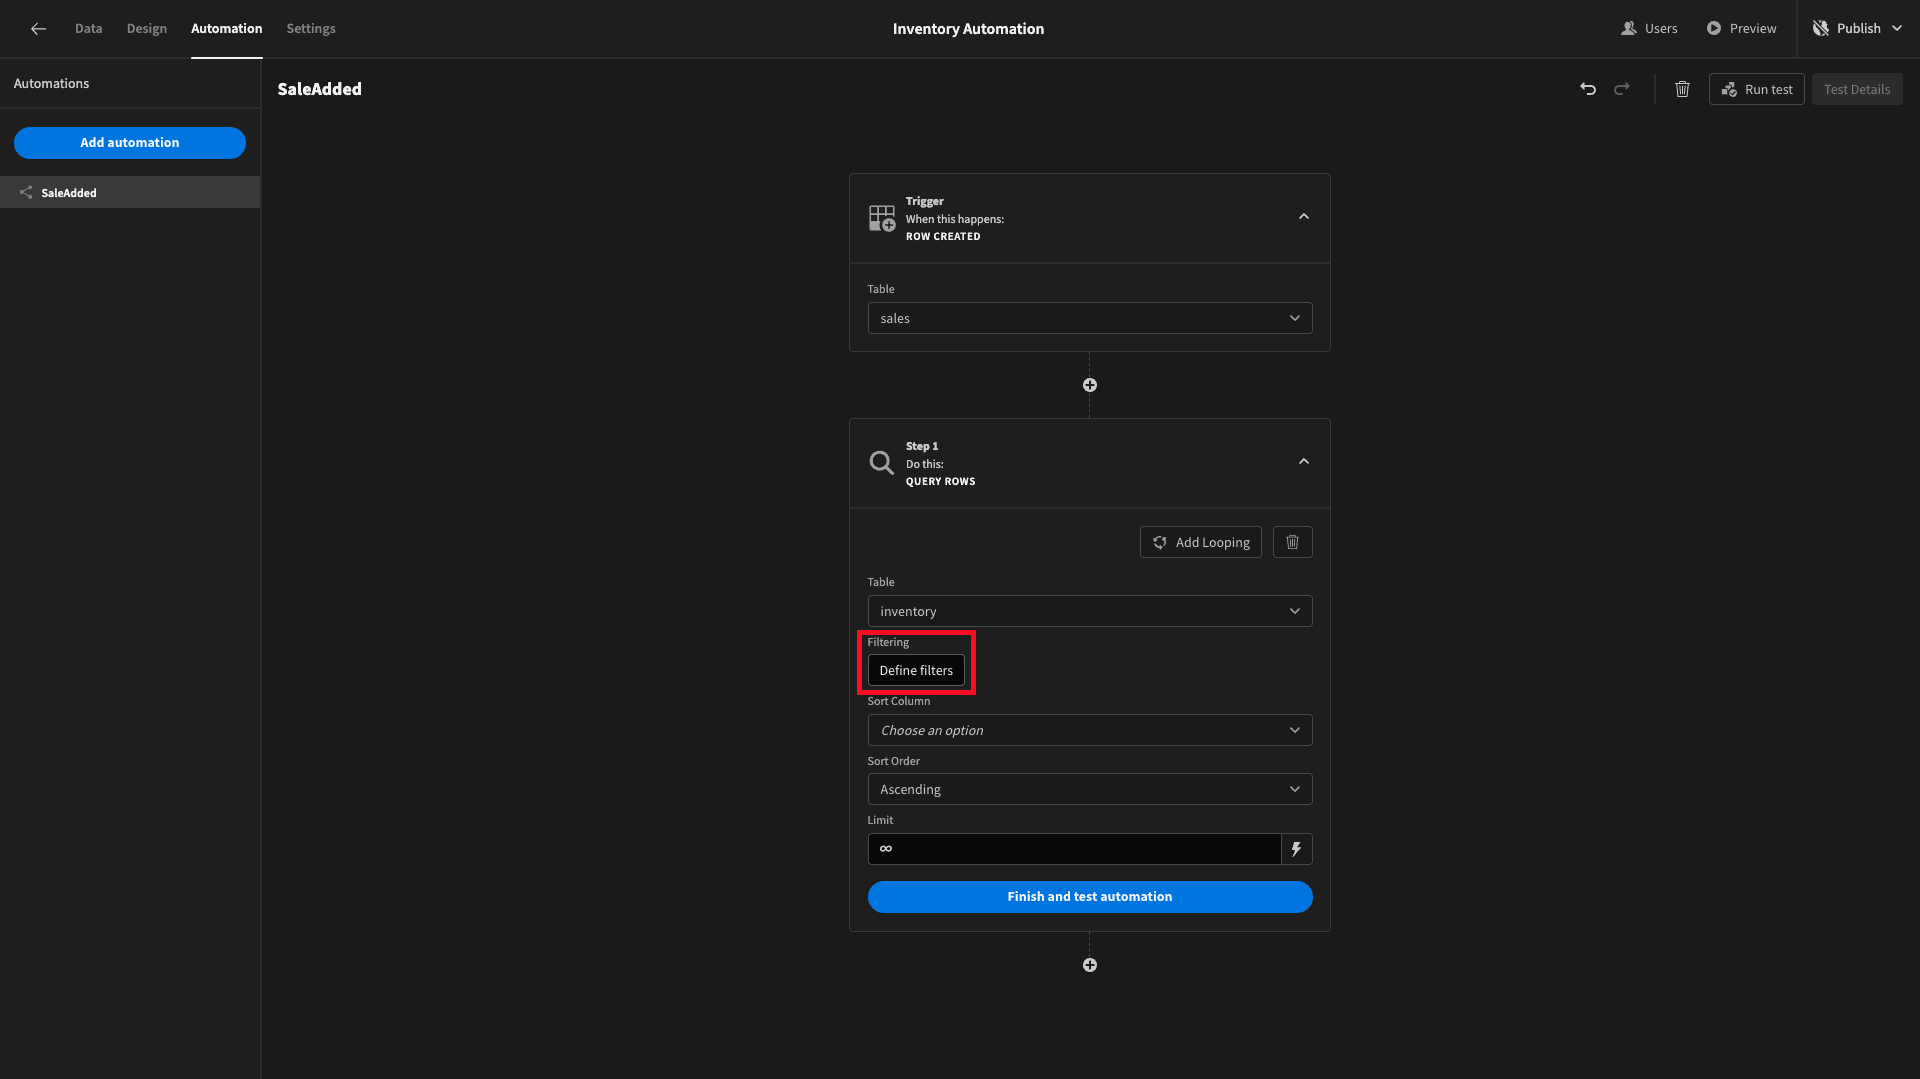
Therefore, our first action will be a query rows step:
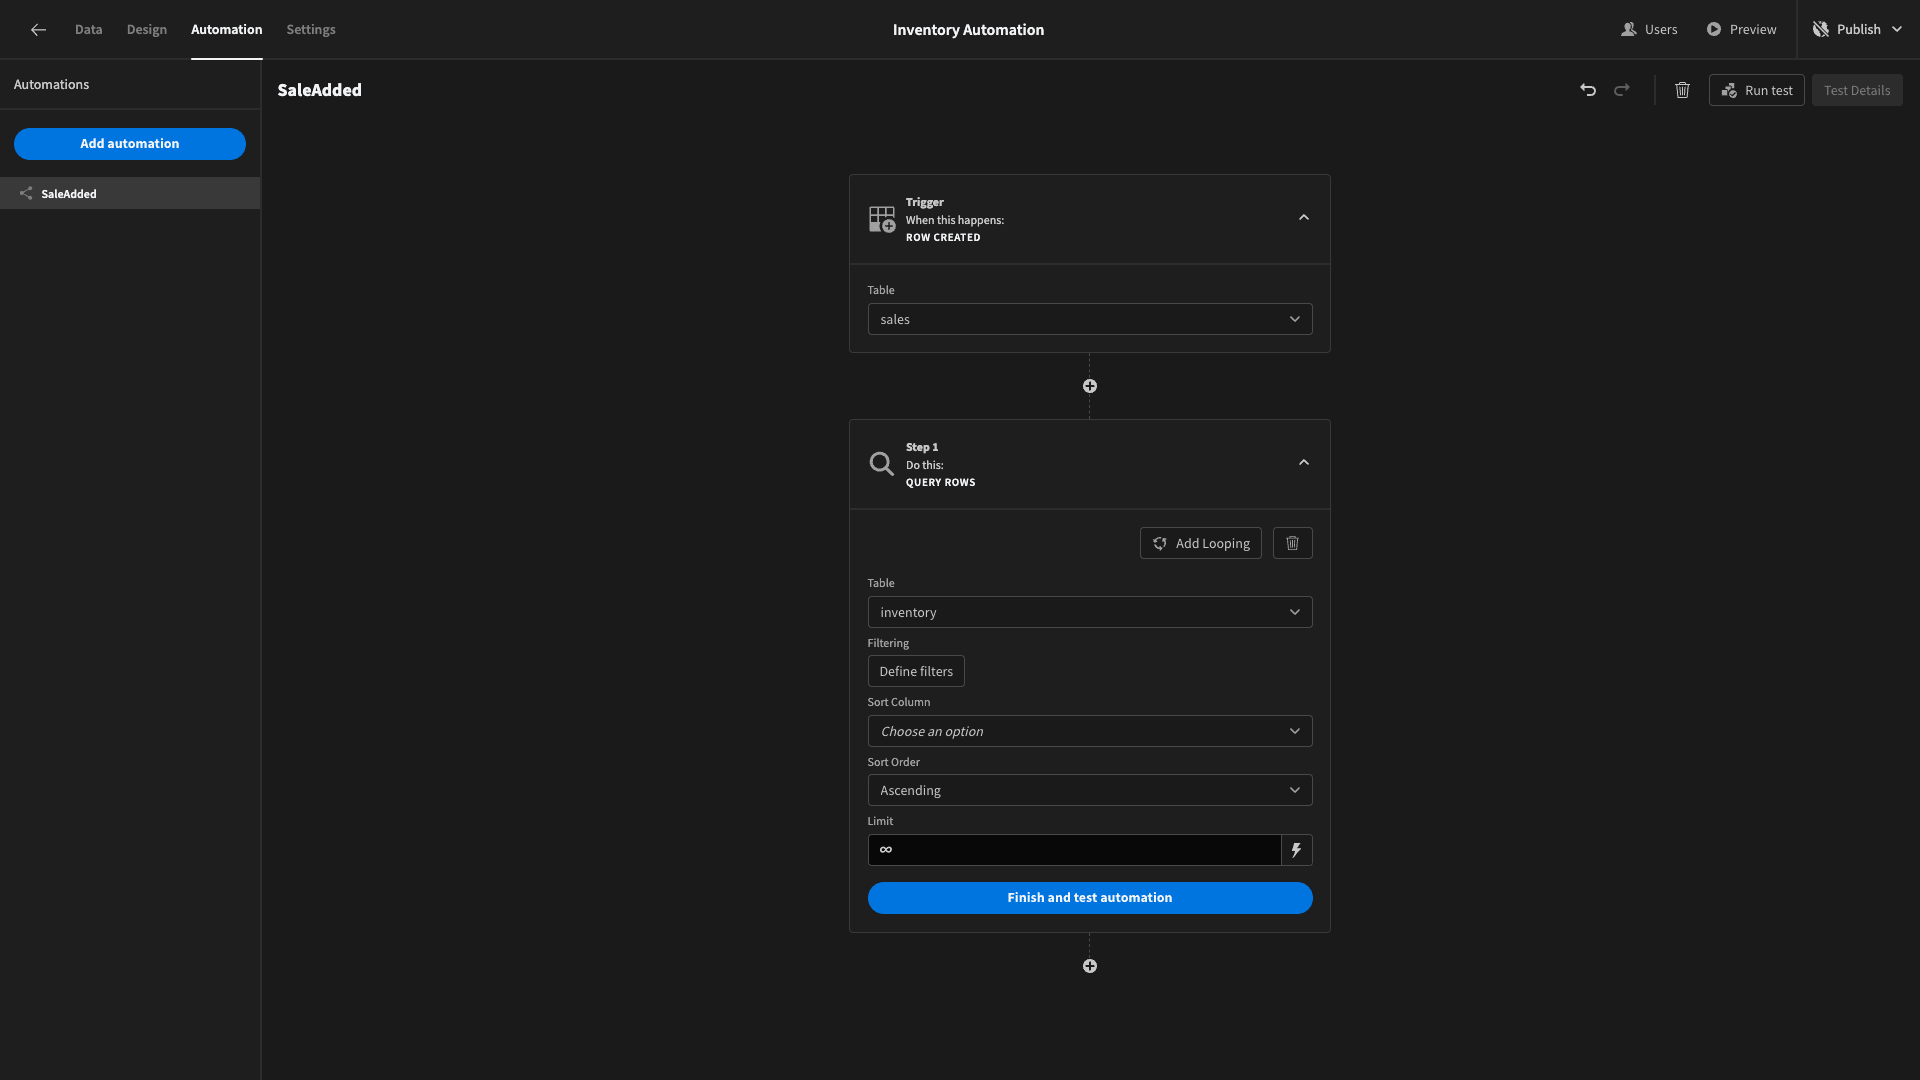
And we’ll point this at the inventory table:
As-is, this will make the entire inventory table usable within our subsequent automation steps. We only want the row with an id attribute that corresponds to the inventory_id that we have stored in our new sales row.
We’ll hit define filters to open the filters drawer:
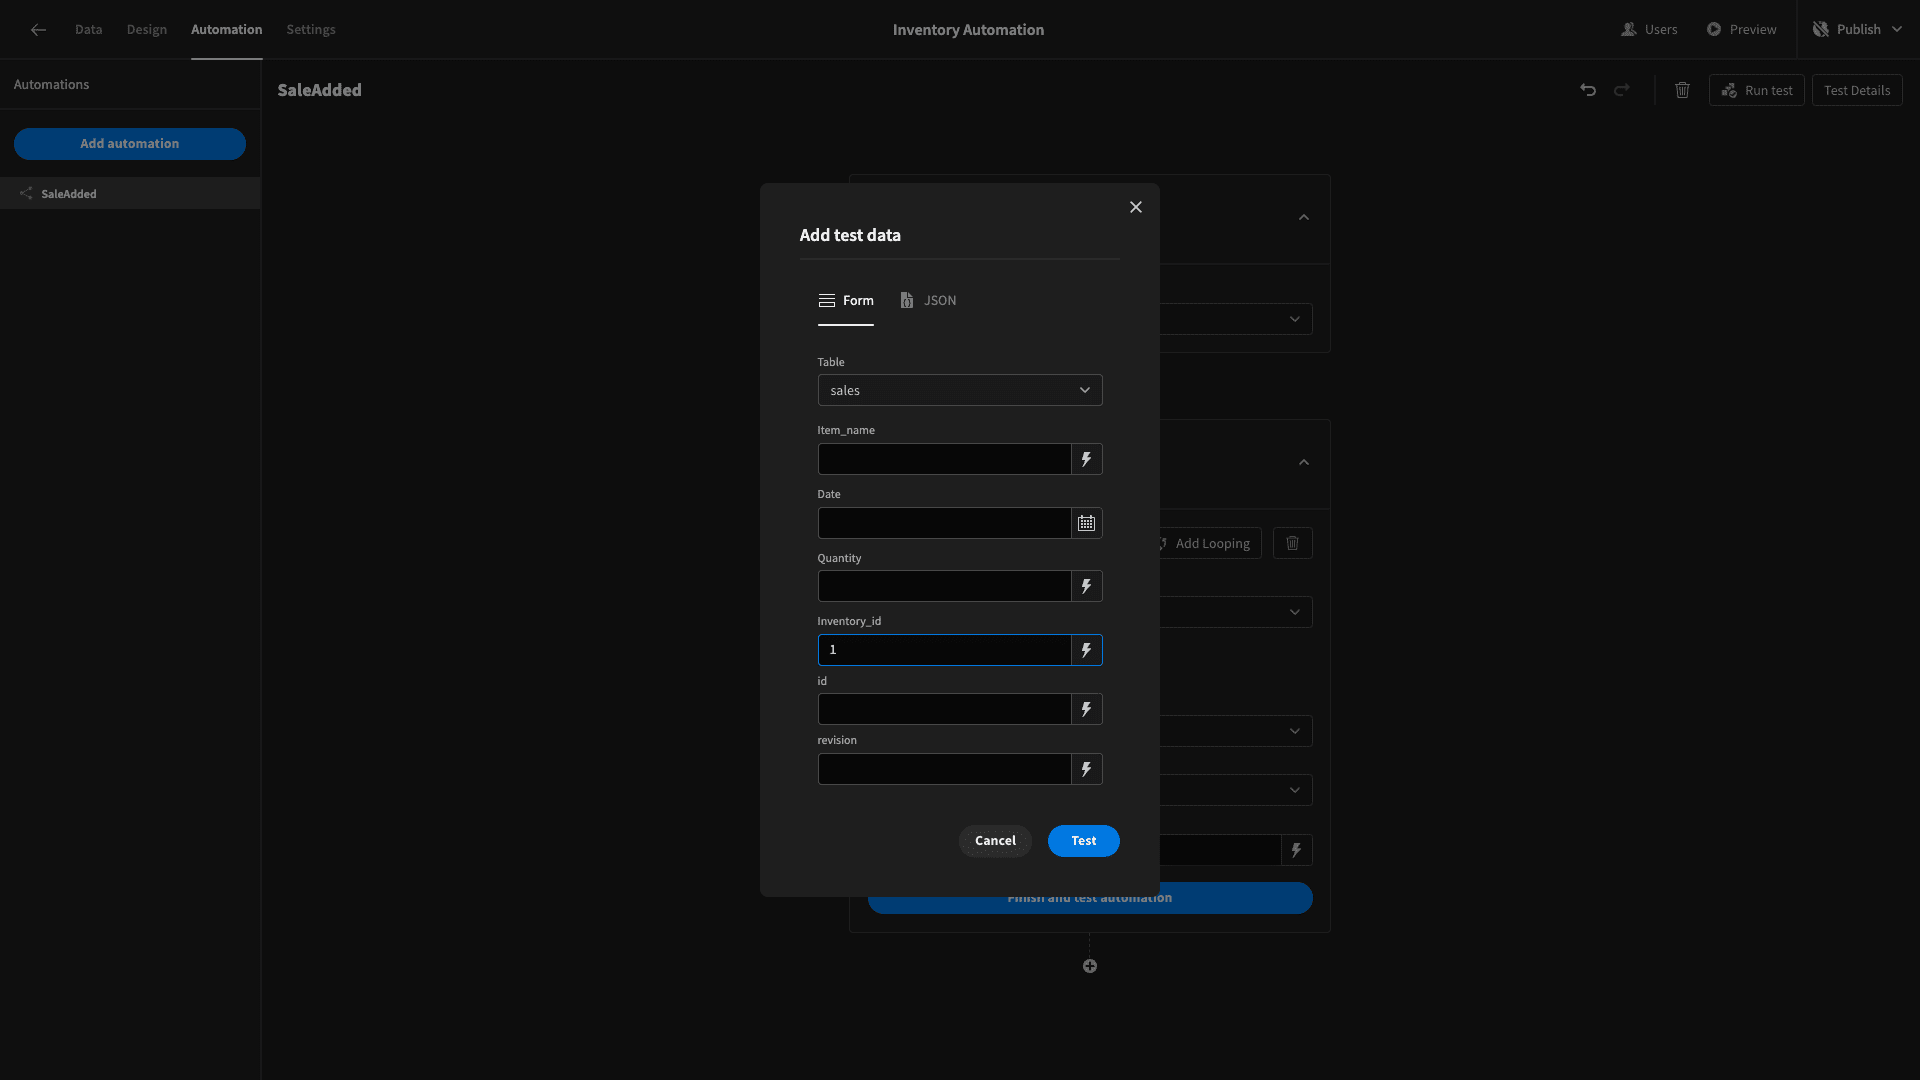
And we can add a filtering expression to only return inventory rows where id equals {{ trigger.row.inventory_id }}.
We can test this by using some dummy data, setting the inventory_id for our trigger row to 1 - which we know is the id of one of our inventory items:
Our query rows step will output a data object that looks like this.
 1{
 2
 3 "rows": [
 4
 5  {
 6
 7   "vendor_id": 4,
 8
 9   "id": 1,
10
11   "quantity": 225,
12
13   "item_name": "Bulldozer",
14
15   "unit_price": 210,
16
17   "_id": "%5B1%5D",
18
19   "tableId": "datasource_plus_2fb21a1bd6ed4e20b3ff449096fad3ed__inventory",
20
21   "_rev": "rev"
22
23  }
24
25 ],
26
27 "success": true
28
29}
Note that there are two attributes here called id and _id. id is the one that already existed in our Postgres table. _id was autogenerated by Budibase, so we can ignore it.
We’ll see how to use the returned data in subsequent automations in a second.
We want to do two more things with this automation rule - update the quantity attribute in the relevant inventory row and add the details of our change to the inventory_changes table.
We’ll start by adding an update row action and pointing it at our inventory table:
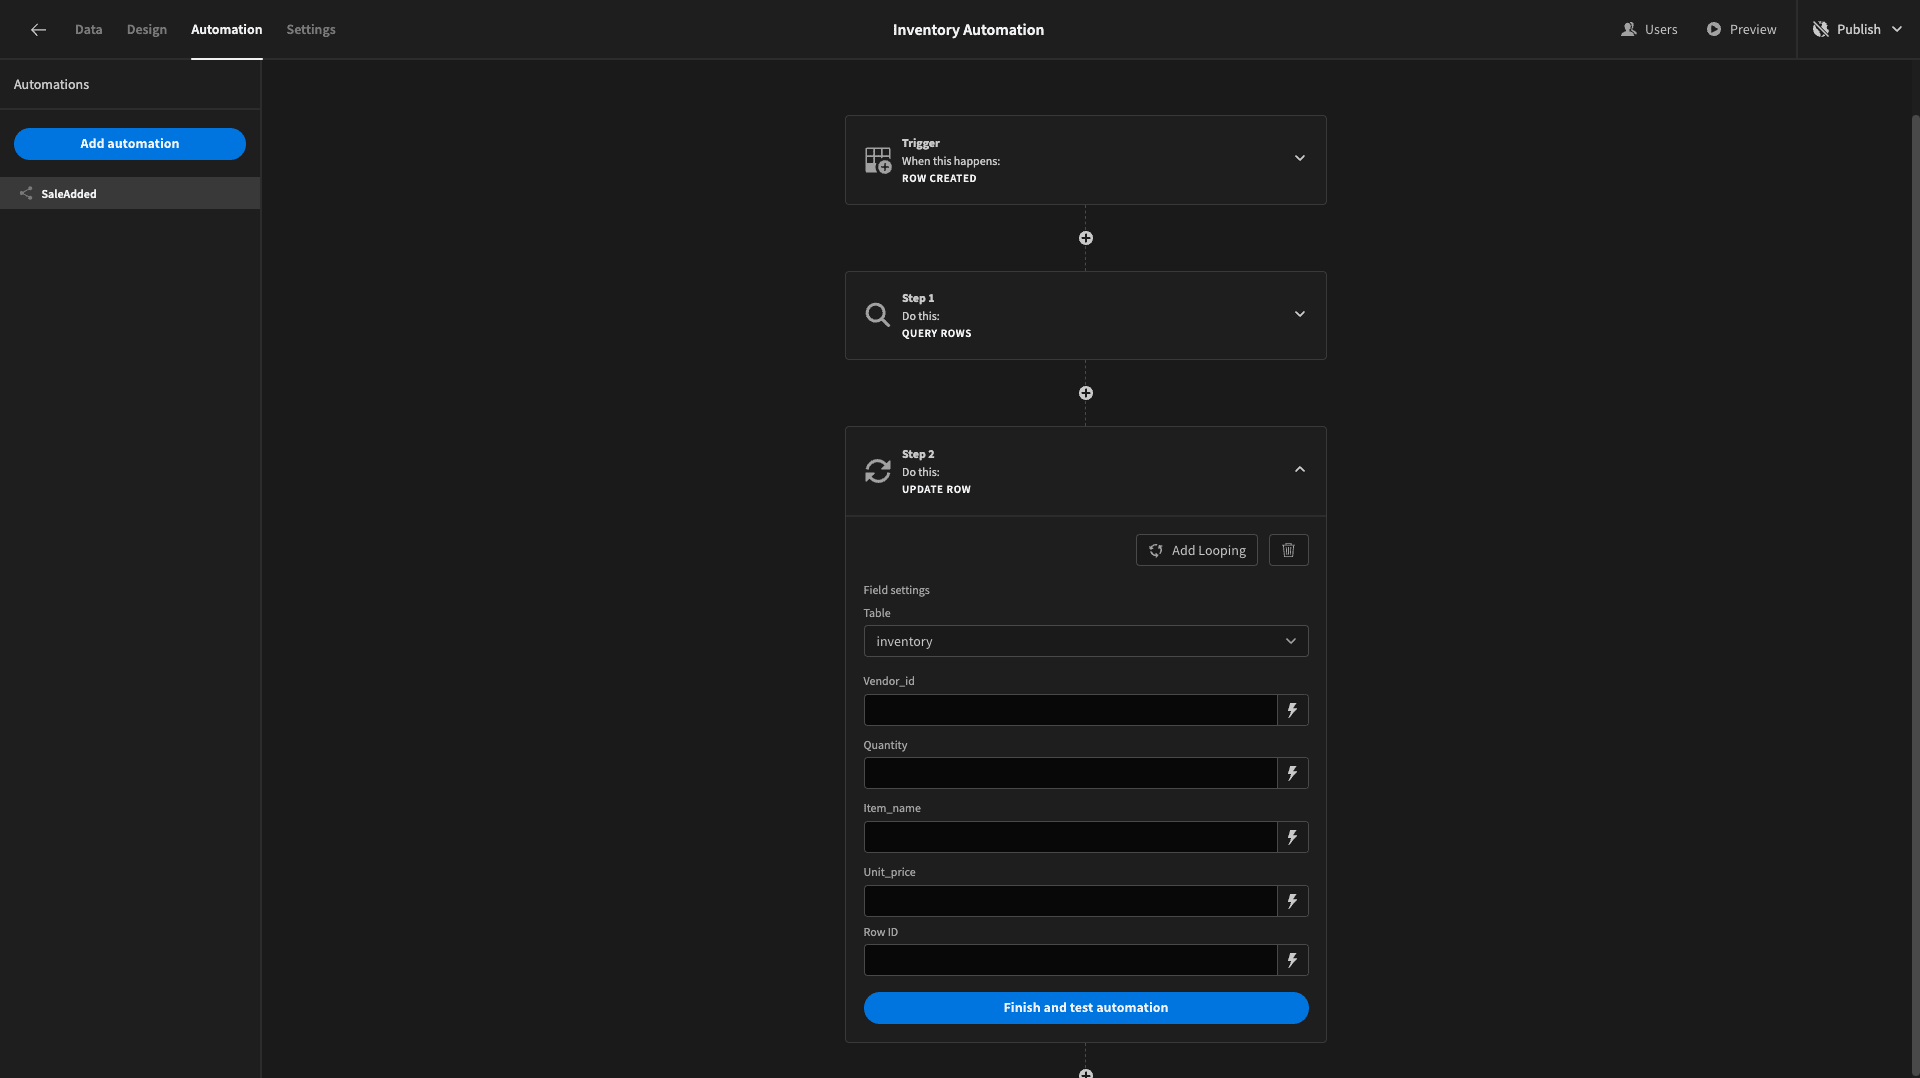
We can now input the details we want. item_name, vendor_id, unit_price, and row_id should remain unchanged.
So, we’ll bind them to their respective outputs from the previous step in the format:
1{{ steps.1.rows.0.column_name }}Steps.1 contains an object called rows. This could potentially contain many rows, so we need to provide the index of the row we want. In our case, this will always be 0 since there is only one row returned by the previous step.
For quantity, we want to use the difference between the original quantity attribute from the row and the quantity attribute from our new sales row.
We’ll do this by binding the following JavaScript expression.
1return $("steps.1.rows.0.quantity") - $("trigger.row.quantity")Test this and make sure it works as expected. When you’re happy, add another automation action, this time selecting create row.
We’ll point this one at inventory_changes:
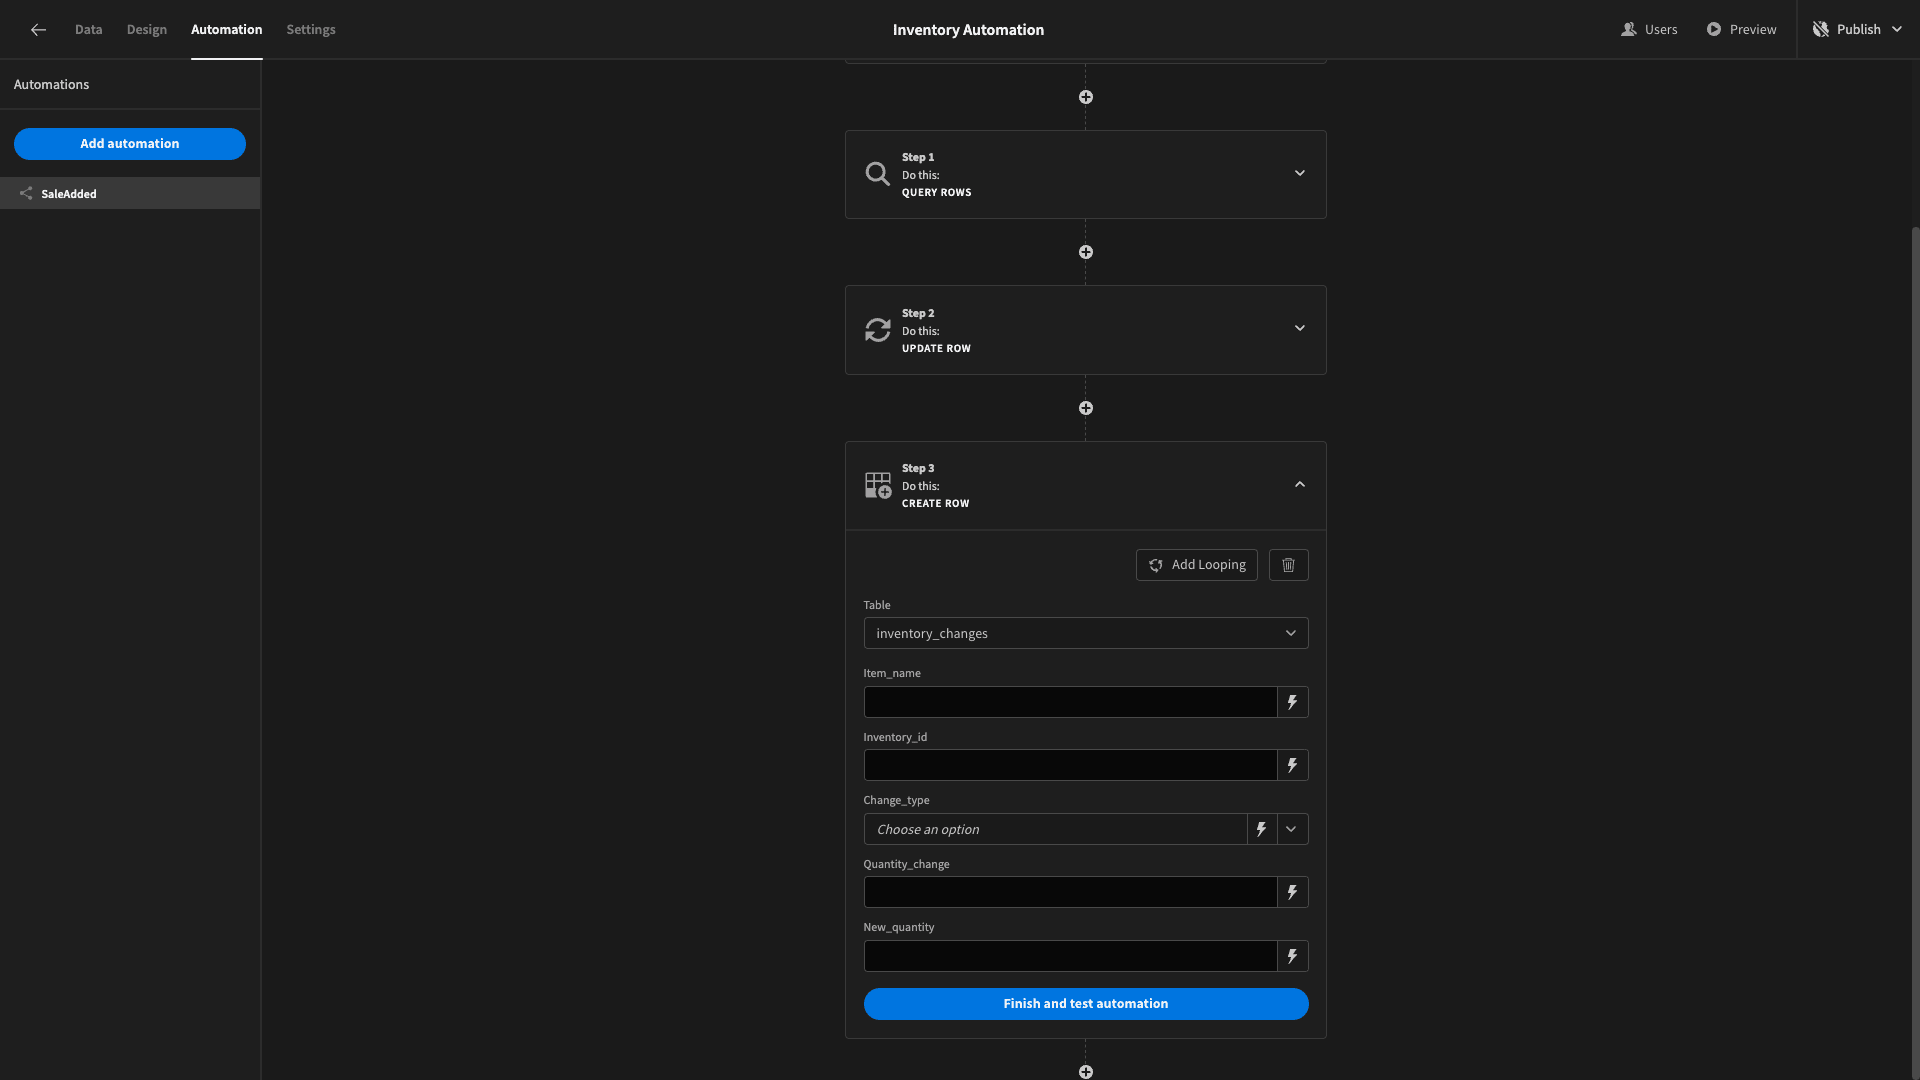
We’ll take our inventory_id, item_name, and quantity_change from our trigger row, in the format:
1{{ trigger.row.column_name }}There’s no need for an index this time, since the row object from our trigger can only include a single row.
For change_type, we’ll select Sales.
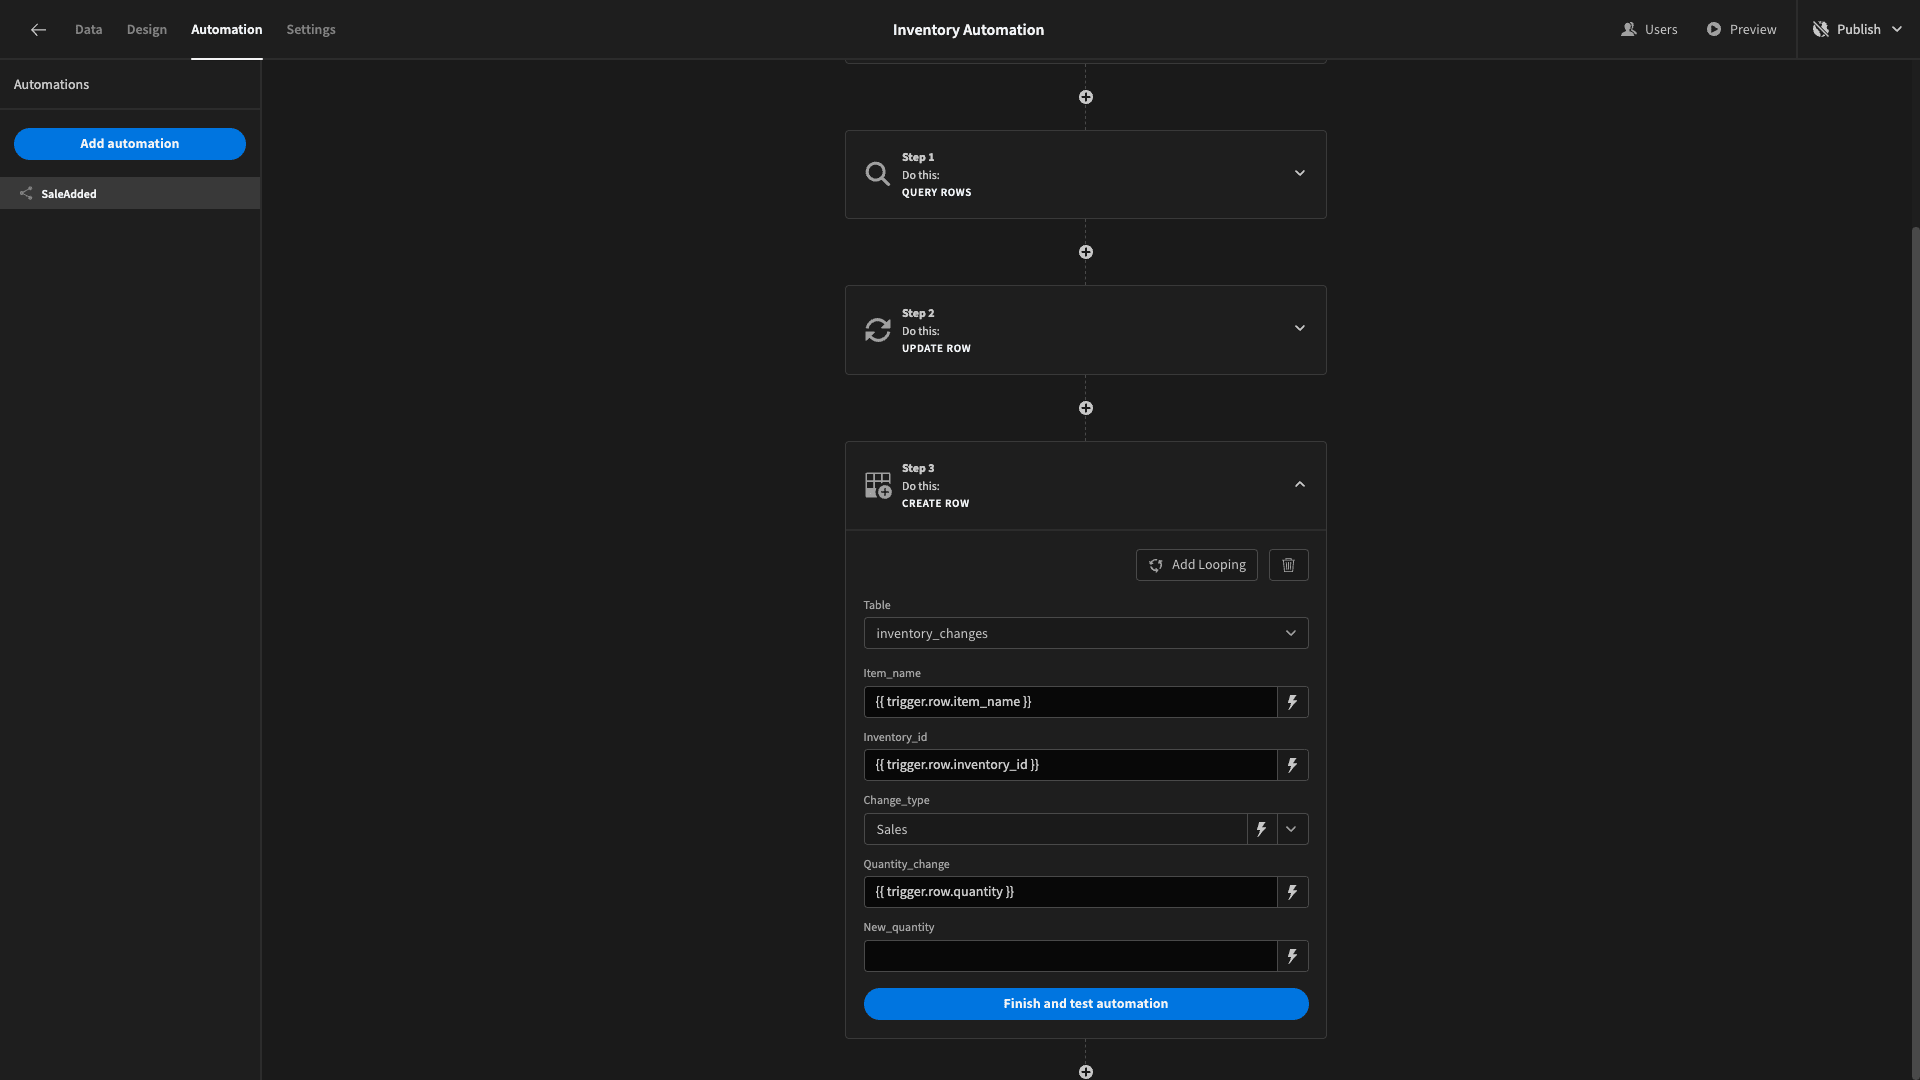
We can also use the exact same JavaScript function as before to calculate the new quantity.
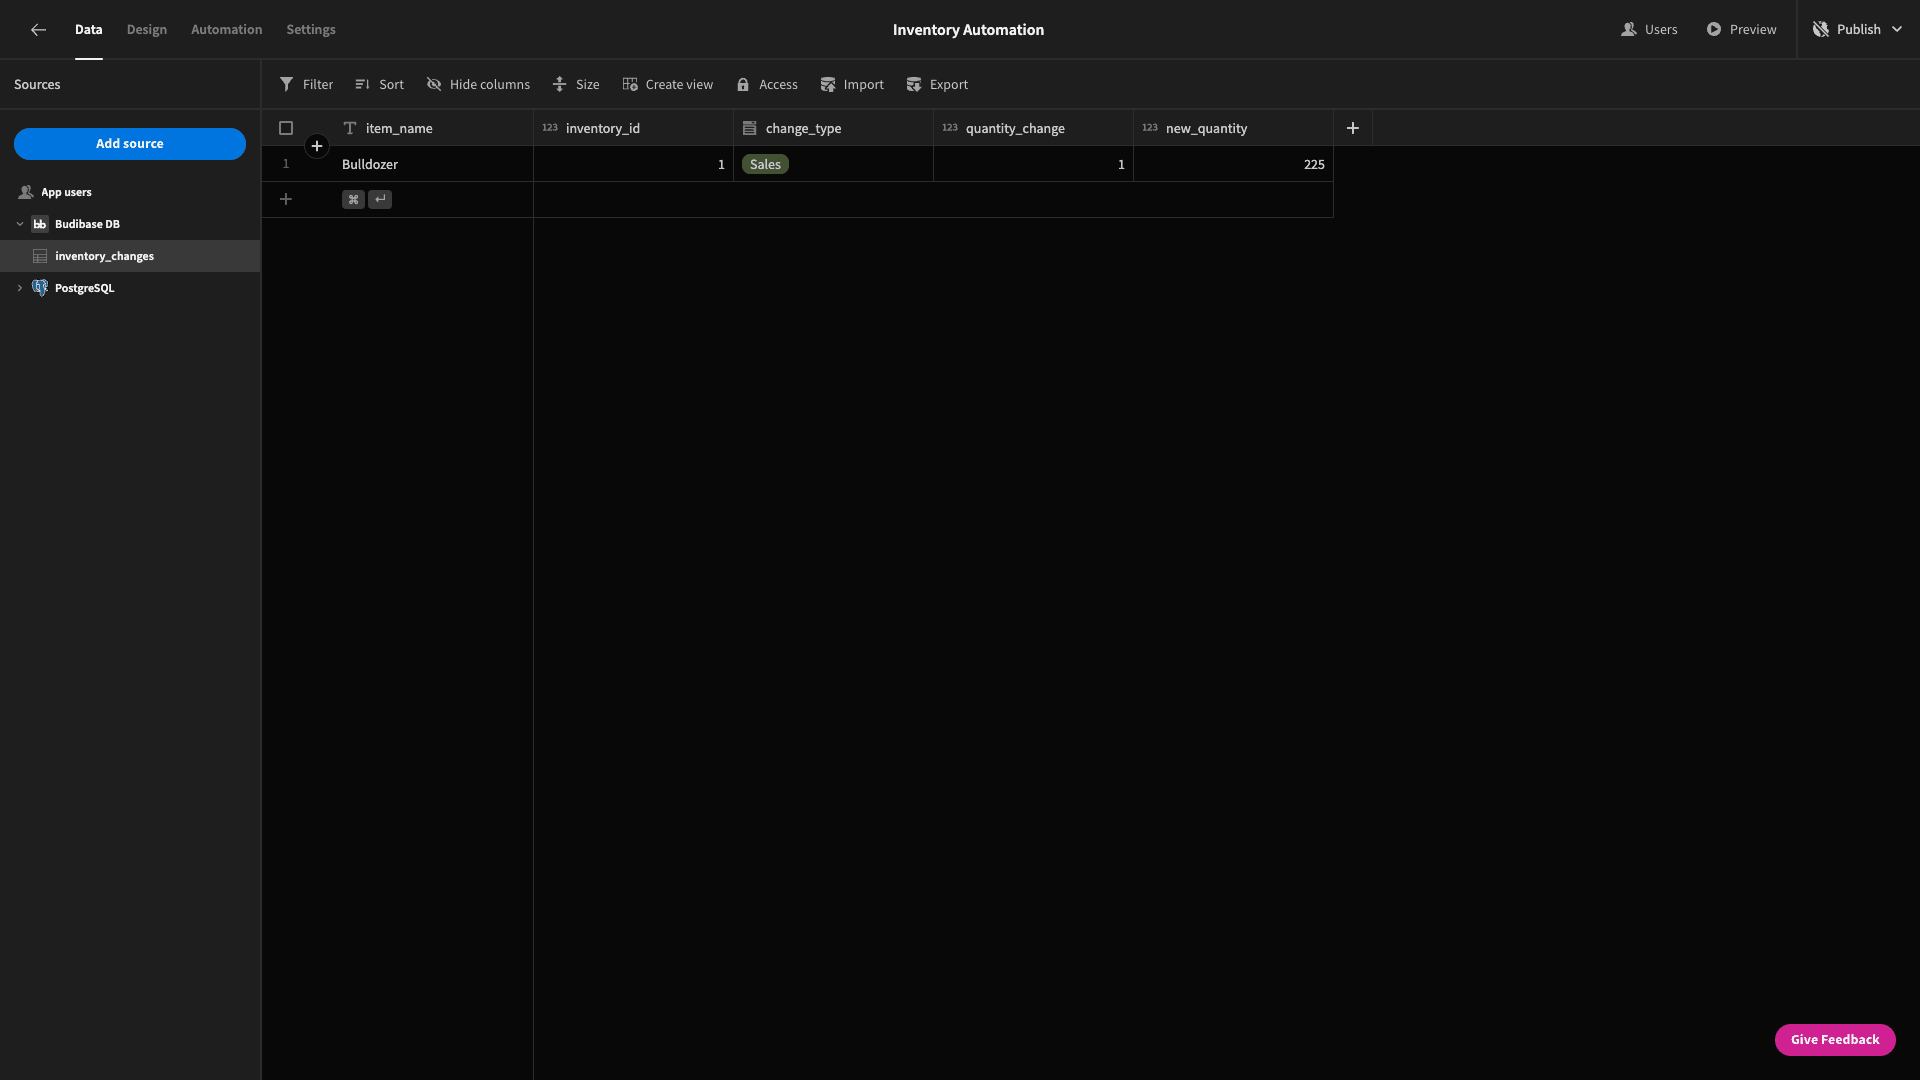
When we test our automation again, we can see that a new row has been added to the inventory_changes table with the test data that we provided:
4. Handling returns
Next, we’ll duplicate our inventory automation rule and change the name of the new version to ReturnAdded:
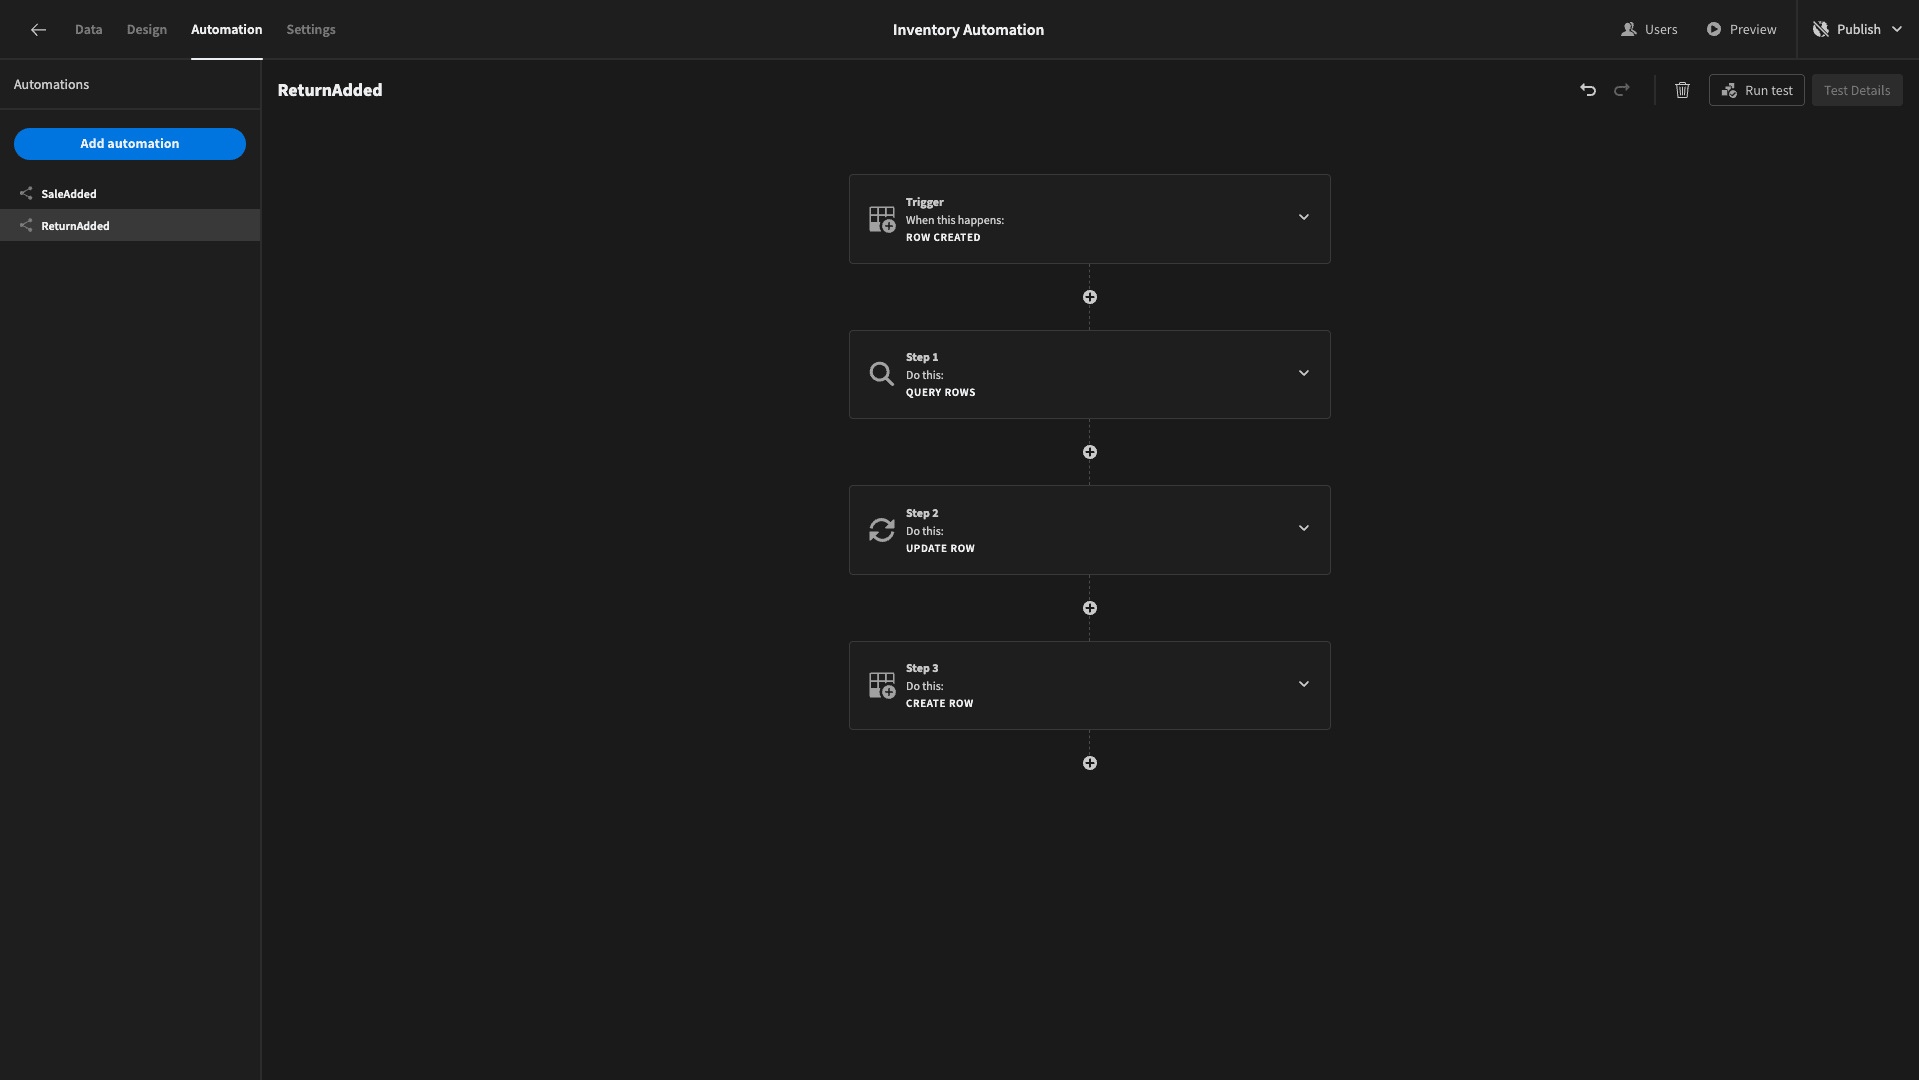
This will save us a little bit of time, since we can largely just swap out the data and retain a similar flow - albeit with one extra step.
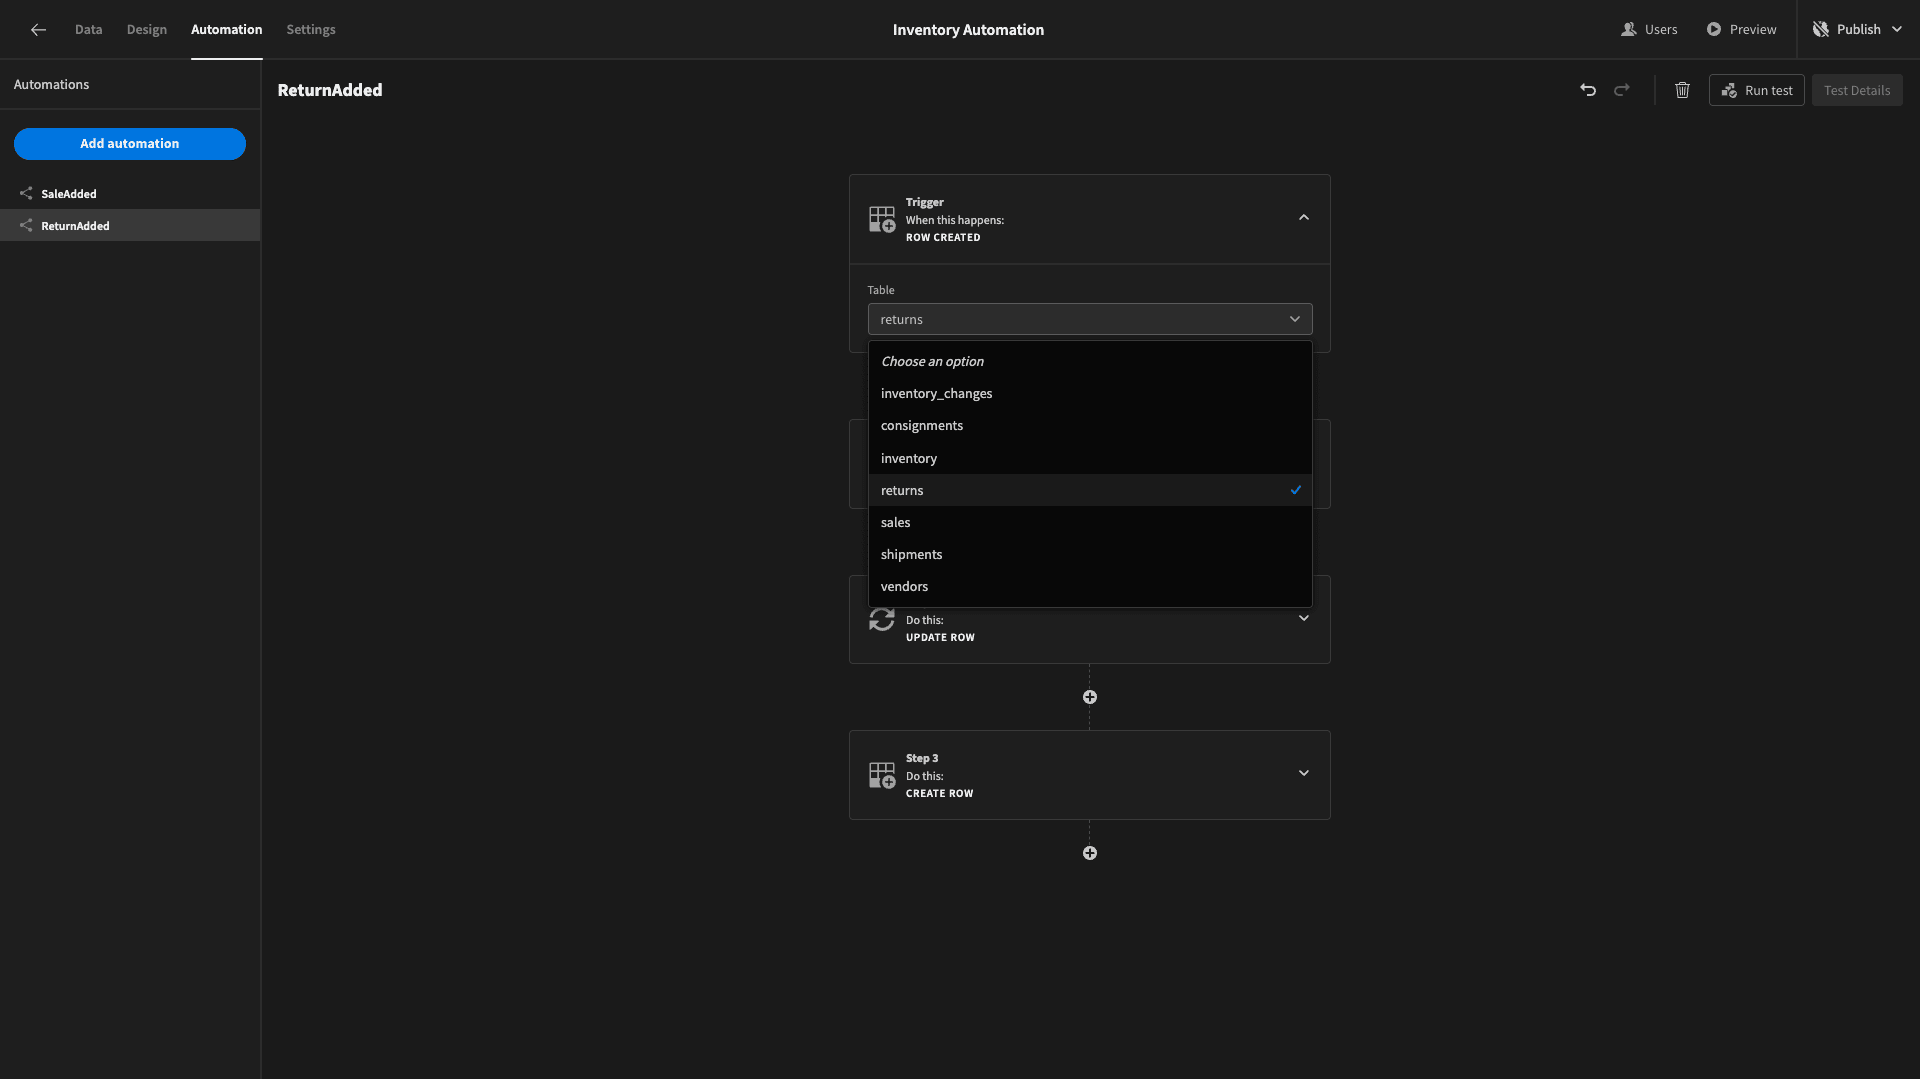
The first thing we’ll change is the table our trigger is pointed at. We want this to be returns rather than sales.
Now, in the previous automation flow, we could just query our inventory table - since our data model is set up so that sales rows are linked to inventory rows. We can’t do this with returns, because they aren’t linked directly to the inventory table.
However, they do have an attribute called sales_id which corresponds to the row of the original order that’s being returned.
We can query the relevant sales row - and then use the output from this to query the appropriate inventory row.
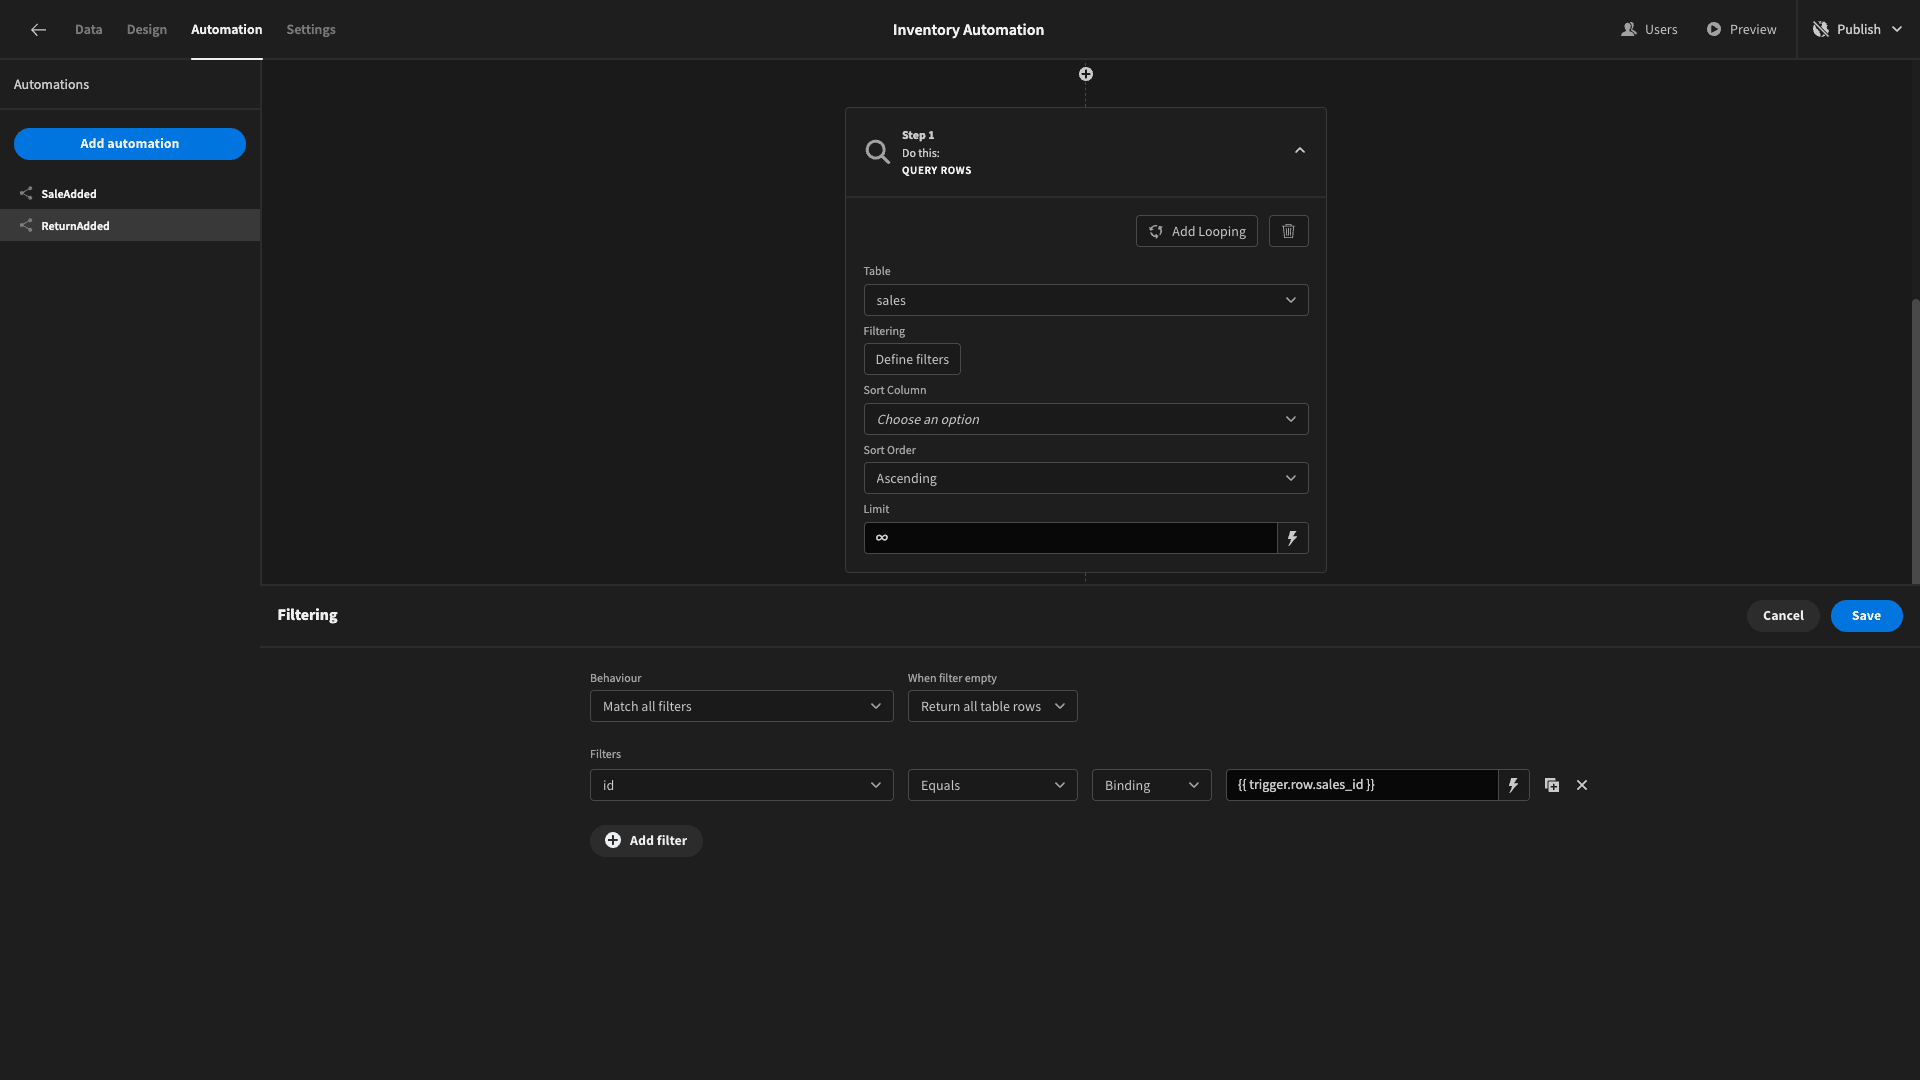
So, we’ll add another query rows action immediately after our trigger and point it at the sales table.
This time, the filter will be set to retrieve the row where id matches {{ trigger.row.sale_id }}.
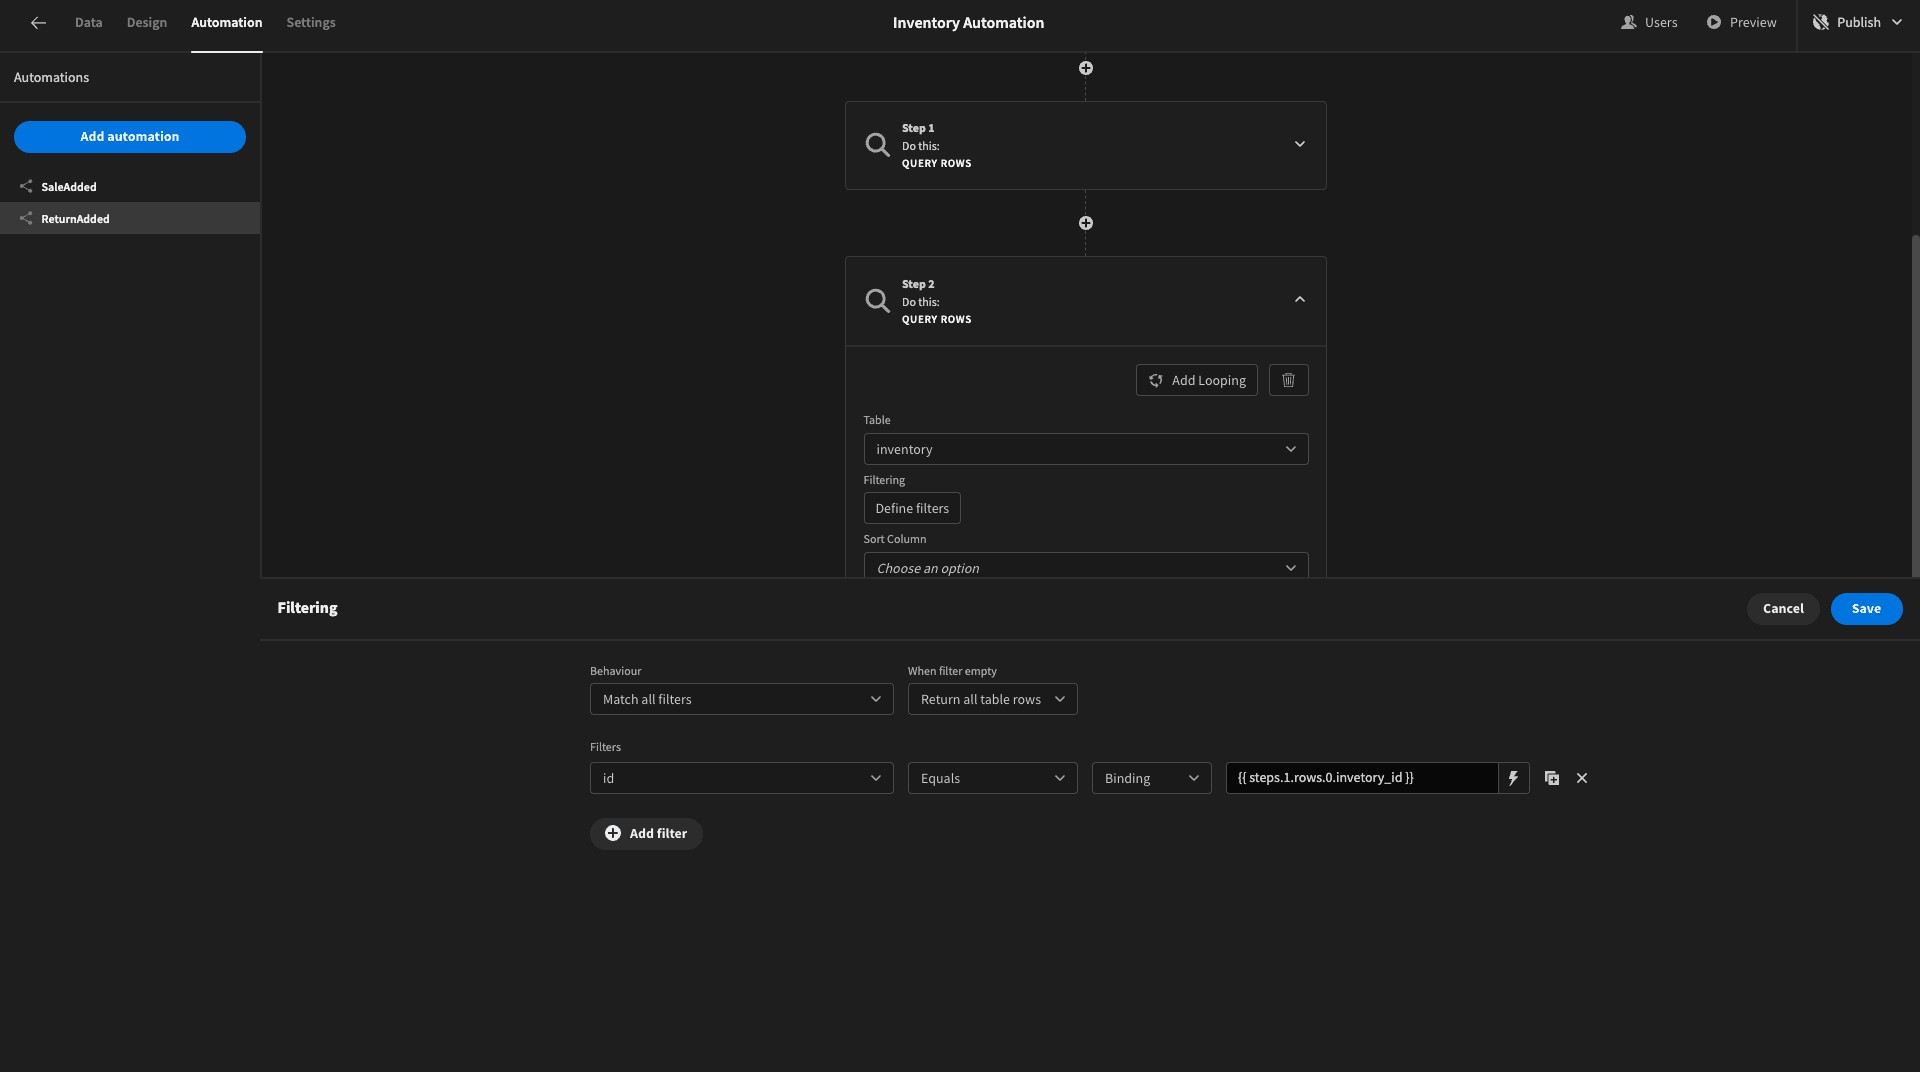
Then, we’ll update the filter for the inventory query action to get the row where id equals {{ steps.1.rows.0.inventory_id }}.
Now, we need to update all of the bindings in our subsequent update row and create row actions.
For updating the inventory table, this is easy. All of our existing bindings are just wrong by one step. So, anywhere it says steps.1, we want to replace this with steps.2 - including in our JavaScript function.
We’ll also change our JavaScript function to return the sum of the relevant quantities - since a return adds to our current stock levels:
1return $("steps.2.rows.0.quantity") + $("steps.1.row.0.quantity")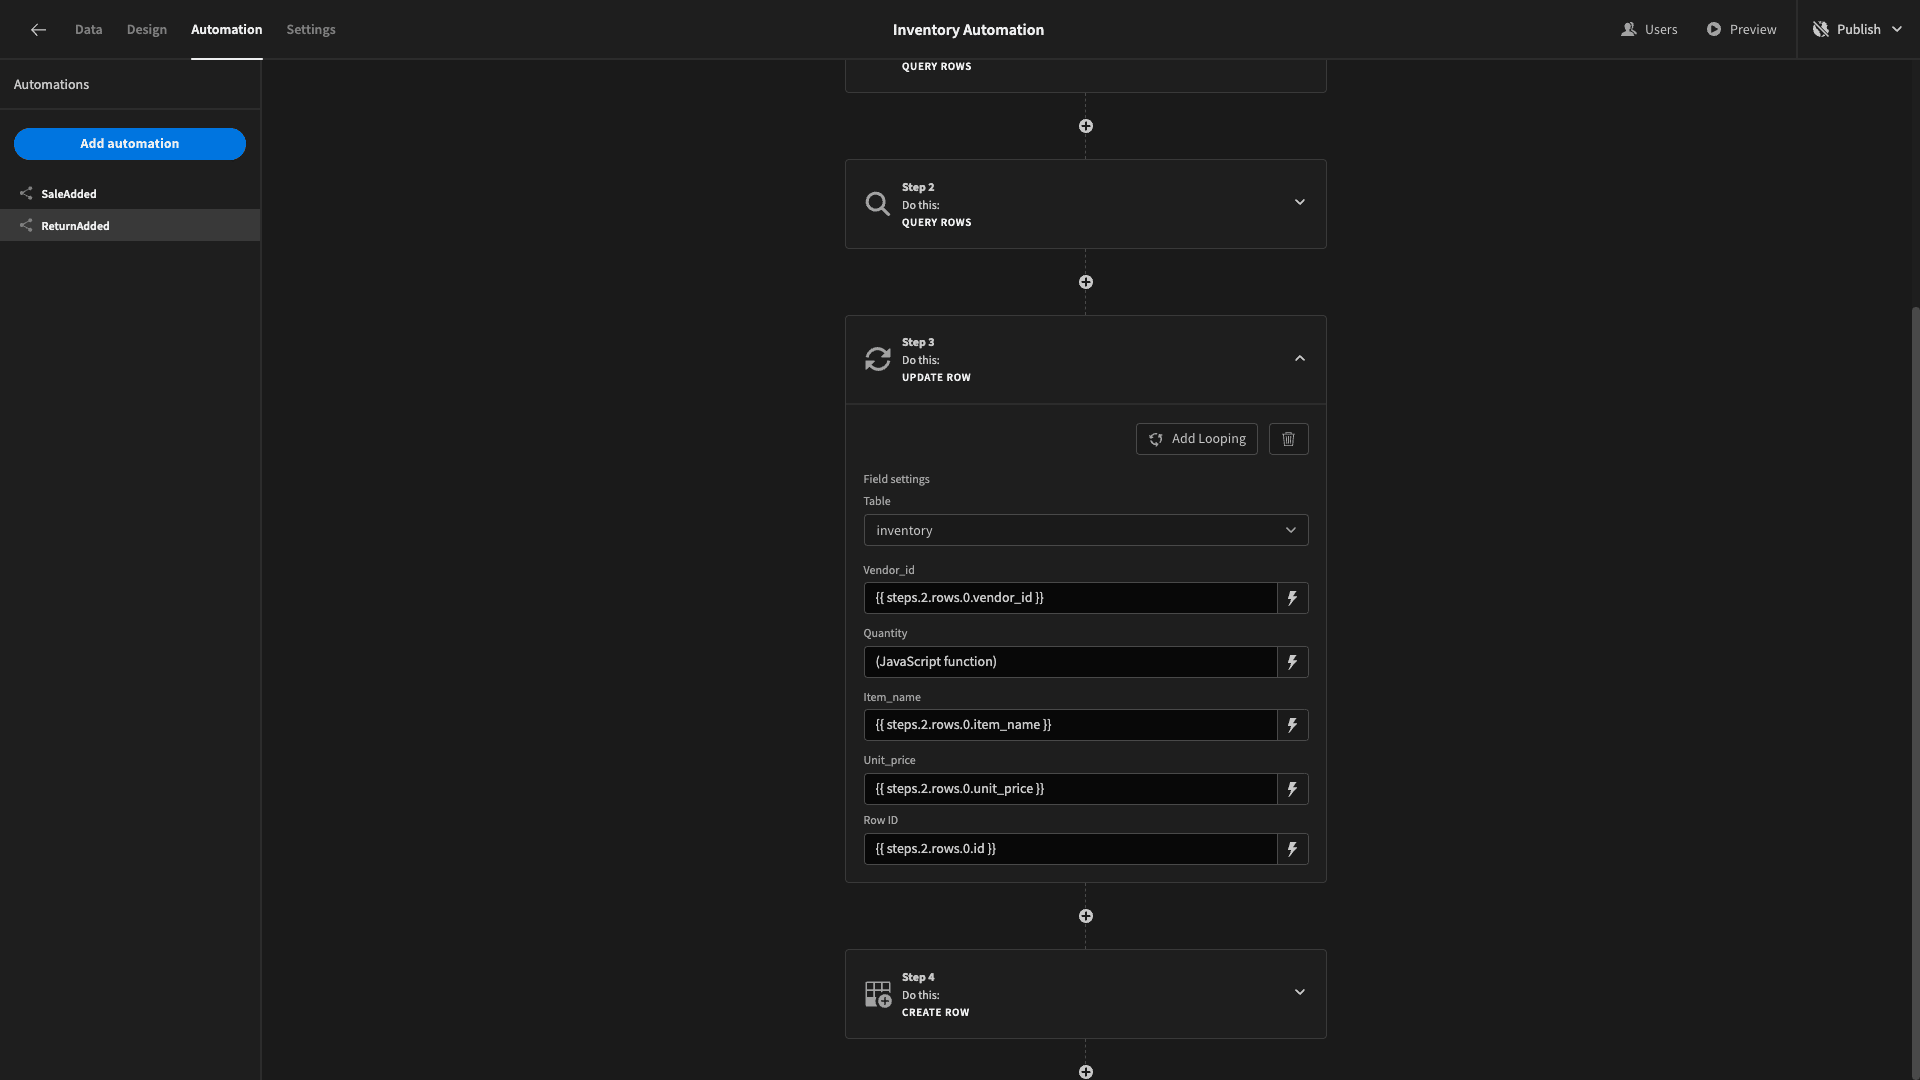
For the create row action we need to populate the values for our new row using our sales and inventory tables. So, item_name, inventory_id, and quantity_change will come in the format:
1{{ steps.1.rows.0.column_name }}We’ll set the change_type to Return and swap our JavaScript function for:
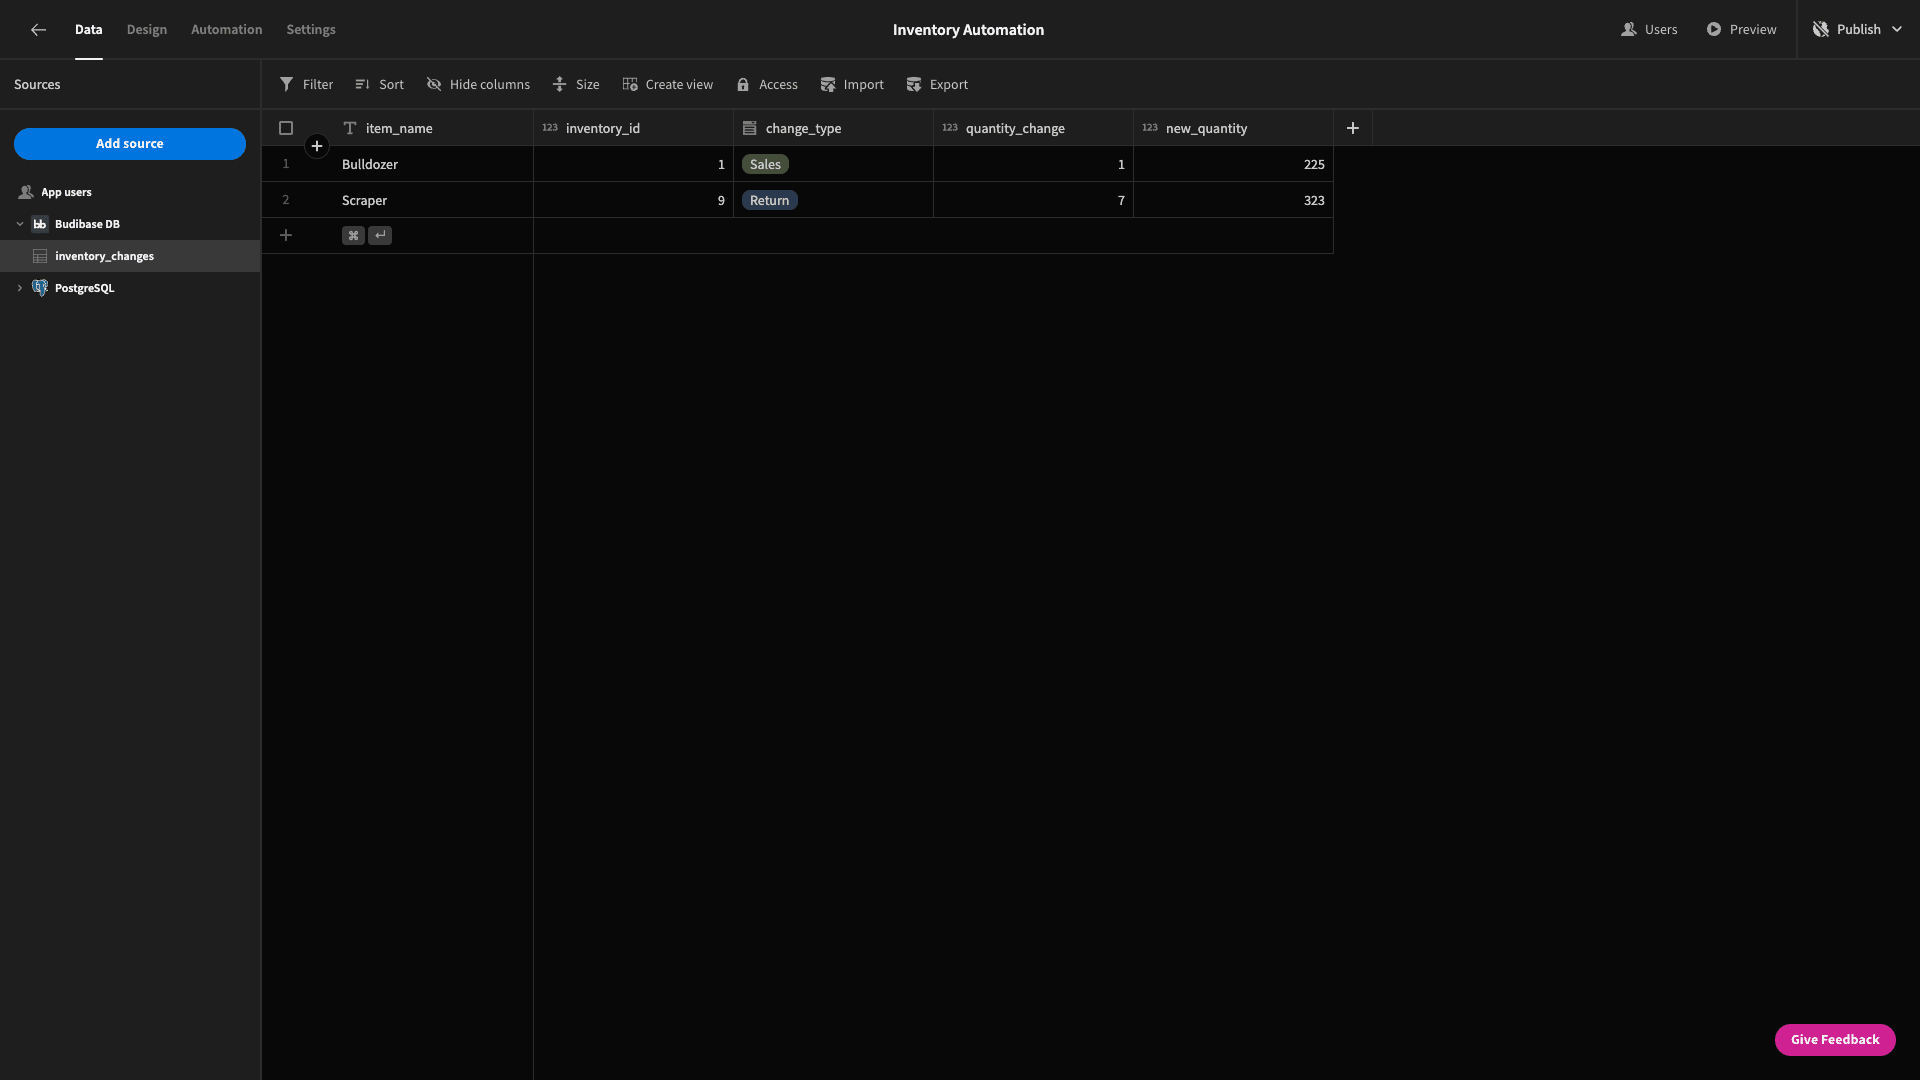
1return $("steps.2.rows.0.quantity") + $("steps.1.row.0.quantity")Just like before, we’ll test our automation to confirm that it works:
5. Handling procurement
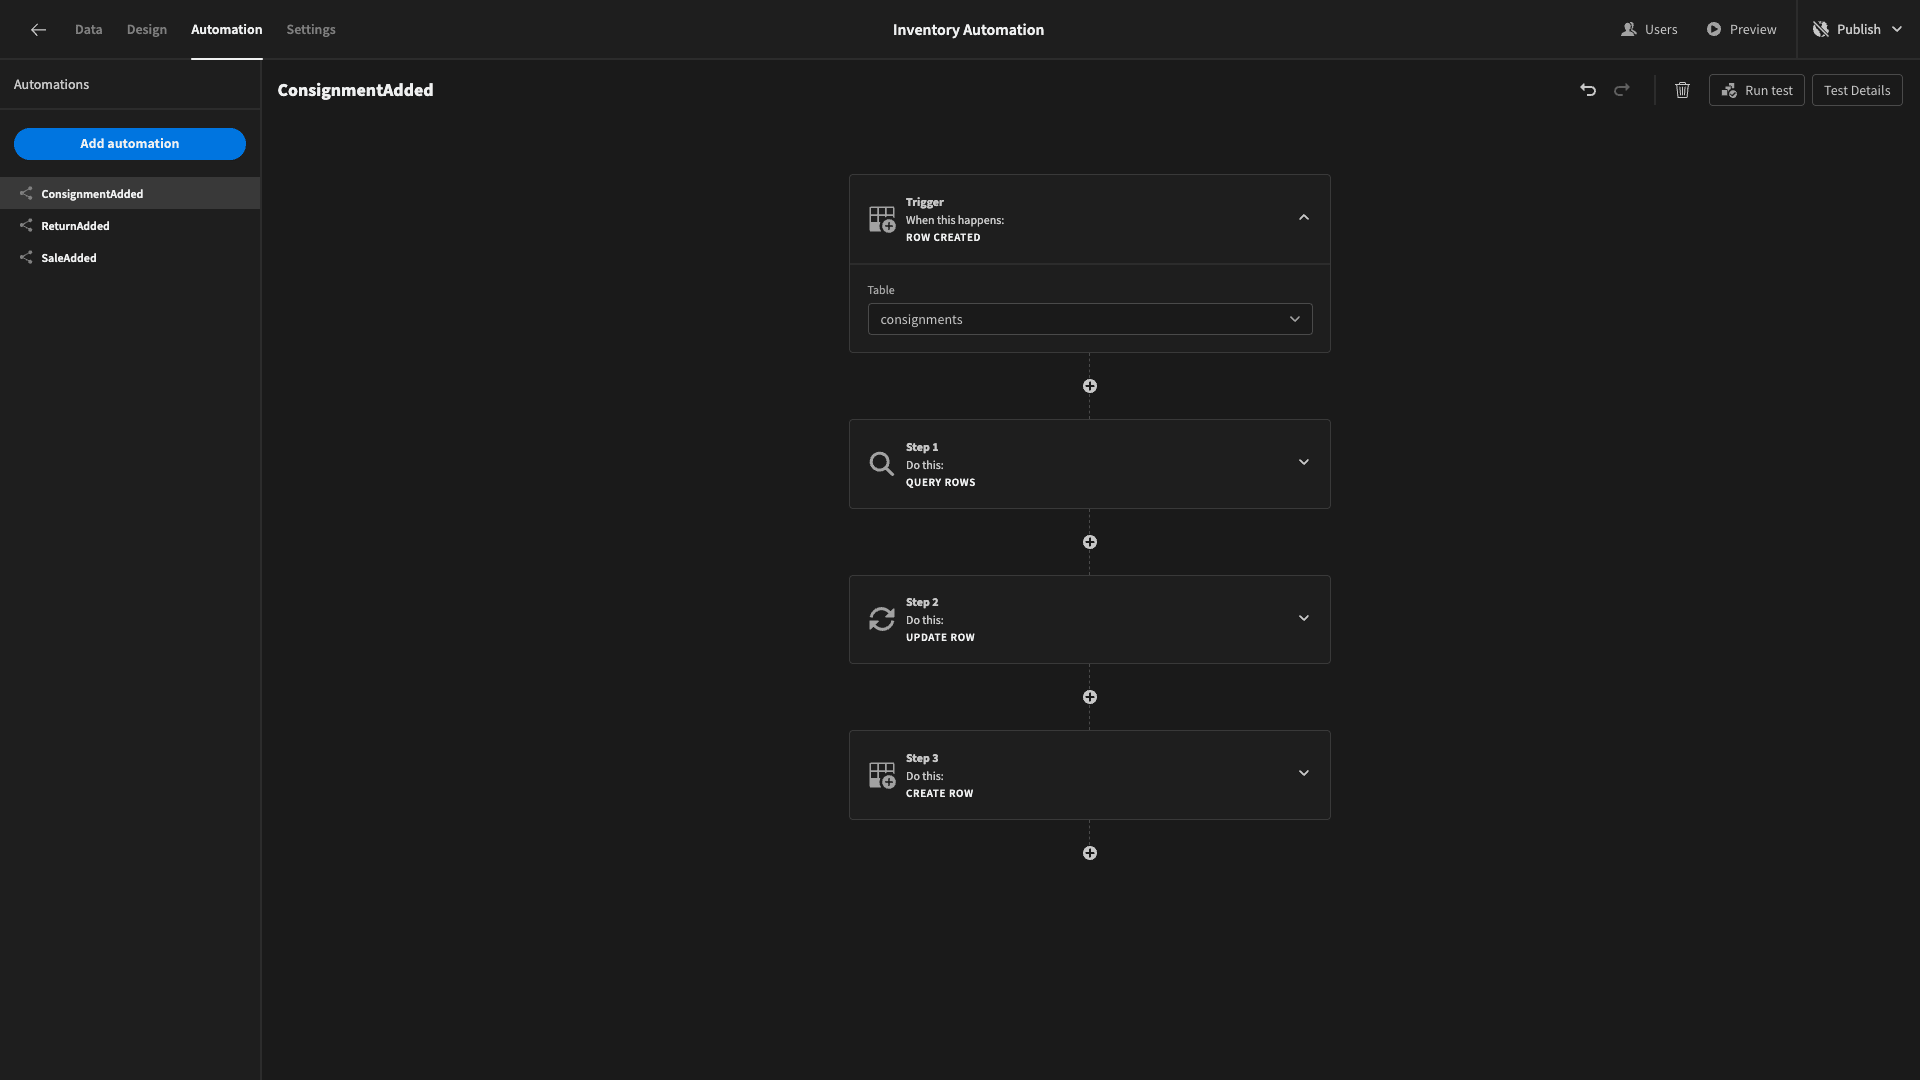
Now, duplicate the SaleAdded flow again, this time calling the new version ConsignmentAdded.
The consignments table links to inventory - so we only need one query rows action this time.
We’ll swap the table for our trigger to consignments:
And then the only other change we need to make is to swap the JavaScript for updating the quantity to:
1return Number($("steps.1.rows.0.quantity")) + Number($("trigger.row.quantity"))Remember to do this for both the update row and create row actions.
Then, we’ll verify that this works as we expected:
6. Ordering new stock
The last automation rule we’ll build is a little bit different. Basically, we want to enable users to send an email template to the vendor of any given item in order to request more stock.
In the next step, we’ll create a UI where users can trigger this automation on any item, specifying the quantity of stock they’d like to order.
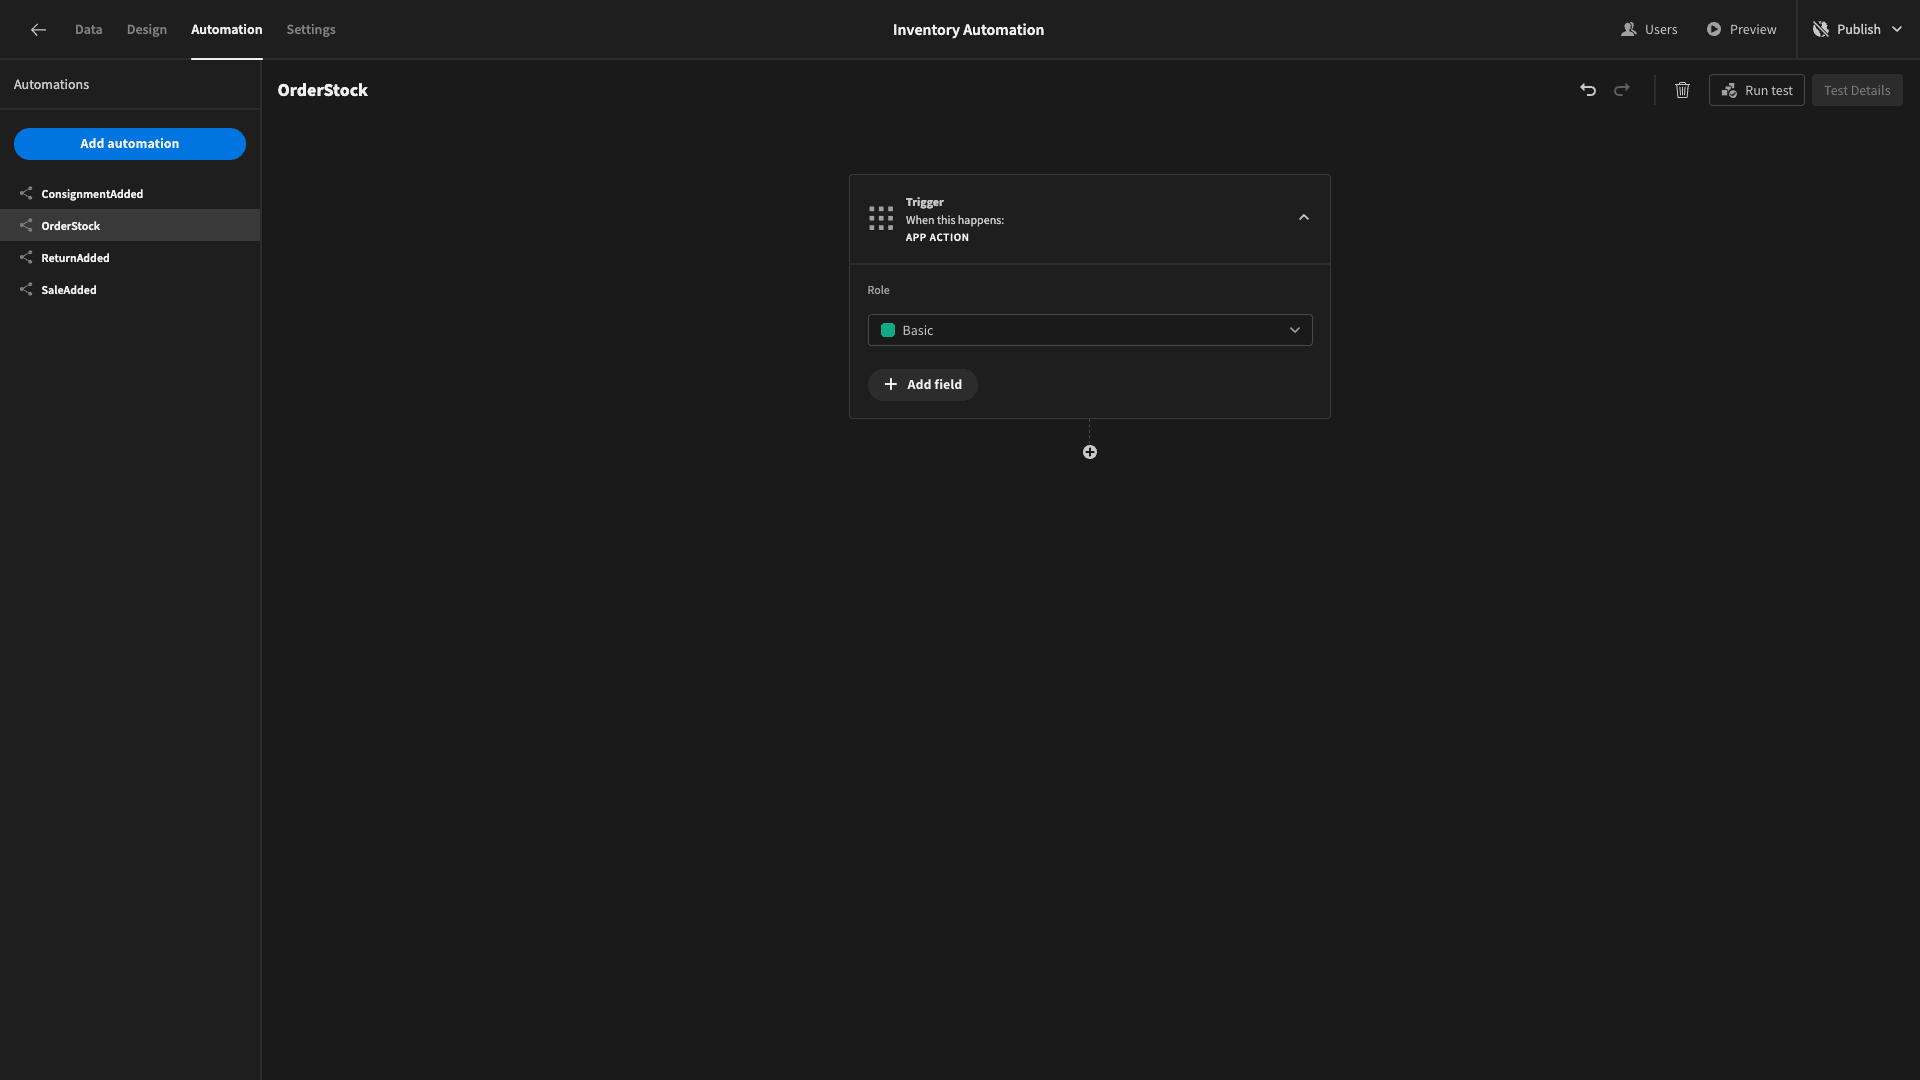
We’ll start by creating a new automation which we’ll call OrderStock. This time we’re using the App Action trigger. This allows us to specify variables that we can pass to our automation whenever it’s triggered:
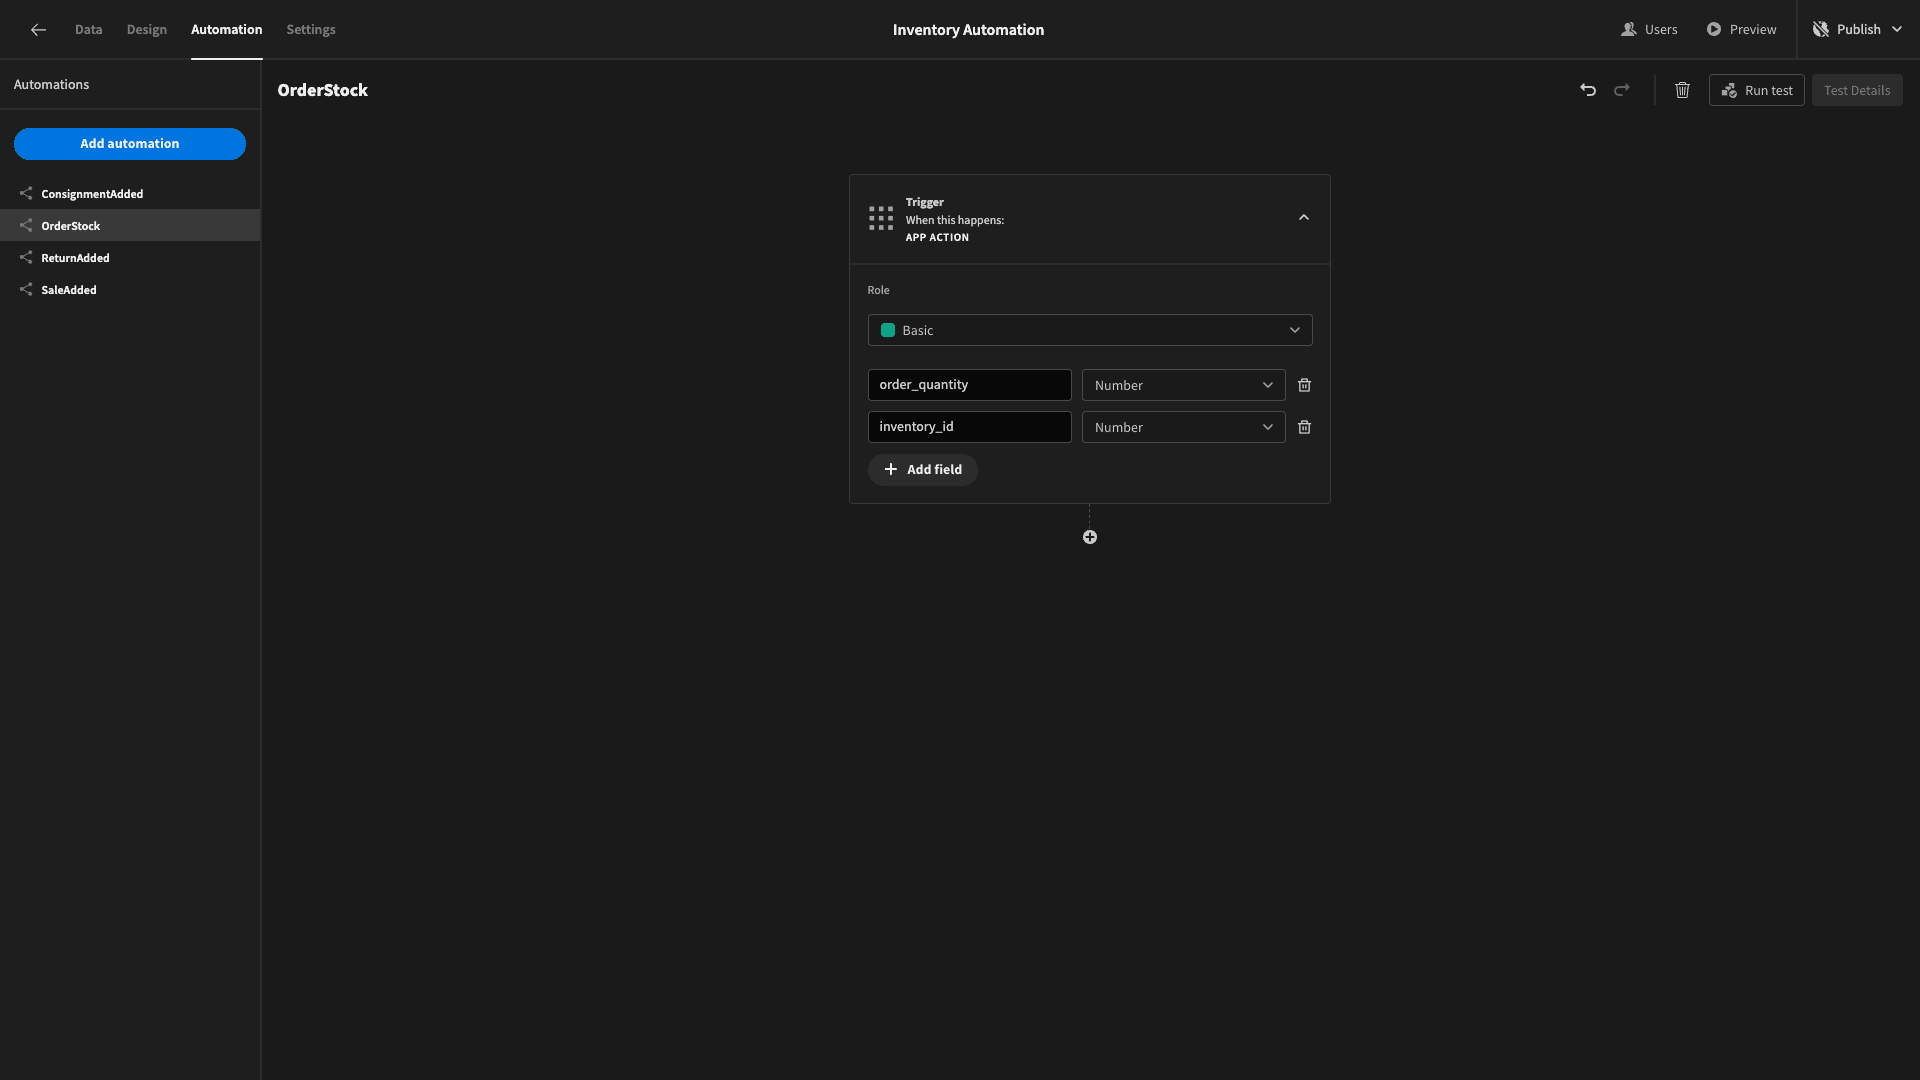
We’re going to add two number fields, called order_quantity and inventory_id.
We’re going to use the inventory_id to retrieve the appropriate row from our inventory table, using a filtered query rows action - just like before.
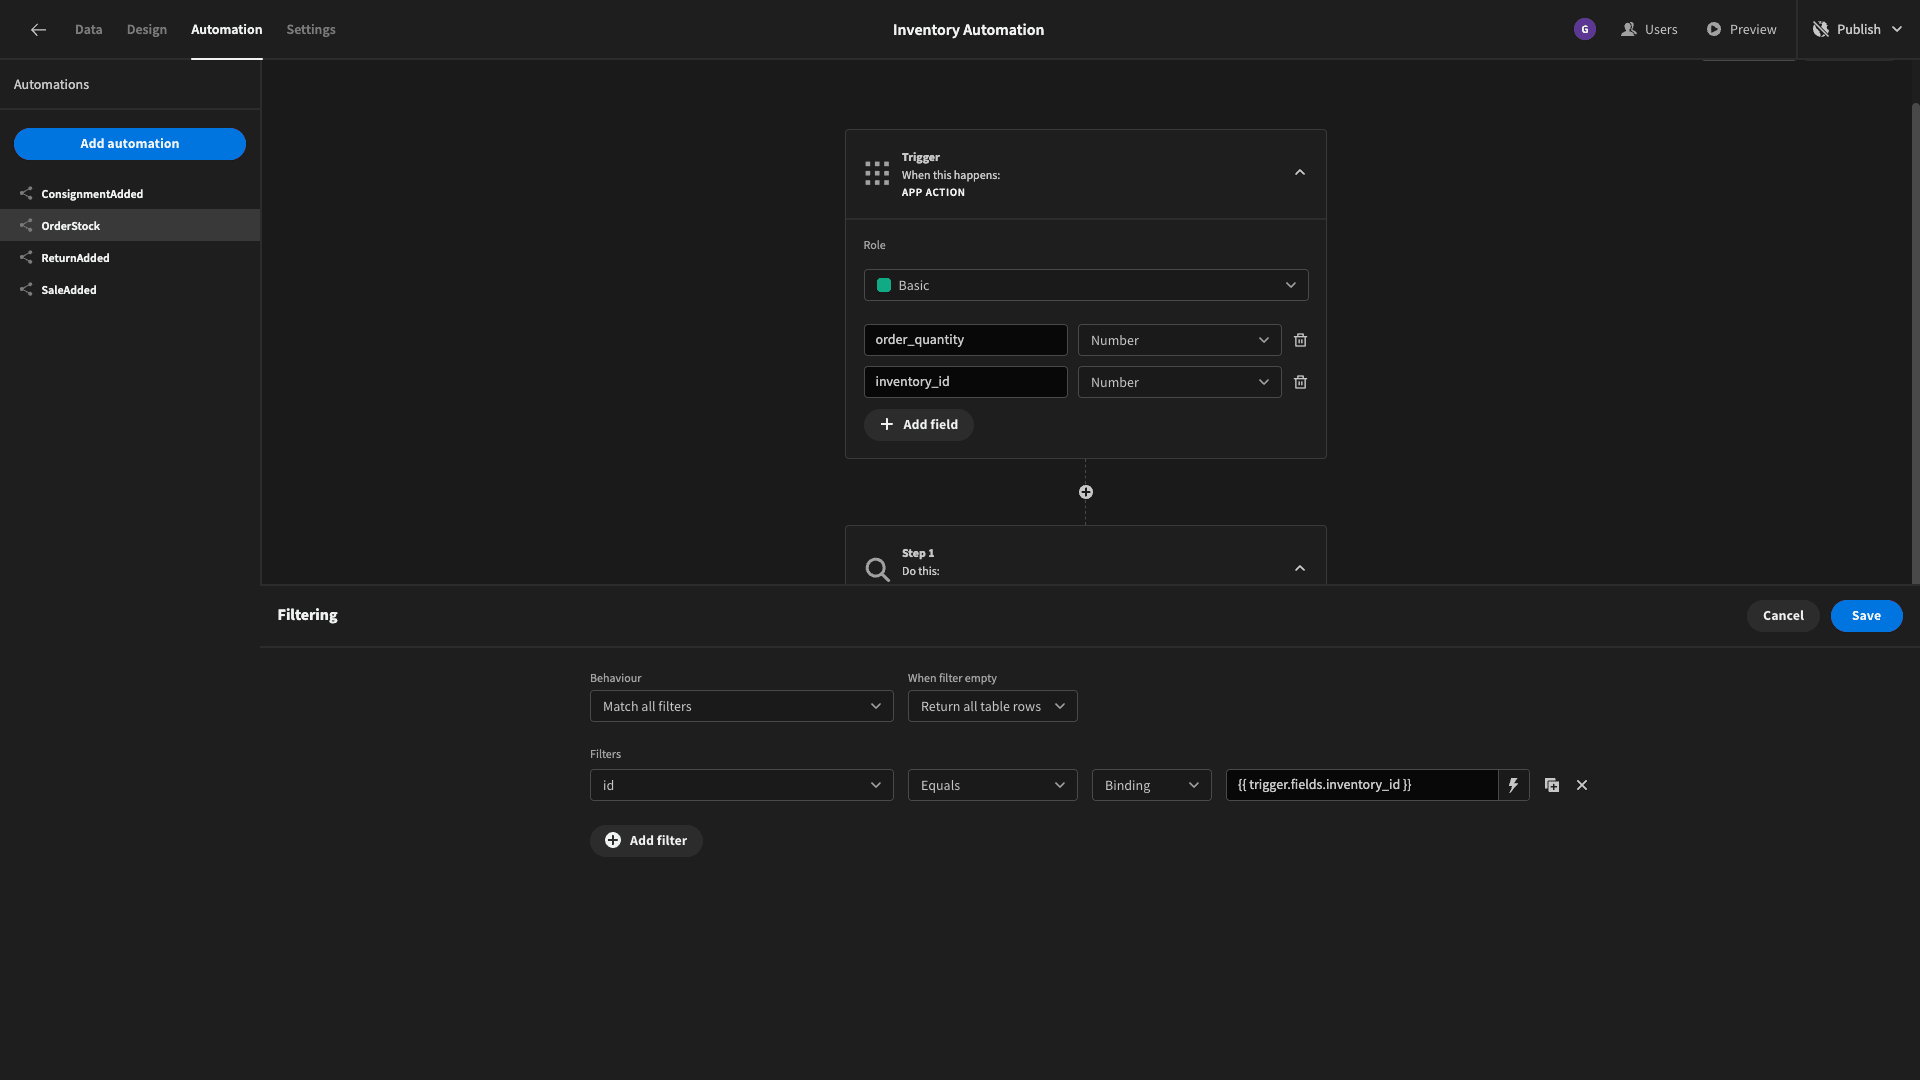
Each row in the inventory table is linked to a row in the vendors table - which stores details of the companies that supply our stock.
We need to retrieve the relevant vendors row too.
Add another query rows action, pointed at the vendors table. This has an attribute called v_id. We’ll use a filter expression to return the row where this matches the vendor_id output of our previous step:
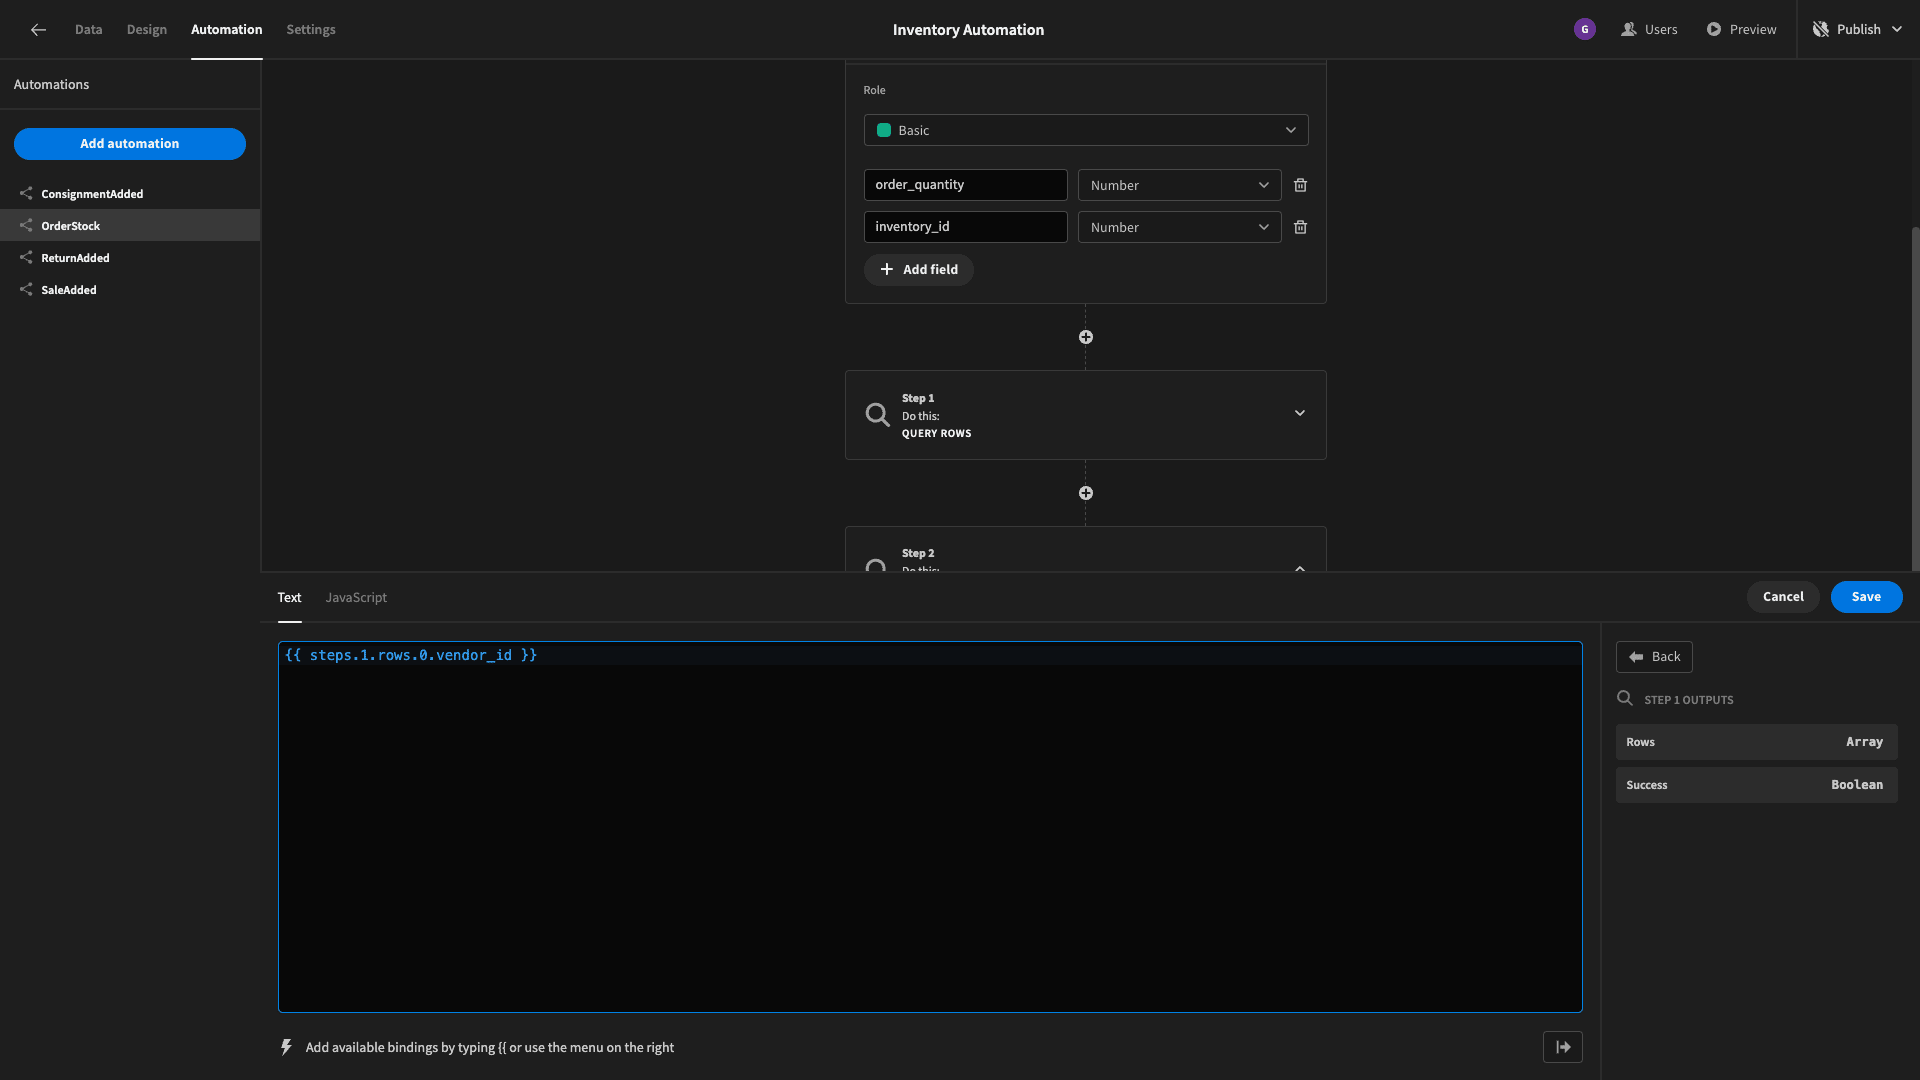
The data object we get back looks like this:
 1{
 2
 3 "rows": [
 4
 5  {
 6
 7   "ein_number": "10-0774902",
 8
 9   "street_address_line_2": "Unit 200",
10
11   "services_description": "Sed ante. Vivamus tortor. Duis mattis egestas metus.",
12
13   "contact_email": "adurhamj@slideshare.net",
14
15   "company_name": "O'Reilly-Greenholt",
16
17   "contact_phone": "785-373-6000",
18
19   "v_id": 4,
20
21   "contact_last_name": "Durham",
22
23   "state": "KS",
24
25   "category": "Medical/Nursing Services",
26
27   "purchase_order_billing": "TRUE",
28
29   "vendor_number": 2,
30
31   "street_address": "5 Erie Court",
32
33   "zip": 66611,
34
35   "contact_first_name": "Aaren",
36
37   "_id": "%5B4%5D",
38
39   "tableId": "datasource_plus_2fb21a1bd6ed4e20b3ff449096fad3ed__vendors",
40
41   "_rev": "rev"
42
43  }
44
45 ],
46
47 "success": true
48
49}
This is quite a lot of information, but we only need contact_email and contact_first_name - alongside the item_name value from our inventory query and our original trigger’s order_quanitity.
Next, add a send email action. You’ll need to have your SMTP credentials set up in Budibase for this to work - so check out our [email docs](https://docs.budibase.com/docs/email#:~:text=Budibase comes with three different,right side of the page.).
We’ll bind the send to field to the output of our vendors query, using {{ steps.2.rows.0.contact_email }}. Send from and subject can be whatever you want:
For the subject, we’re using:
1Order Request: {{ steps.1.rows.0.item_name }}Your email body can be set using standard HTML. For example:
1<p>Dear {{ steps.2.rows.0.contact_first_name }}</p>
2
3<p>We require {{ trigger.fields.quantity }} {{ steps.1.rows.0.item_name }}s.</p>
4
5<p>Can you please process this request</p>
6
7<p>Thanks.</p>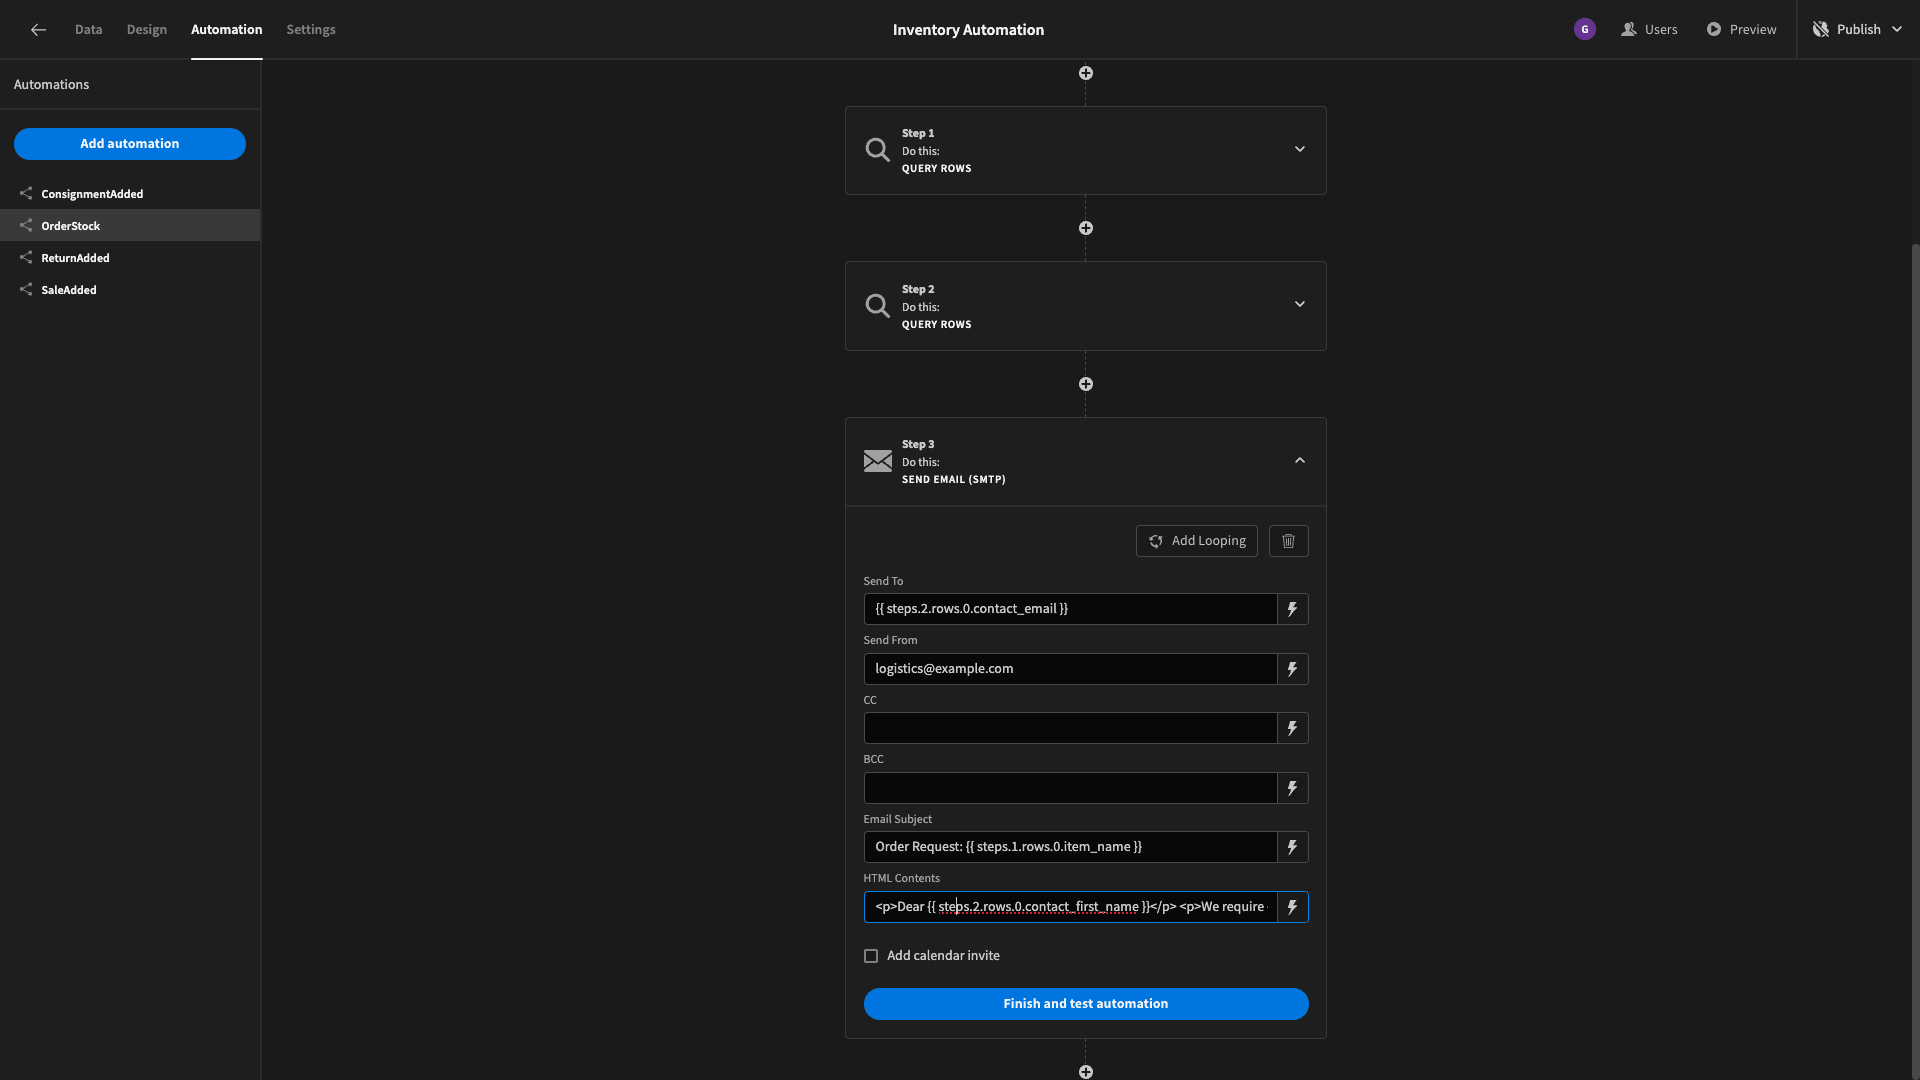
Once you’re satisfied that this works, we can move on to creating our admin panel.
7. Building an admin panel
Head to the design section and create a new table screen:
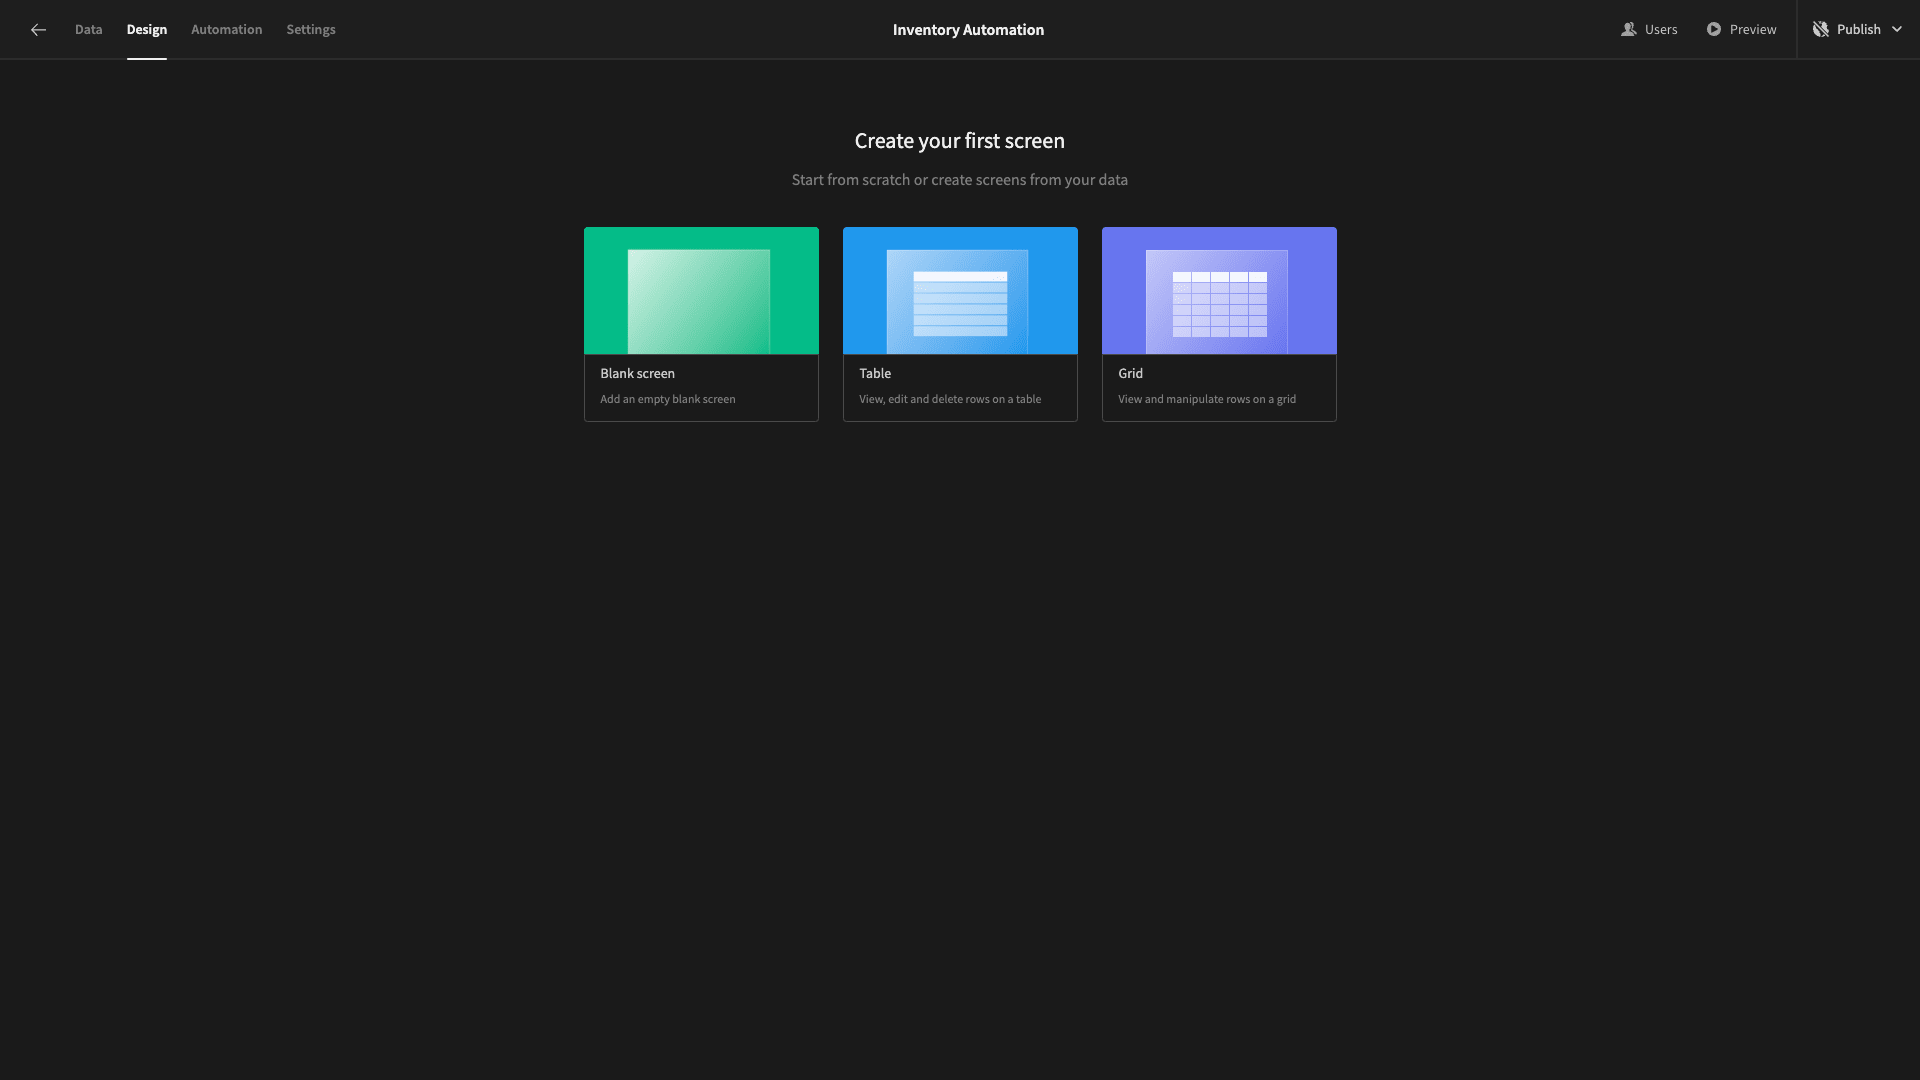
We’ll base this on our inventory table:
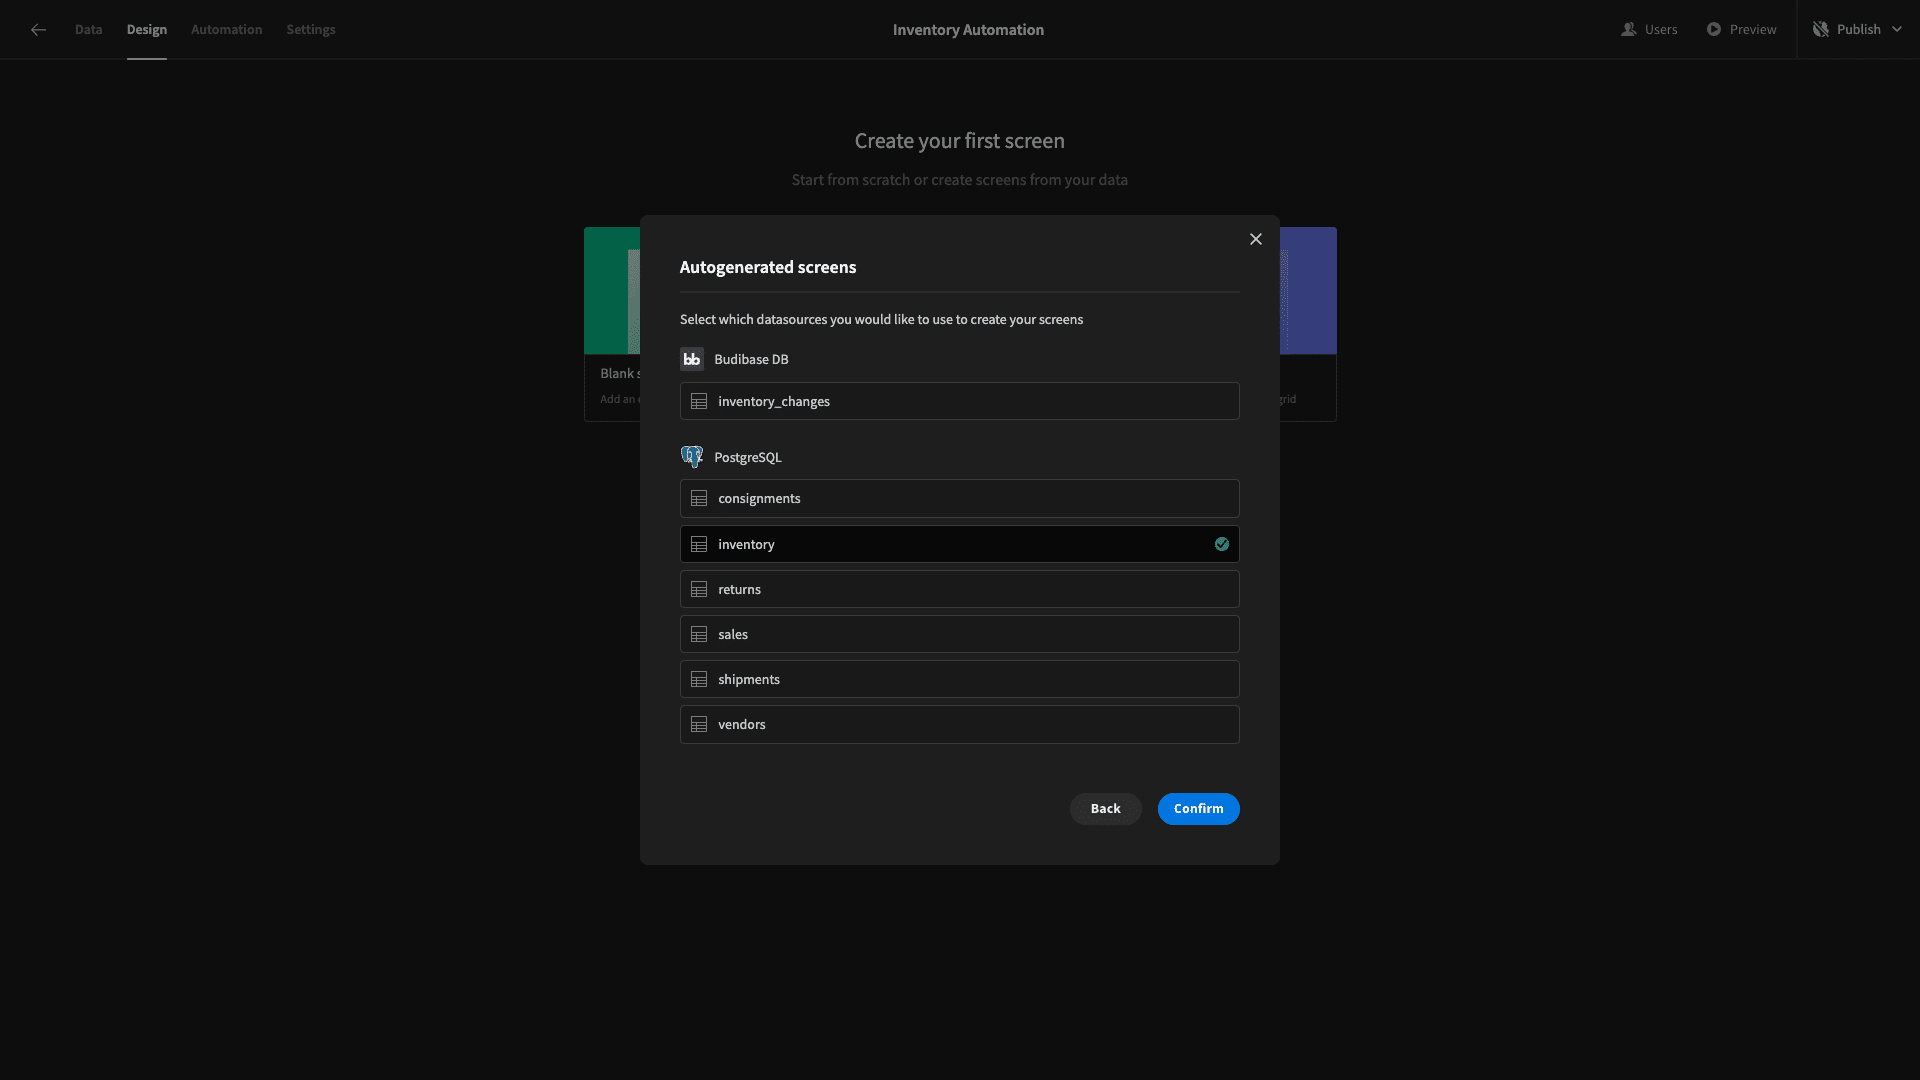
Budibase will autogenerate a working CRUD screen for our inventory data:
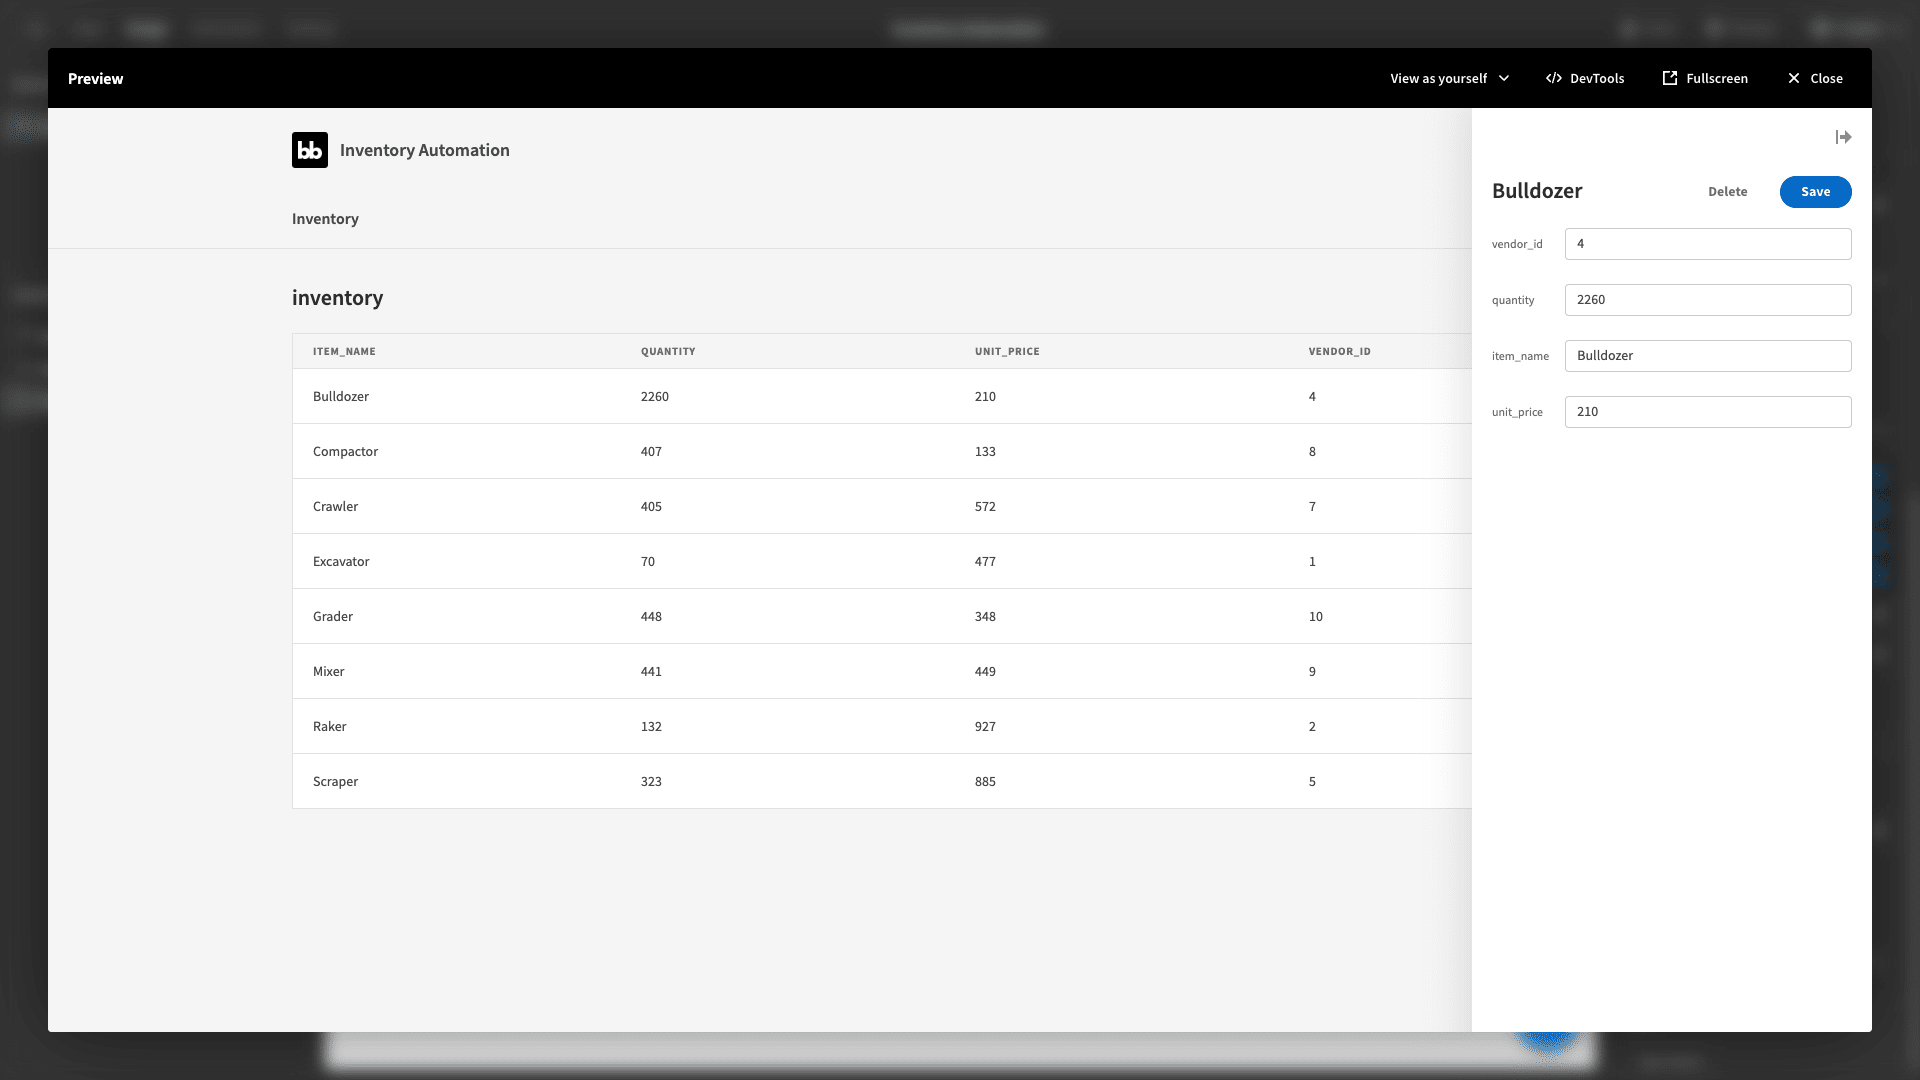
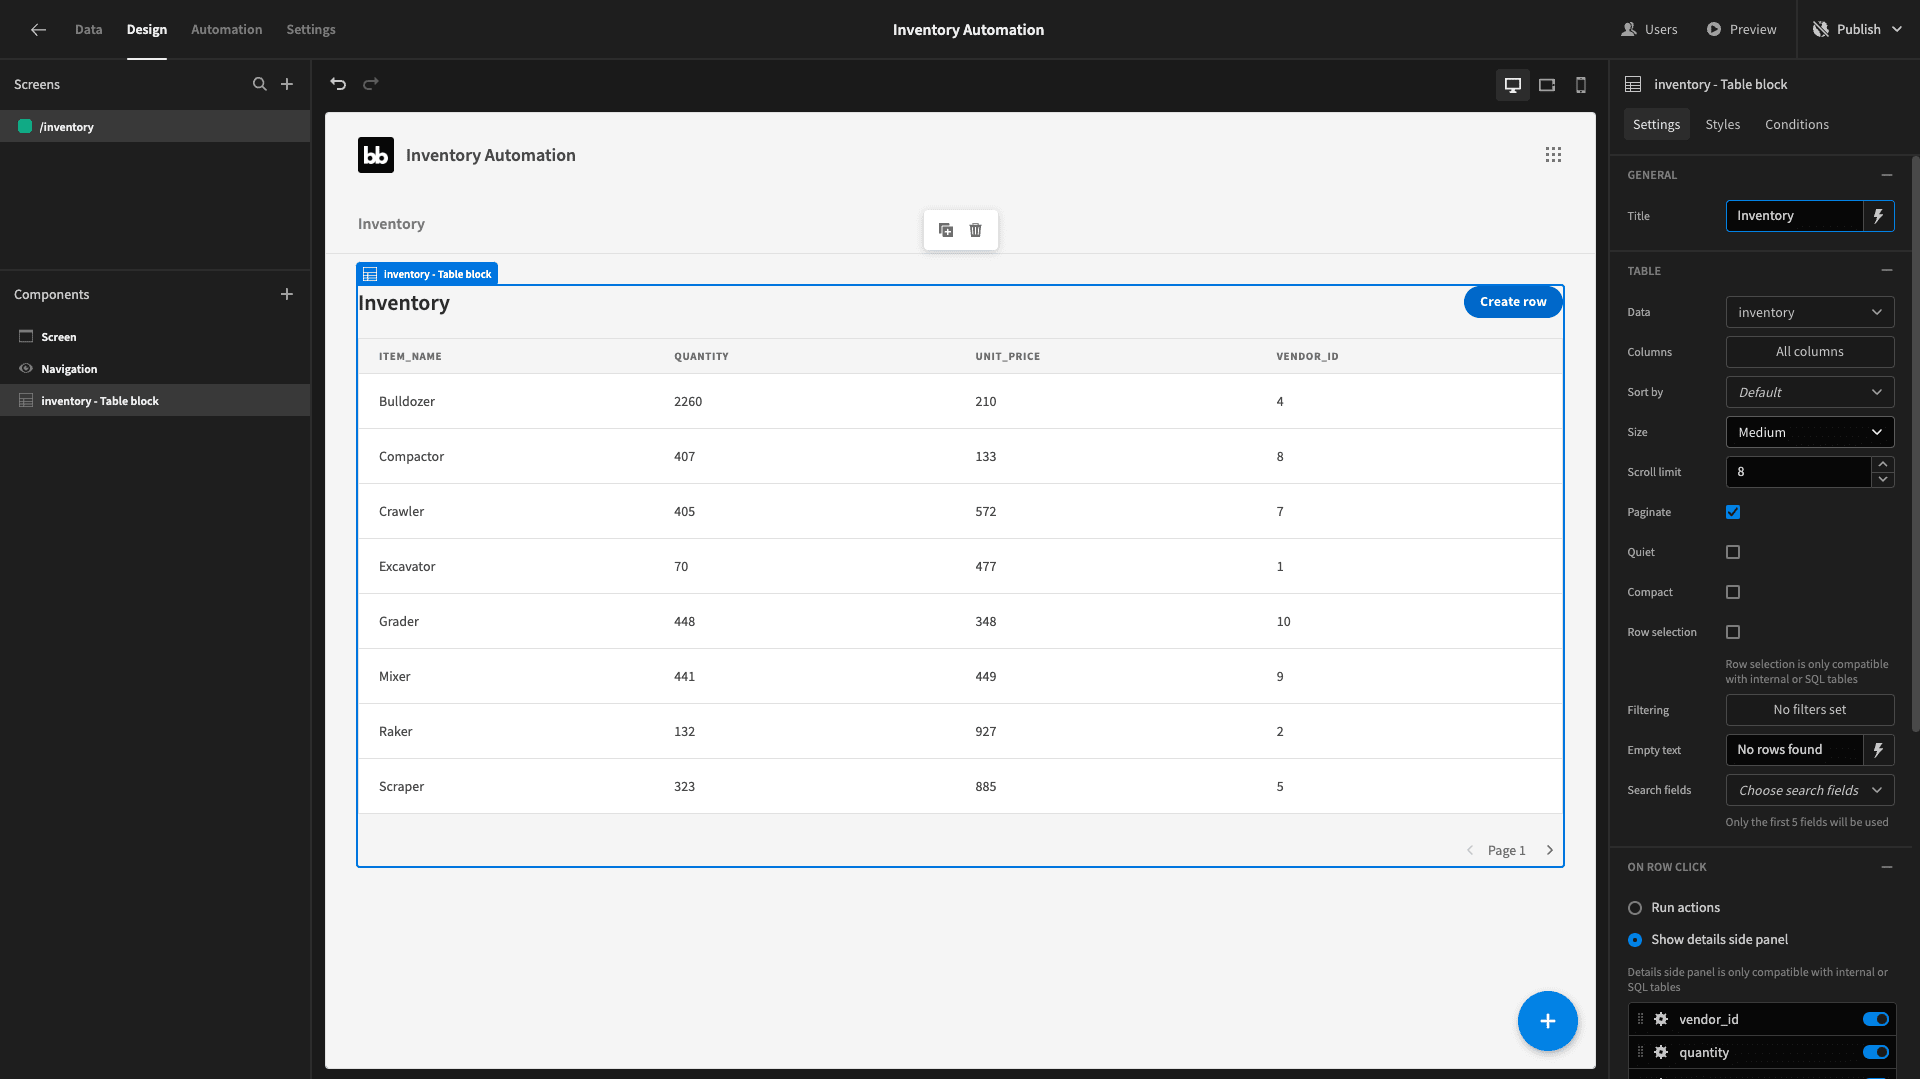
We’re going to back a few changes to the side panel to replace the existing update form with one that allows users to make new stock requests, based on the email automation we just set up.
We’ll start by capitalizing our title:
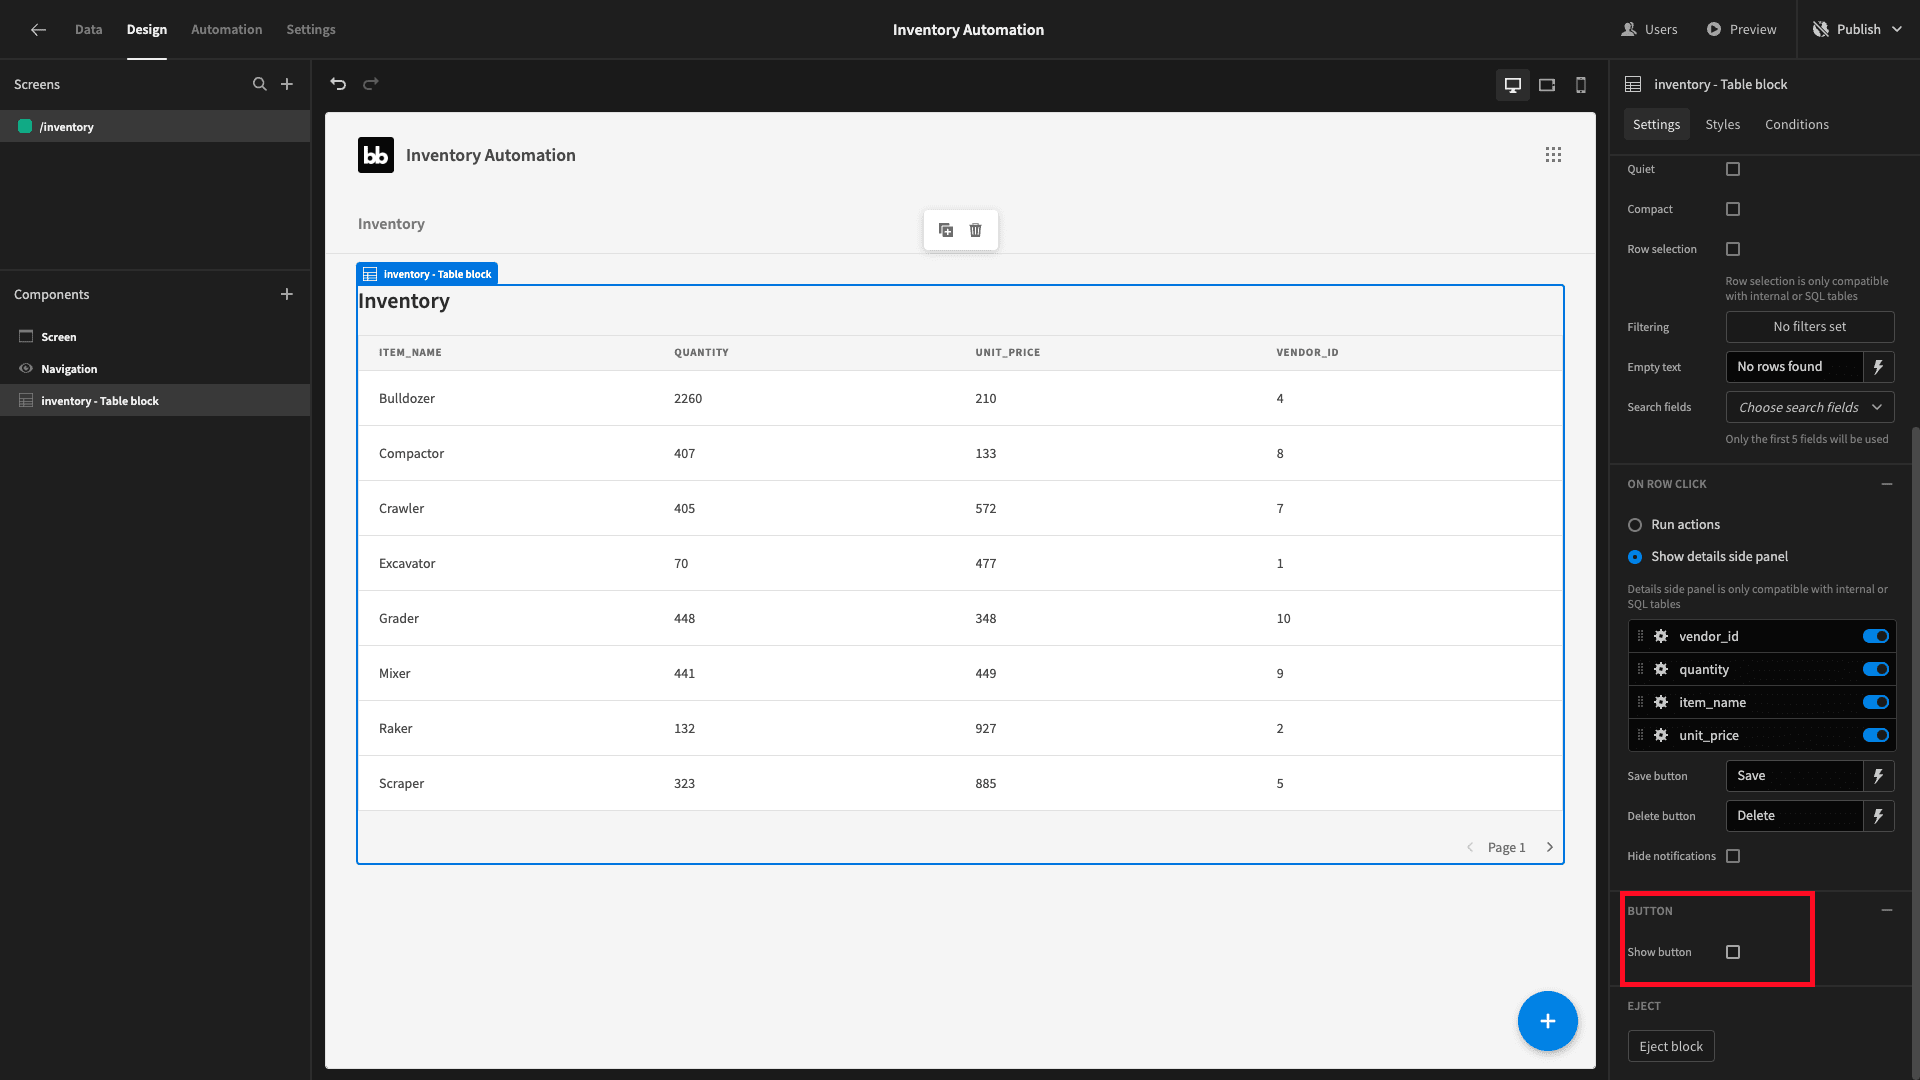
We’ll also disable the show button option:
Then we’ll turn off paginate and increase the scroll limit to match the number of rows in our inventory table:
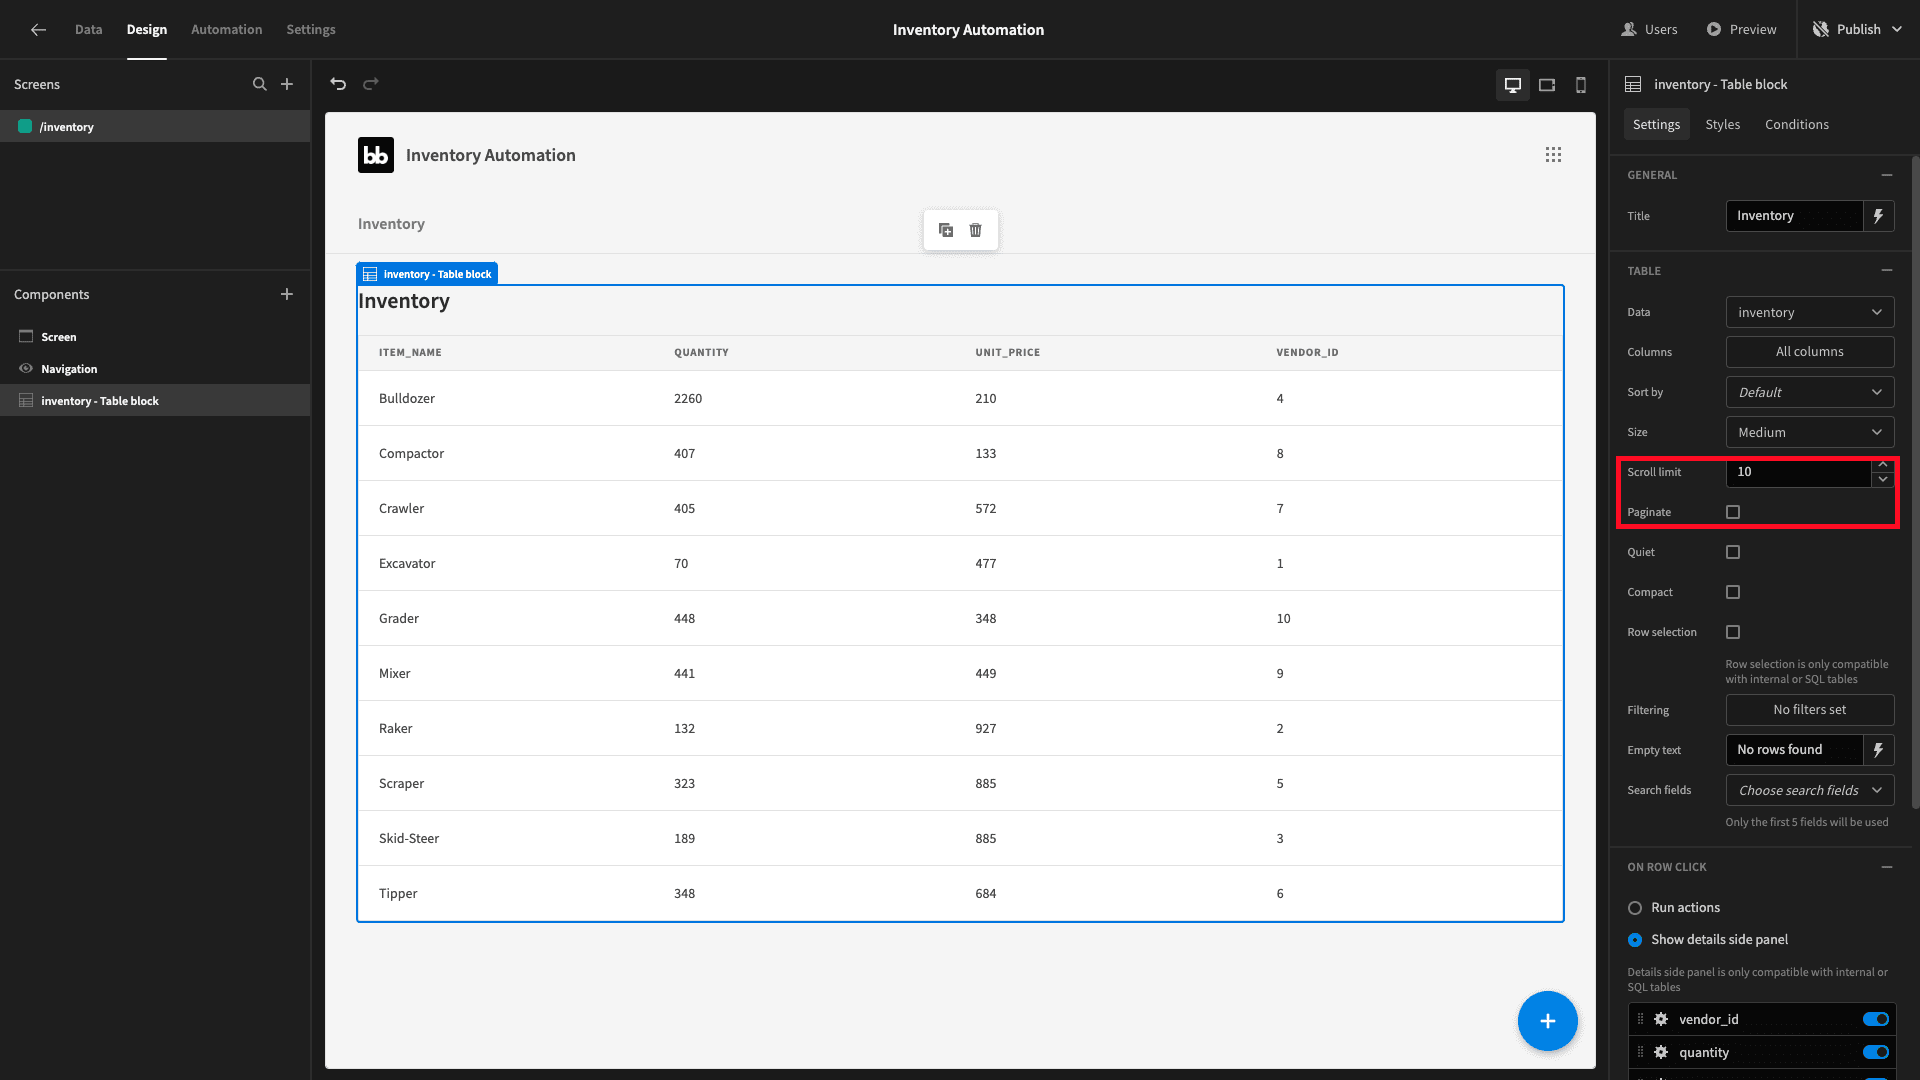
When we’re happy with the design we’ll hit eject block:
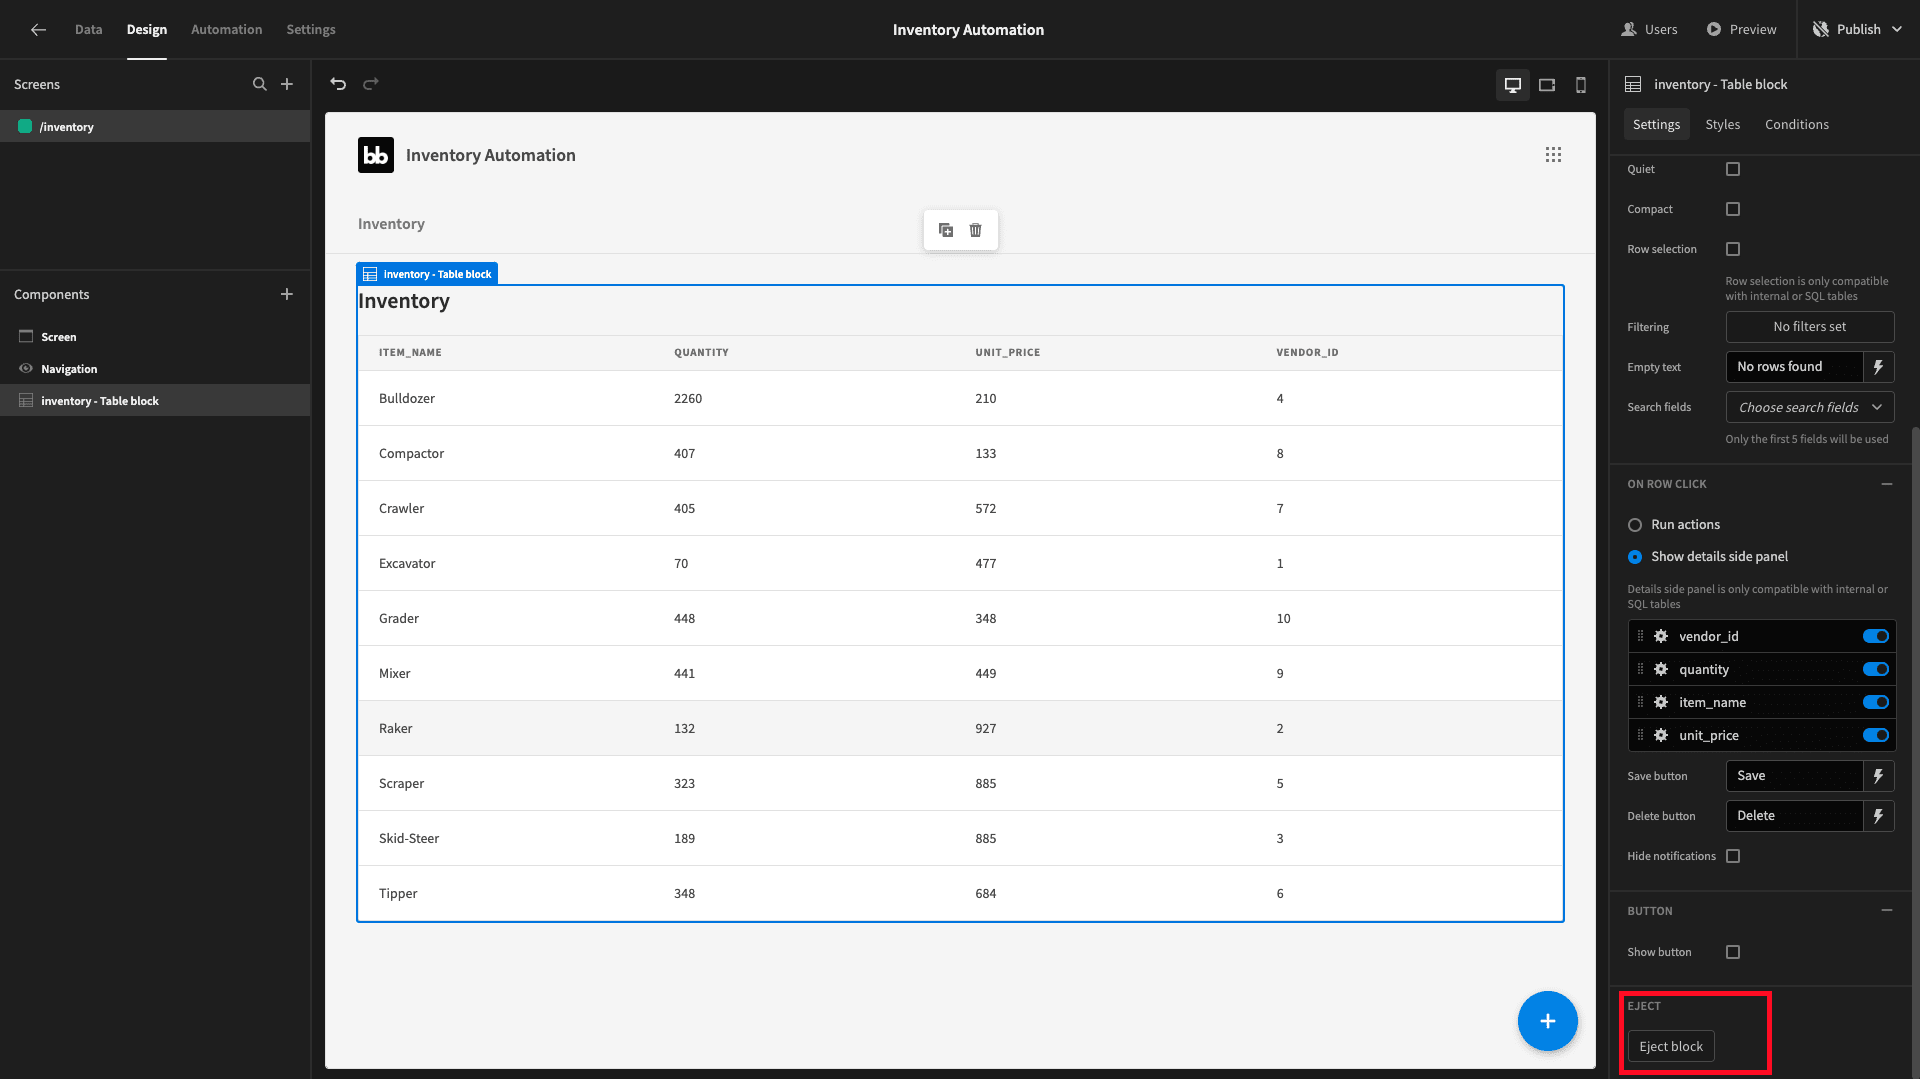
This exposes the constituent components that make up our table block.
We have a component called side panel inside of which there’s a form block. This is a prebuilt form. We’ll make a couple of design tweaks to this too before we eject it. First, remove the delete button’s text.
Then, set align labels to top:
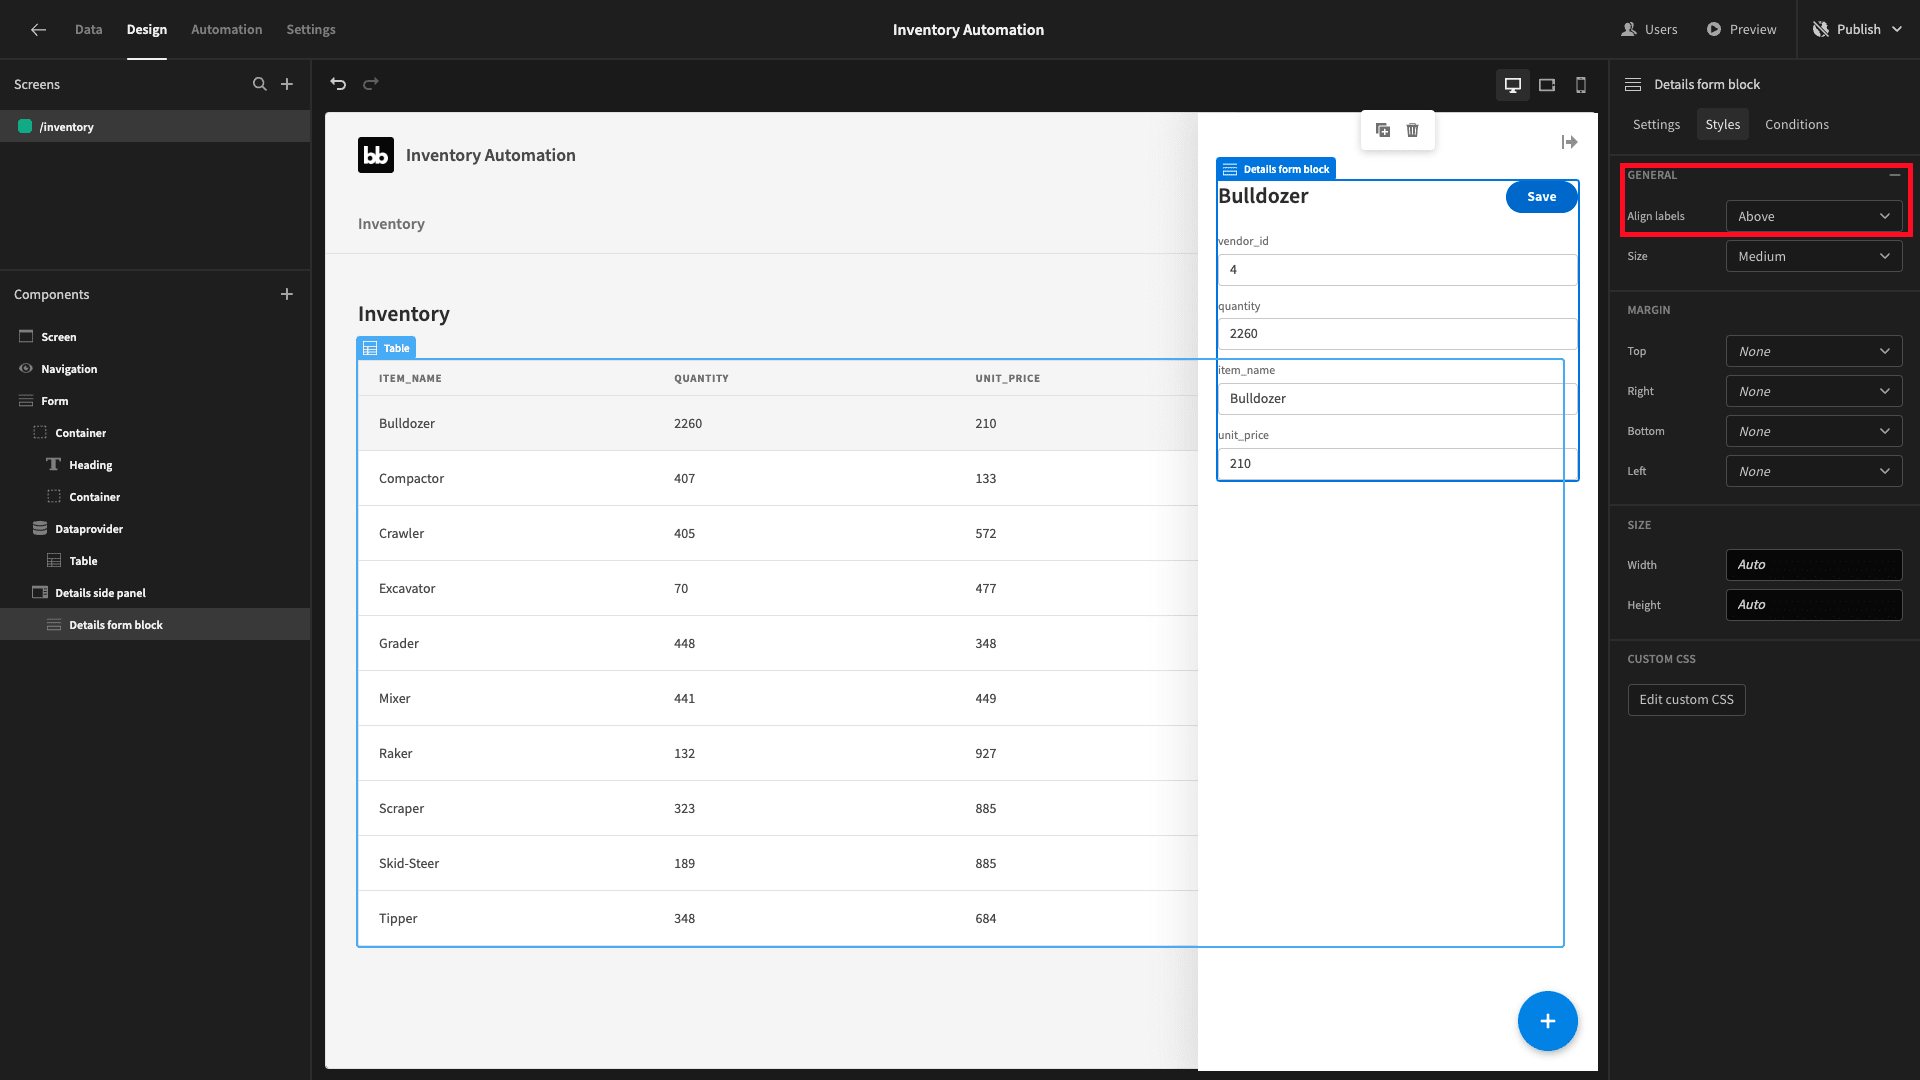
Now eject your form block.
We’ll change the headline component to read Restock:
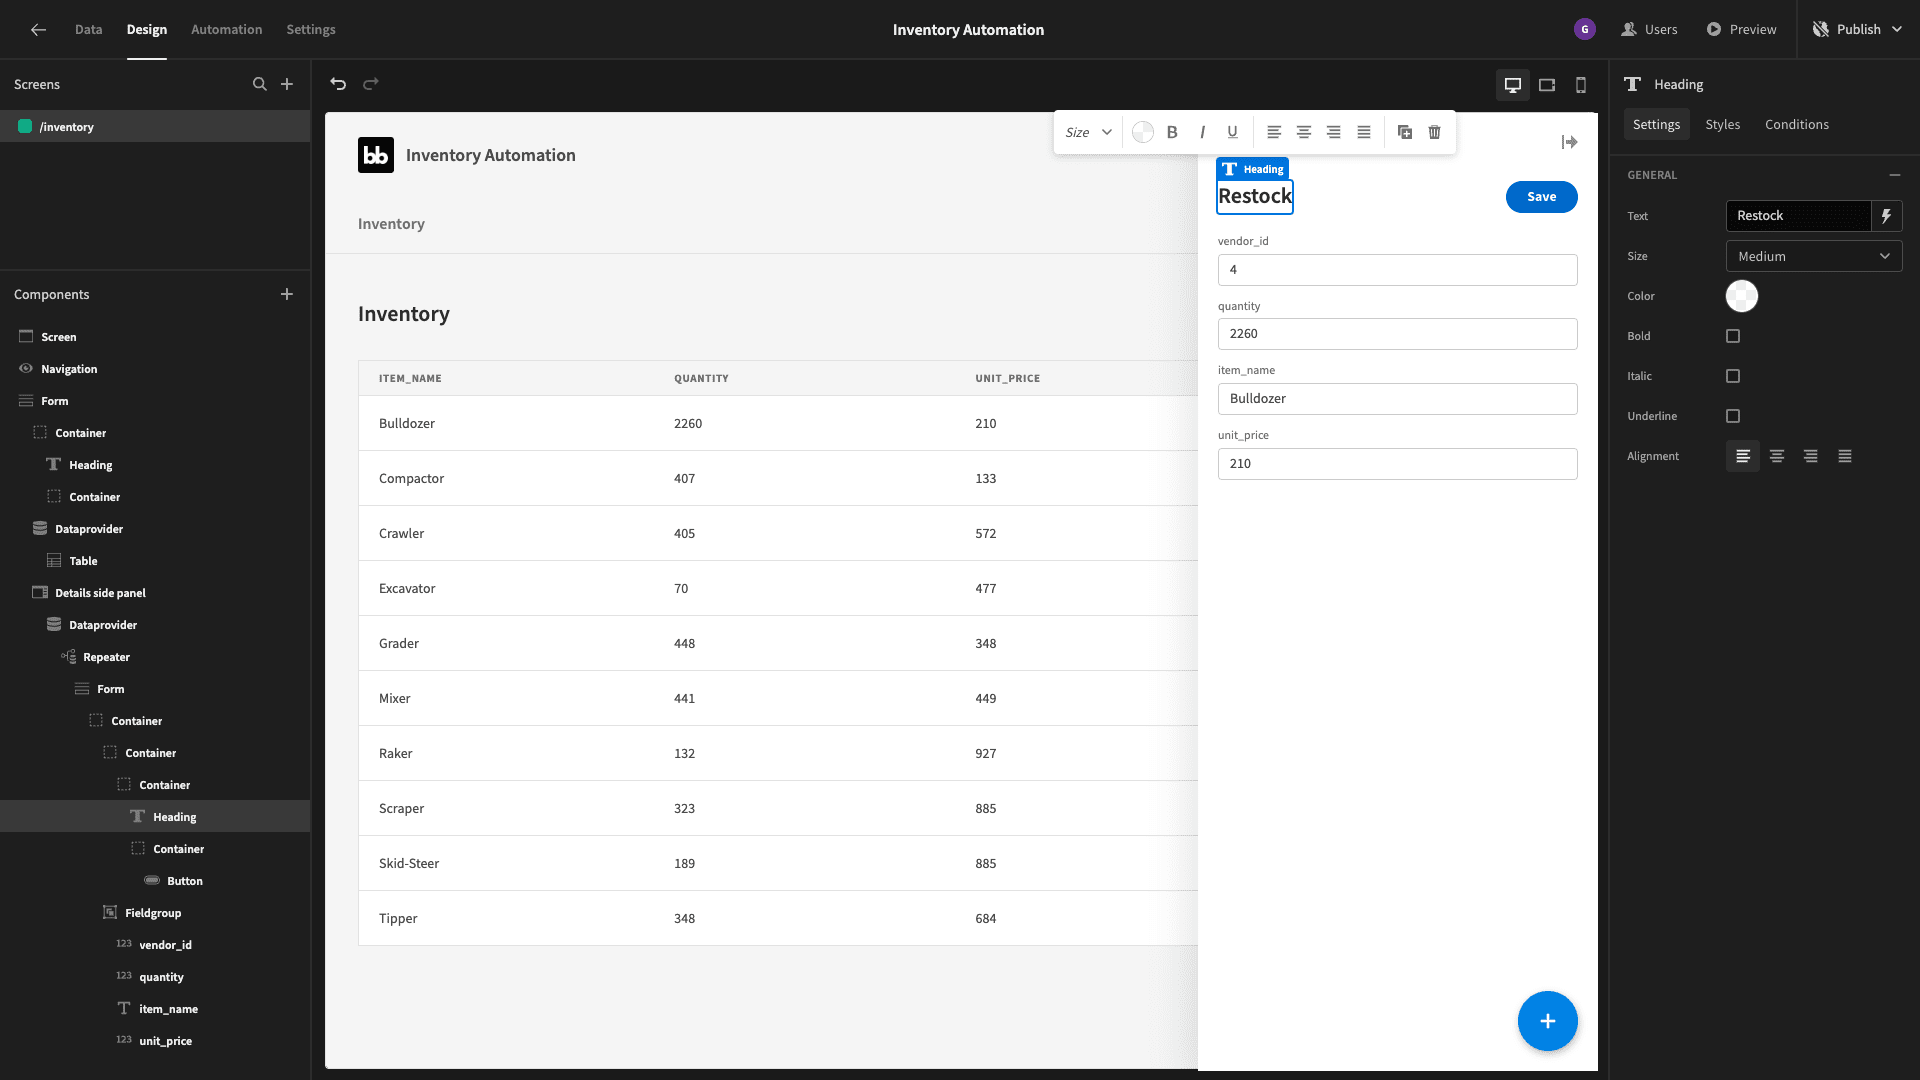
Then, we’ll select the disabled check box under each of our form fields:

Now - recall that our email automation has two trigger fields - inventory_id and order_quantity. We already know the inventory_id, based on the row that the user clicked on.
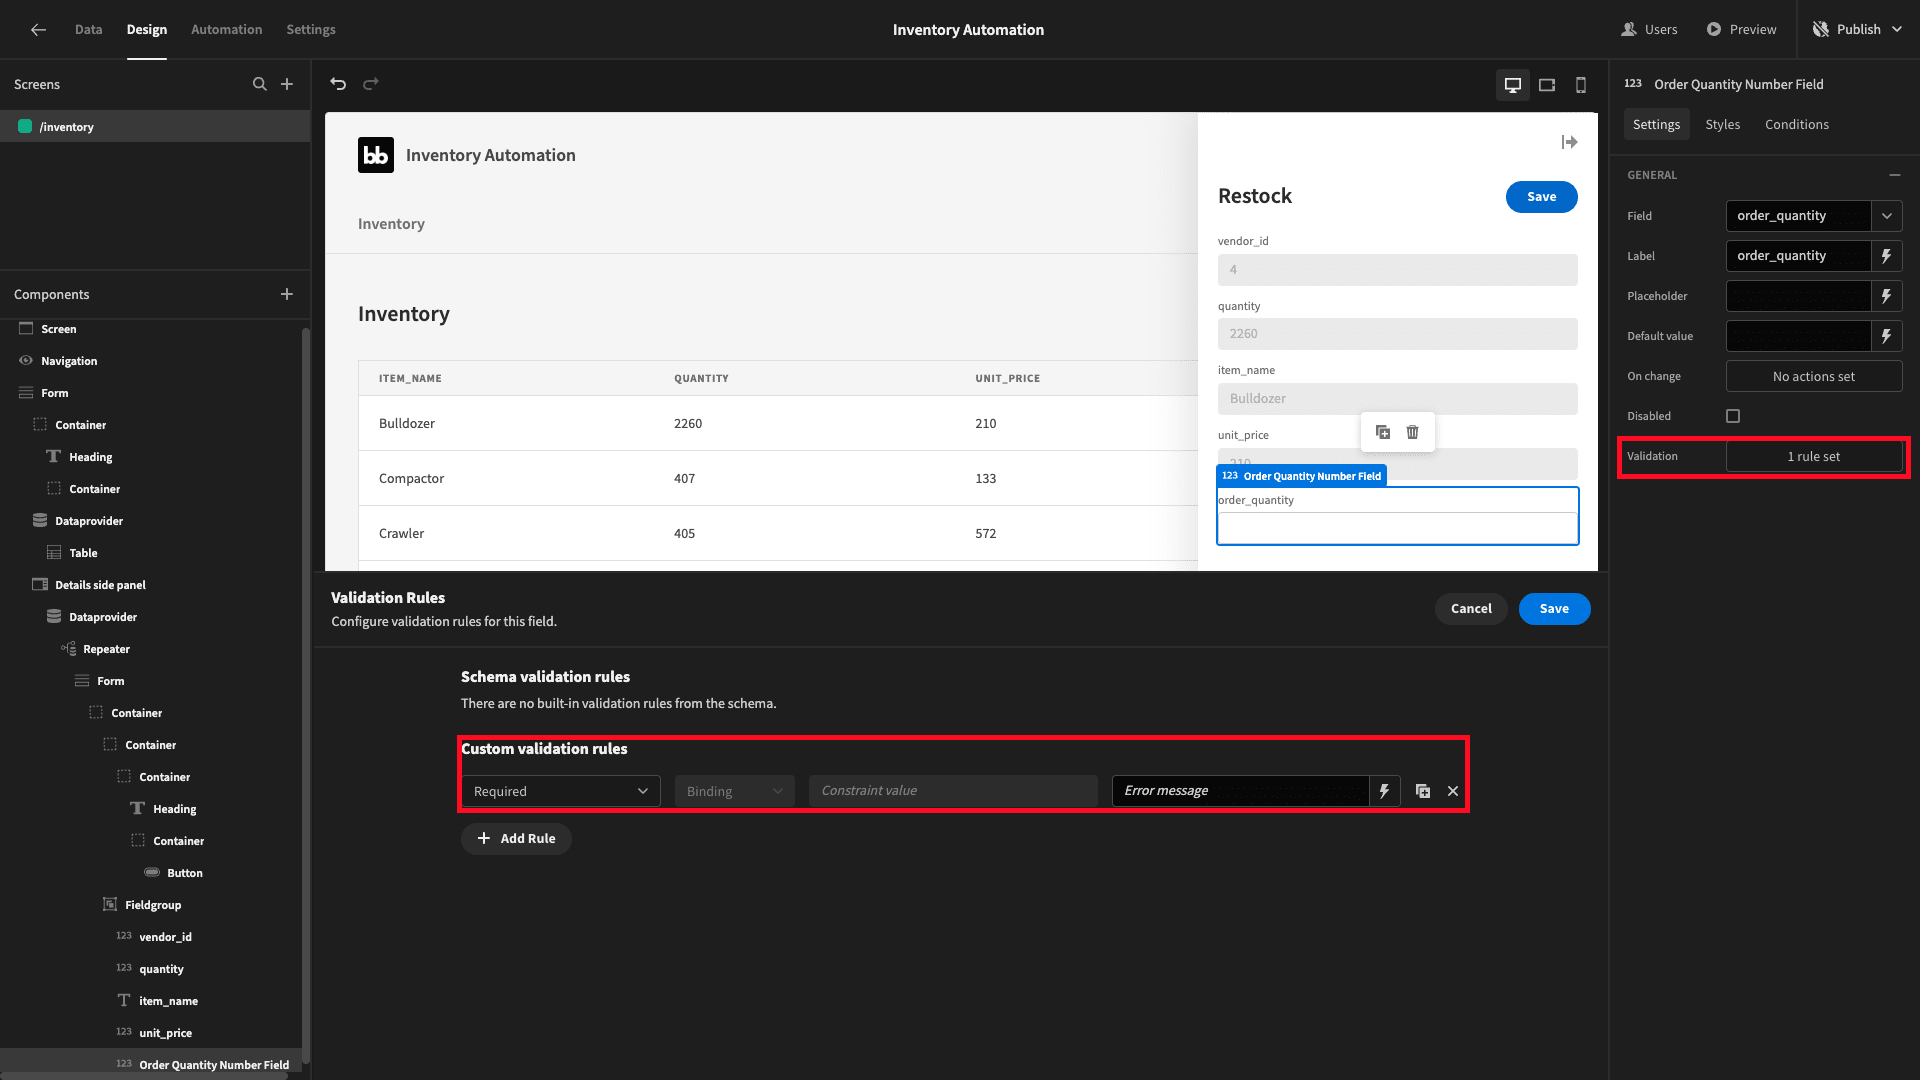
We need to add a number field to allow them to specify a quantity by setting the field and label to order_quantity:
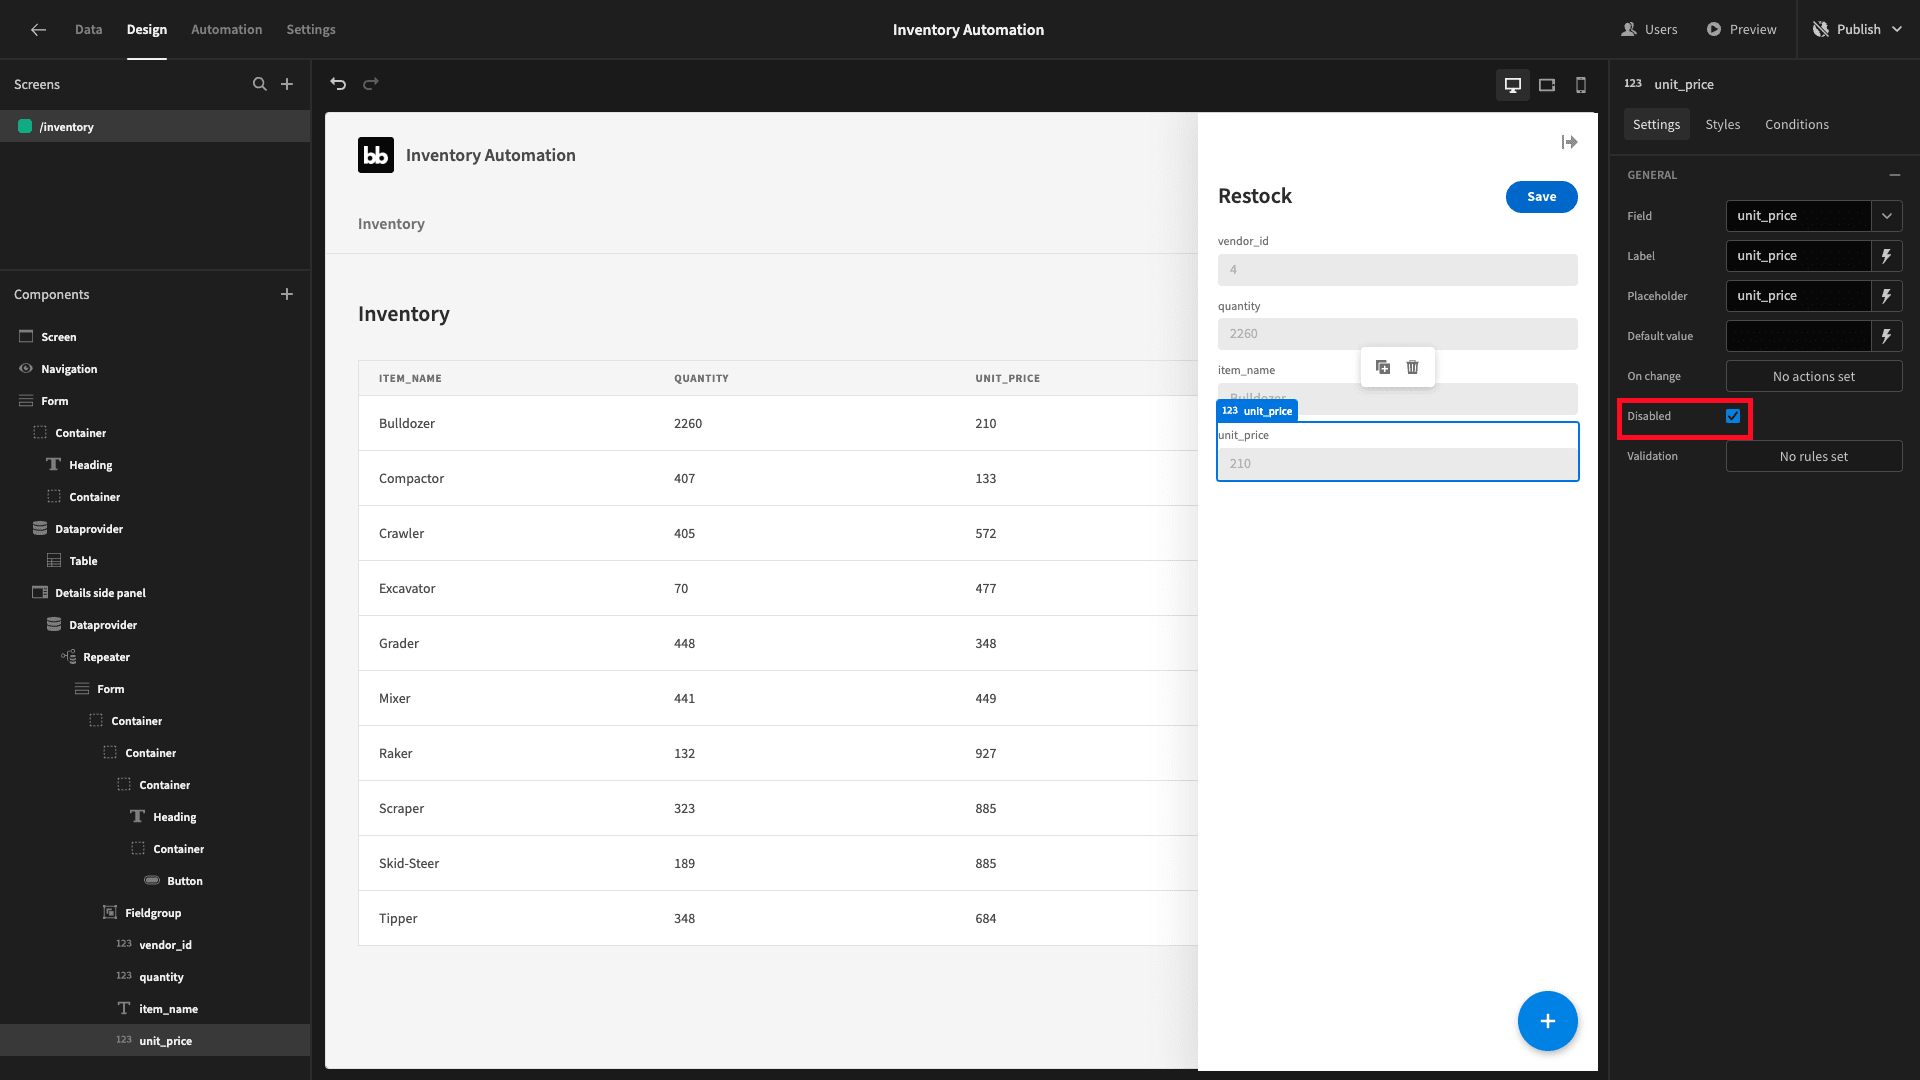
We’ll also add a validation rule so that this is required:
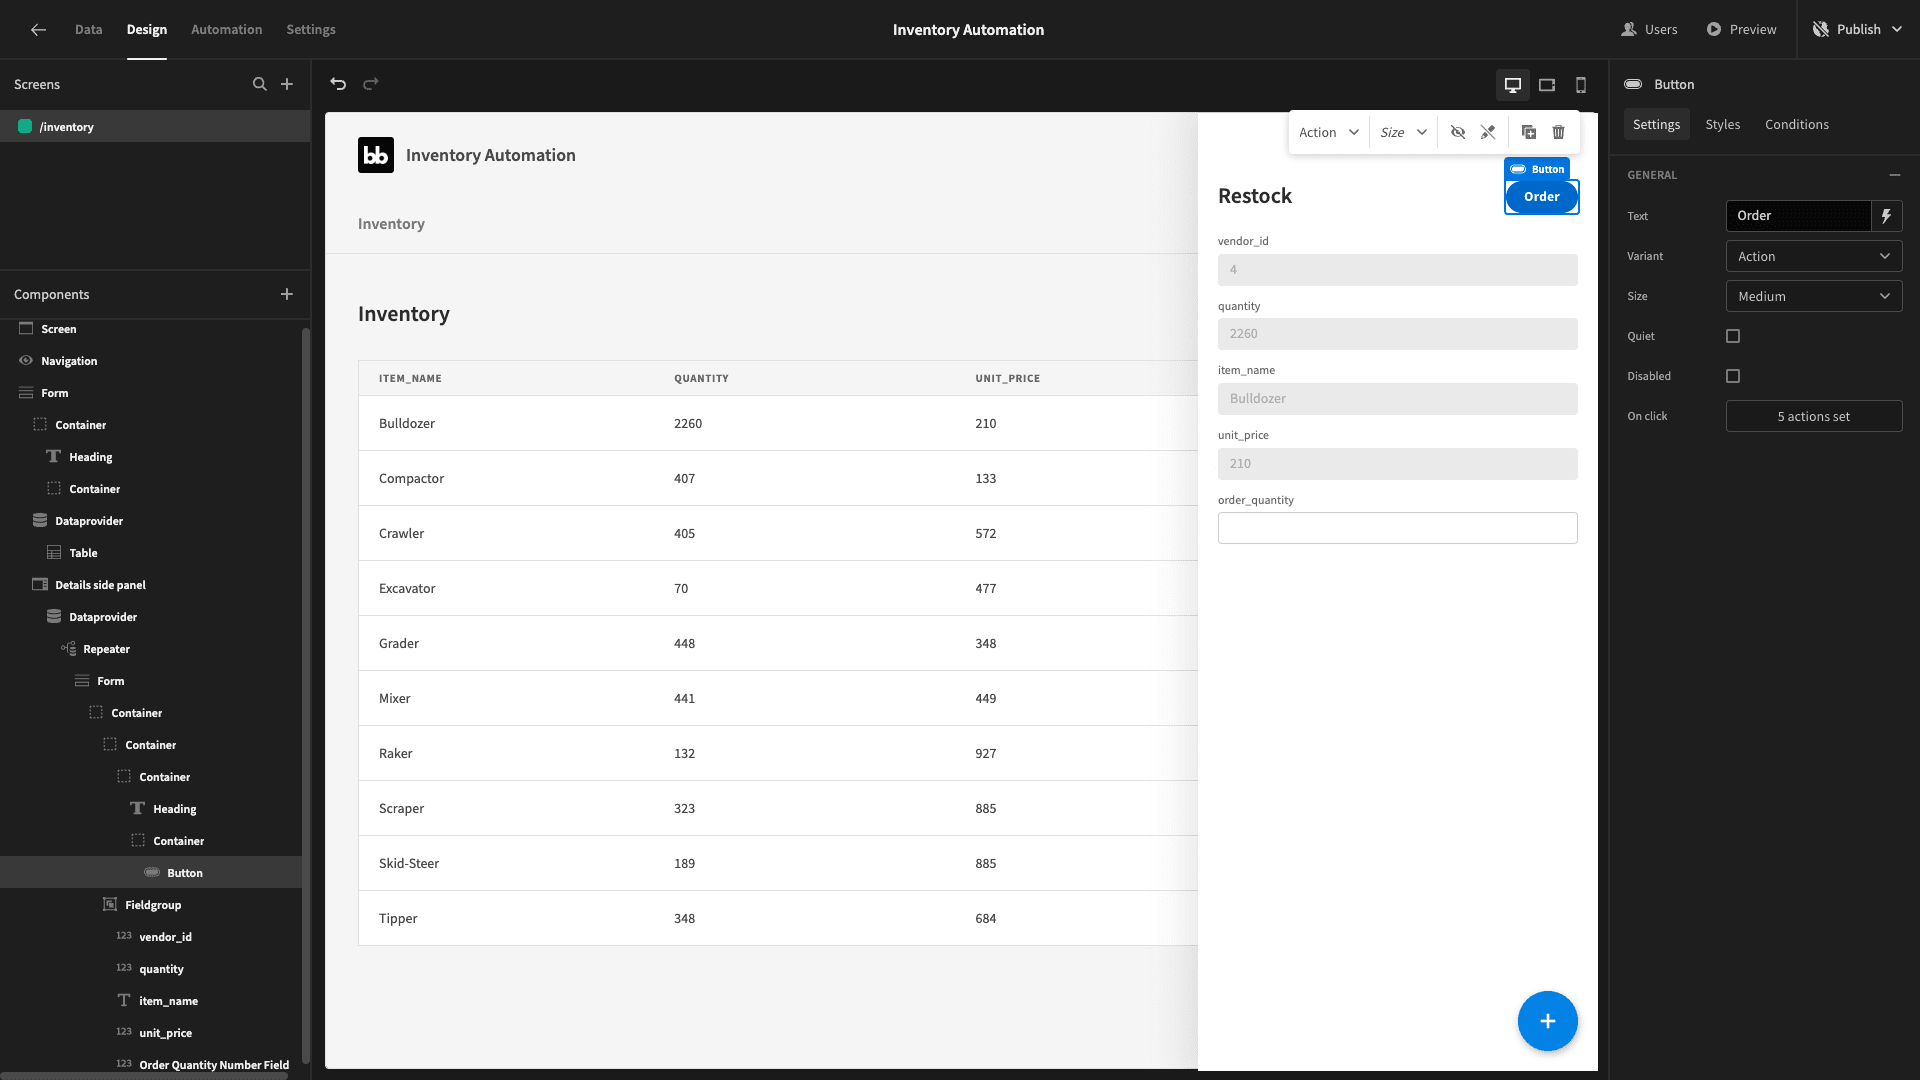
We then need to update our button to carry out our new action. We can start by updating its text from save to order:
We also need to update the button’s actions:
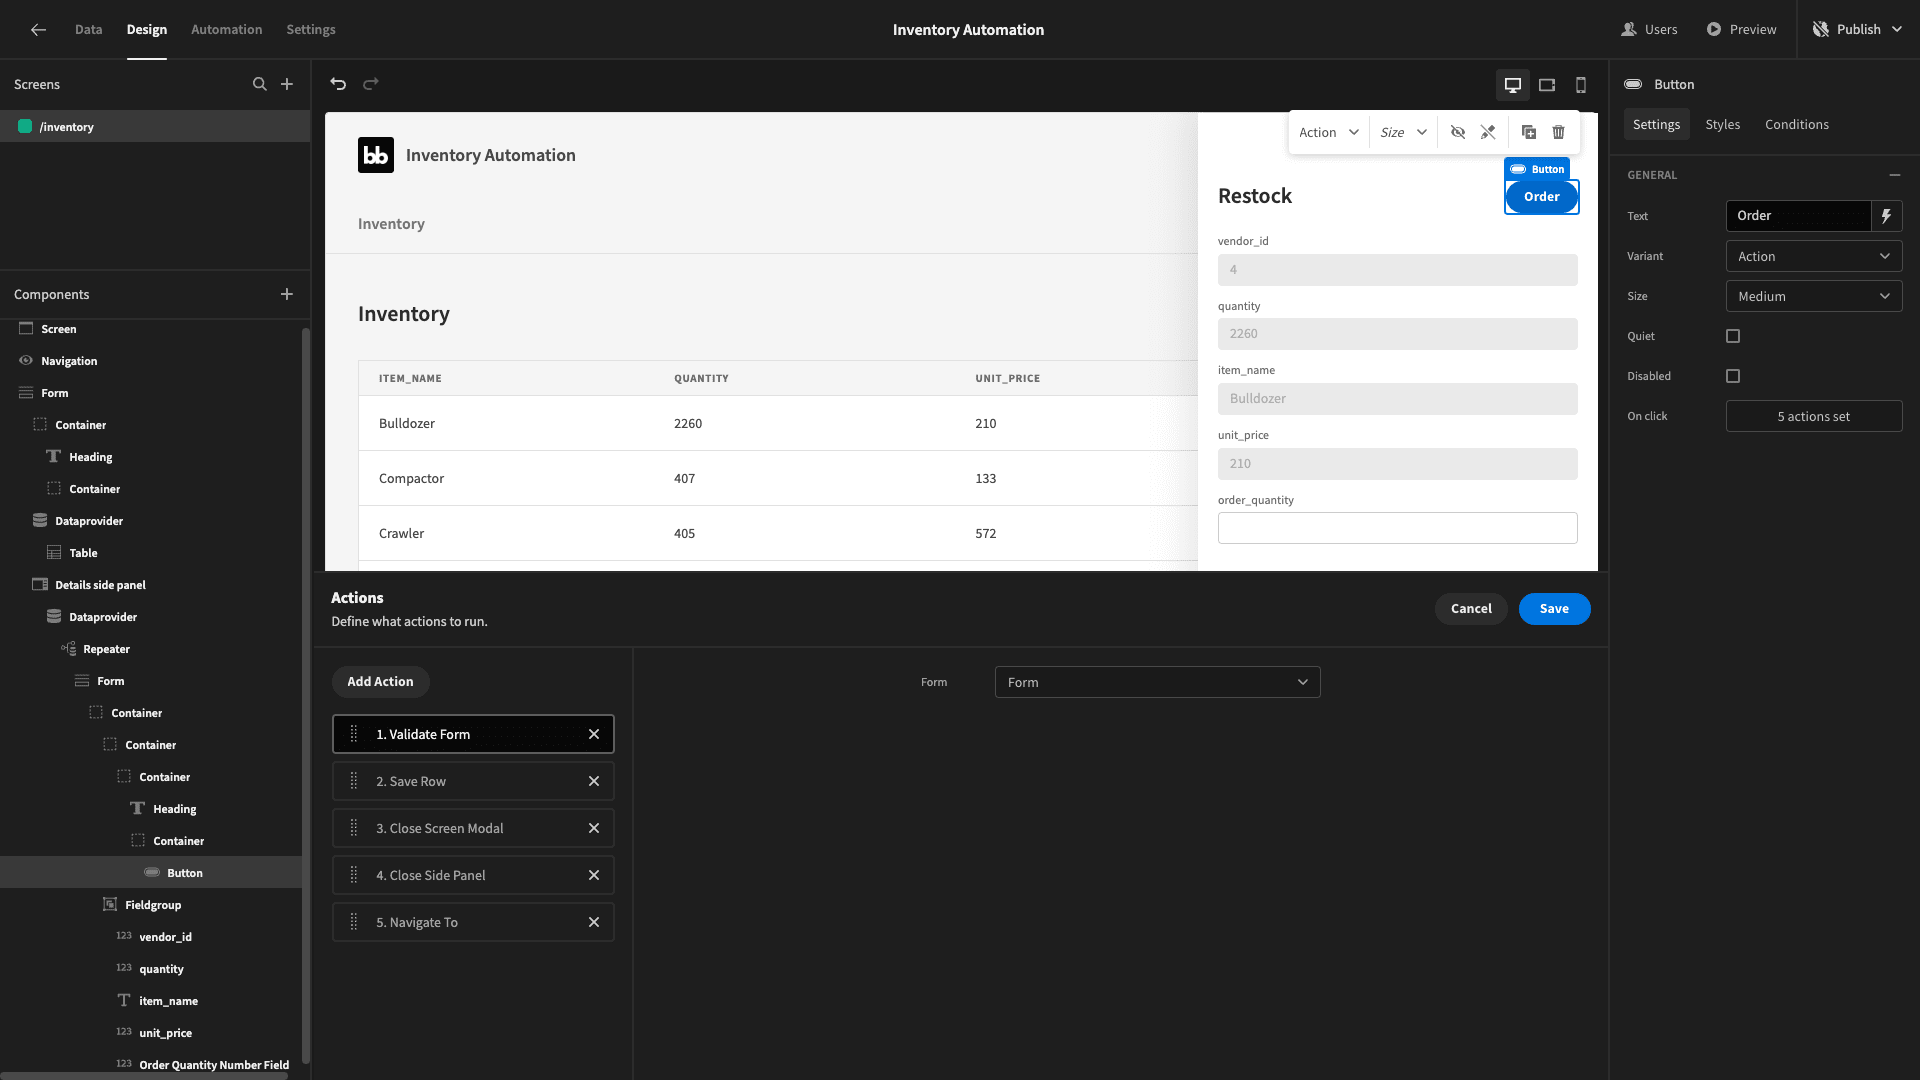
Delete everything except validate form:
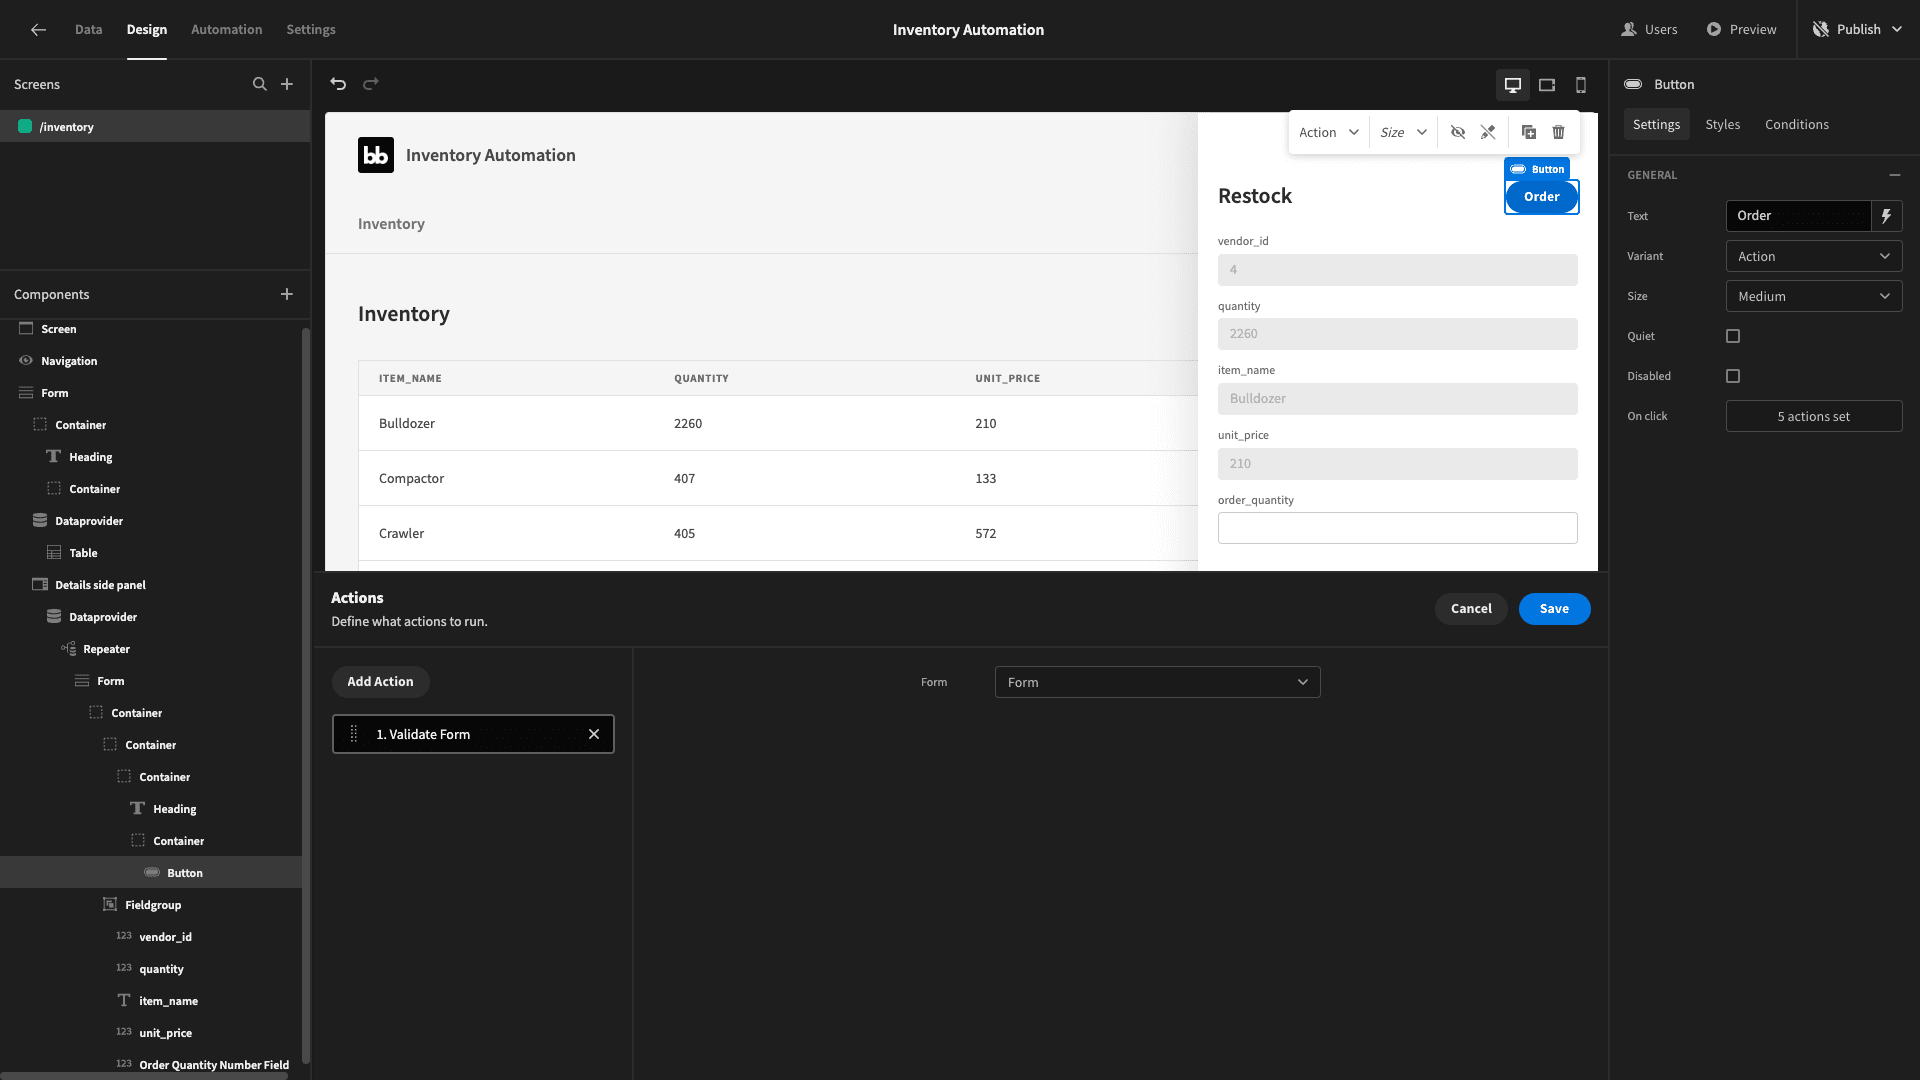
Add a trigger automation row and select OrderStock as its automation:
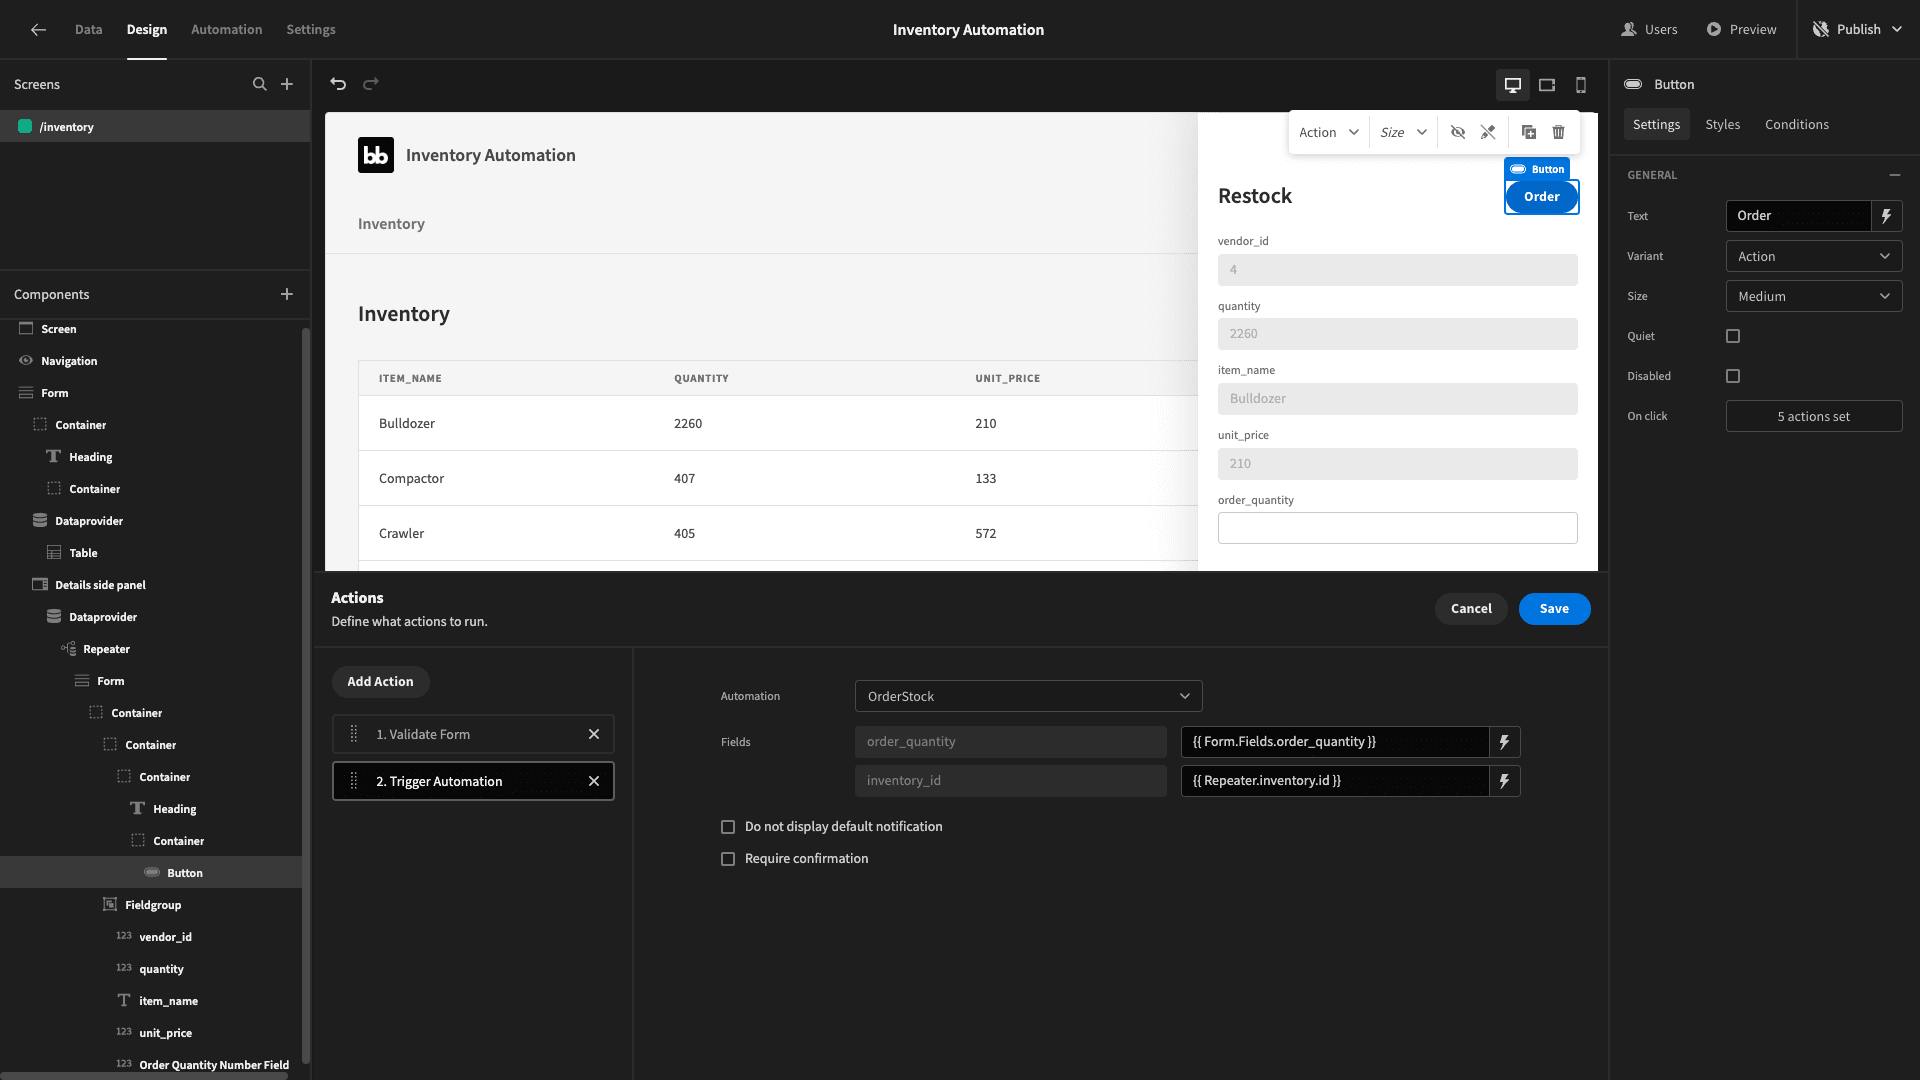
Then, we can set the bindings for our two trigger fields. We’ve set order_quantity to {{ form.fields.order_quantity }} and inventory_id to {{ repeater.inventory.id }}.
Now, when a user clicks on the order button under any given item, the relevant vendor will be contacted to make an order. Or - they will once we’ve pushed our app live.
Before that though, we’re going to make a couple more design tweaks.
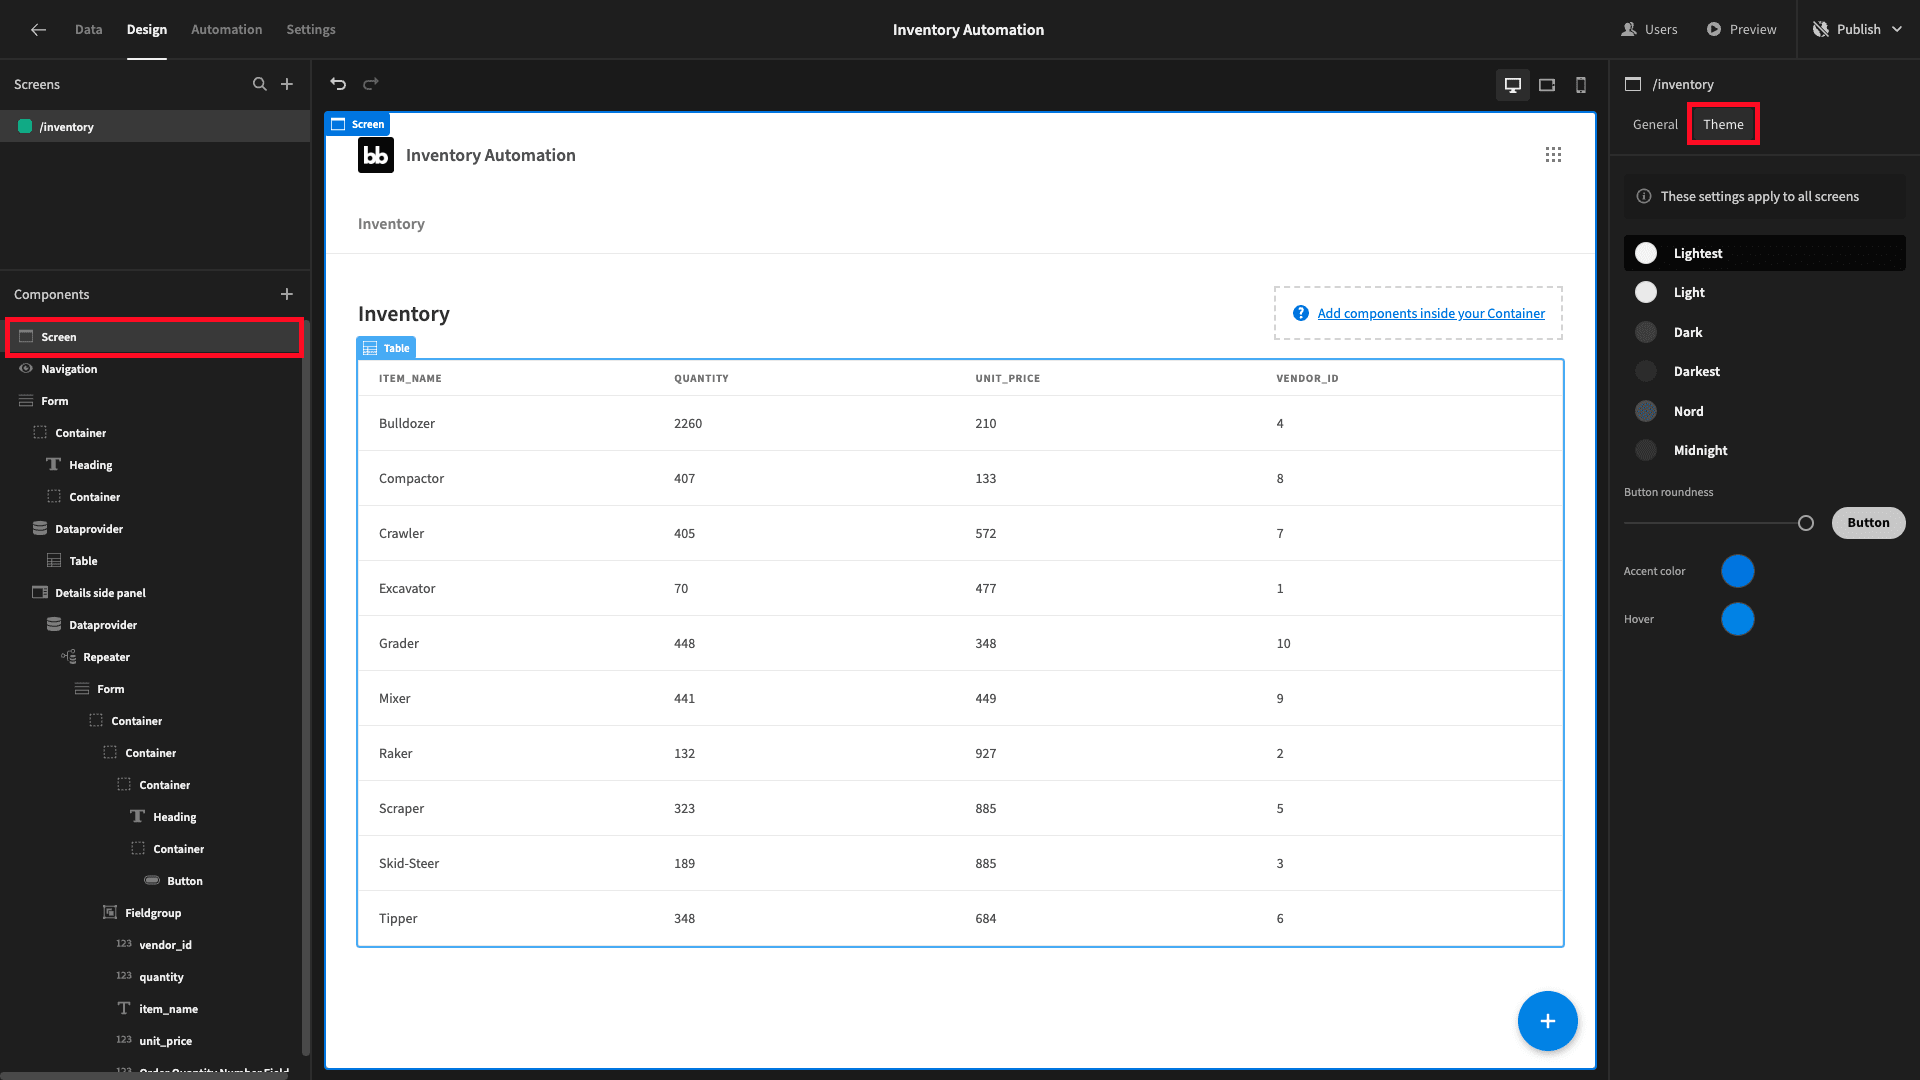
First, we’ll choose the lightest option under screen and theme:
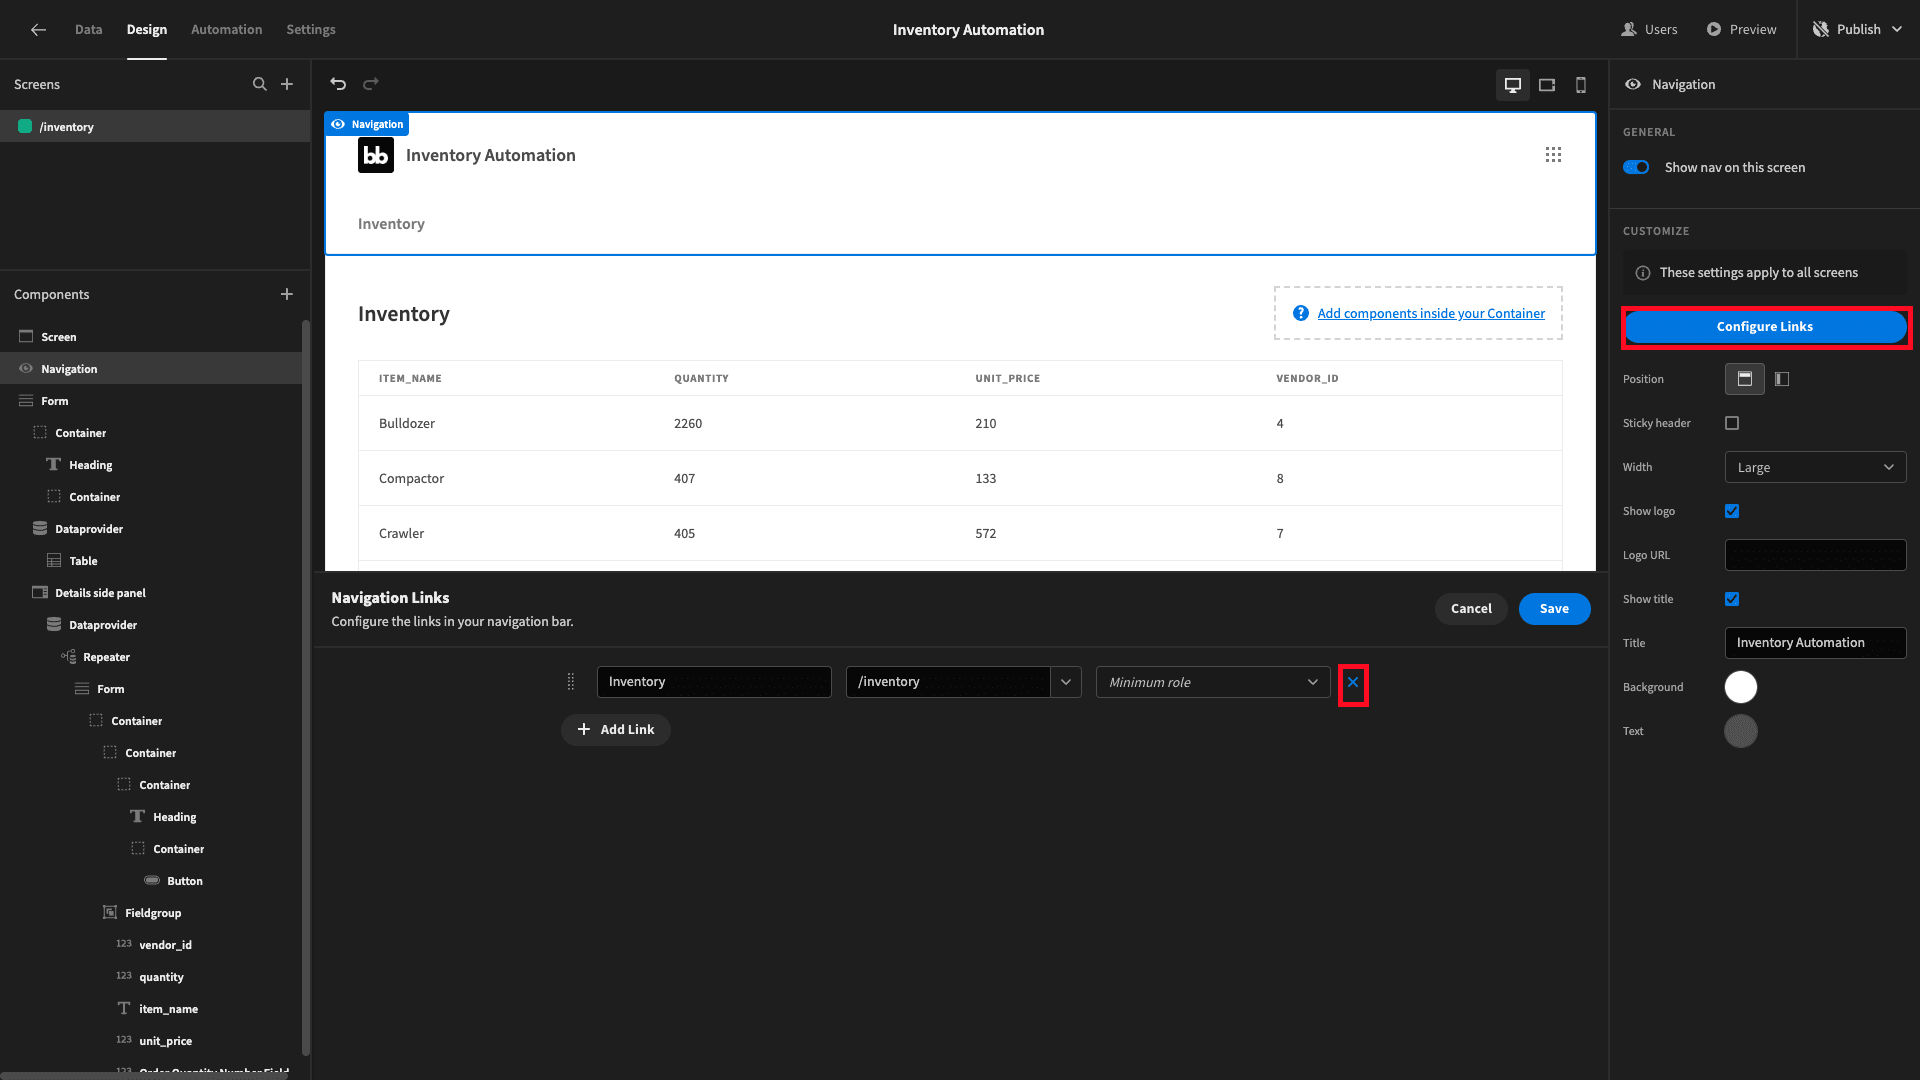
Then, we’ll open configure links and remove our menu entry - since our inventory automation app only has one screen anyway.
The last thing we want to do is add some notification cards to display the most recent inventory_changes at the bottom of our screen.
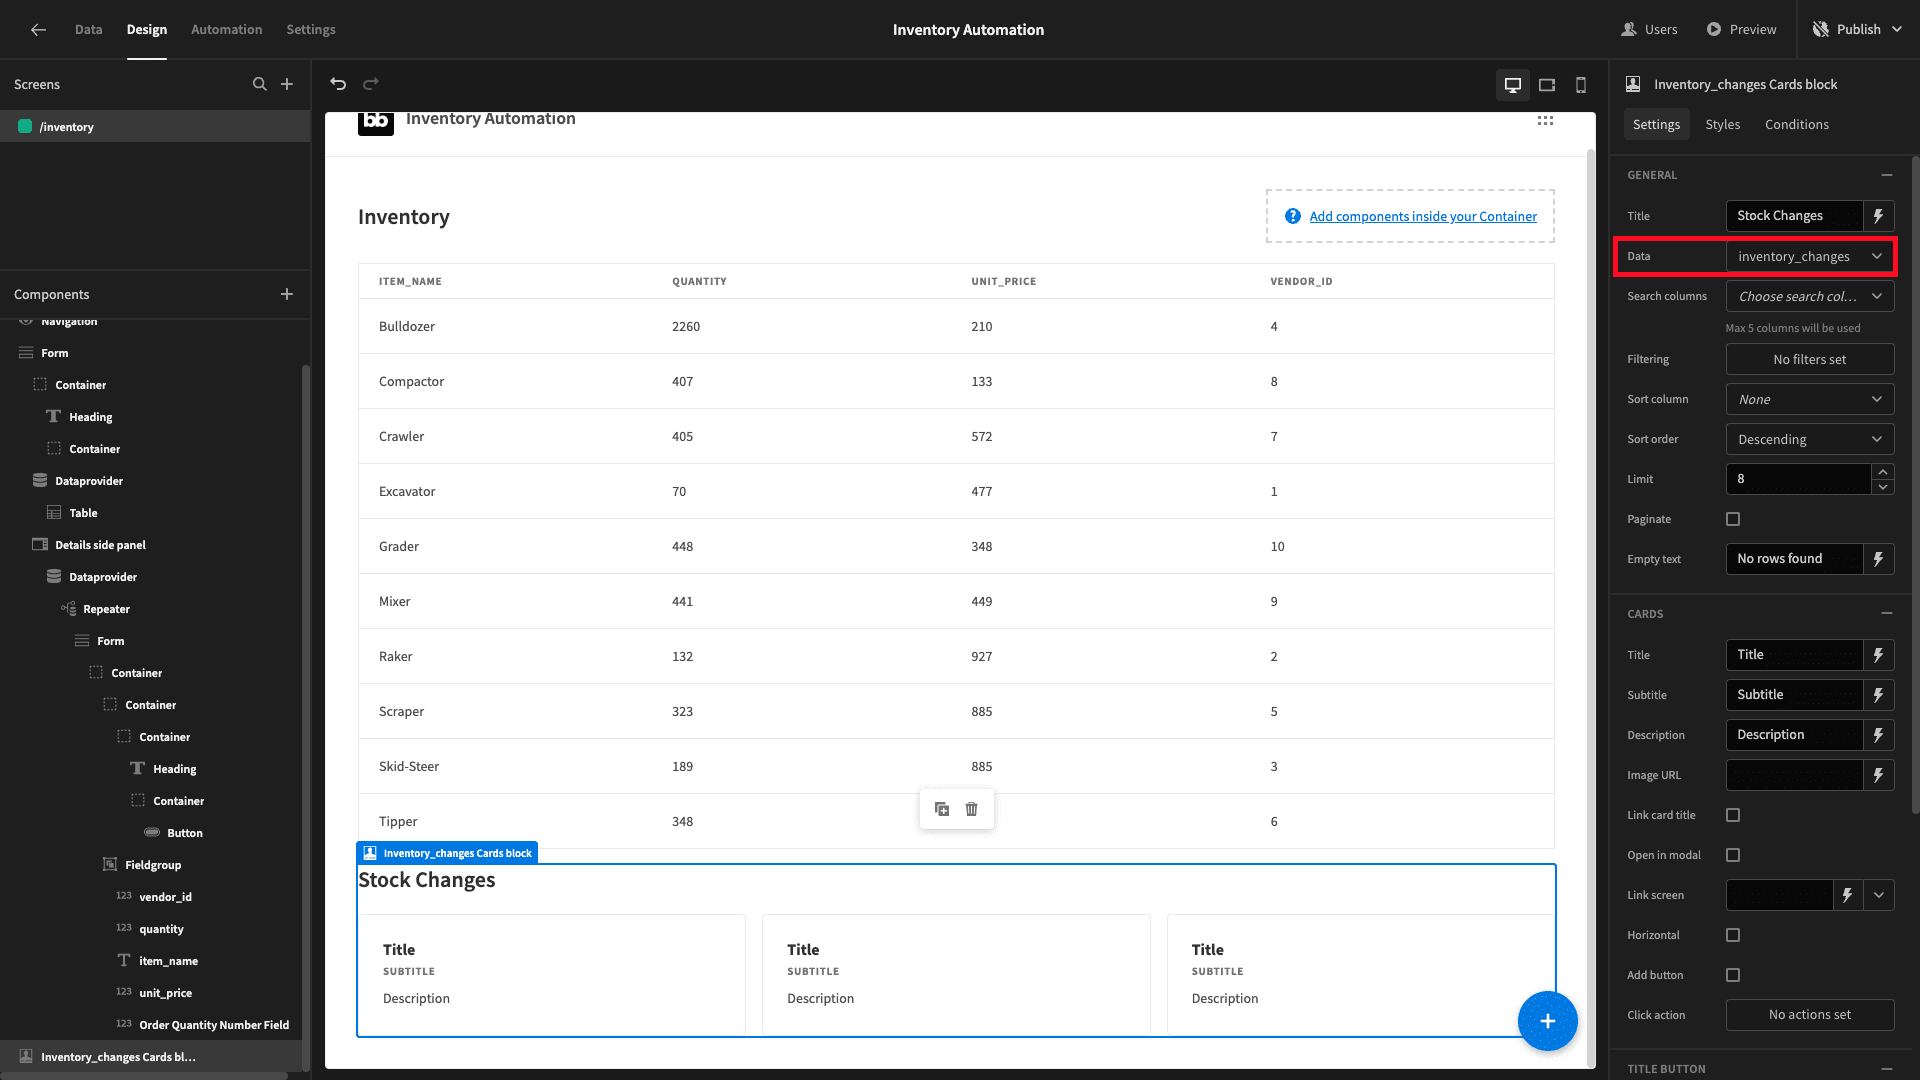
Add a cards block beneath your form, give it a title, and set its data to inventory_changes:
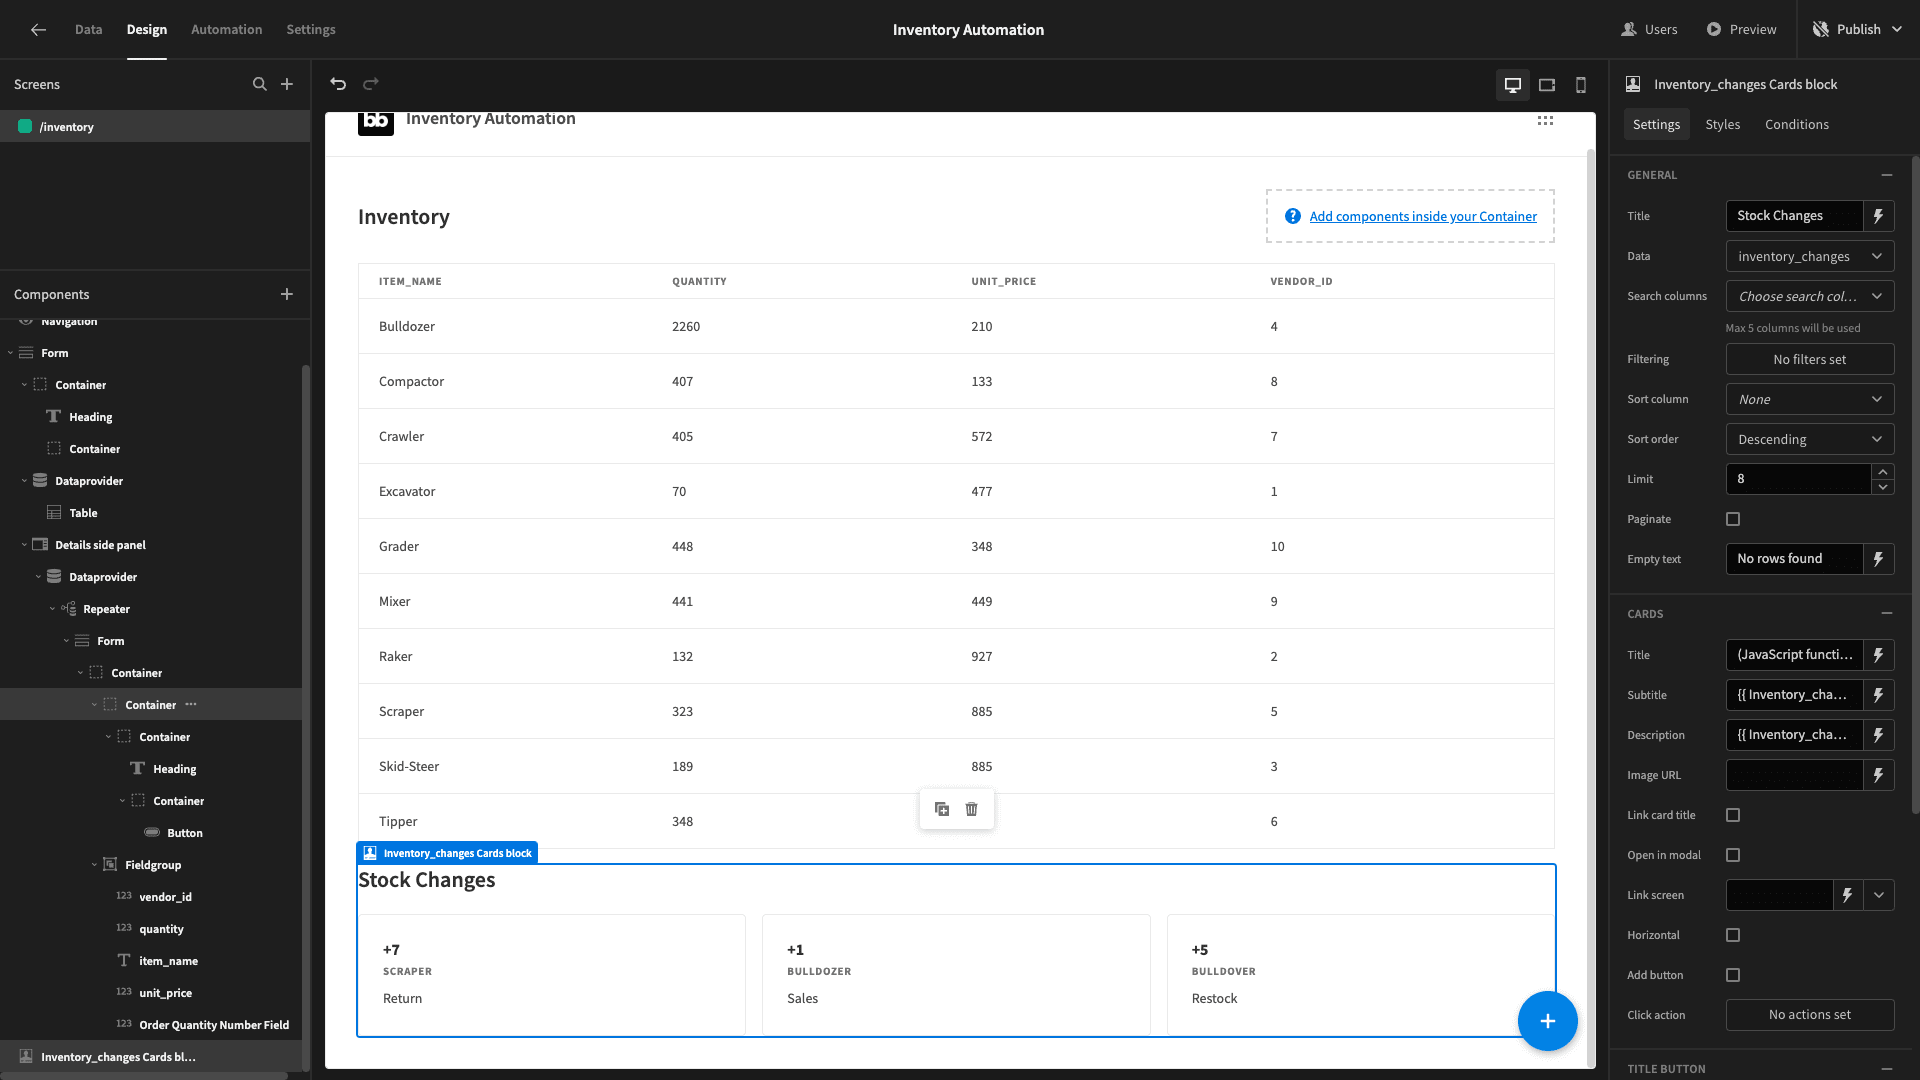
We’ll set its title to the following JavaScript function:
1if ($("Inventory_changes Cards block.inventory_changes.quantity_change") > 0){
2
3 return "+" + $("Inventory_changes Cards block.inventory_changes.quantity_change")
4
5}
6
7else return $("Inventory_changes Cards block.inventory_changes.quantity_change")
This ensures that the quantity_change attribute is always prefixed with a plus or minus symbol.
For the subtitle, we’ll use {{ Inventory_changes Cards block.inventory_changes.item_name }} and for description we’ll use {{ Inventory_changes Cards block.inventory_changes.change_type }}.
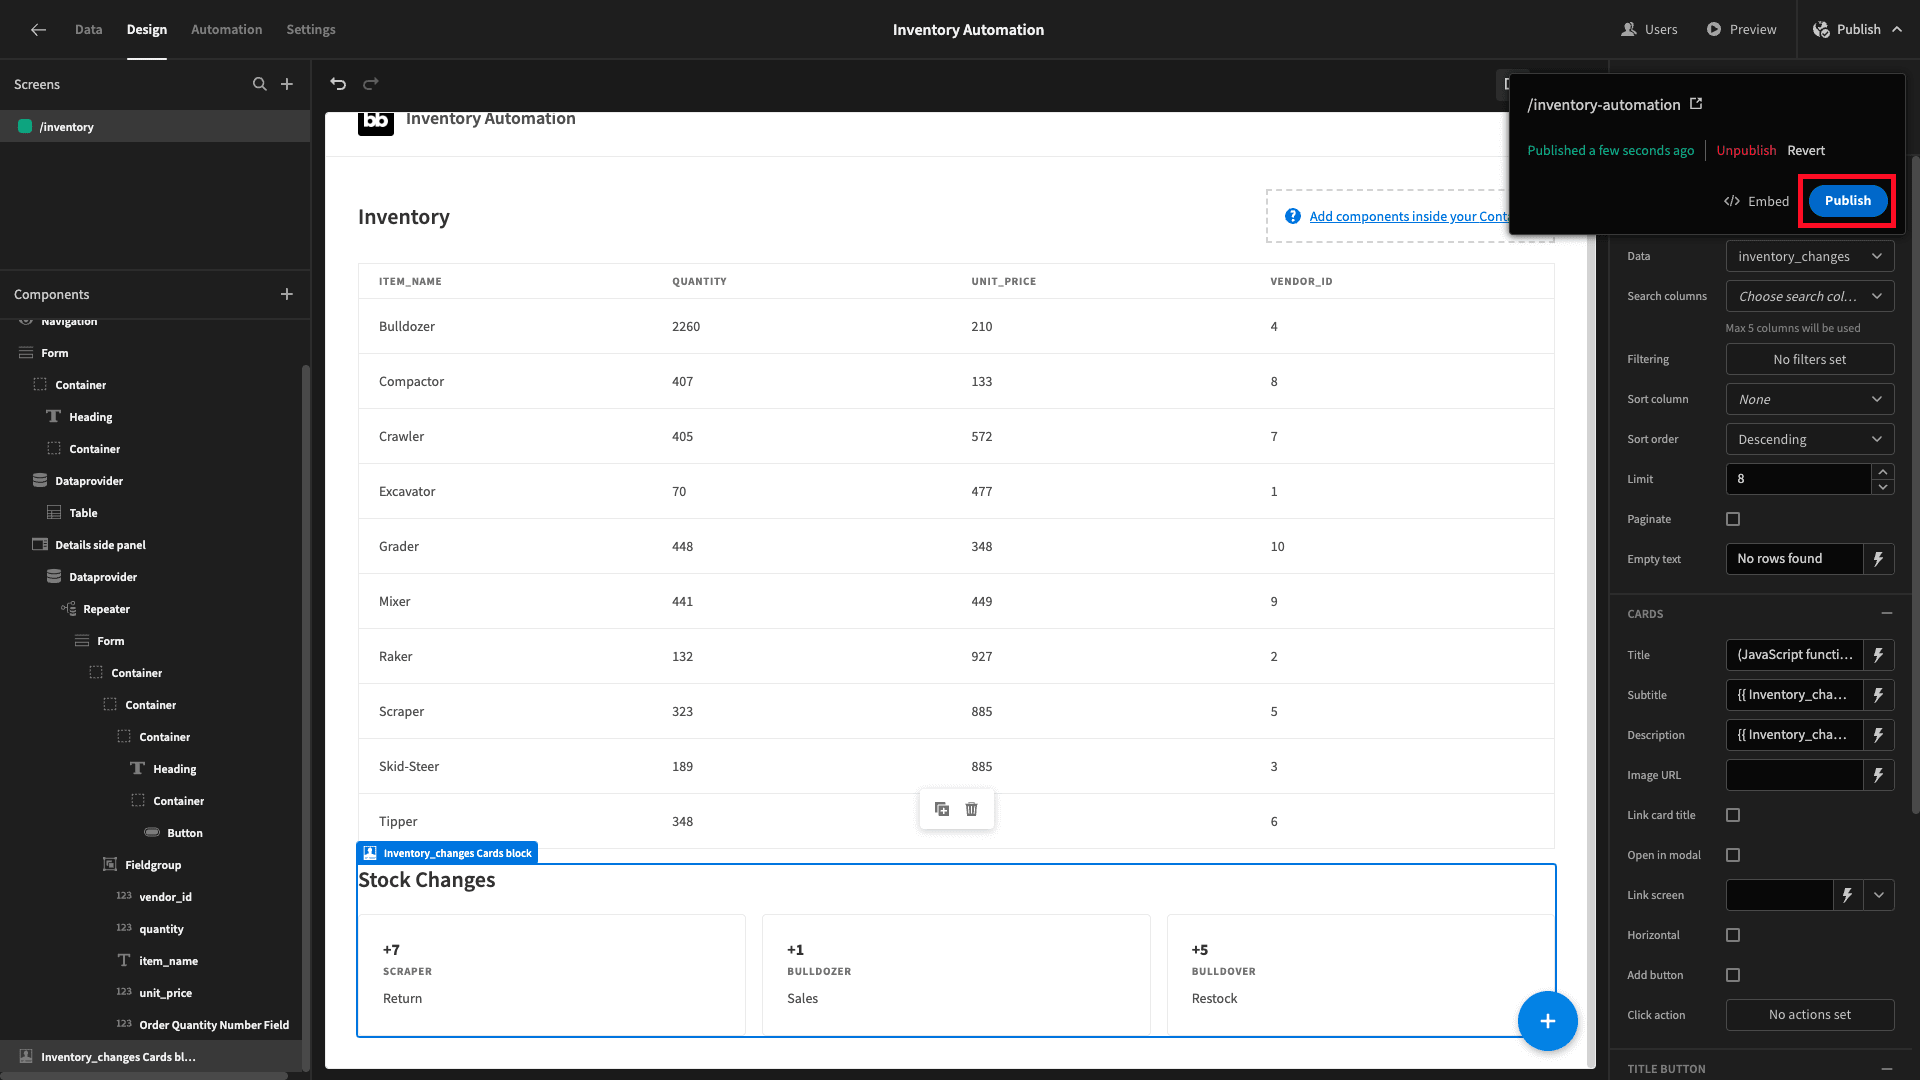
Then, publish your app to push it live - including your inventory automation rules:
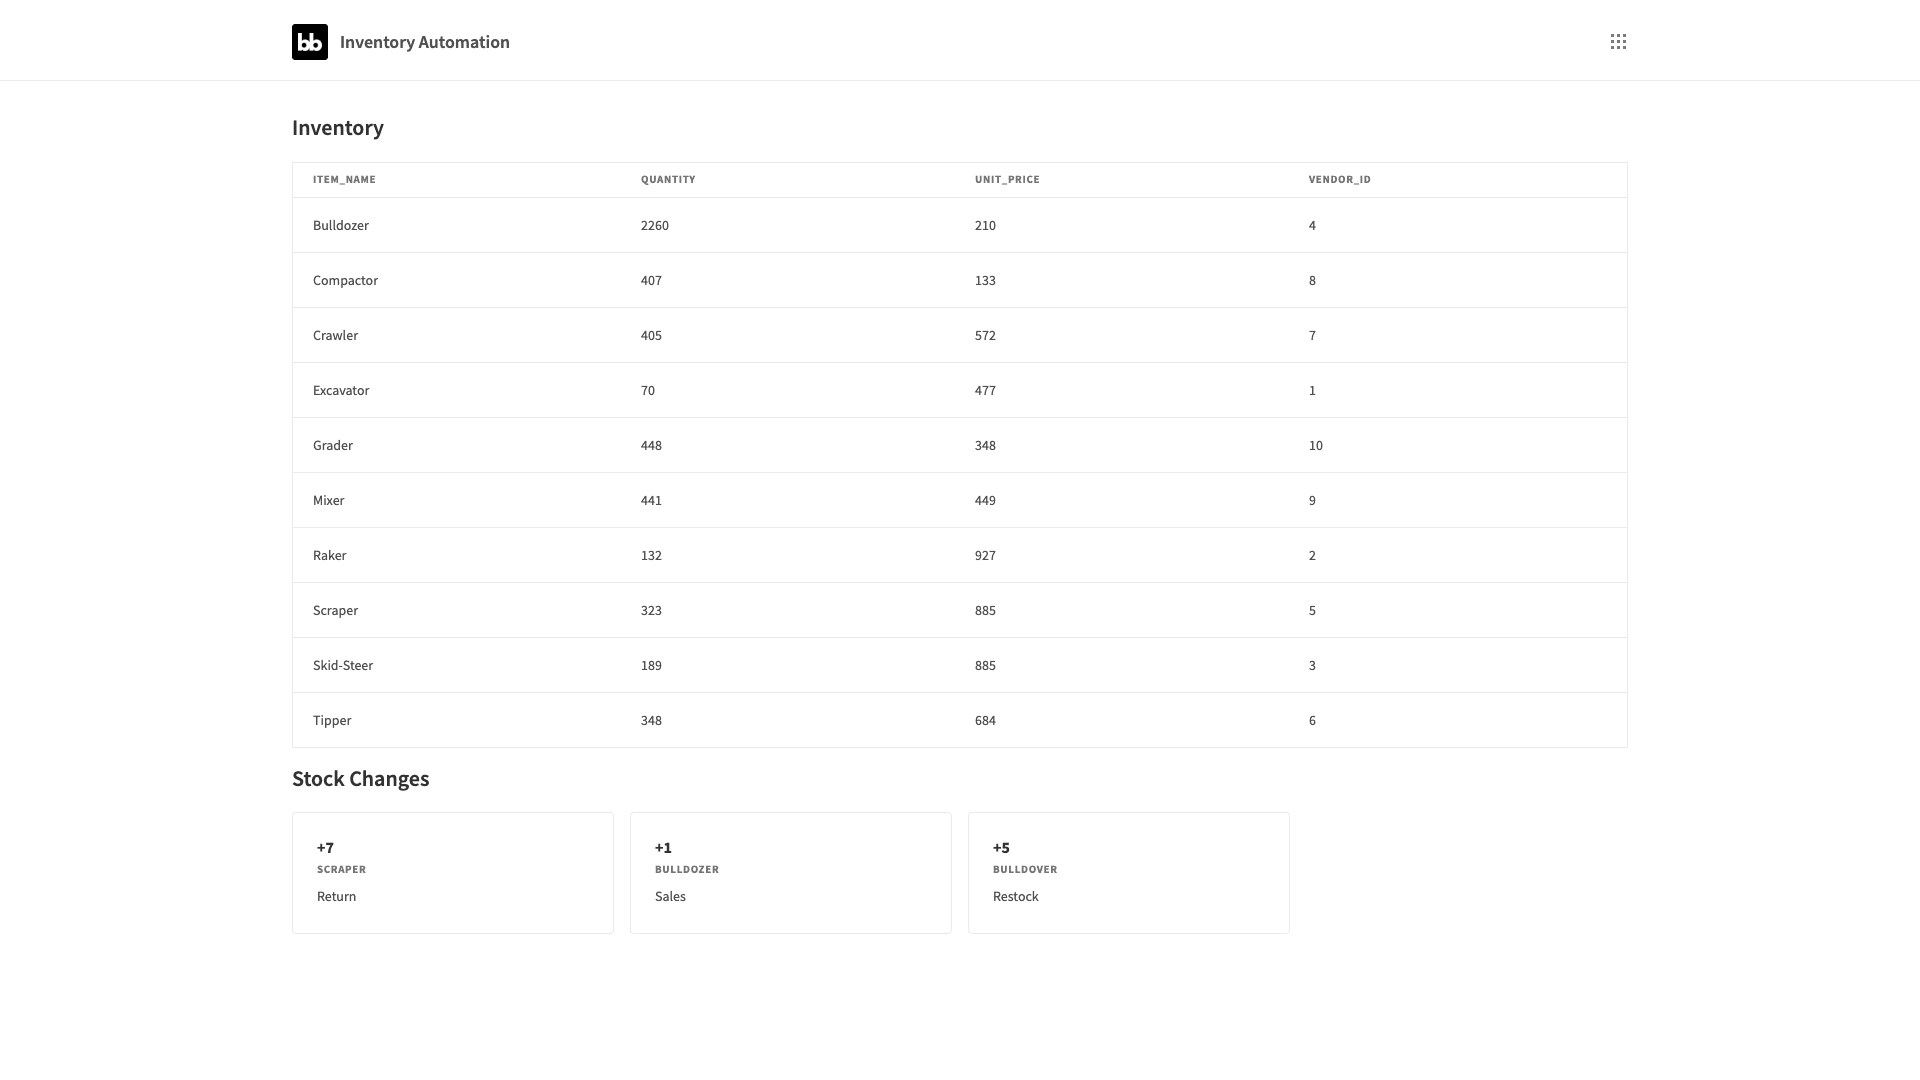
Here’s what the finished product should look like once it’s published:
If you found this tutorial helpful, you might also like our guide to building a warehouse dashboard .